
MyGiving.Online allows you to not only provide tax statements for some of your donors, but also to offer your thanks and show your donors what a difference their donations have made. This is achieved through generating "Thank you letters".
1. Navigate to https://www.mygiving.online
Tip: Before creating your letters, you will first need to create a letter template. The below steps will guide you on how to do this.
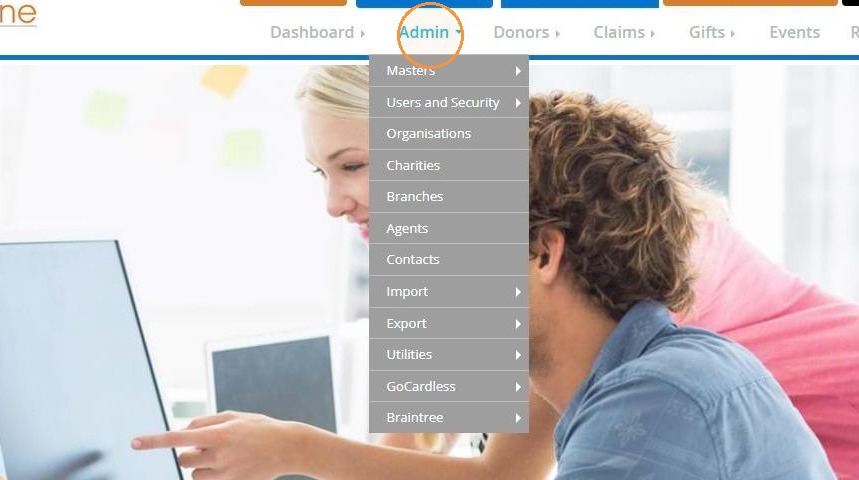
2. Click "Admin"
">
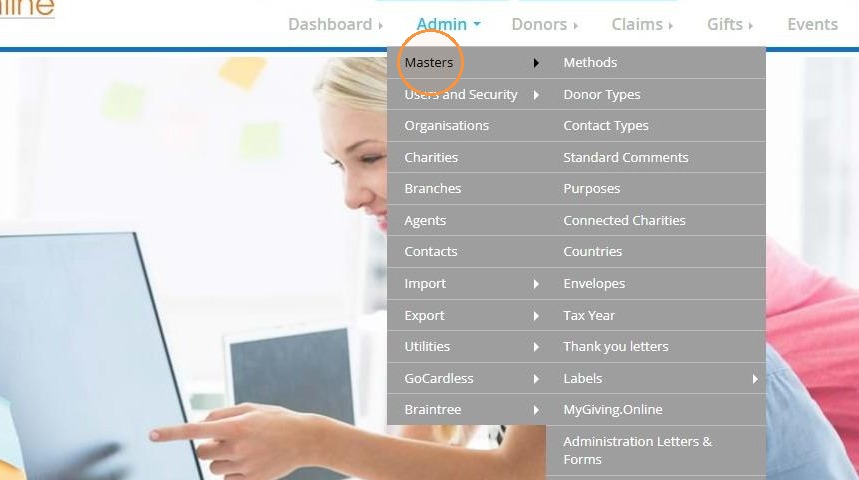
3. Click "Masters".
">
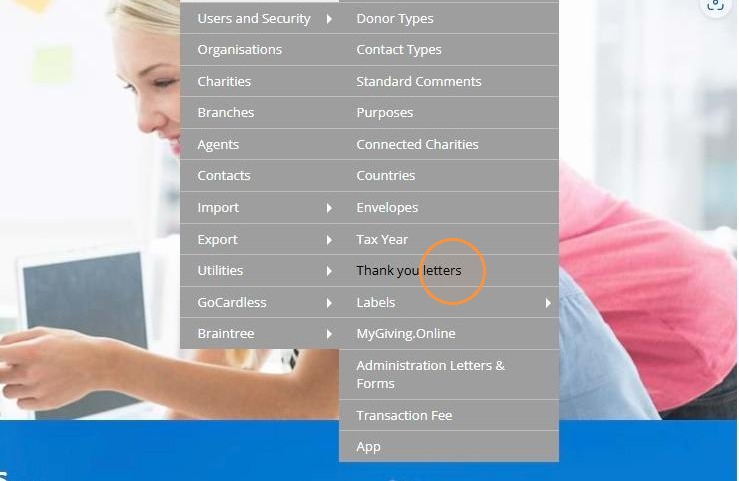
4. Click "Thank you letters".
">
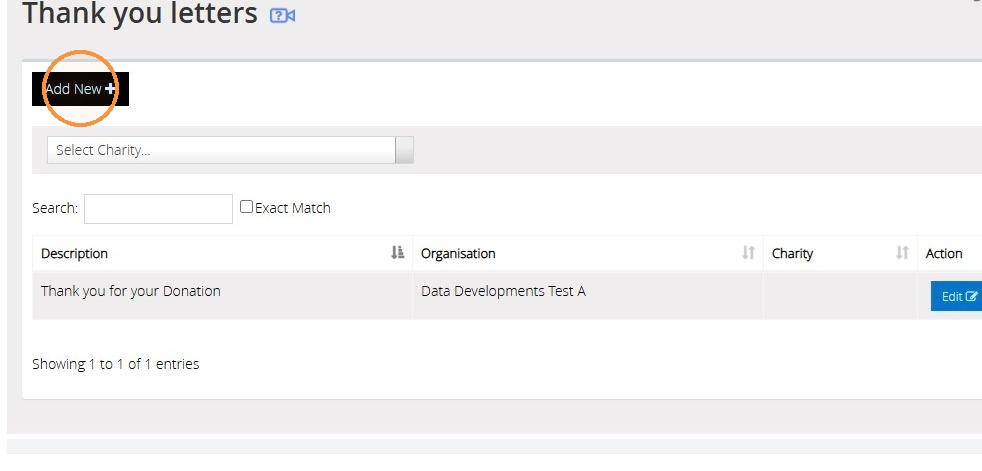
5. Click "Add New".
">
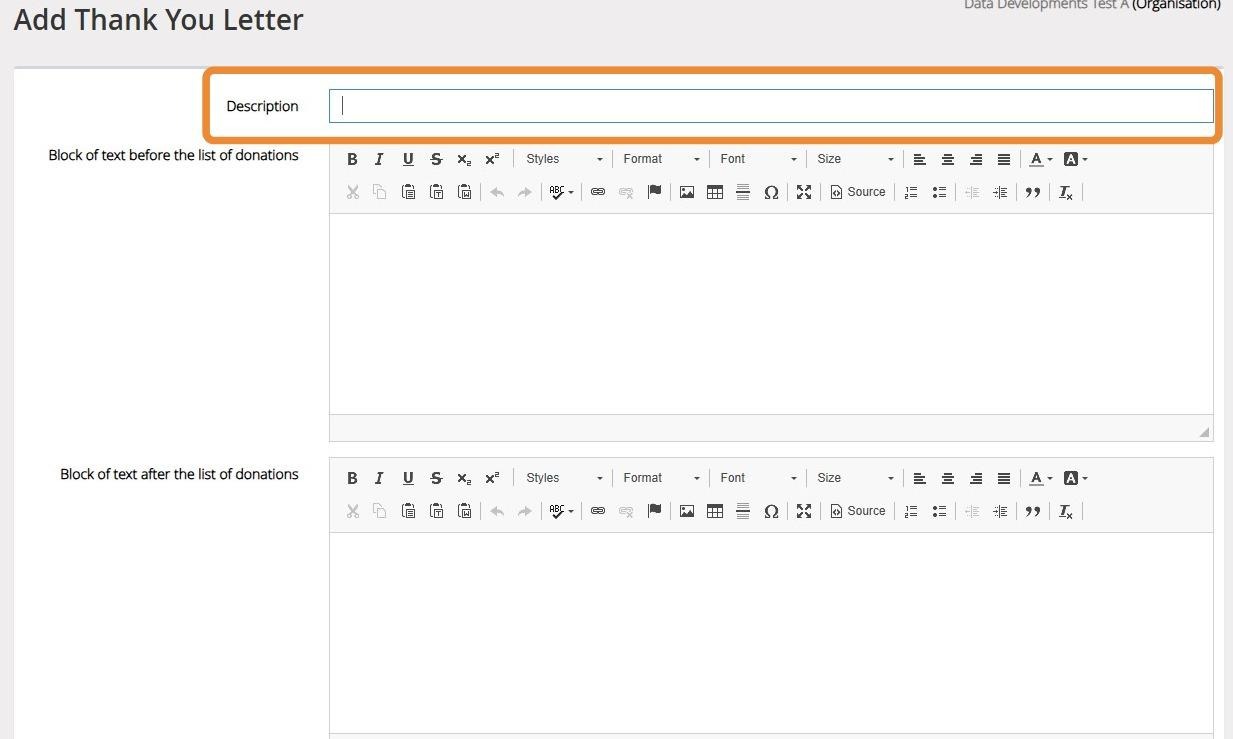
6. Enter a description for your Letter Template.
">
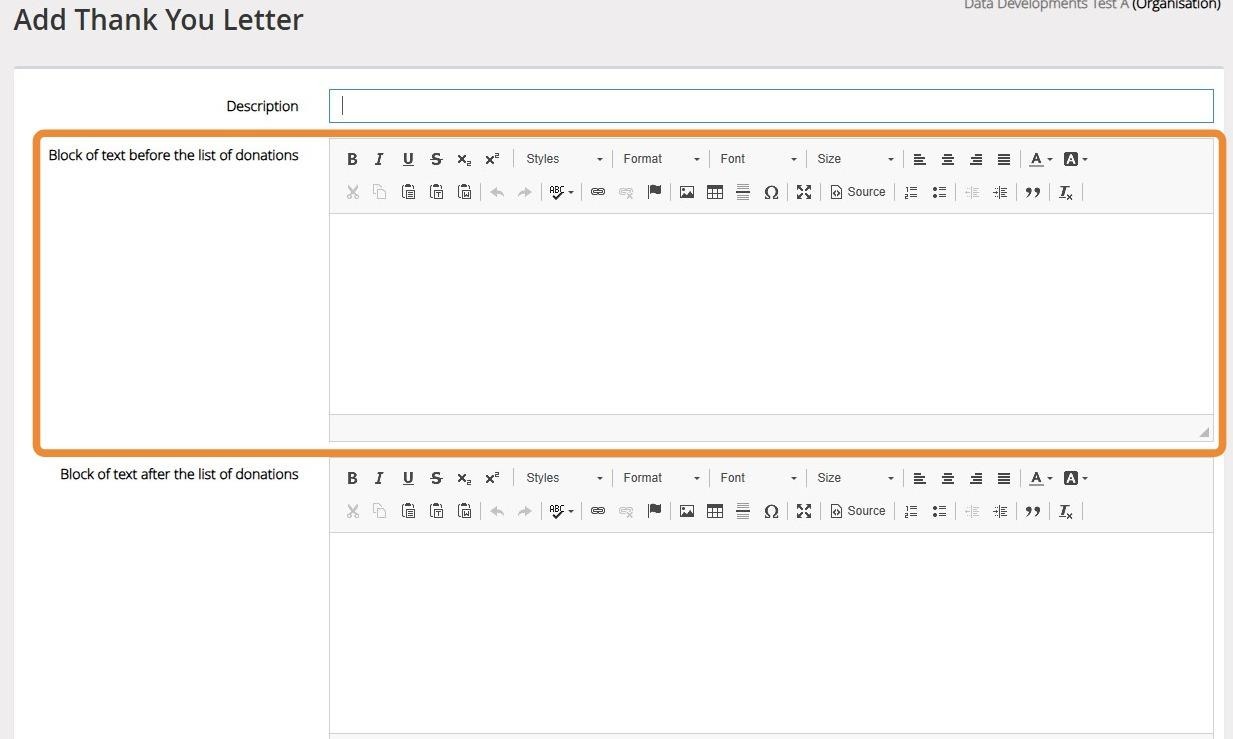
7. Enter the text you wish to appear before the list of the donations.
">
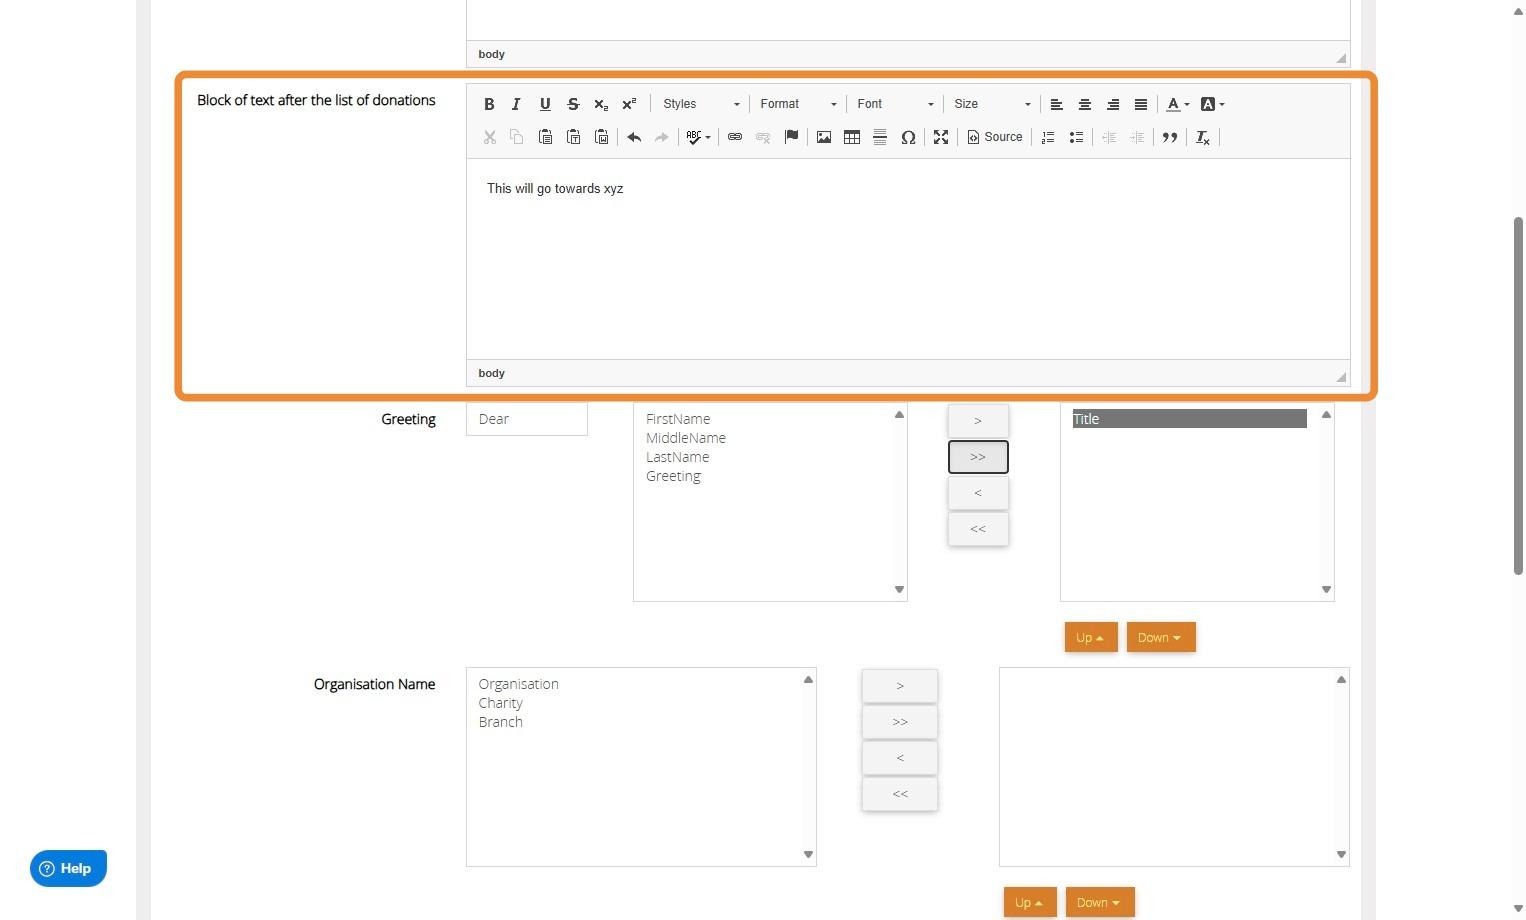
8. Enter the text that should appear after the list of donations.
">
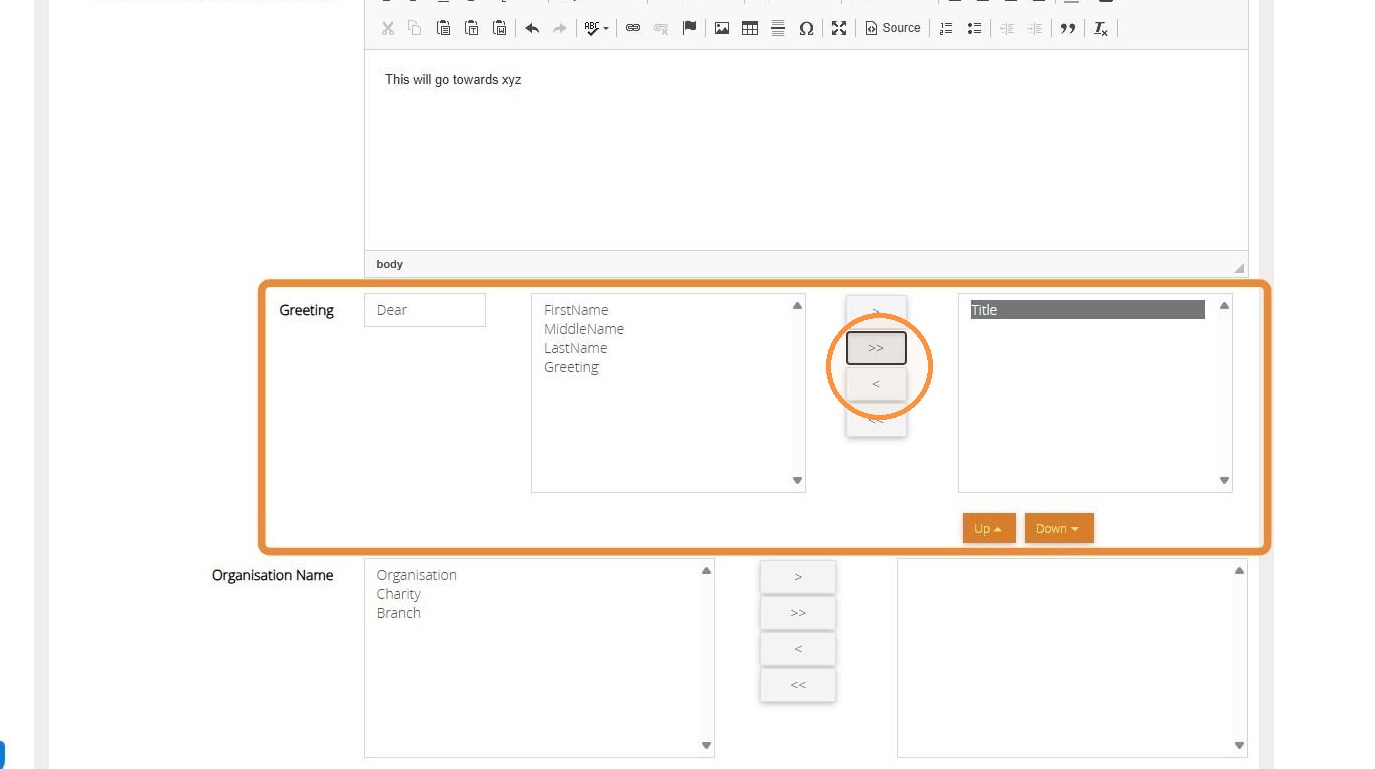
9. Select the format of the greeting you wish to use.
You can move one field at a time by selecting the field and then clicking the ">" button between the list or ">>" to move all fields from left to right. You can do the opposite with the "<" and "<<" buttons.
">
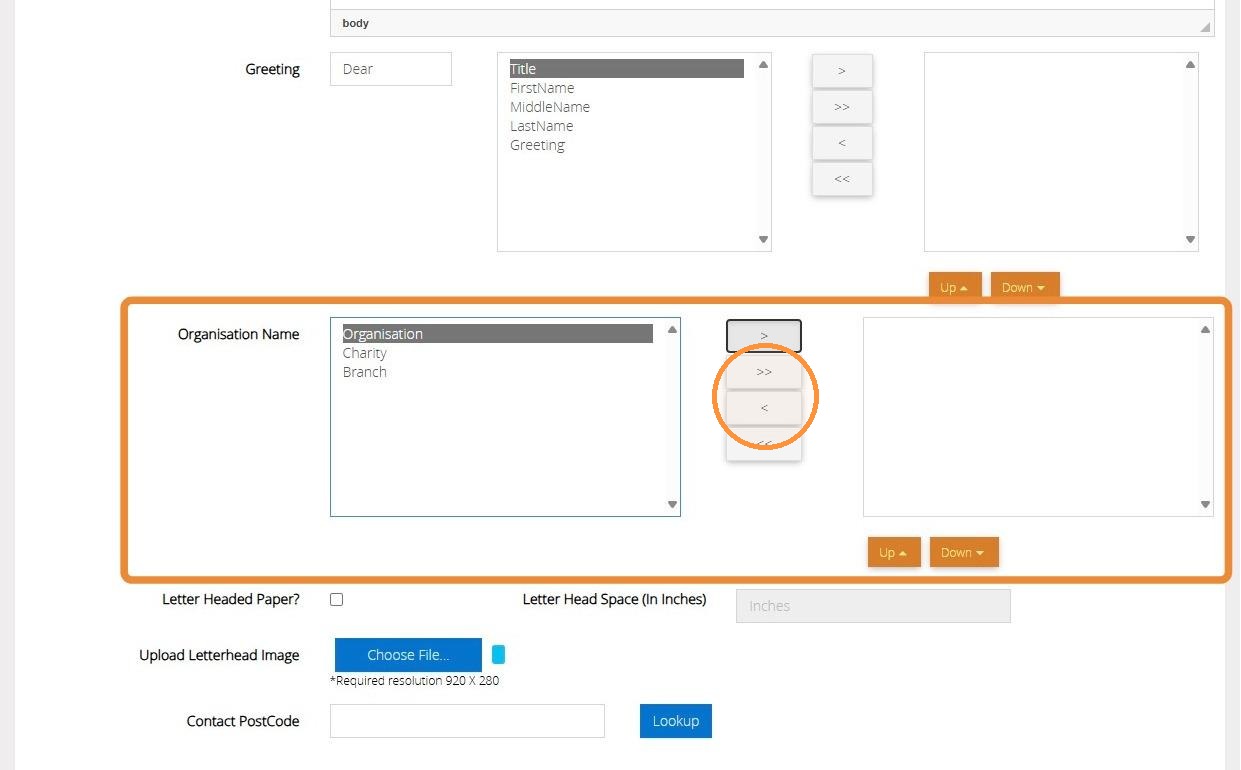
10. Select the Account name that you wish to appear on the letter. This could be the overall organisation name, the charity name or the individual branch.
You can move one field at a time by selecting the field and then clicking the ">" button between the list or ">>" to move all fields from left to right. You can do the opposite with the "<" and "<<" buttons.
">
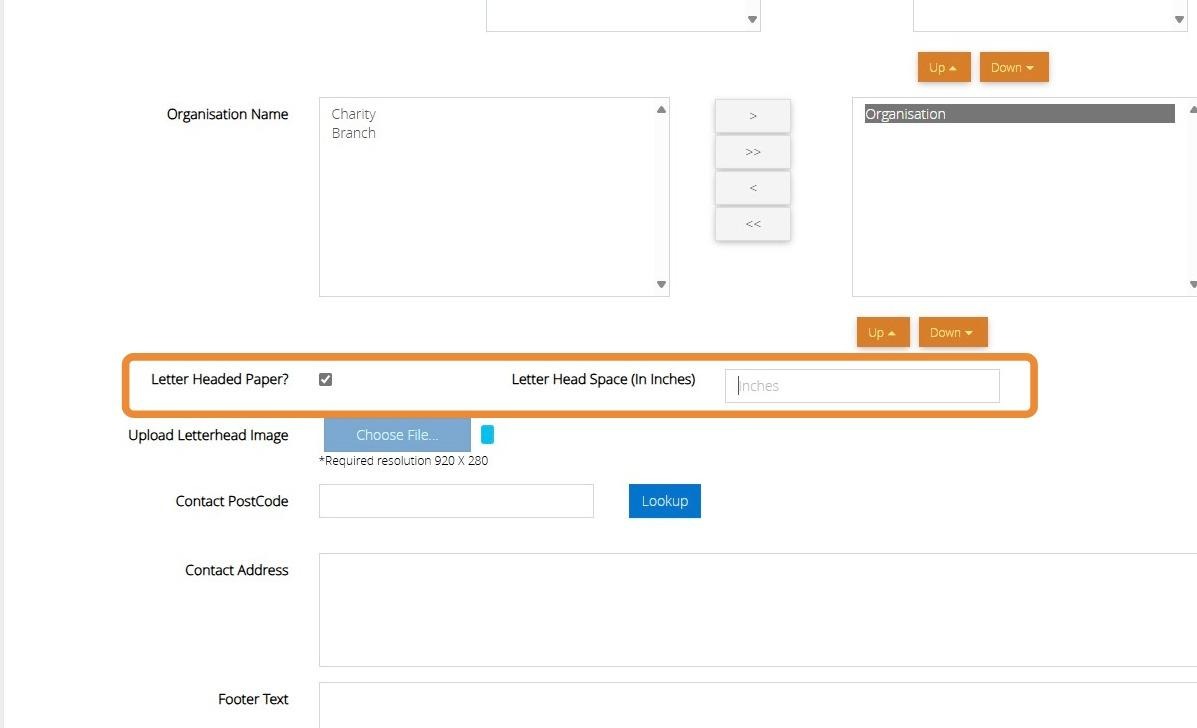
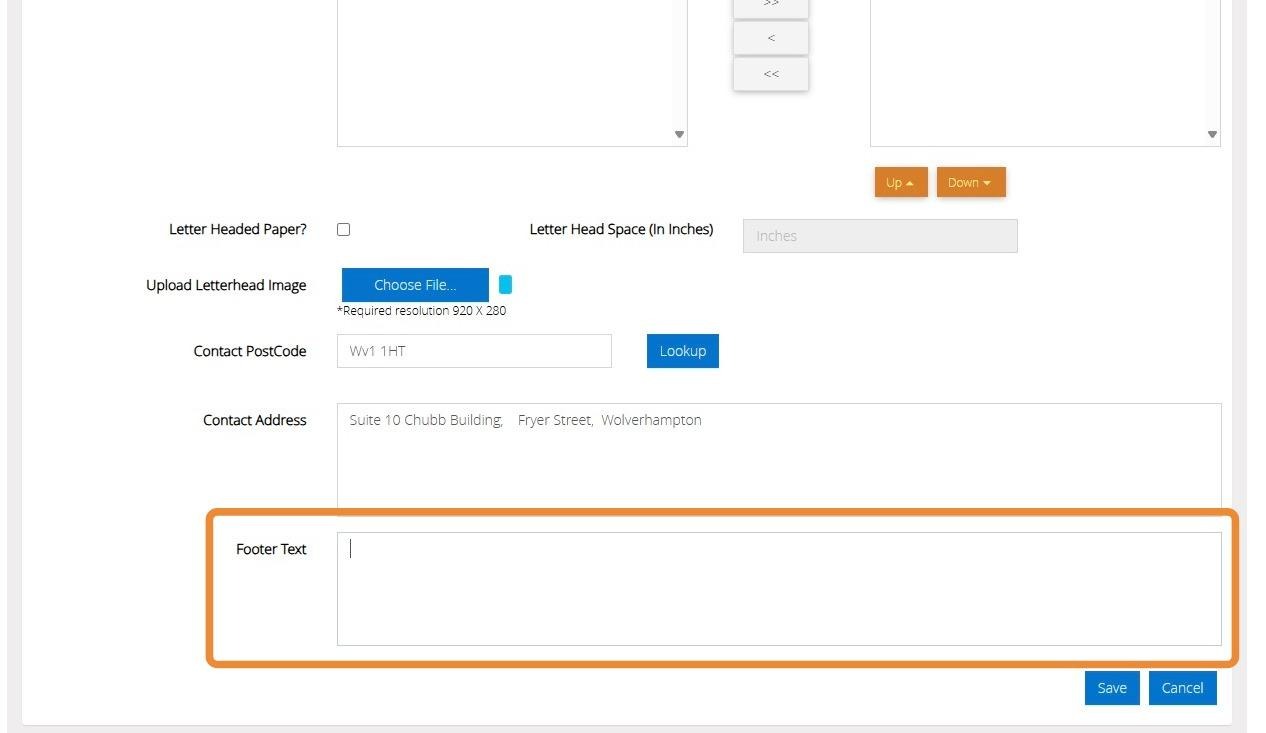
11. If you wish to use Letter Headed Paper, tick the box and then enter the Letter head space in inches.
">
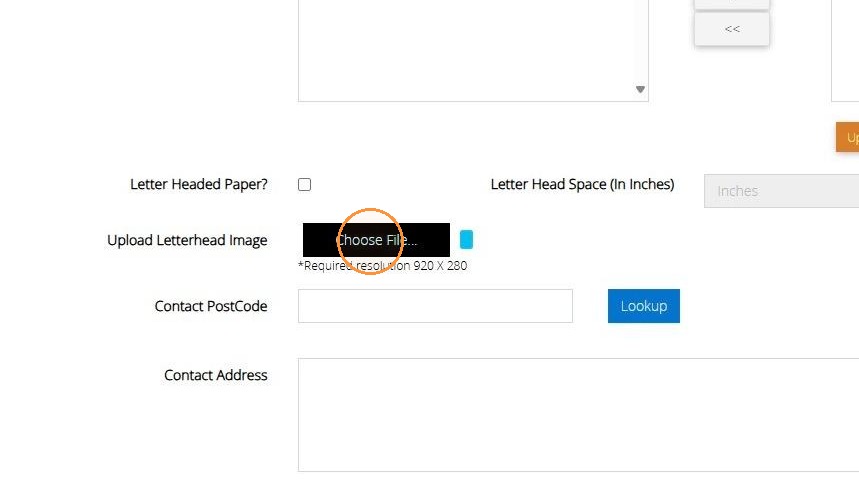
12. Alternatively, you can upload a letterhead image to your template by clicking "Choose File".
">
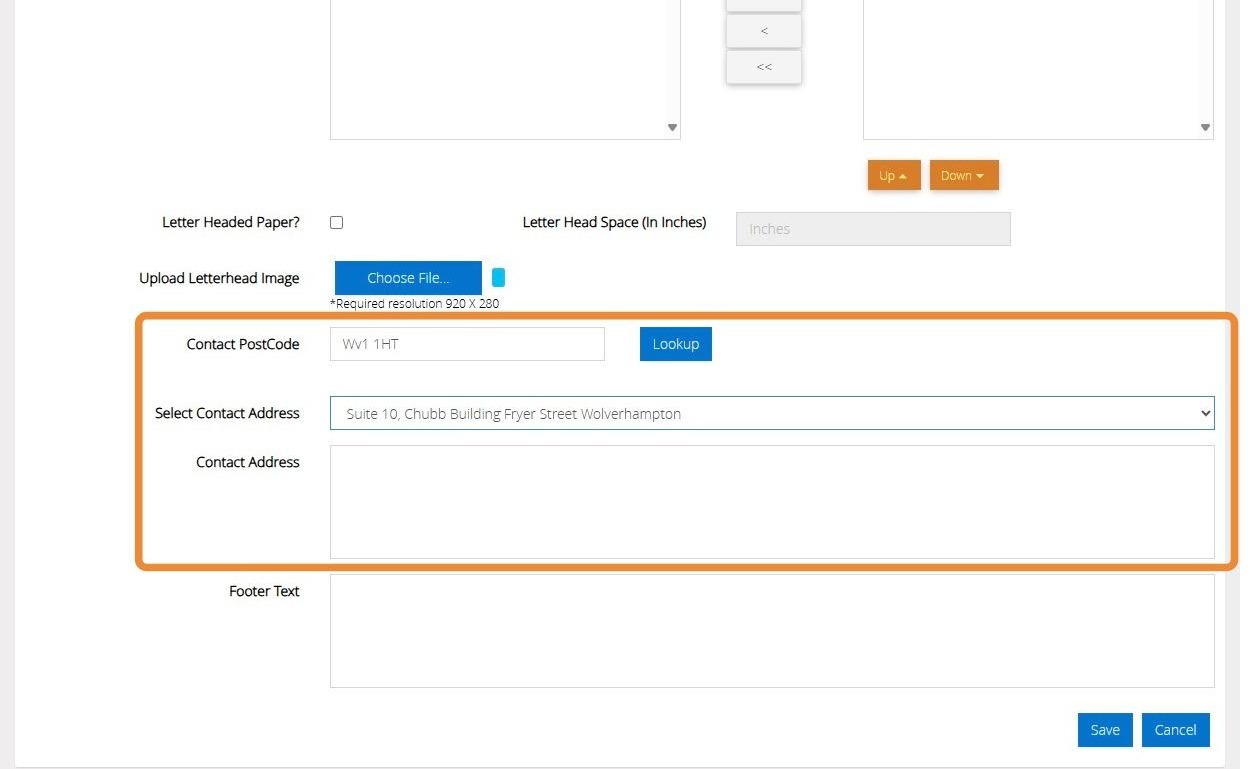
13. Enter the contact address that you want to appear on the template.
">
14. Enter your Footer Text in the box provided.
">
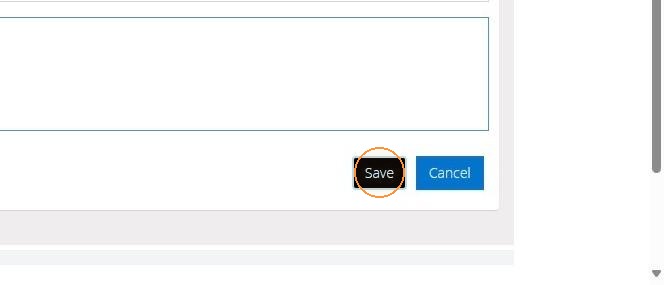
15. Once you are happy with your template, click "Save".
">
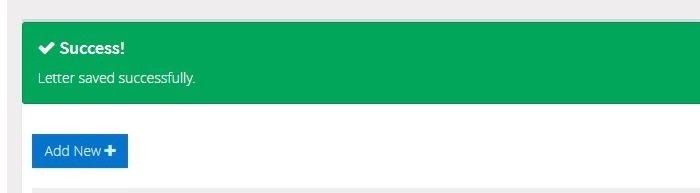
16. The below message will appear once this has been saved successfully.
">
Making changes to an existing template
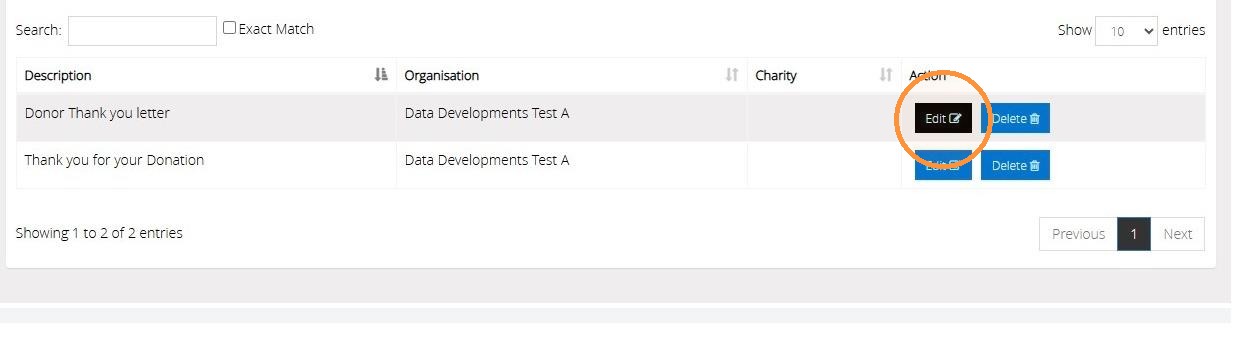
17. Click Edit next to your template name to re-open this. Once you have made your changes, you can save it. Should you no longer require the template, you can click on "Delete" to remove it.
">
Audit Trail and Thank you Letter
Tip: The below steps will guide you in creating a thank you letter for your donors to offer thanks and showcase the difference their donations are making.
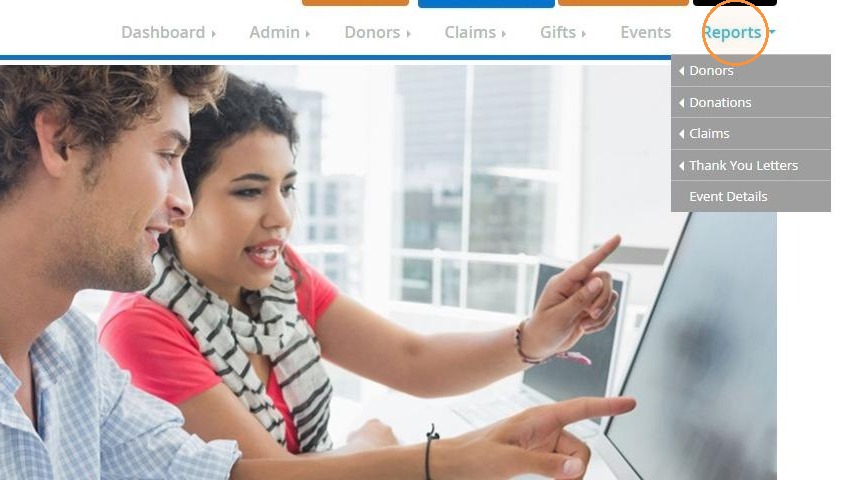
18. Click "Reports".
">
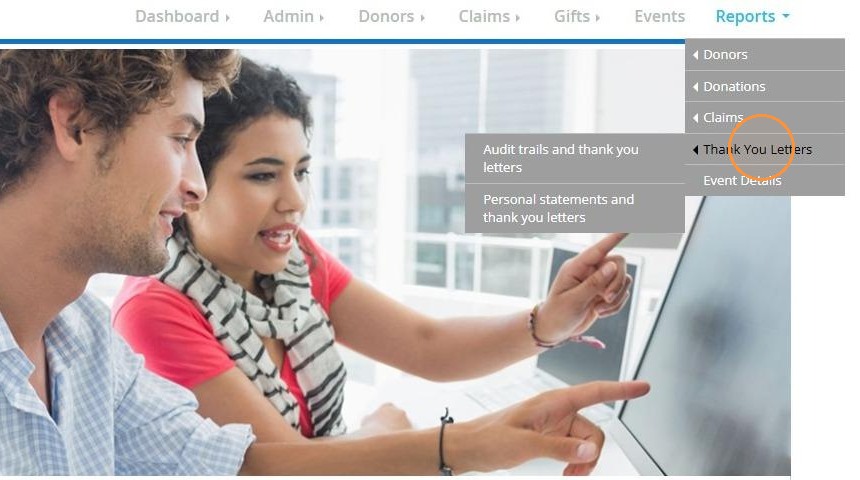
19. Click "Thank You Letters".
">
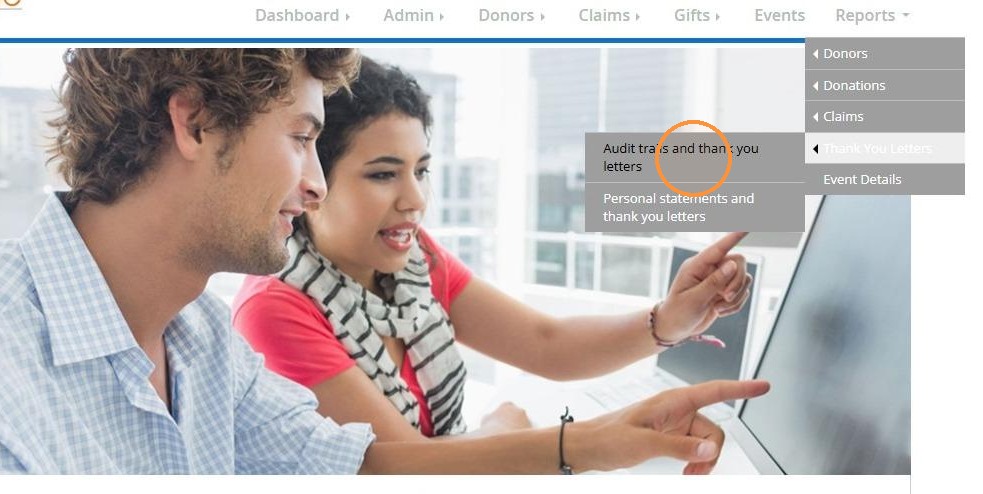
20. Click "Audit trails and thank you letters".
">
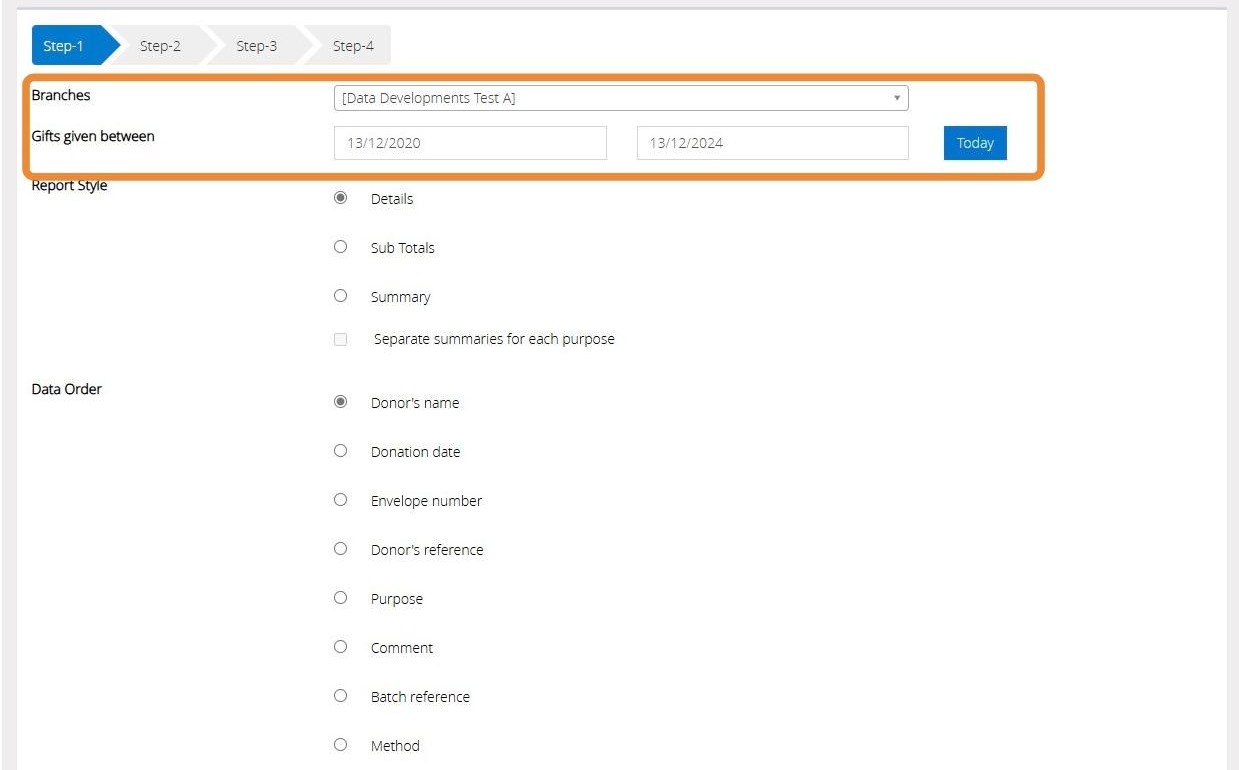
21. Enter the date range that the donations were given between.
">
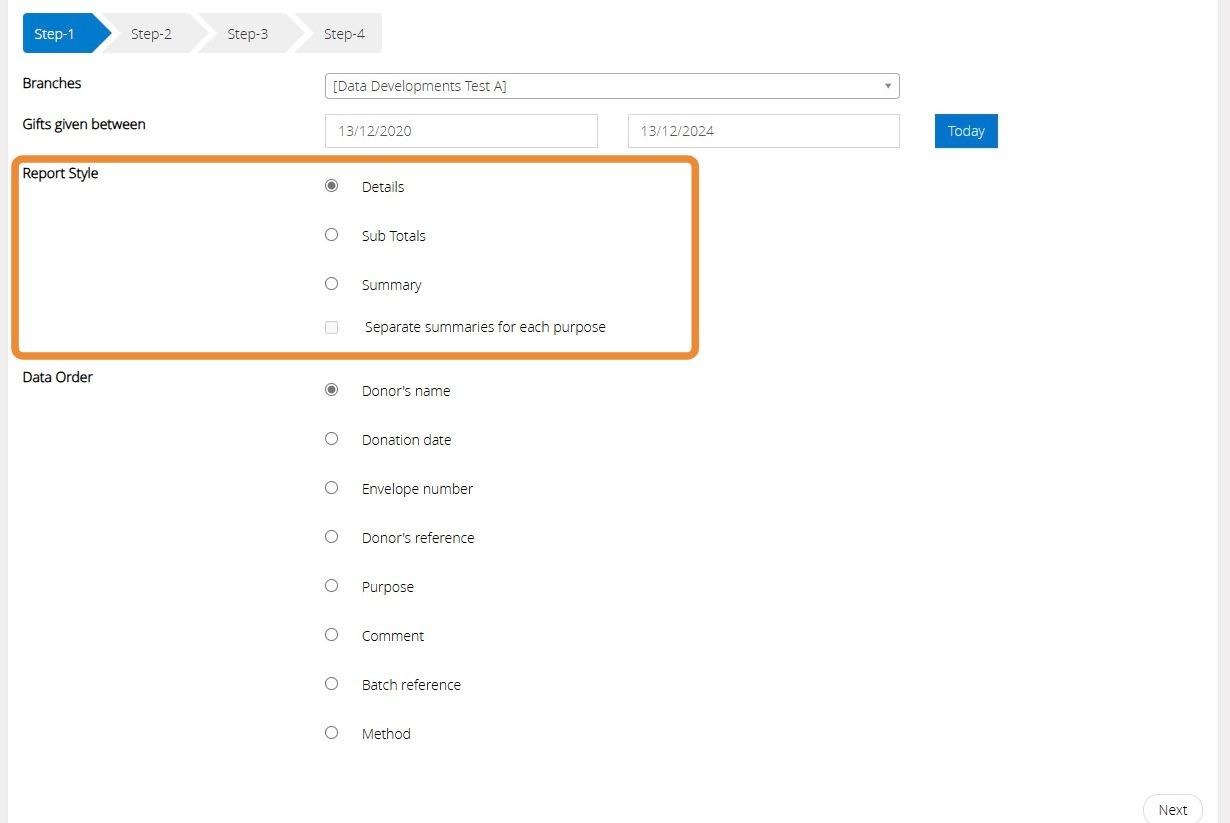
22. Select the report style you require.
- Details : every individual donation will be listed.
- Sub Total: provide a Sub Total.
- Summary: only a single line will be shown.
- Summary with separate summaries for each purpose : one line for each unique purpose the donor has given to.
">
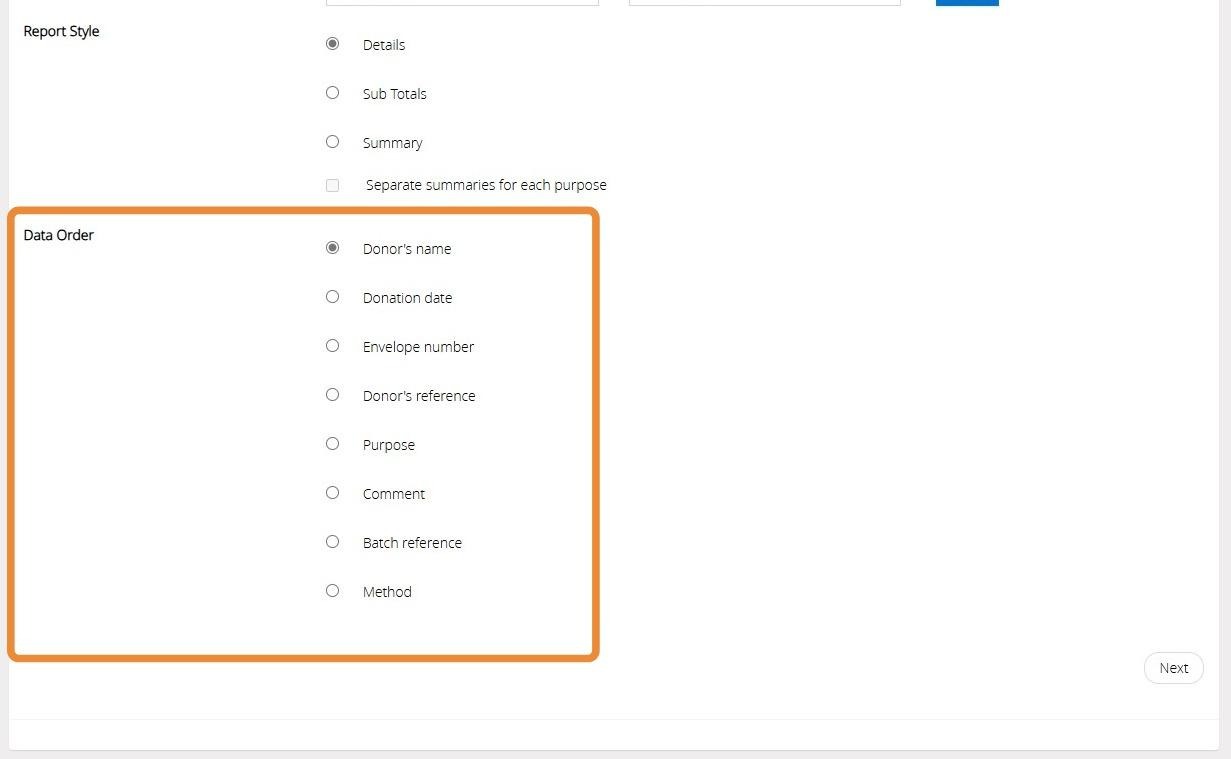
23. Select how you wish to order the data from the highlighted list.
">
24. Click "Next".
">
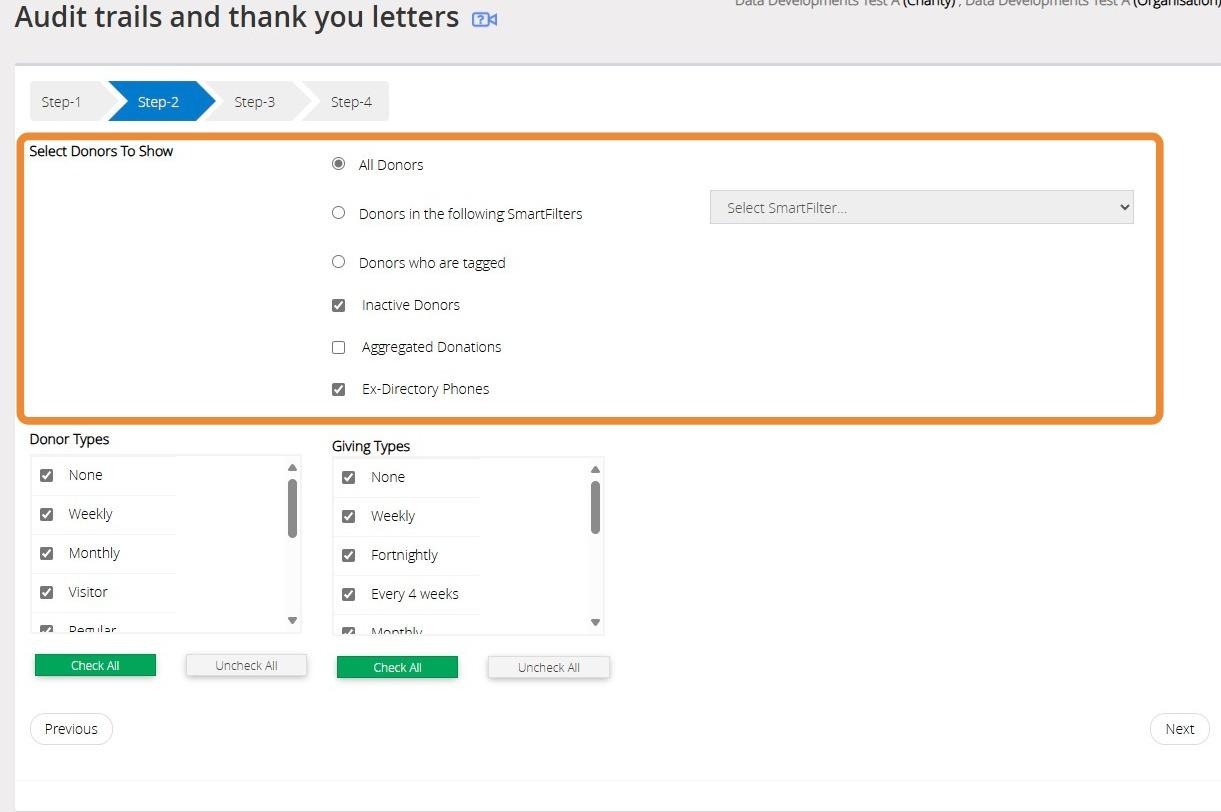
25. If needed, filter the donors you want to create a letter for here.
">
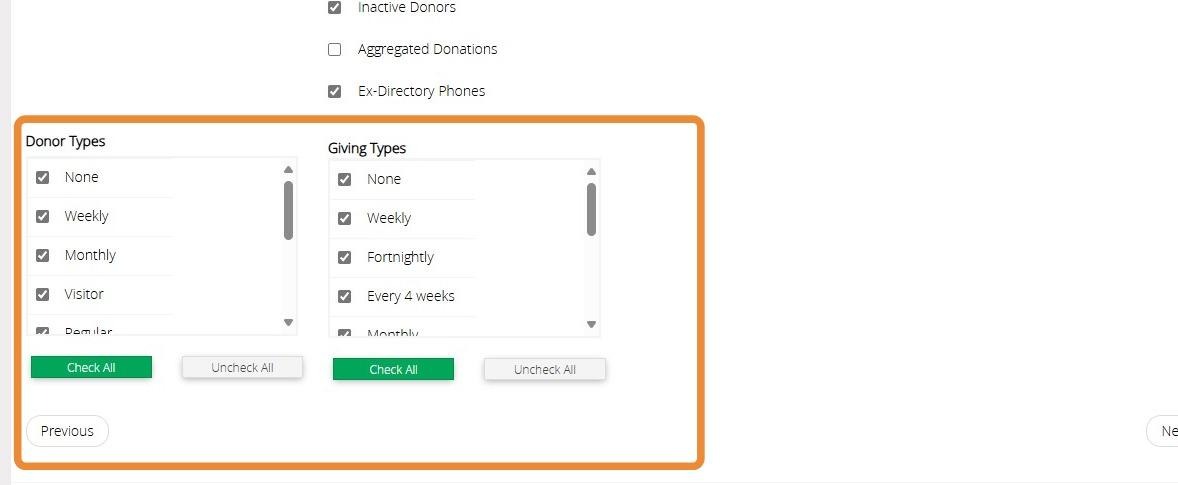
26. Click here to filter the donor by their Donor Types and/or Giving Types.
">
27. Click "Next".
">
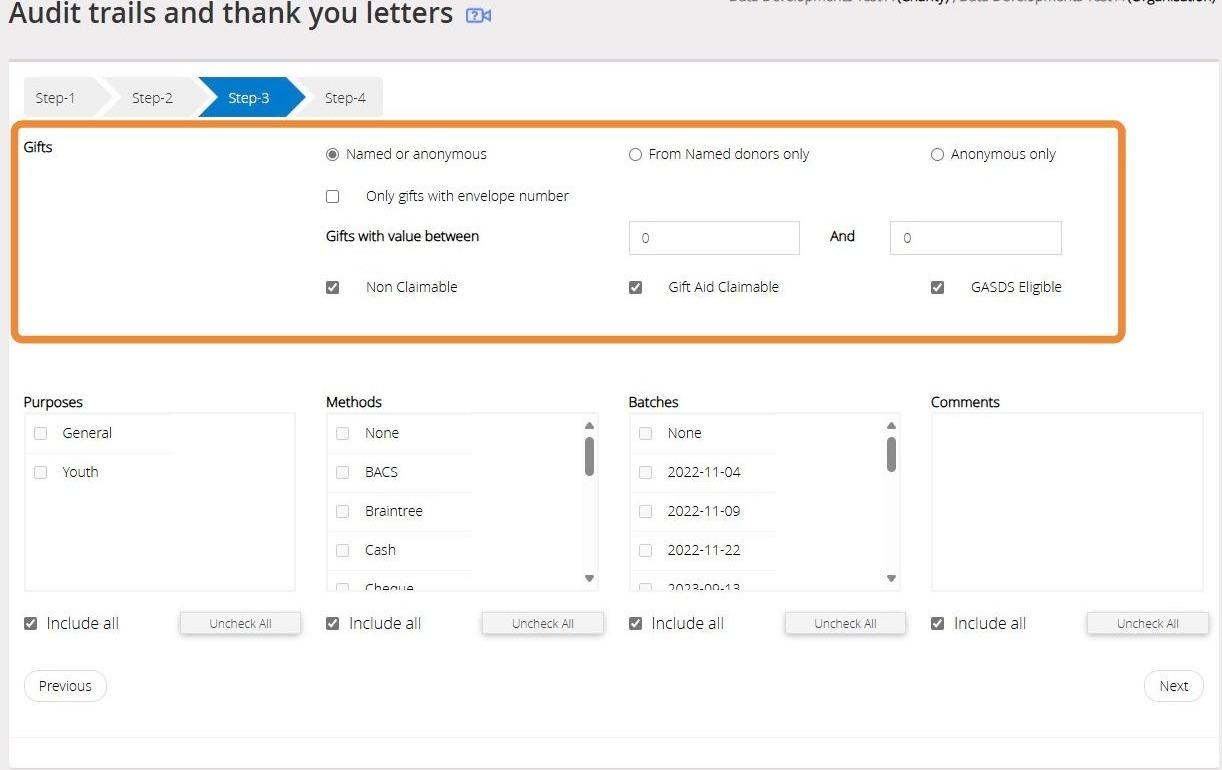
28. Select the donations to be included by applying the filters here.
">
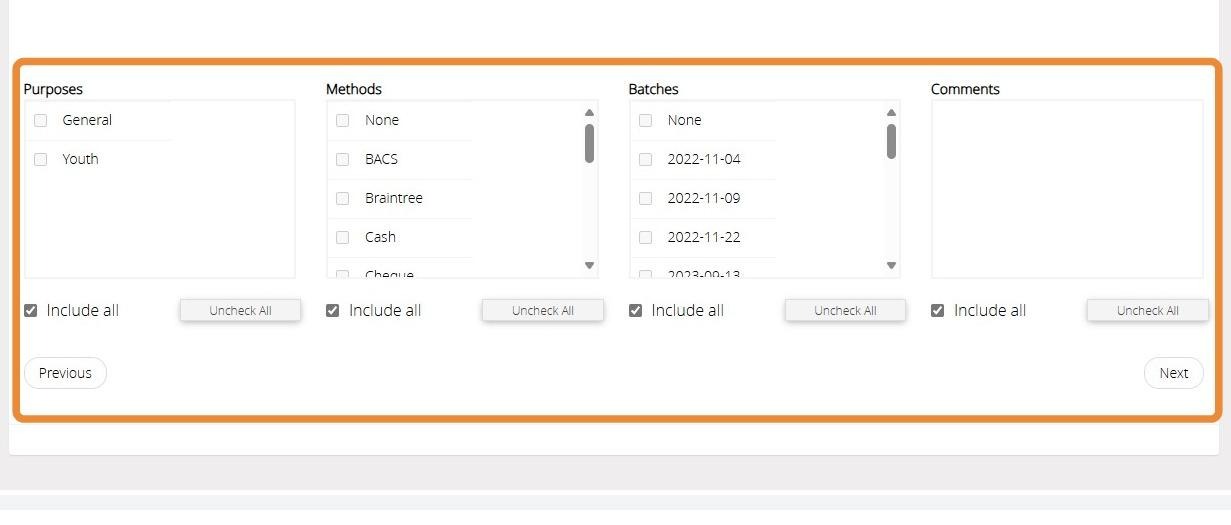
29. You can filter donations based on their purpose, method, and batch number here. Additionally, you can search for specific comments associated with each donation.
">
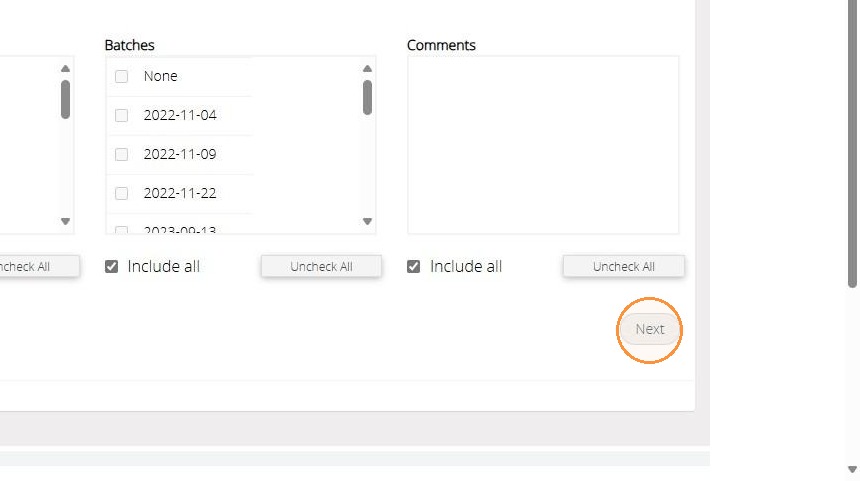
30. Click "Next".
">
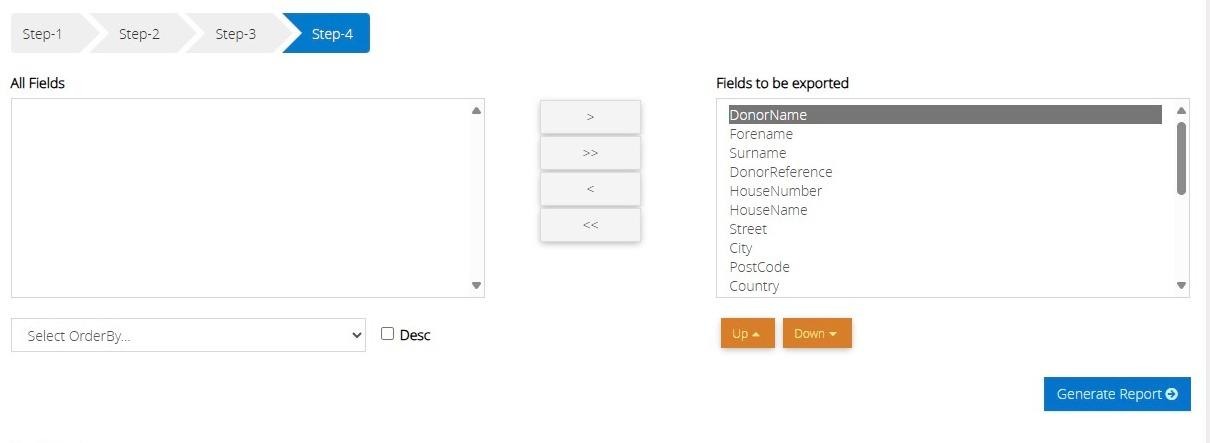
31. Data order can be ignored here as it does not affect the letter.
">
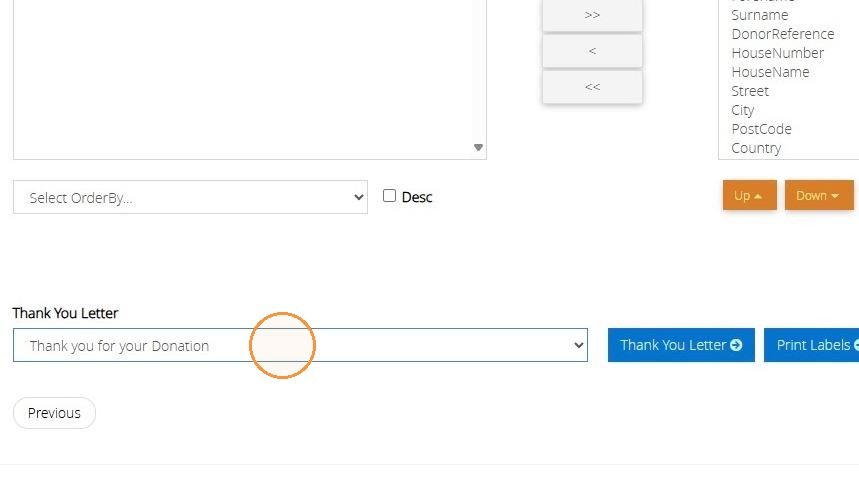
32. Select the letter template to be used from the drop down menu provided.
">
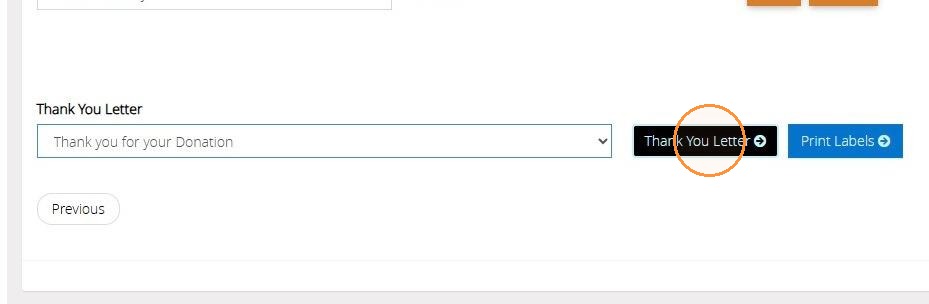
33. Click "Thank You Letter".
">
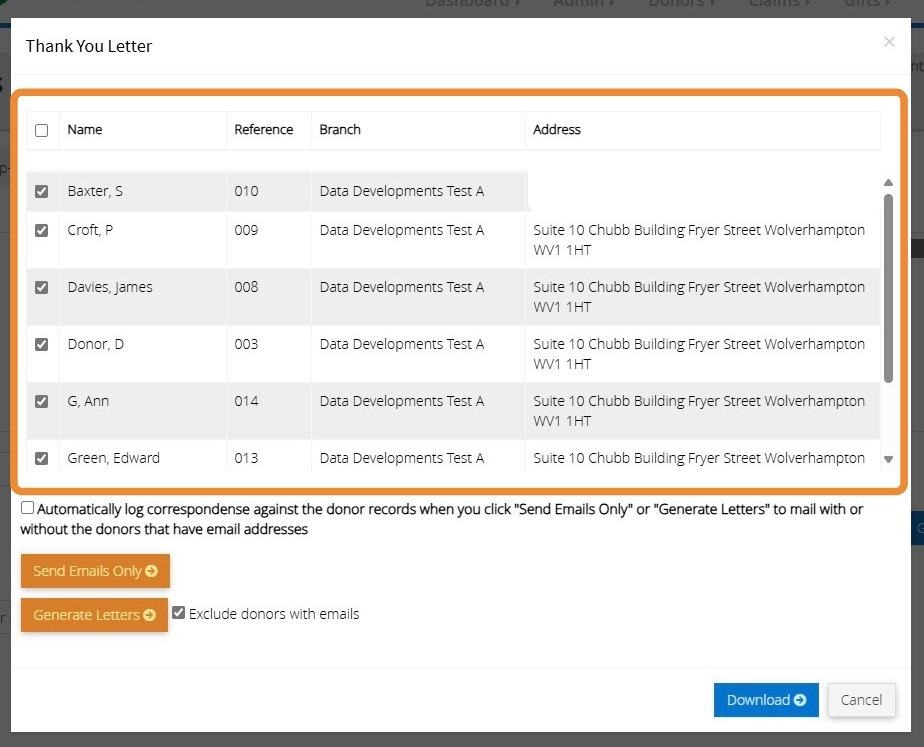
34. A preview of the donors who meet all criteria selected will be displayed here. You can uncheck any donors you do not wish to be included.
">
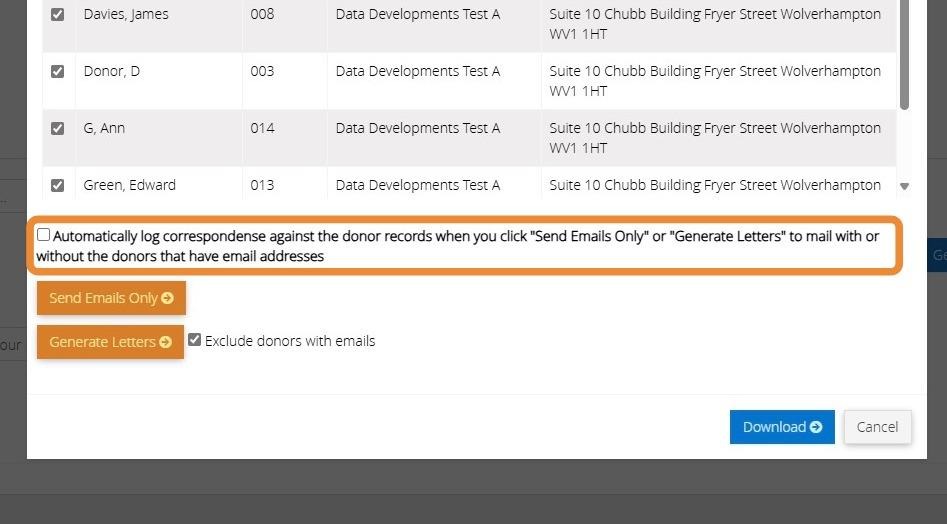
35. Check this box if you want to log the correspondence directly on the donors' records.
">
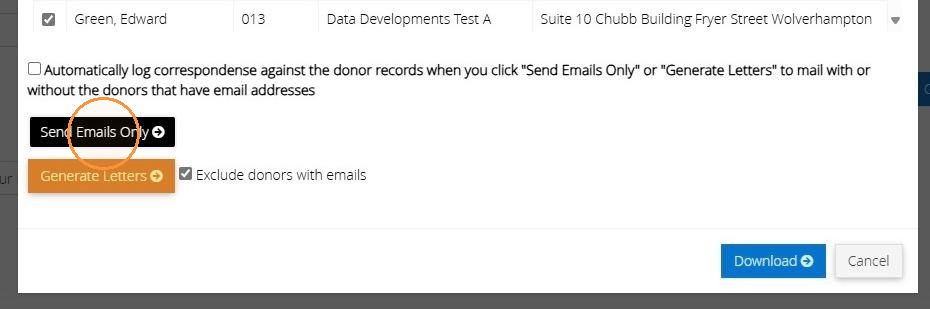
36. Click "Send Emails Only" to send a copy of the letter to all donors with an email address.
">
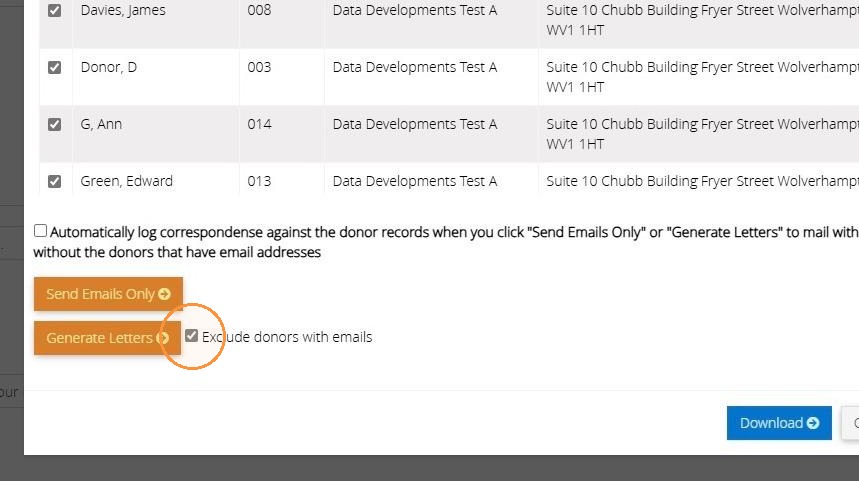
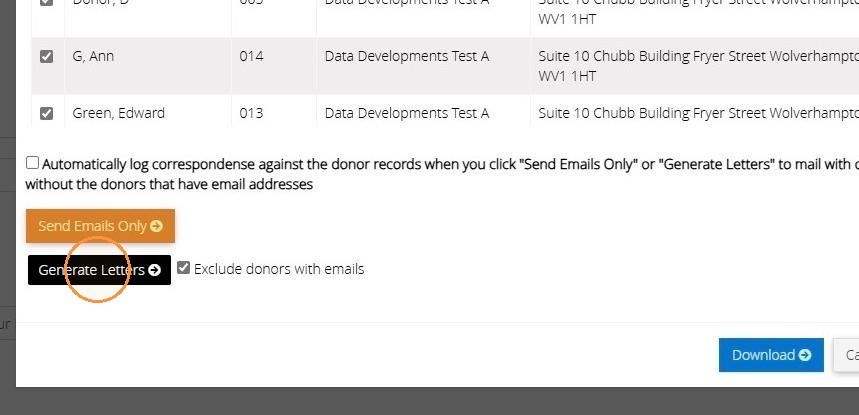
37. Check this box to ensure that no letters are generated for donors with an email address on their record.
">
38. Click "Generate Letters" to open the letters in a new browser tab.
">
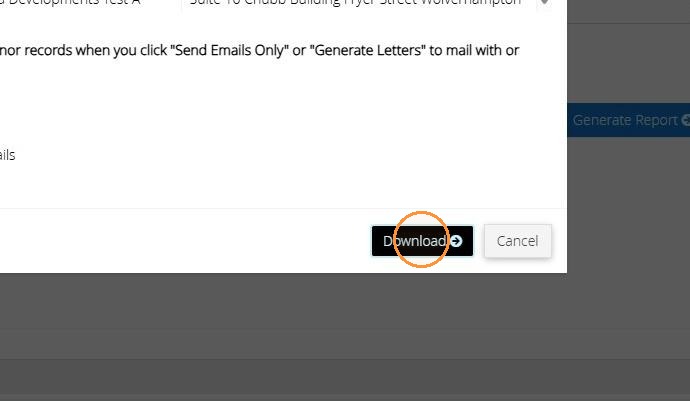
39. Click "Download" to download a file of the letters directly to your device.
">
Personal Statements
40. Click "Reports".
">
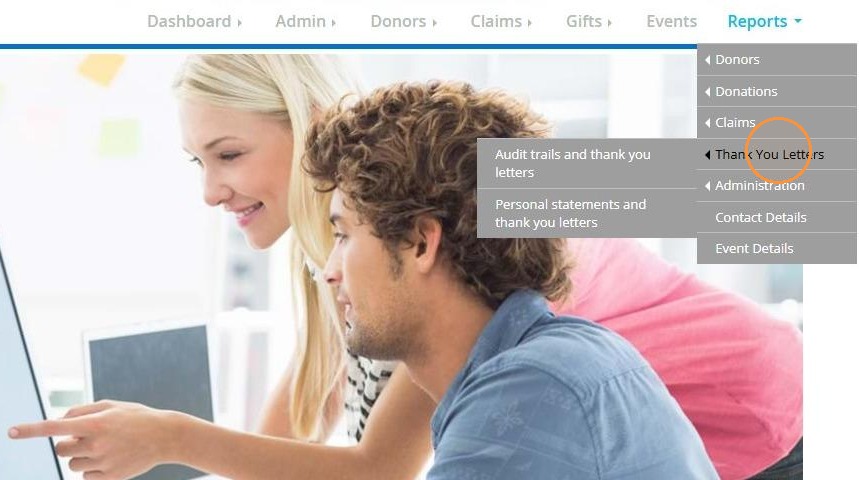
41. Click "Thank You Letters".
">
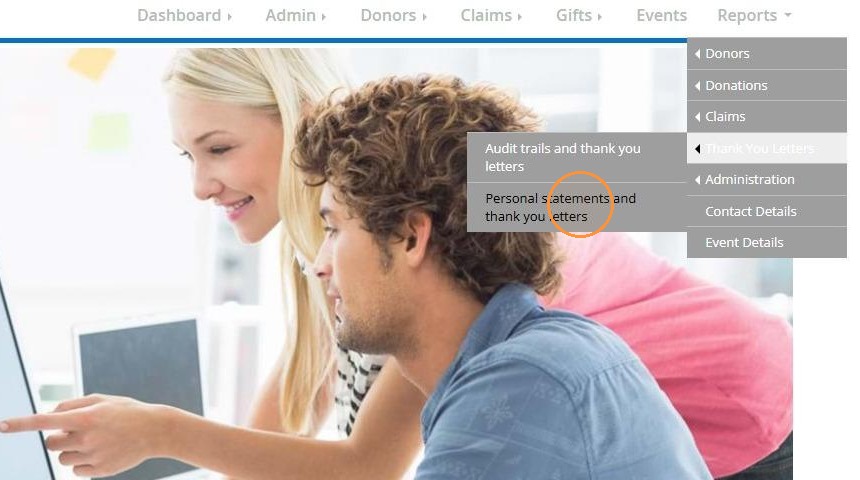
42. Click "Personal statements and thank you letters".
">
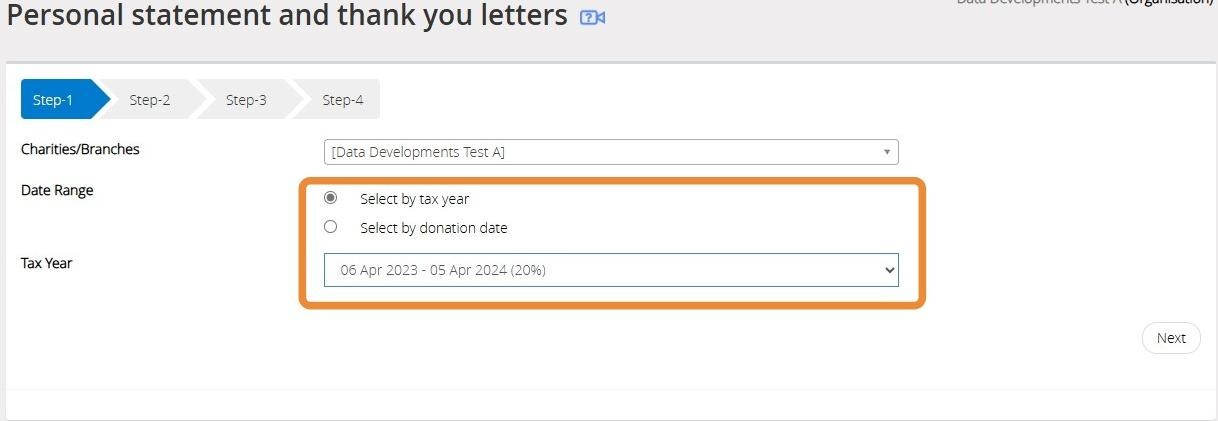
43. To get a personal statement by tax year, choose 'select by tax year' and then select the relevant date from the dropdown menu below
">
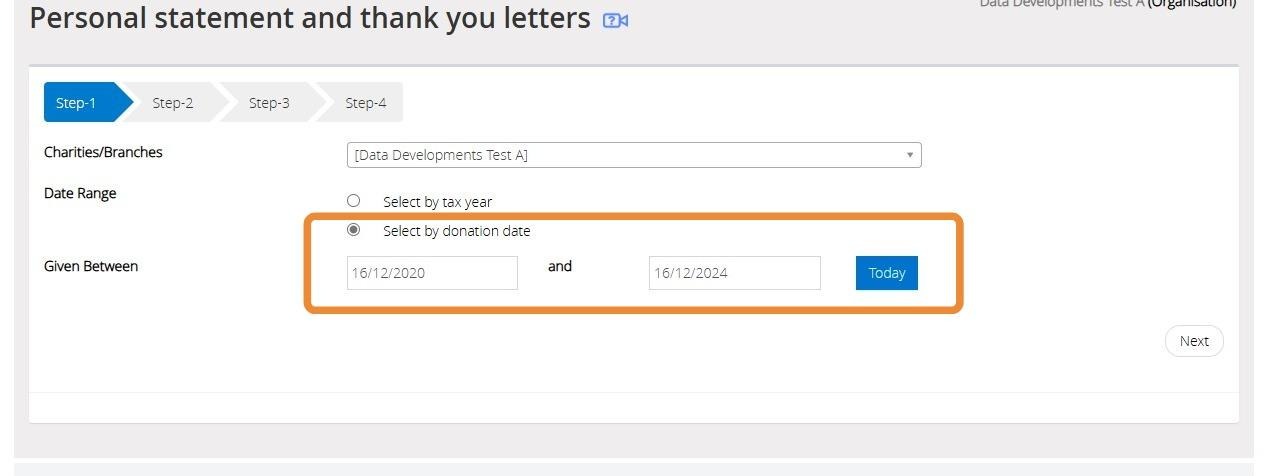
44. Alternatively, by selecting the option "select by donation date" you will have the option to manually enter a date range
">
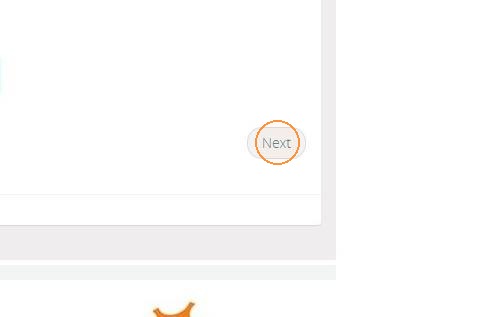
45. Click "Next".
">
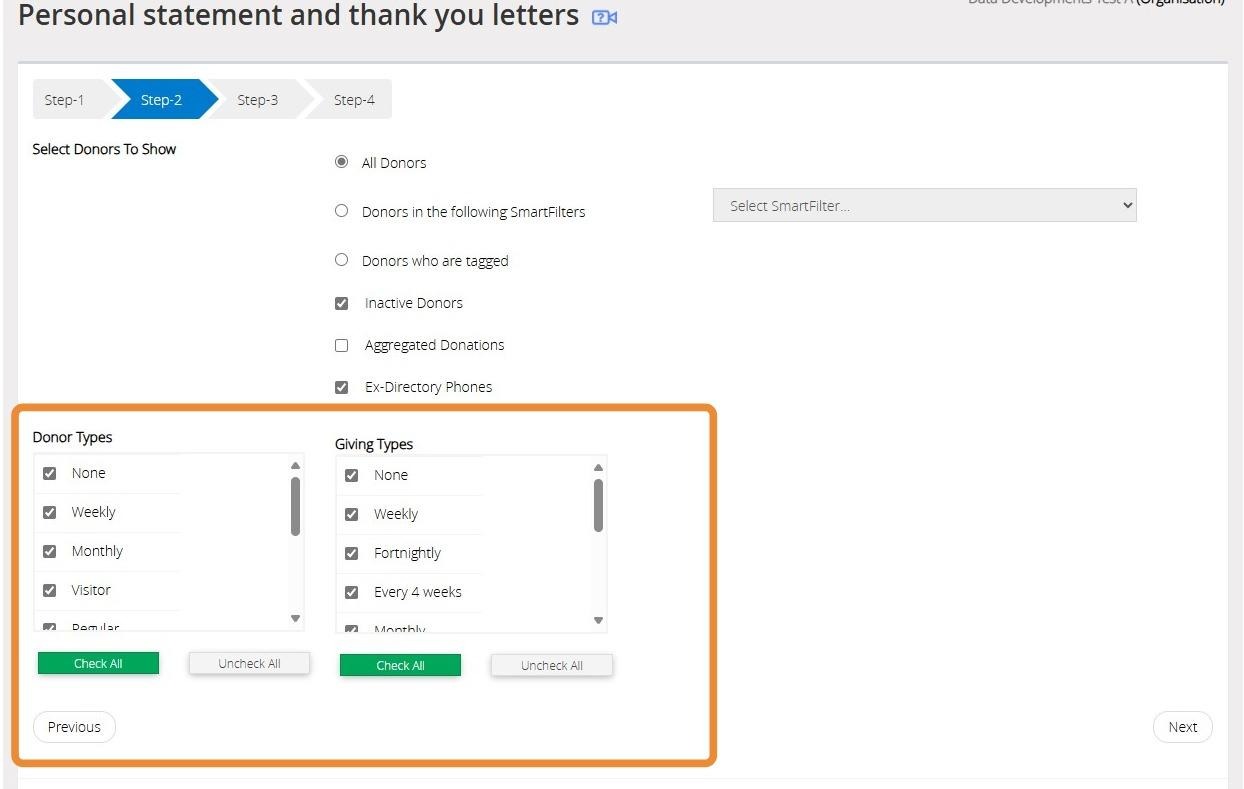
46. If needed, filter the donors you want to create a statement for here.
">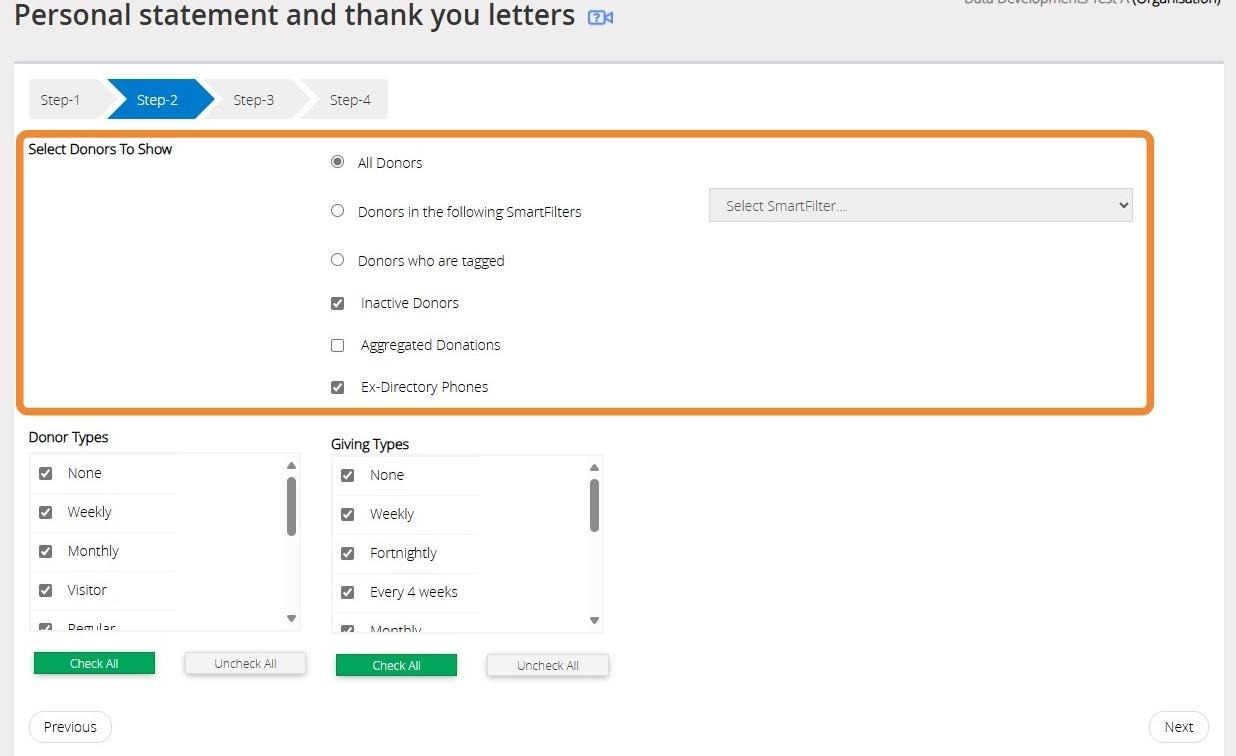
47. Within this section you can filter by Donor Types and Giving Types by ticking next to the required selection.
">
48. Click "Next".
">
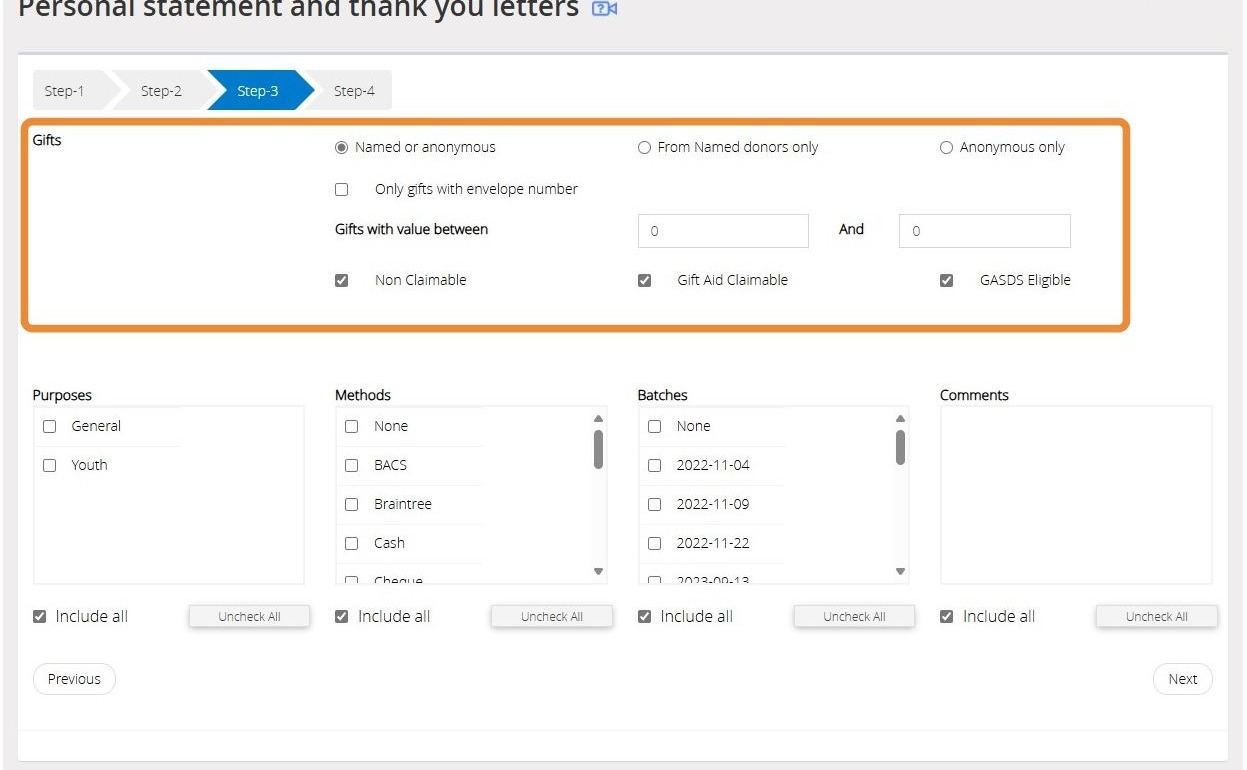
49. Within this section you can filter the gifts to be included within the report. Select if the donations to be included should be named or anonymous and if the donations are Gift Aid Eligible.
">
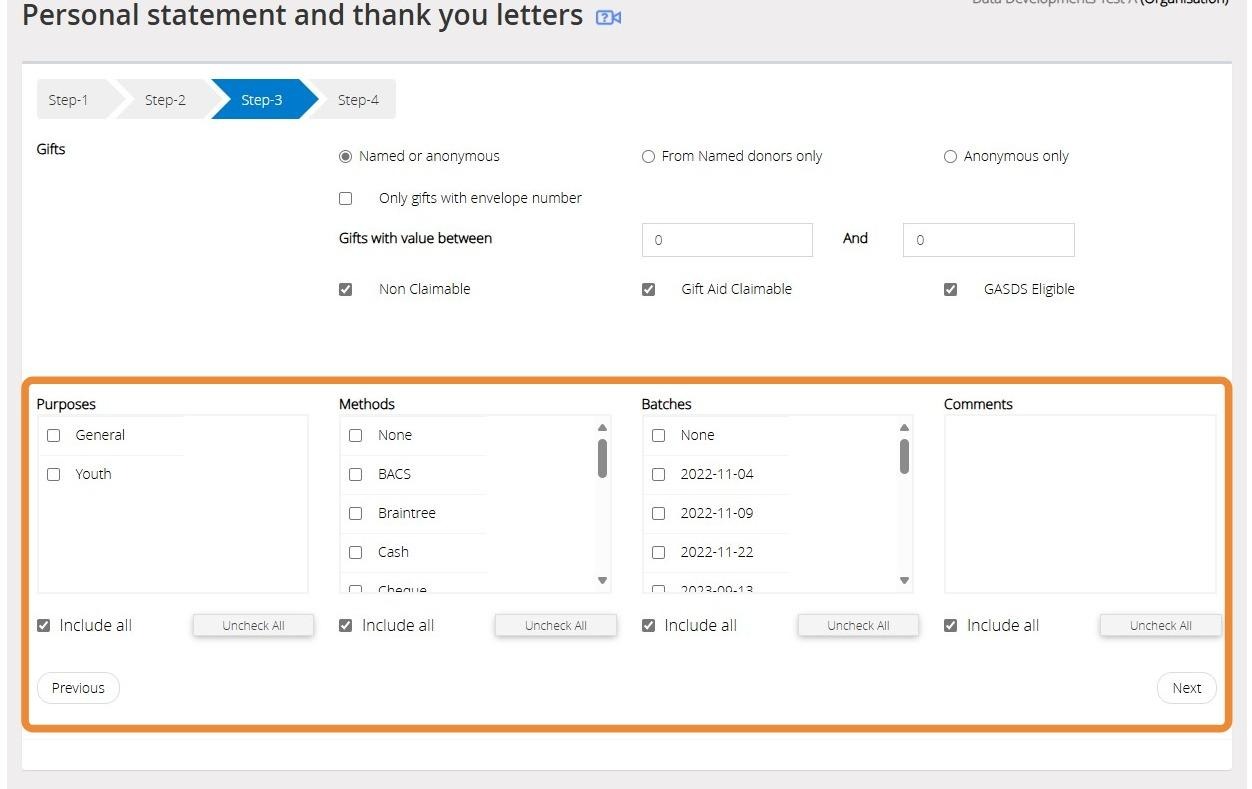
50. Within this section you can limit the donations to be included by their Purpose, Method, Batch Number or comment.
">
51. Click "Next".
">
52. Data order can be ignored here as it does not affect the letter.
">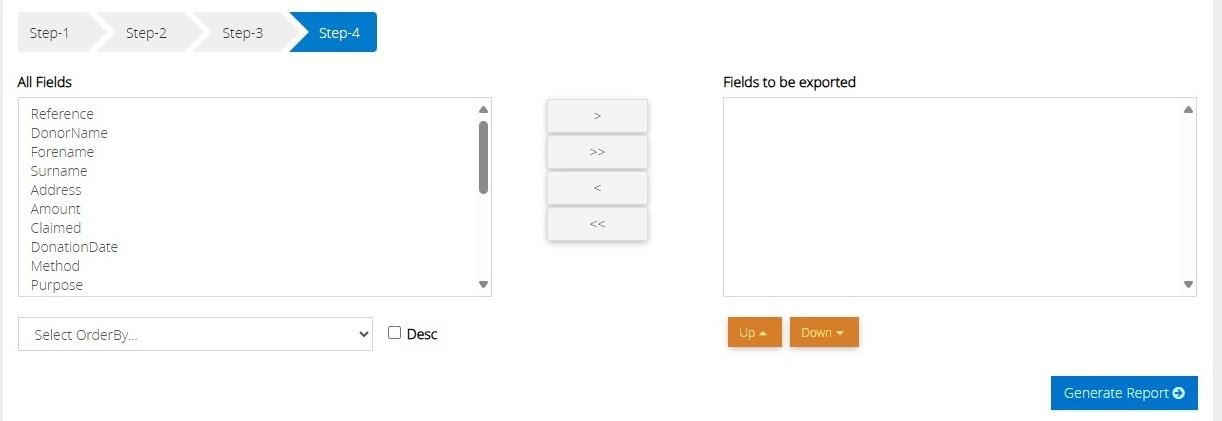
Alert: Alert! If you require a report only, then you will need to select your chosen fields and click "Generate Report".
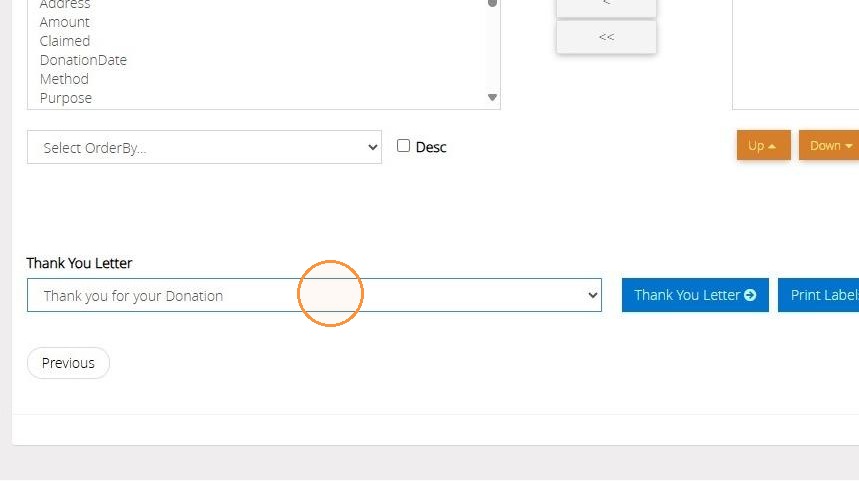
53. Select the letter template to be used from the drop down menu provided.
">
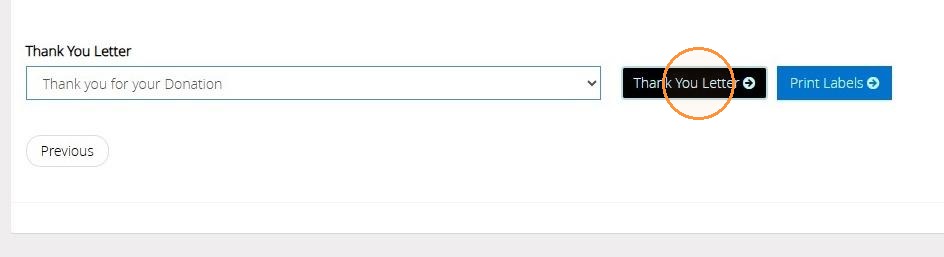
54. Click "Thank You Letter".
">
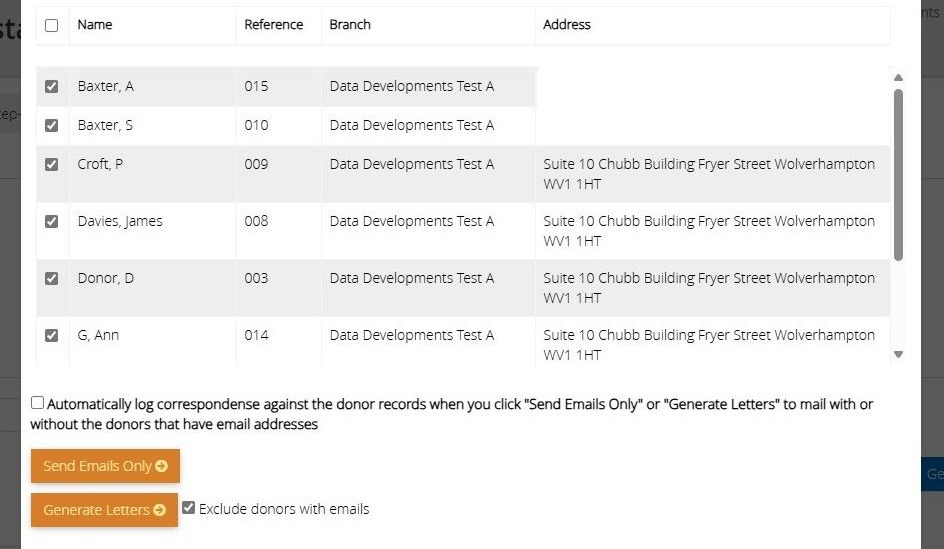
55. A preview of the donors who meet all criteria selected will be displayed here. You can uncheck any donors you do not wish to be included.
">
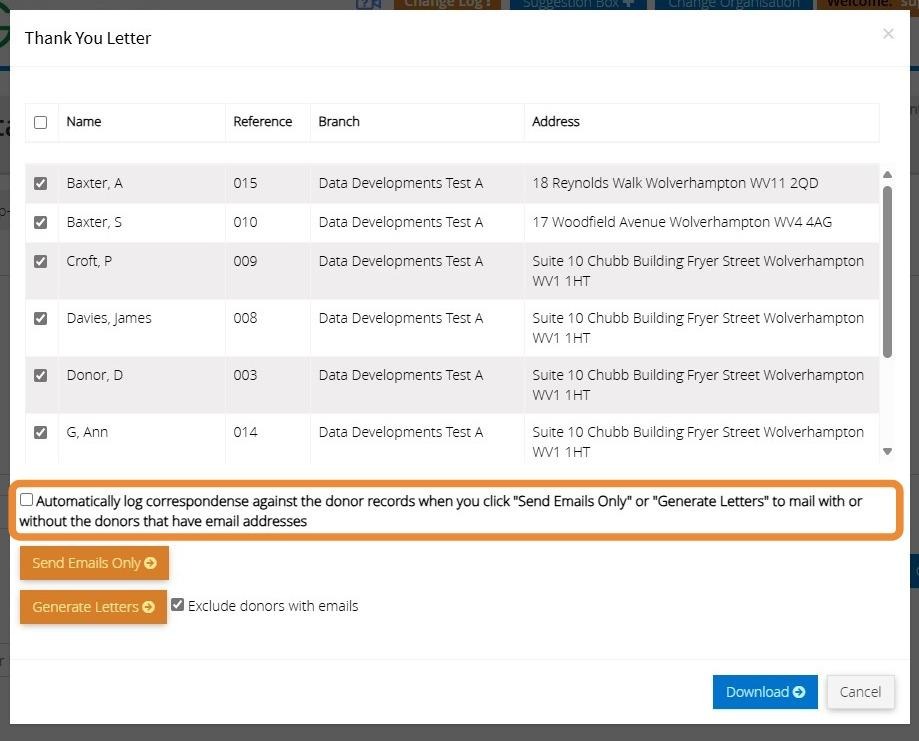
56. Check this box if you want to log the correspondence directly on the donors' records.
">
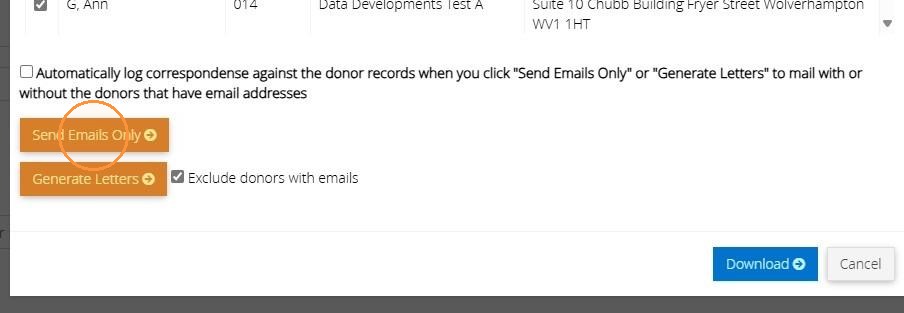
57. Click "Send Emails Only" to send a copy of the letter to all donors with an email address.
">
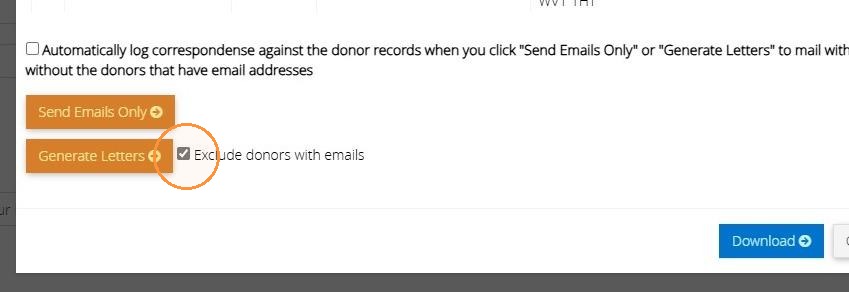
58. Check this box to ensure that no letters are generated for donors with an email address on their record.
">
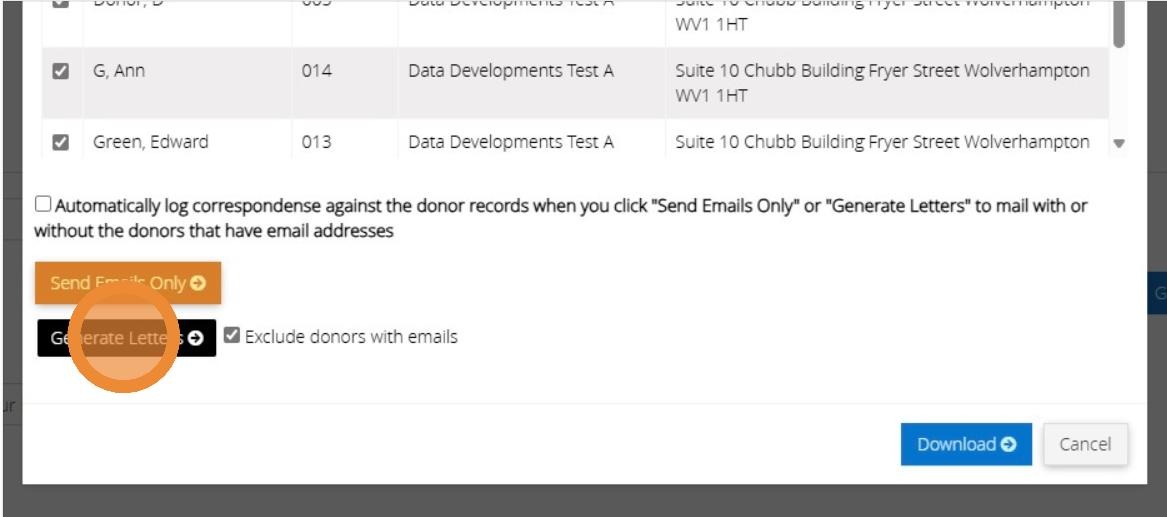
59. Click "Generate Letters" to open the letters in a new browser tab.
">
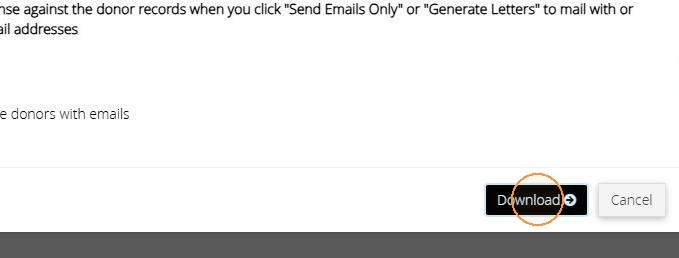
60. Click "Download" to download a file of the letters directly to your device.
">
We hope you found this guide helpful and easy to follow. If you require any further assistance, please contact our support team by telephone on 01902 714030 or by email at support@datadevelopments.co.uk.