
What are Debtor and Creditor useful for in MyFundAccounting.Online?
1. Recording a debtor or creditor is beneficial when you have an outstanding bill that will be settled in the subsequent year or over a few years. It is also useful if an organisation owes you money or if you are awaiting gift aid.
How to find the Debtor and Creditor assistant
2. Hover over "Transactions".
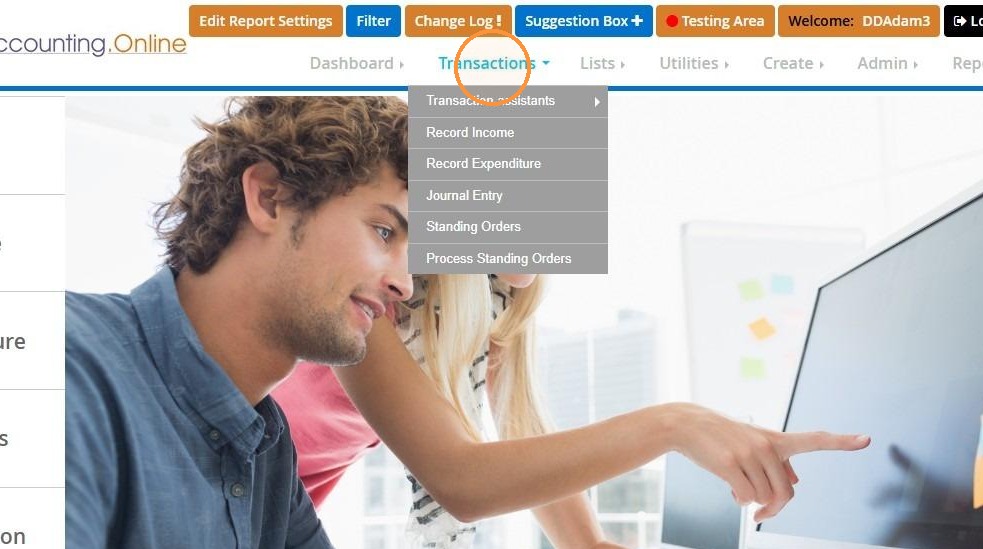
3. Select "Transaction assistants".
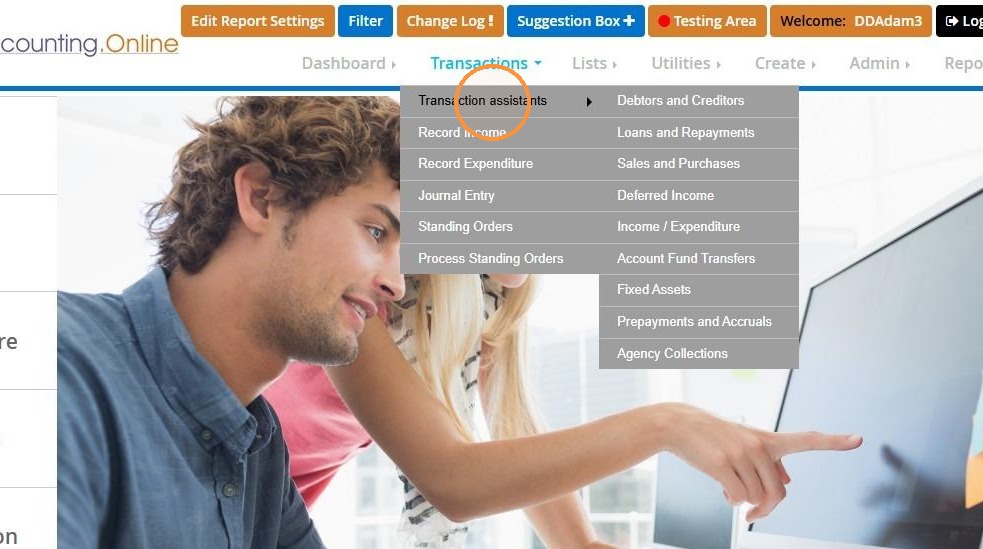
4. Click "Debtors and Creditors".
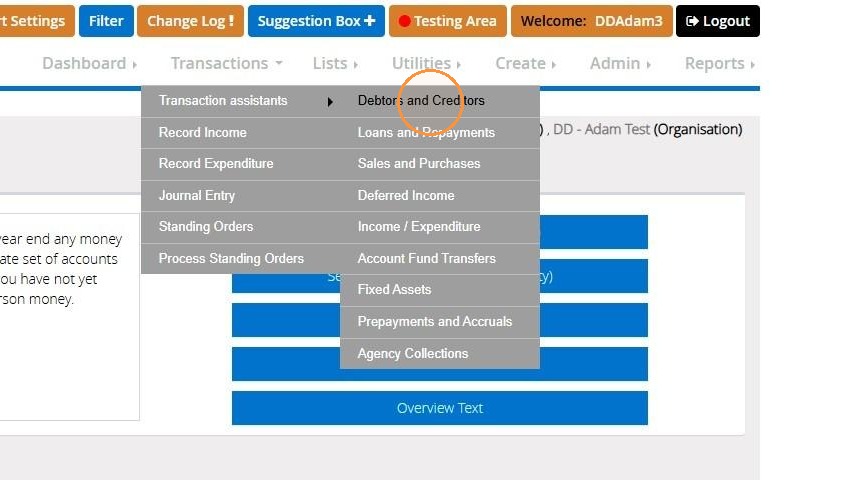
5. Debtors and creditors allow you to show outstanding balances that are either owed to you or owed by you.
The debtors will show money owed to your organisation, such as a HMRC claim you may be waiting to pay for.
Creditors will show how much money is owed. This could be an outstanding gas bill that has been part-paid as an example.
Recording a Creditor
6. Recording a creditor will show the balance outstanding against a lability. This will also show against the expense code once the creditor transactions have been recorded.
7. Click "Record a creditor (add a liability)".
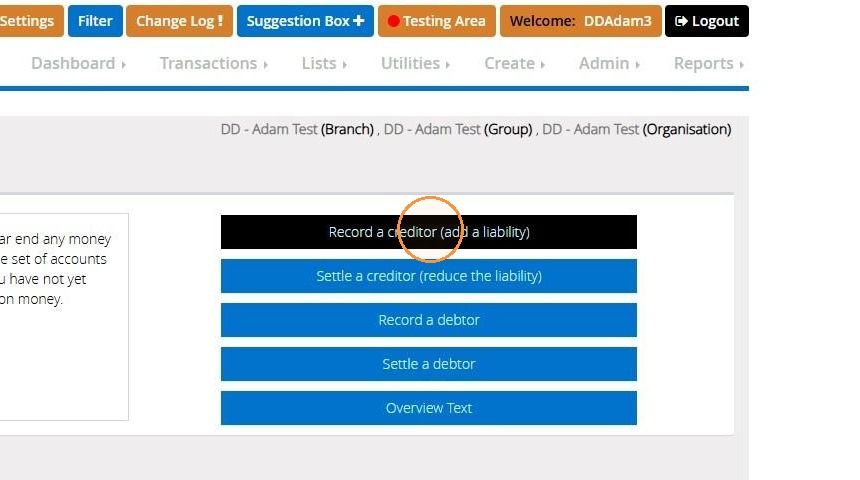
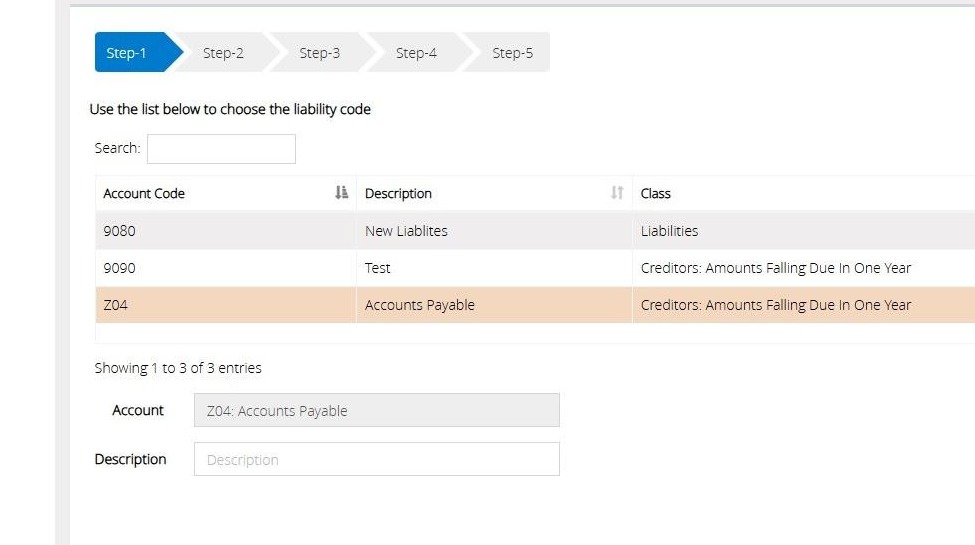
8. In Step 1, select the liability code you wish to record the creditor against from the list below.
You can create a new liability code via Create > Accounts Assistant > Nominal Accounts > Liabilities. Alternatively, you can use the system code Z04.
You can also enter a description for this transaction in the description field.
Afterwards, click "Next Step".
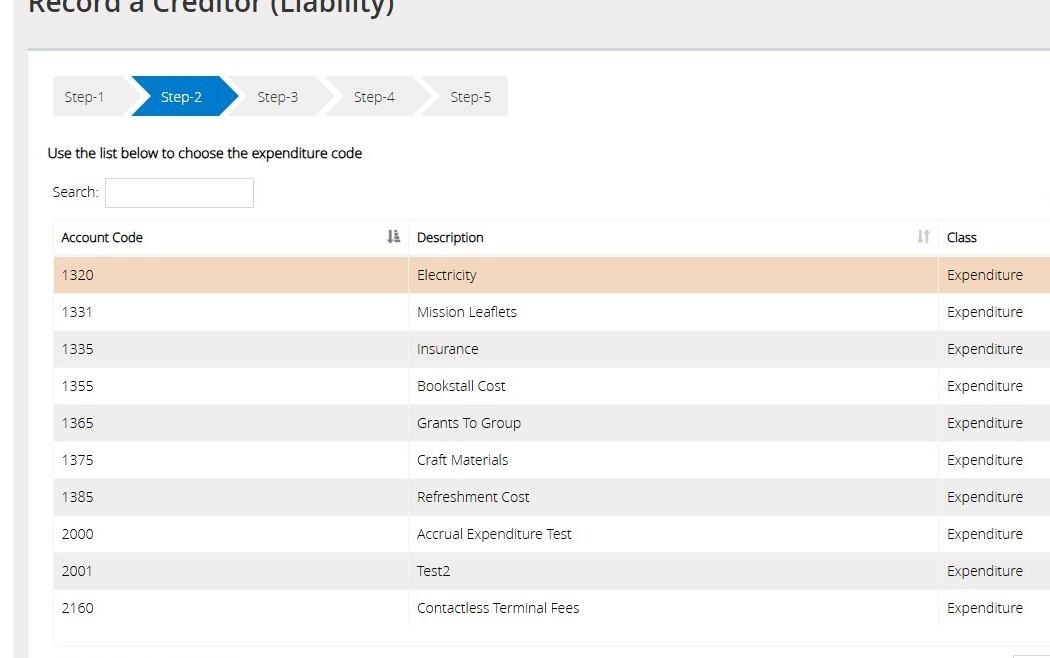
9. In Step 2, choose the expenditure code the liability should affect from the list.
You also have the option to enter a description in the description field. Once completed, choose "Next Step".
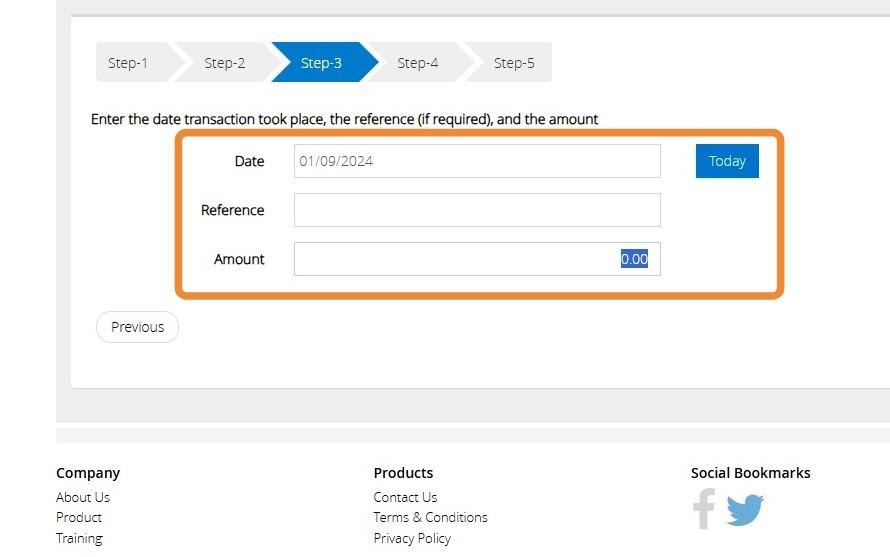
10. In Step 3, you can enter the date the transaction took place, along with the creditor amount owed. You can also add a reference if necessary.
Afterwards, click "Next Step".
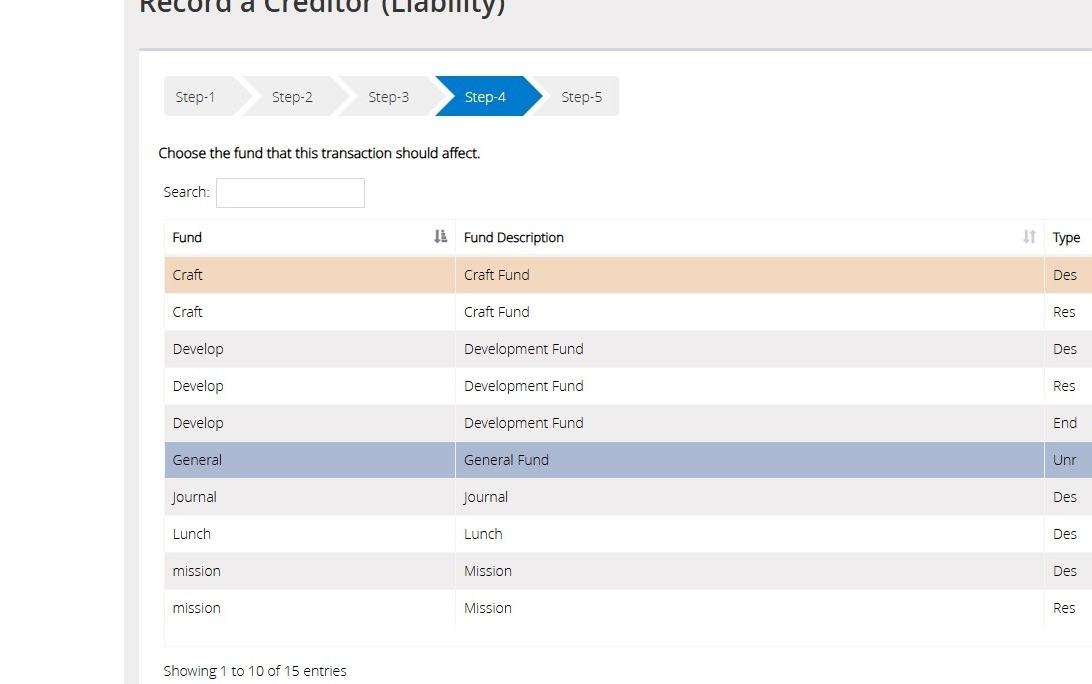
11. In Step 4, you can choose the fund you want the transaction to affect.
Then click "Next Step".
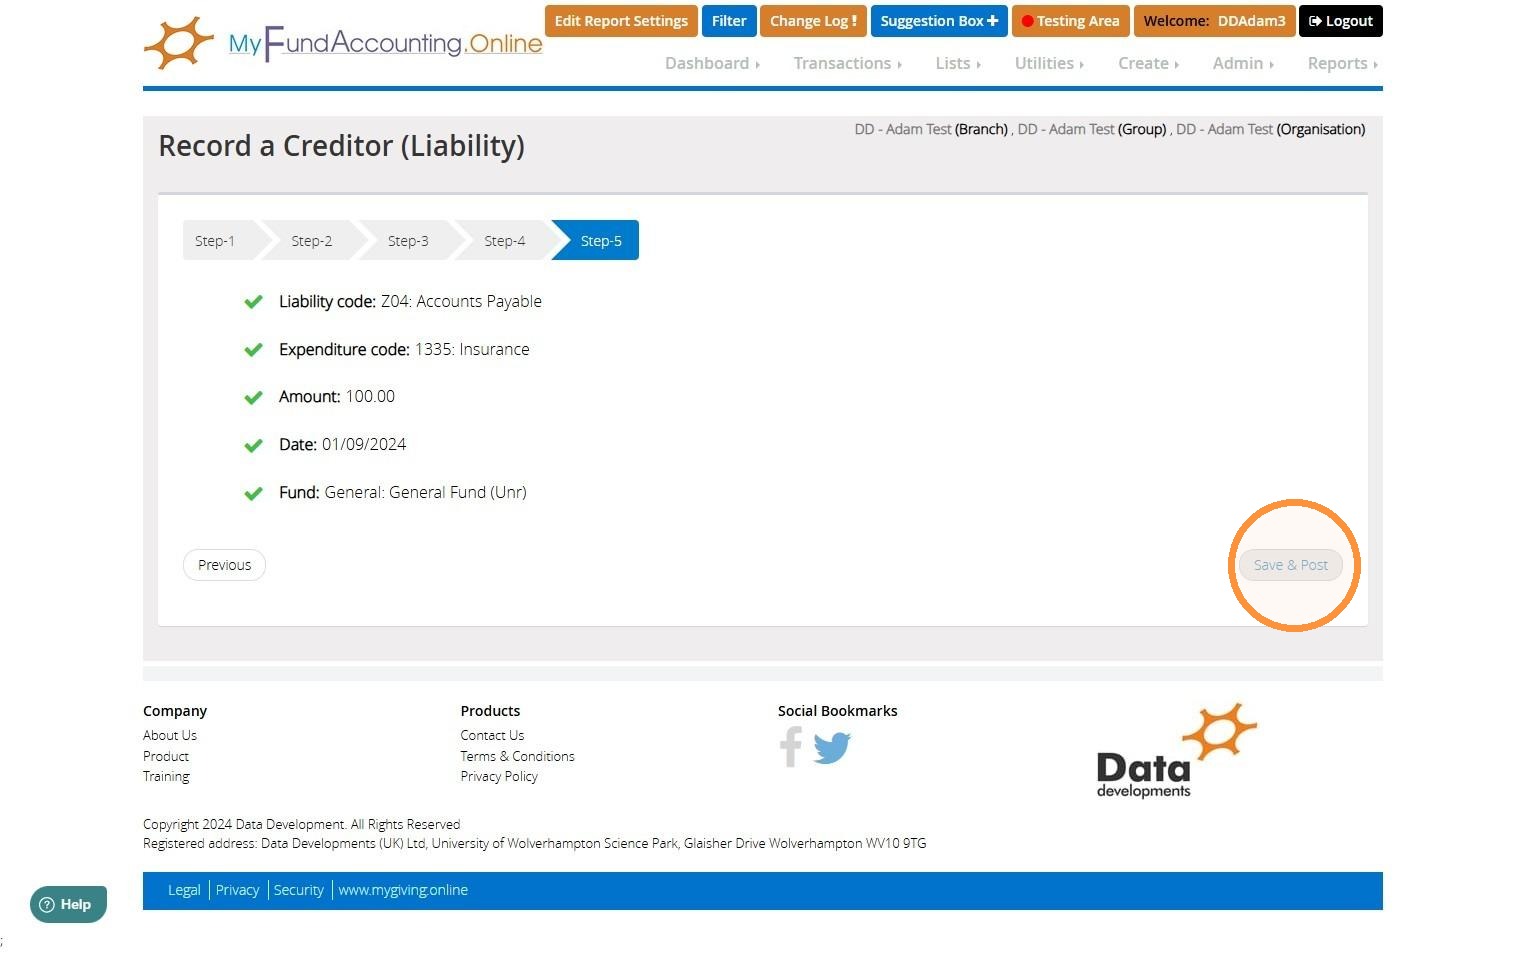
12. In Step 5, you can view all the information you've provided in the previous steps. If you're happy with your choices, choose "Save & Post" to post the transaction. Otherwise, choose "Previous" to return to the previous steps and amend the information.
Settling a Creditor
13. Settling a creditor will remove the amount from the liability, showing the money has been paid out to the bank. You will want to use this feature once you are making a payment to reduce or pay off what you owe.
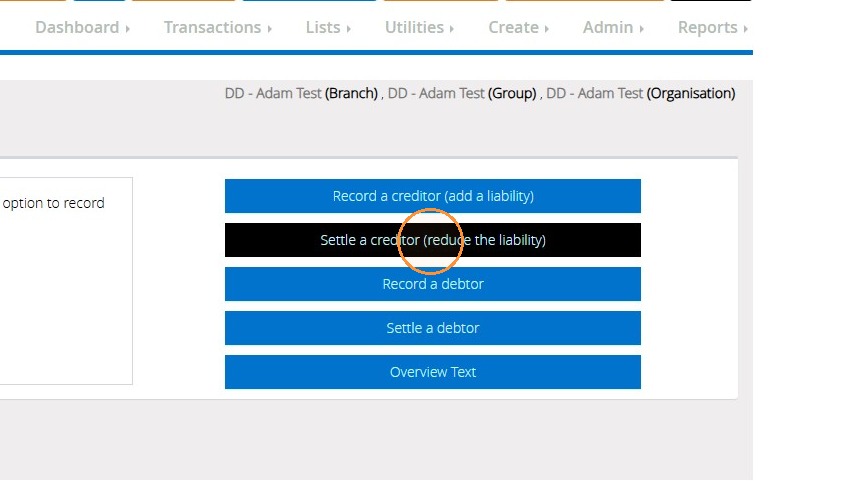
14. Click "Settle a creditor (reduce the liability)".
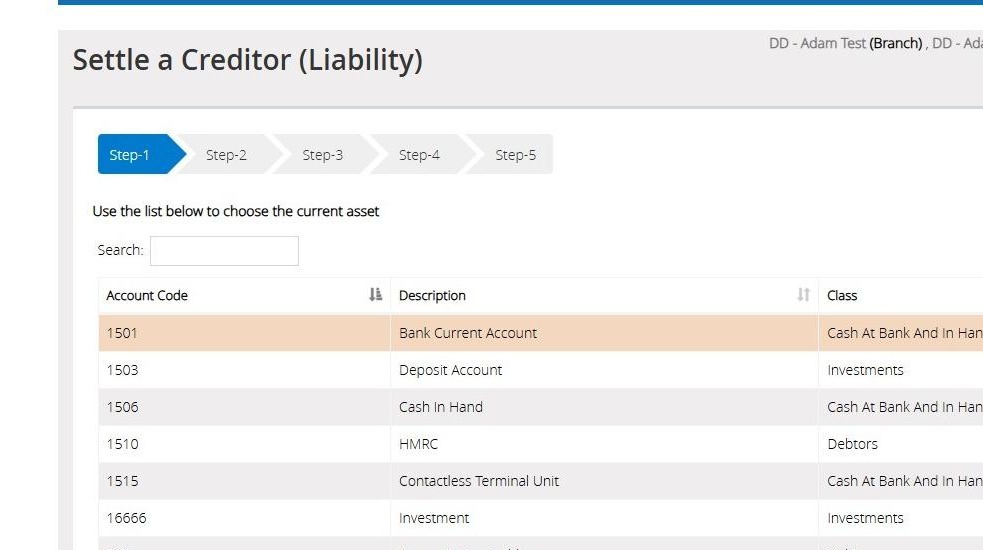
15. In Step 1, choose the bank account / current asset the transaction will affect.
You will also have the option to enter a description in the Description field.
Afterwards, click "Next Step".
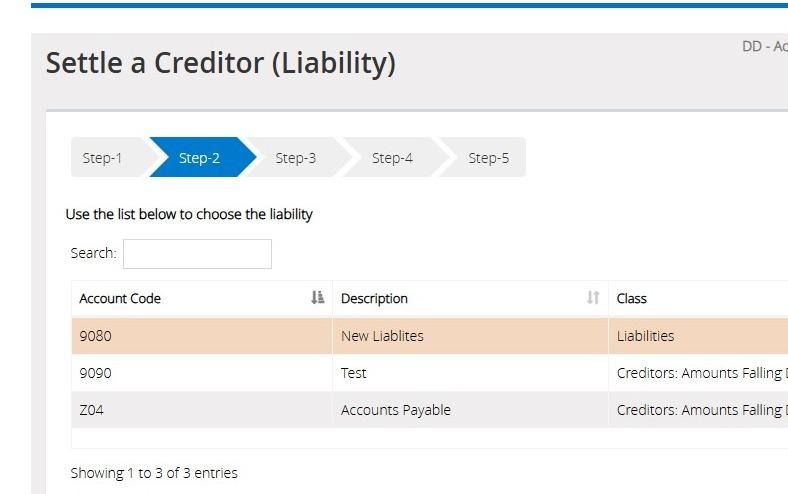
16. In Step 2, choose the liability you originally recorded the creditor against.
If the original recording of the creditor was recorded against Z04, you will want to choose this option. Or if you used a liability you created in MyFundAccounting to record the transactions, choose this option again.
You will also have the option to enter a description in the Description field.
Once completed, choose "Next Step".
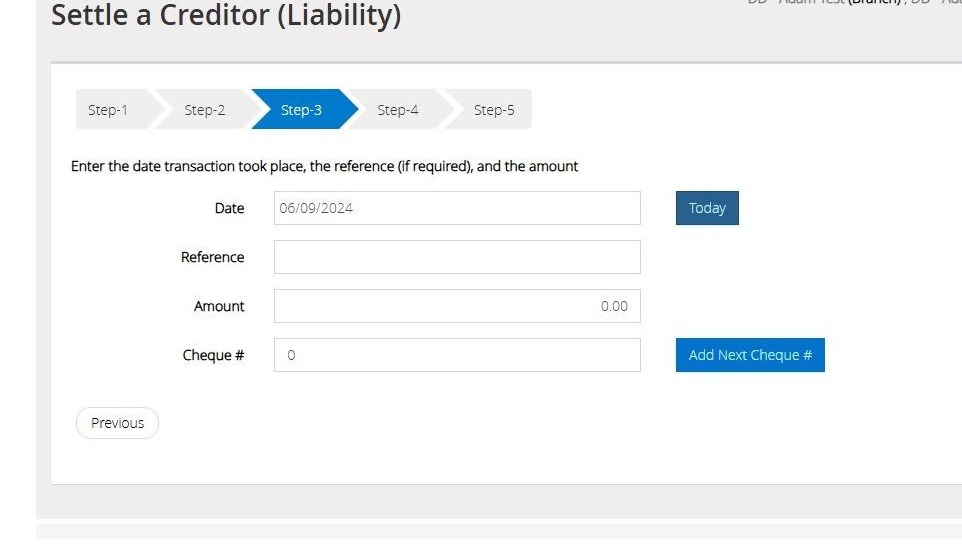
17. In Step 3, enter the date the transaction appears on the bank statement and the amount originally entered under 'Record a Creditor'.
You have the option to enter a cheque number if this is how the payment was made.
Afterwards, select "Next Step".
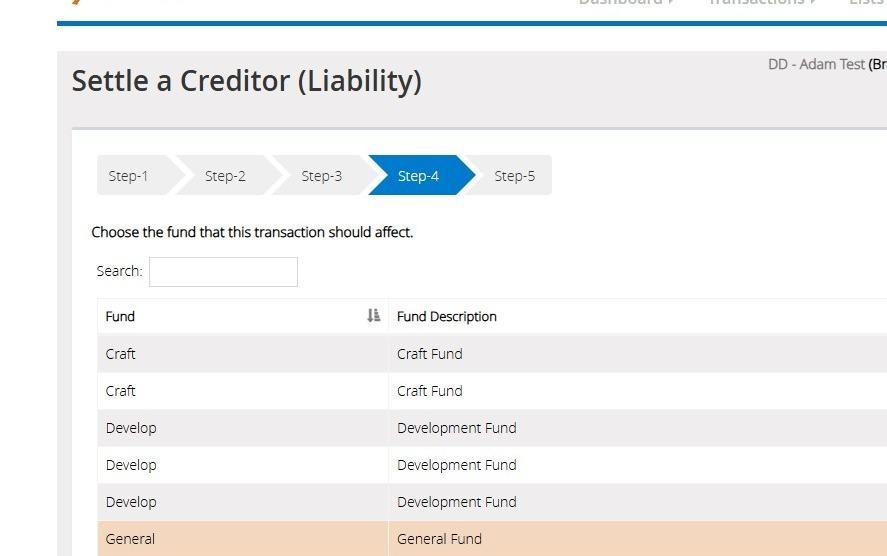
18. In Step 4, choose the fund you originally recorded the creditor amount against in 'Record a Creditor'.
Then choose "Next Step".
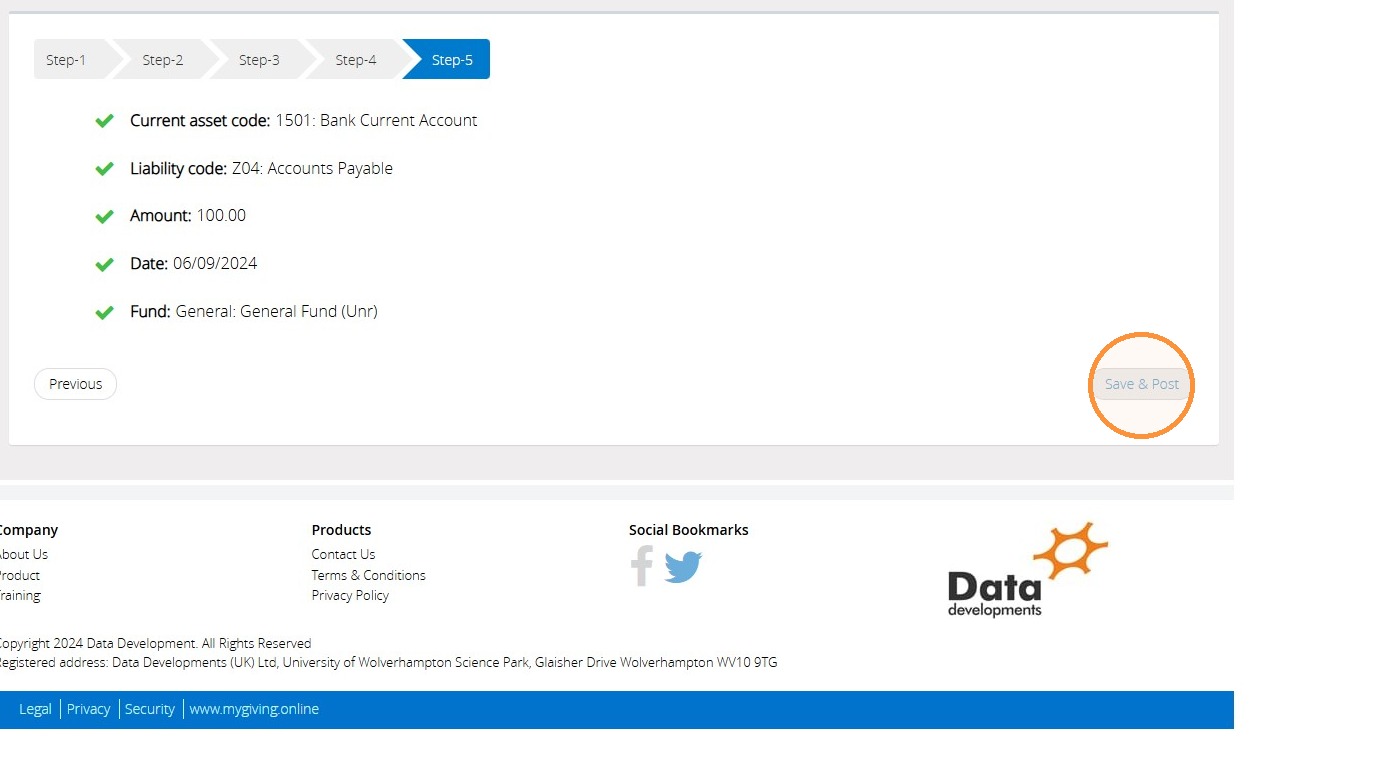
19. In Step 5, you can review all the information you've entered in the previous steps. If you're happy with what's been entered, choose 'Save & Post' to post the transaction. Otherwise, choose 'Previous' to go back to the previous steps and amend the information.
Recording a Debtor
20. When recording a debtor, this will allow you to show money that is owed to you on your balance sheet, as well as stating the income code that this is related to.
21. Click "Record a debtor".
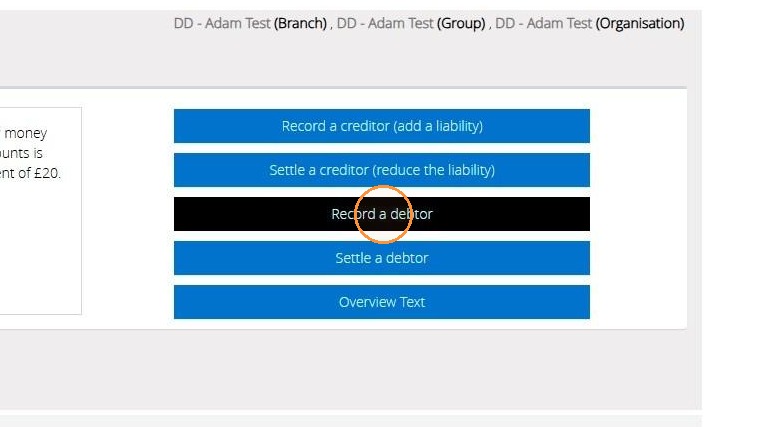
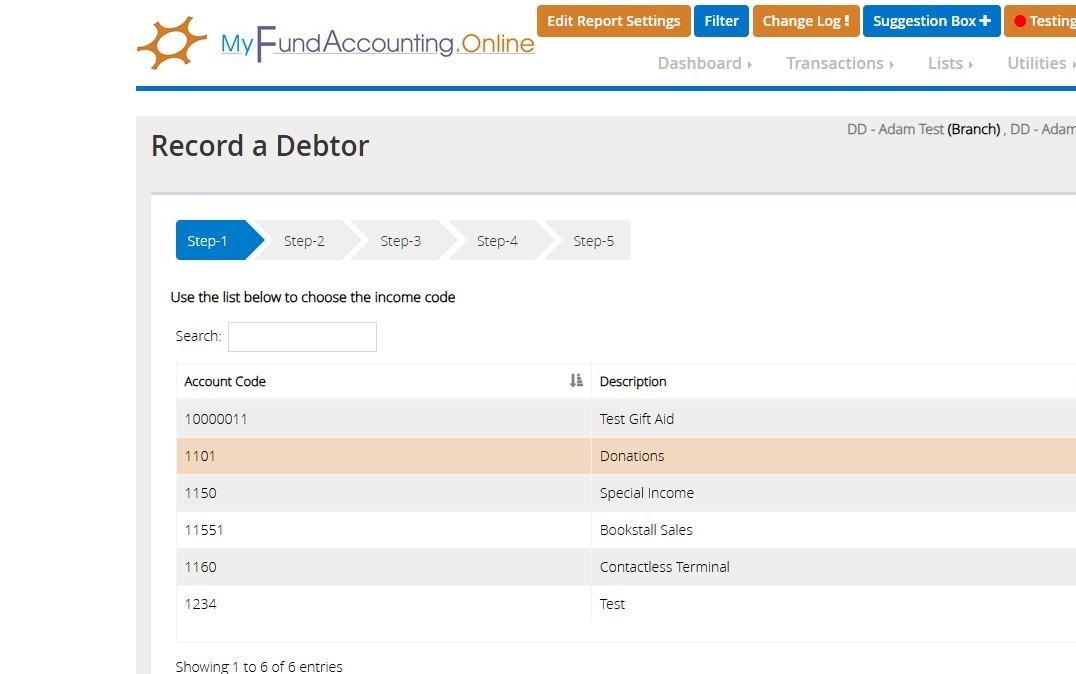
22. In Step 1, choose the income code that the debtor will affect.
You can also add a description if applicable.
Once you've chosen, click "Next Step".
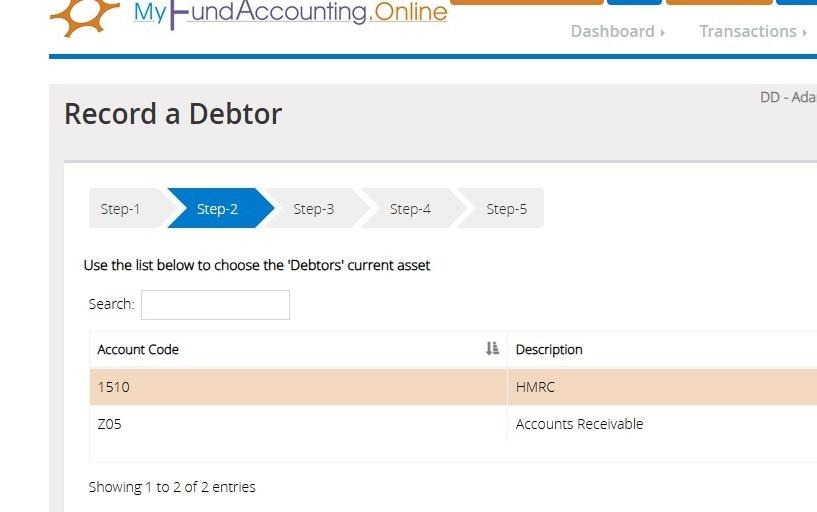
23. In Step 2, choose the debtor code you wish to post the transaction against. You can use the system code Z05, or create one of your own. This can be created by going to Create -> Accounts Assistant -> Nominal Accounts -> Current Assets. As per our example, we have created a debtor code for HMRC.
There will also be an option to add a description.
Afterwards, click "Next Step".
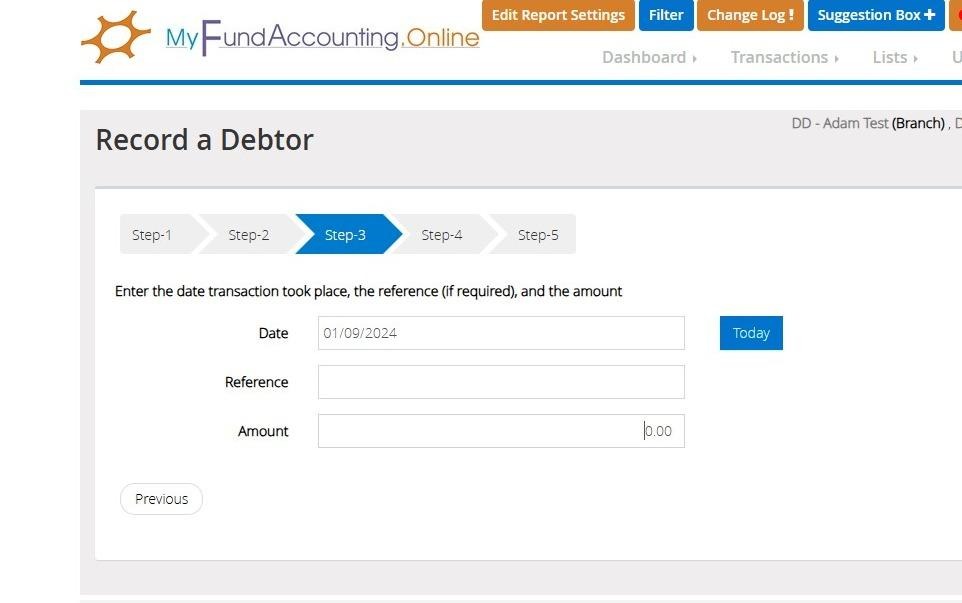
24. In Step 3, choose the date the transaction took place and the amount owed. You can also enter a reference if necessary.
Once completed, choose "Next Step".
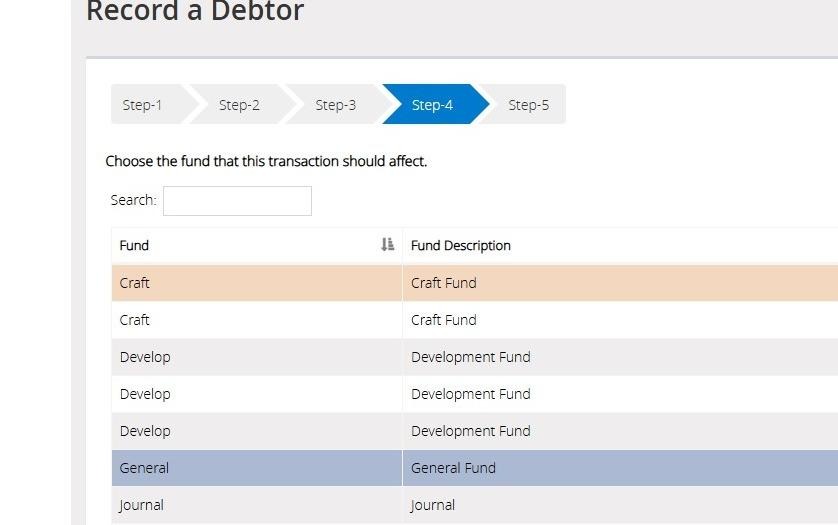
25. In Step 4, choose the fund the debtor transaction will affect.
Afterwards, select "Next Step".
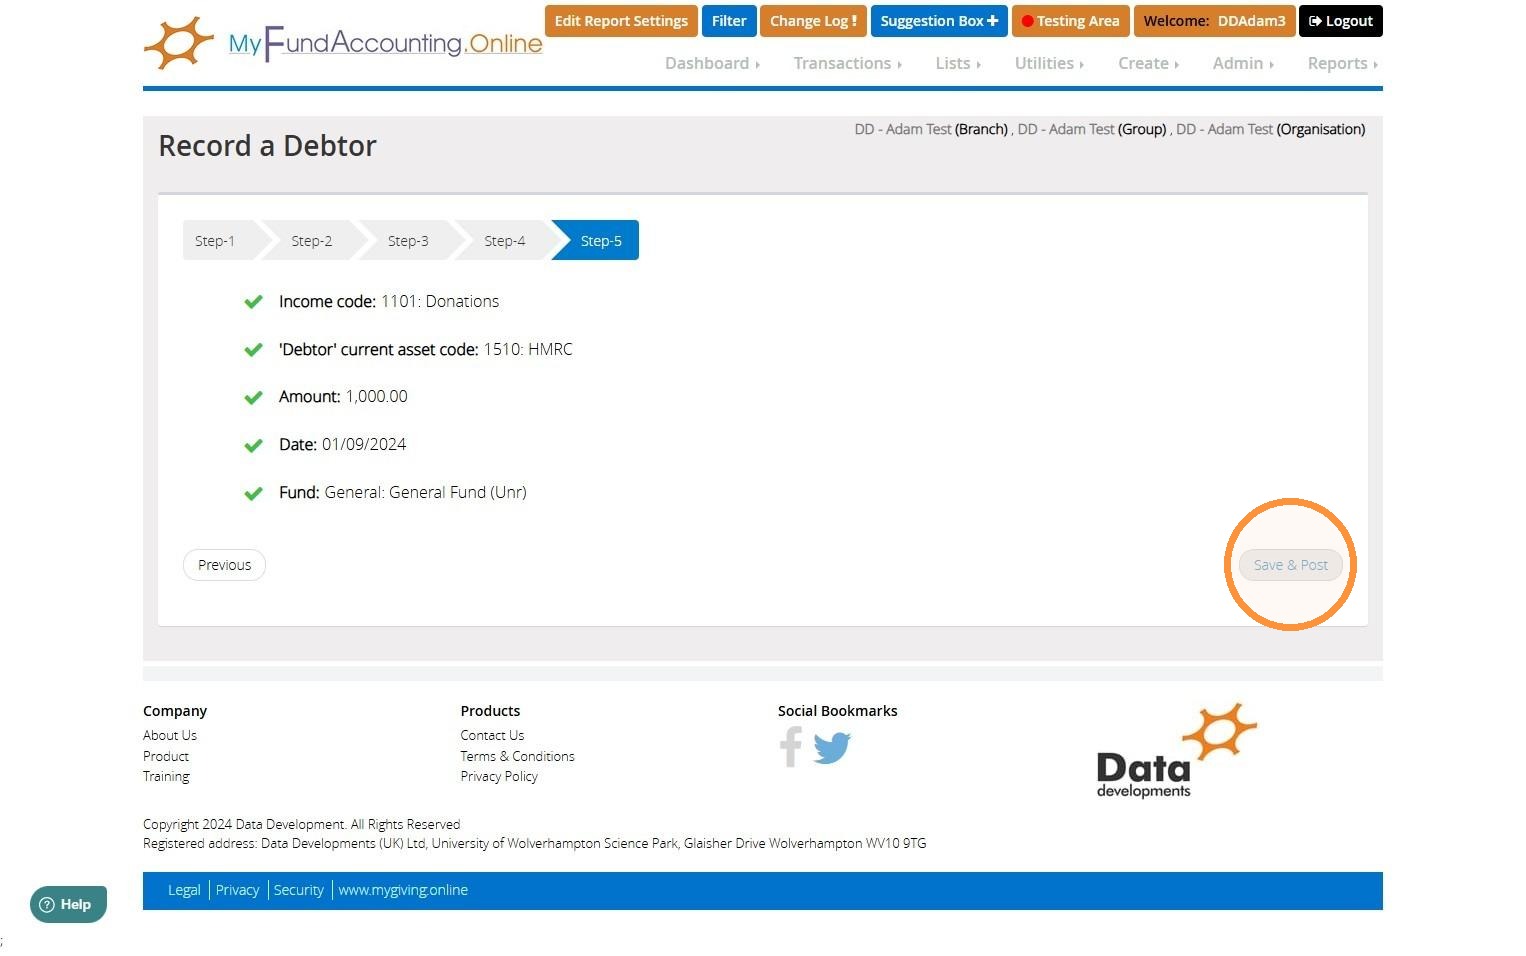
26. In Step 5, you can review all the information entered in the previous steps. If you're happy with it, choose "Save & Post" to post the transaction. Otherwise, choose "Previous" to return to the previous steps and amend the information.
Settling a Debtor
27. When you have received the money within the bank related to you debtor, this is when you would use the settle a debtor option. This will remove money from the debtor on the balance sheet and move the money to the bank, showing this as no longer owed.
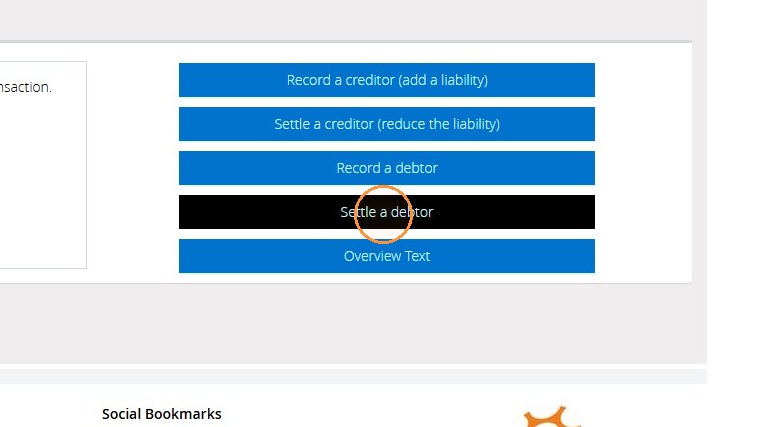
28. Click "Settle a debtor".
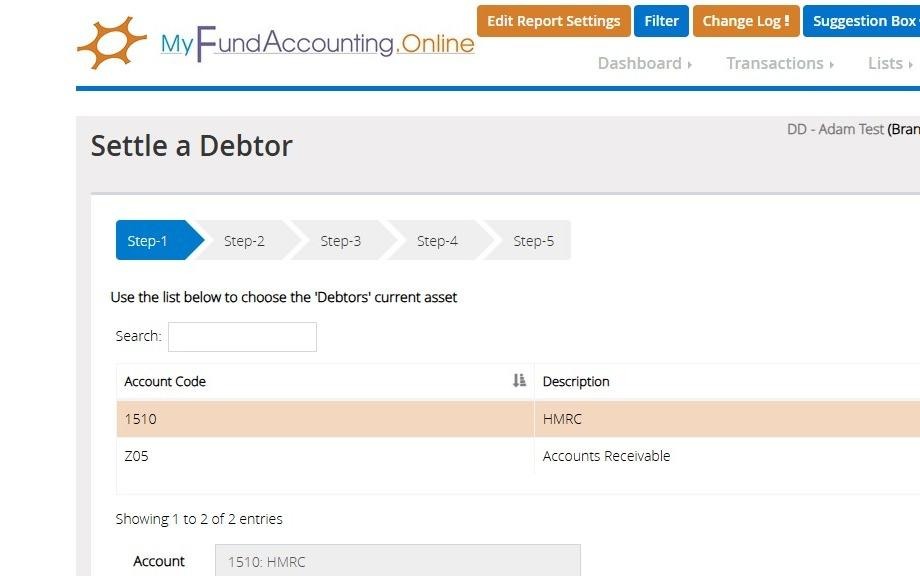
29. In Step 1, use the list below to choose the 'Debtors' current asset. Per our example, we've chosen to record the debtor against the same code used in the 'Record a Debtor' example. You will also have the option to enter a description in the description field.
Afterwards, click "Next Step".
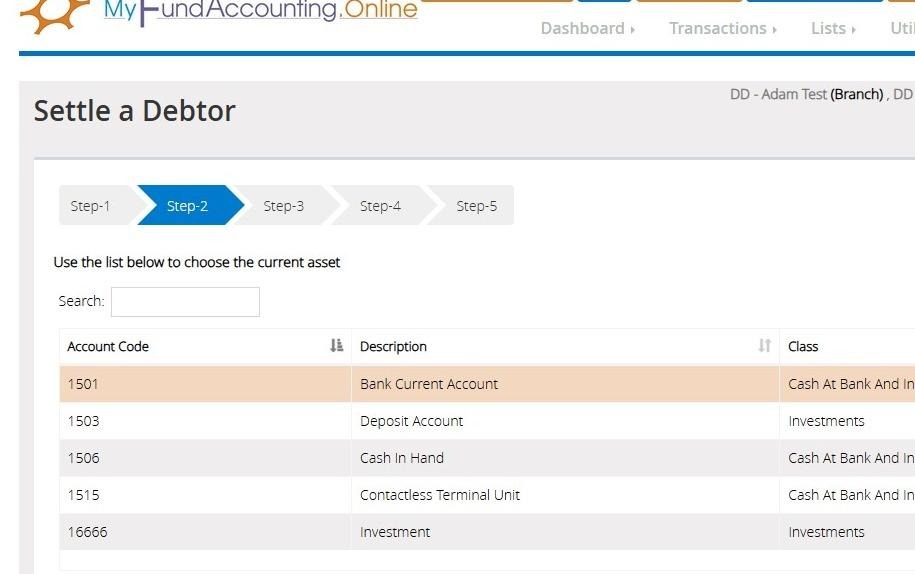
30. In Step 2, use the list below to choose the current asset. This will be the bank account that the money has been received into.
There will also be an option to enter a description.
Once entered, choose "Next Step"
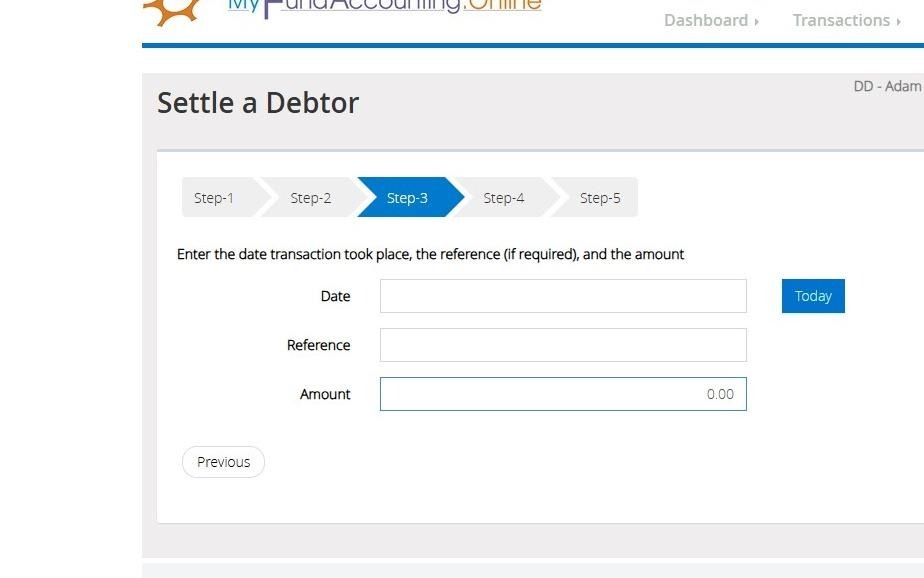
31. In Step 3, enter the date the transaction took place, the reference (if required) and the amount.
Afterwards, choose "Next Step".
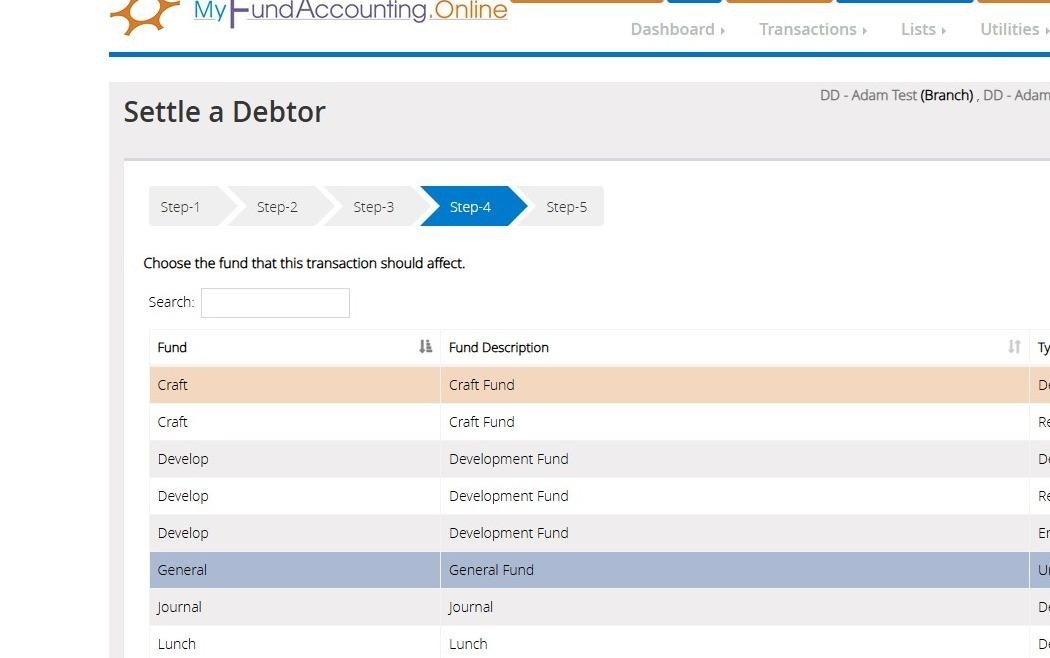
32. In Step 4, choose the fund that this transaction should affect. This should be the same fund chosen when the debtor was recorded.
Once a fund has been selected, choose "Next Step".
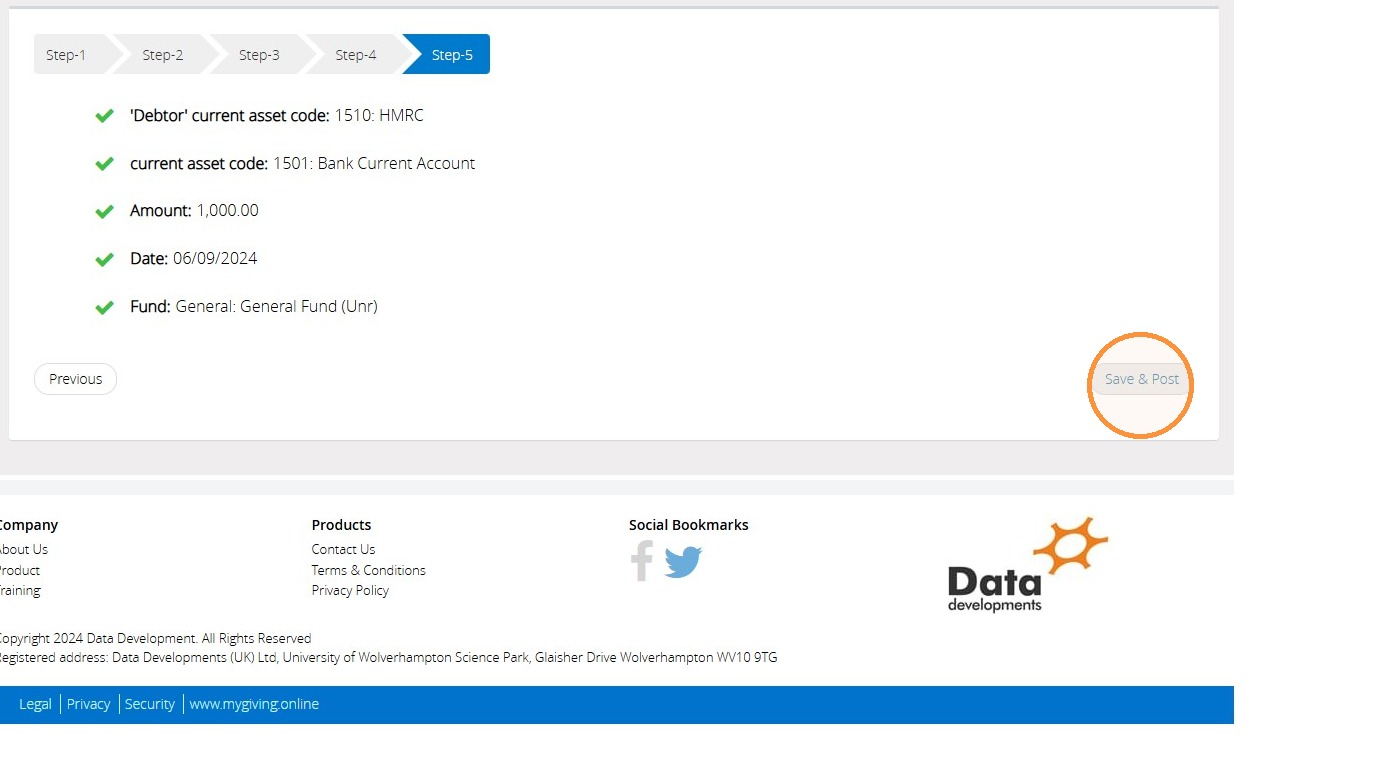
33. In Step 5, you can review all the information entered in the previous steps. If you're happy with it, choose "Save & Post" to post the transaction. Otherwise, choose "Previous" to return to the previous steps and amend the information."
Tip: Tip! We hope you found this guide helpful and easy to follow. If you require any further assistance, please contact our support team by telephone on 01902 714030 or by email at support@datadevelopments.co.uk