
This guide provides a comprehensive walkthrough for setting up your financial records using the MyFundAccounting system for Church of England branches. Learn how to clear old data, configure your financial year, define nominal accounts, and record your initial starting balances efficiently.
1. Navigate to https://www.myfundaccounting.online/dashboard and log in to your account.

System Initialization
2. When you log in to the system for the first time, you will need to initialise the account. This is because you will need to set up your account structure, as well as set your financial year range.
To begin, first click on "Create", select "Accounts Assistant", then choose "Initialisation".

3. If you wish to create your own nominal accounts, you can use the "First time set up (clear existing data)" option. Nominal accounts are related to income, expenditure, current assets, fixed assets and liabilities.
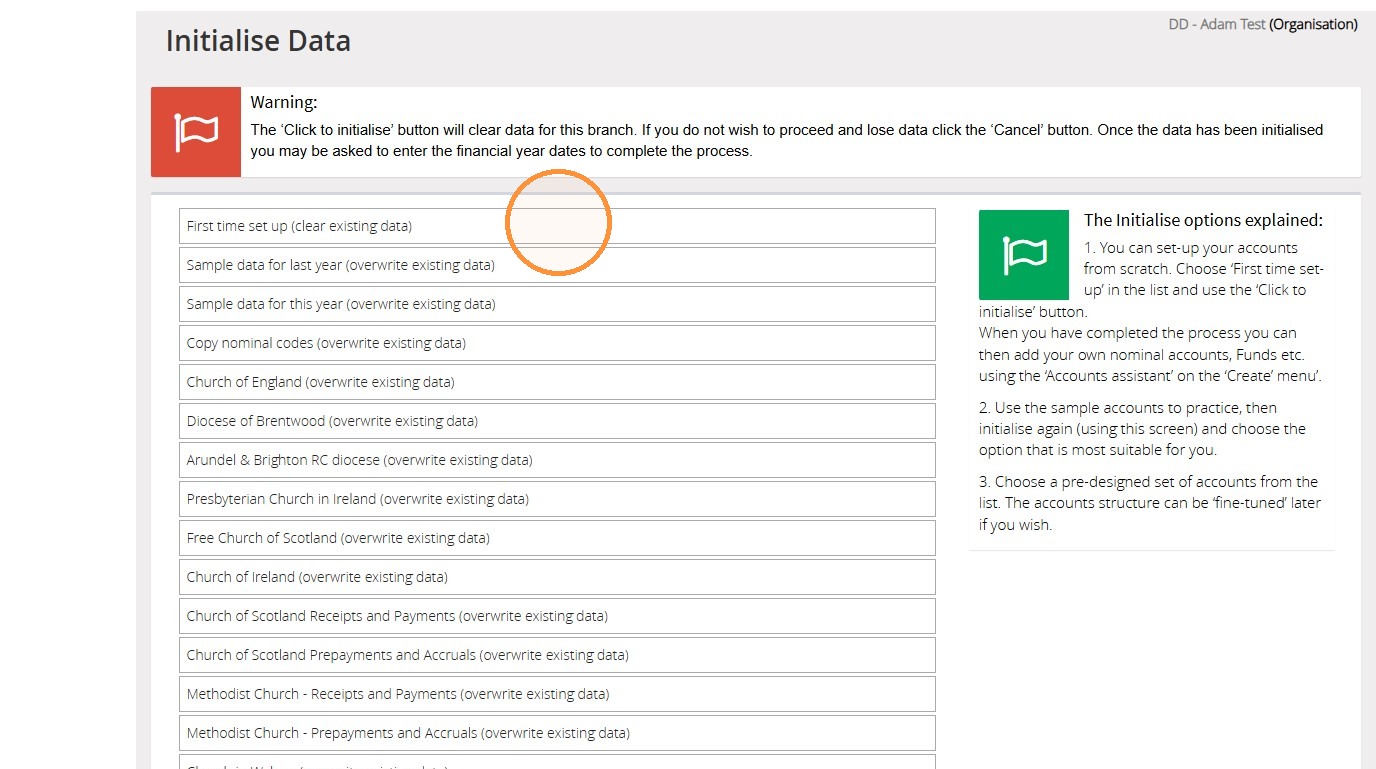
4. Alternatively, if you are unsure where to start with your accounting structure, there are prepopulated nominal accounts you can use from the list. For instance, in our example below, there is an option for 'Church of England' nominal accounts you can choose if you fall under the Church of England.
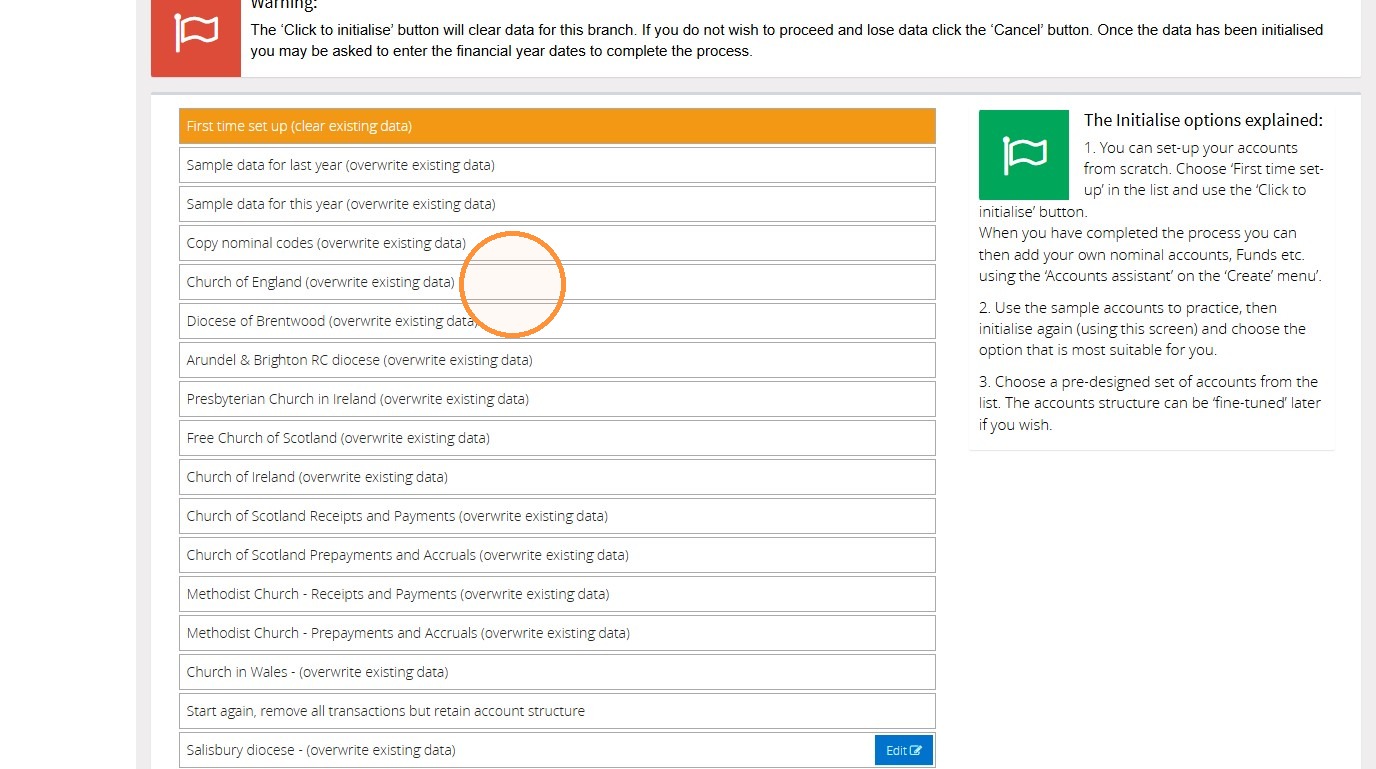
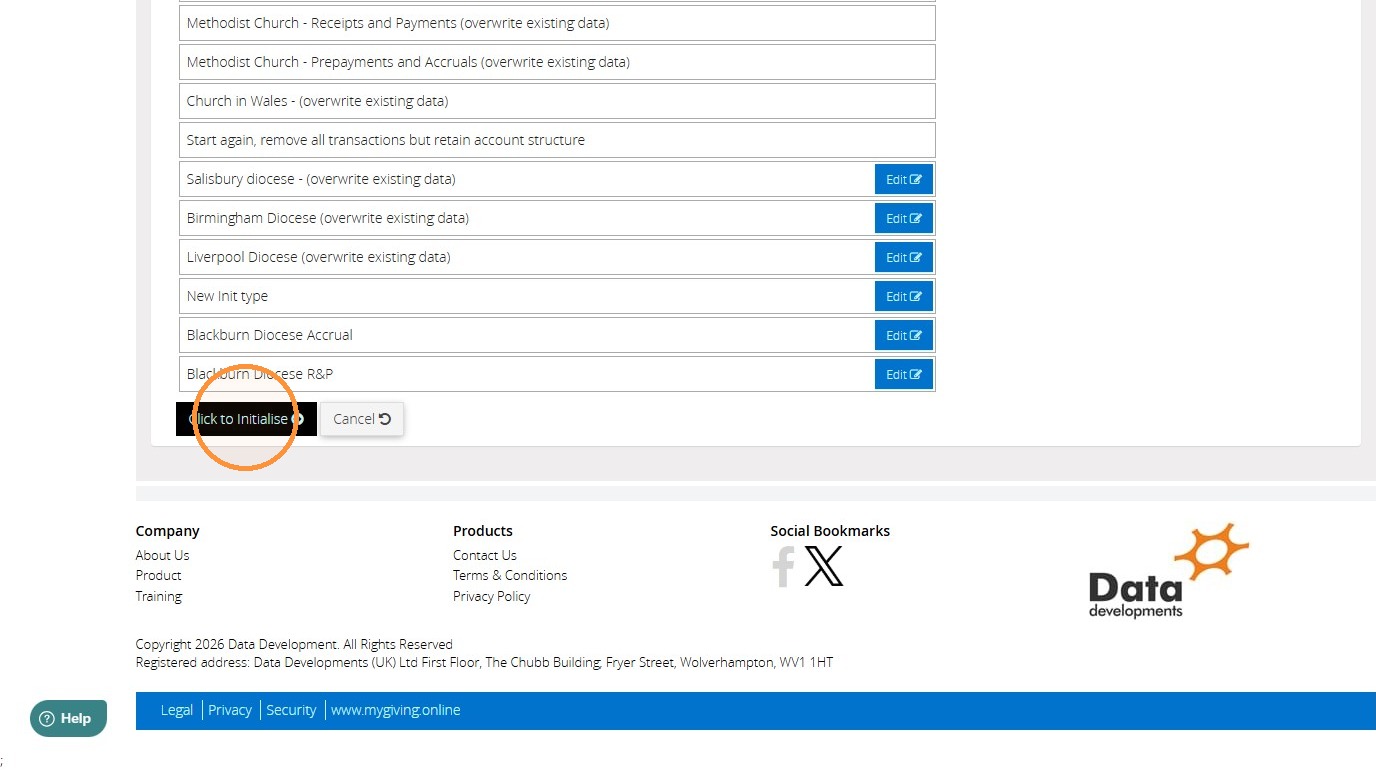
5. Once you have chosen your initialisation option, select "Click to Initialise".
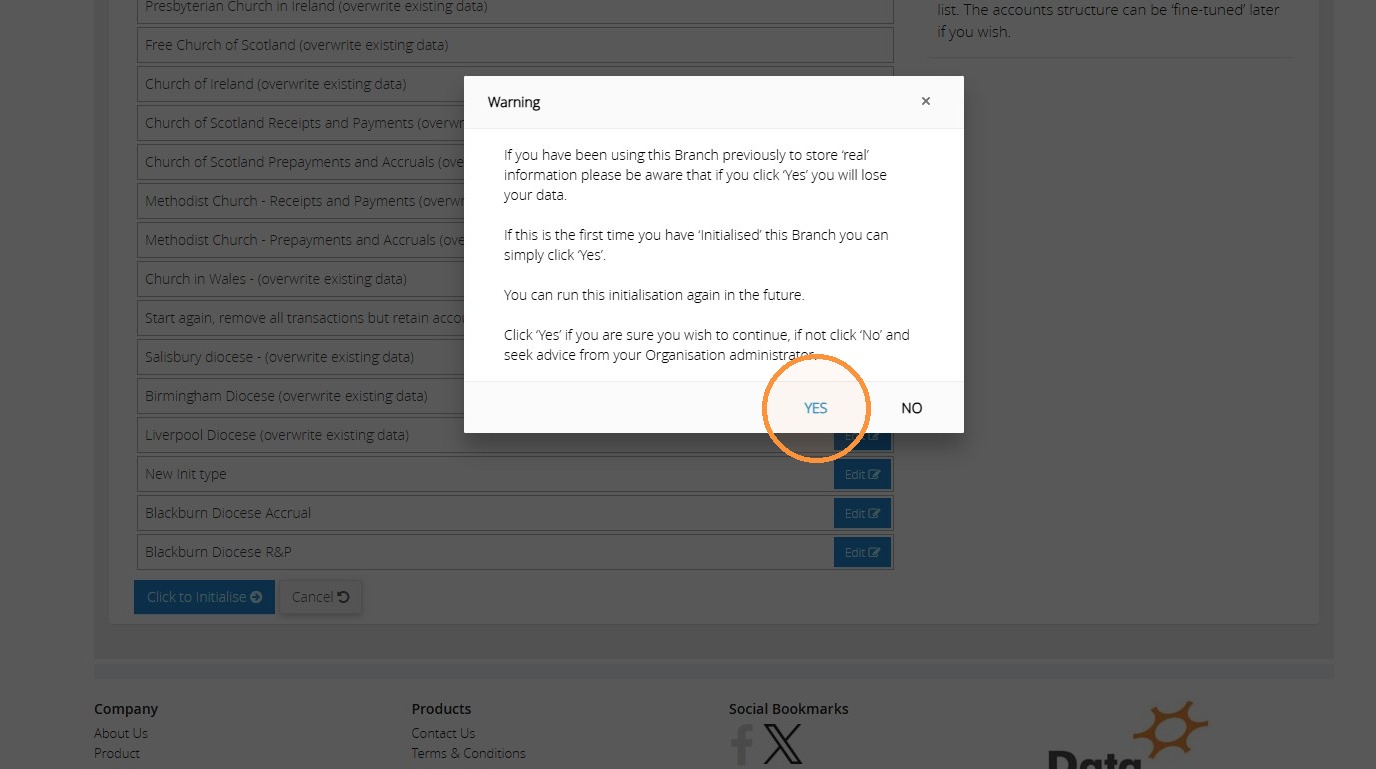
6. A warning message will appear like in the example below. If you have pre-existing data in the system, please be aware that the data will be removed if you choose 'Yes'. However, you can initialise again if you feel the structure you've chosen is wrong or you wish to start again from scratch.
If this is the first time you've initialised this branch in the system, you can just select 'Yes' to confirm and clear existing data.
Financial Year Configuration
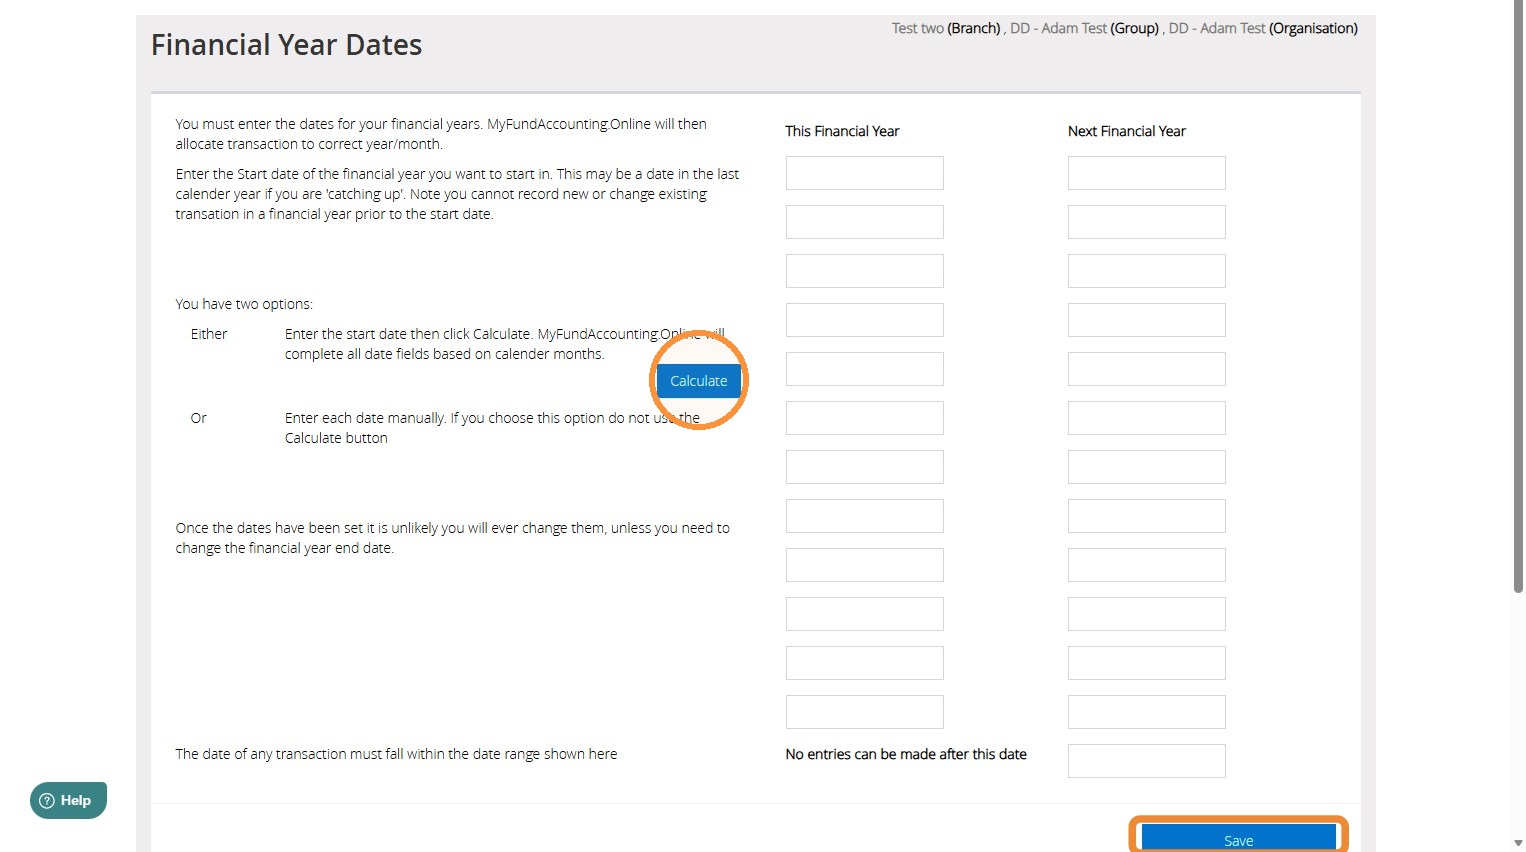
7. Next, enter the dates for your financial years so MyFundAccounting can allocate the transactions to the correct year/month.
You can enter the start of your financial year in the text box underneath 'This Financial Year' and then select "calculate" to populate the rest of the months. For example, 01/01/2026, then choose "calculate".
Once complete, click save.
Account Structure Review
8. Next, you will want to create your nominal accounts and funds to populate your starting balances.
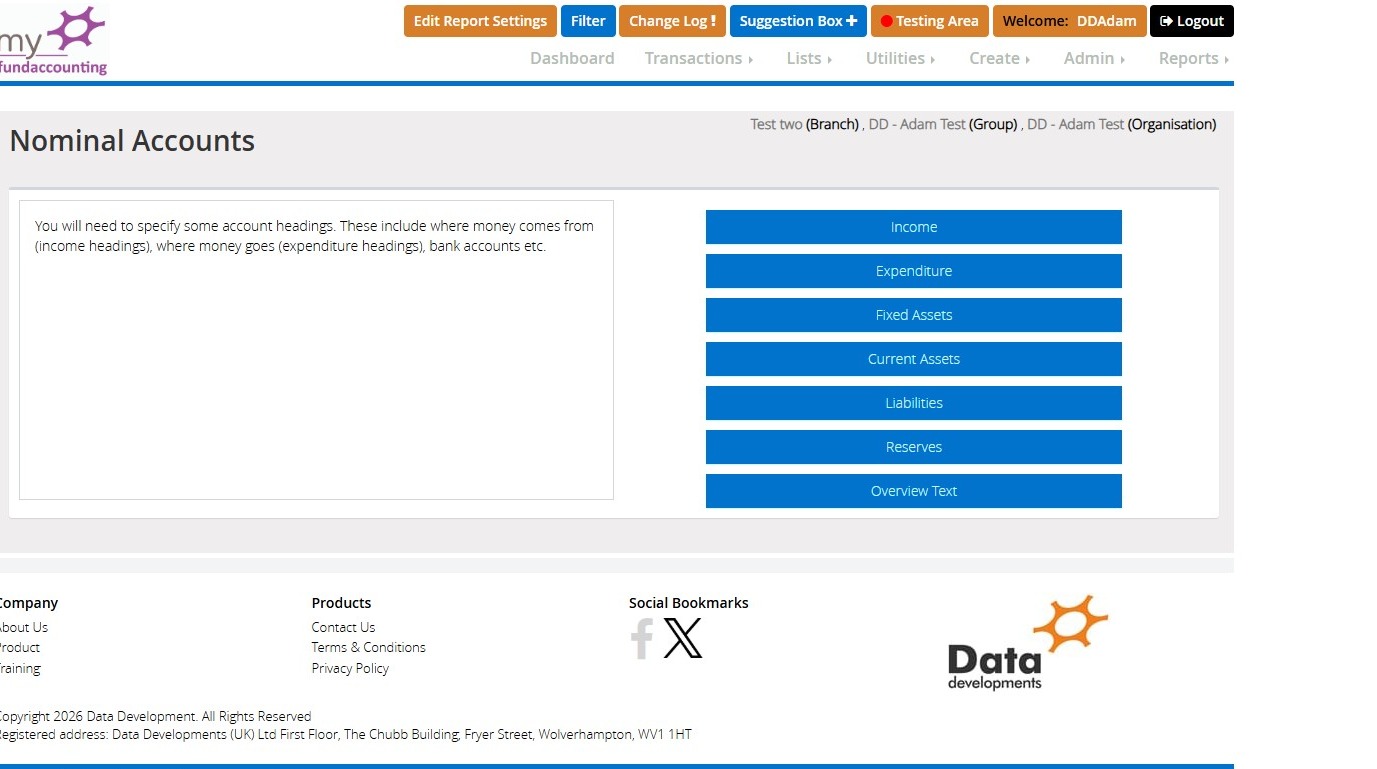
To create nominal accounts, click "Create", choose "Accounts Assistant", then "Nominal Accounts".

9. Here you will have the option of creating income, expenditure, fixed assets, current asset (bank accounts), liability, and reserve codes.
Selecting one of these options will take you to a screen where the codes will be listed. To create a new code, select 'Add New' in the top left corner of the screen.
Income and Expenditure Code Setup
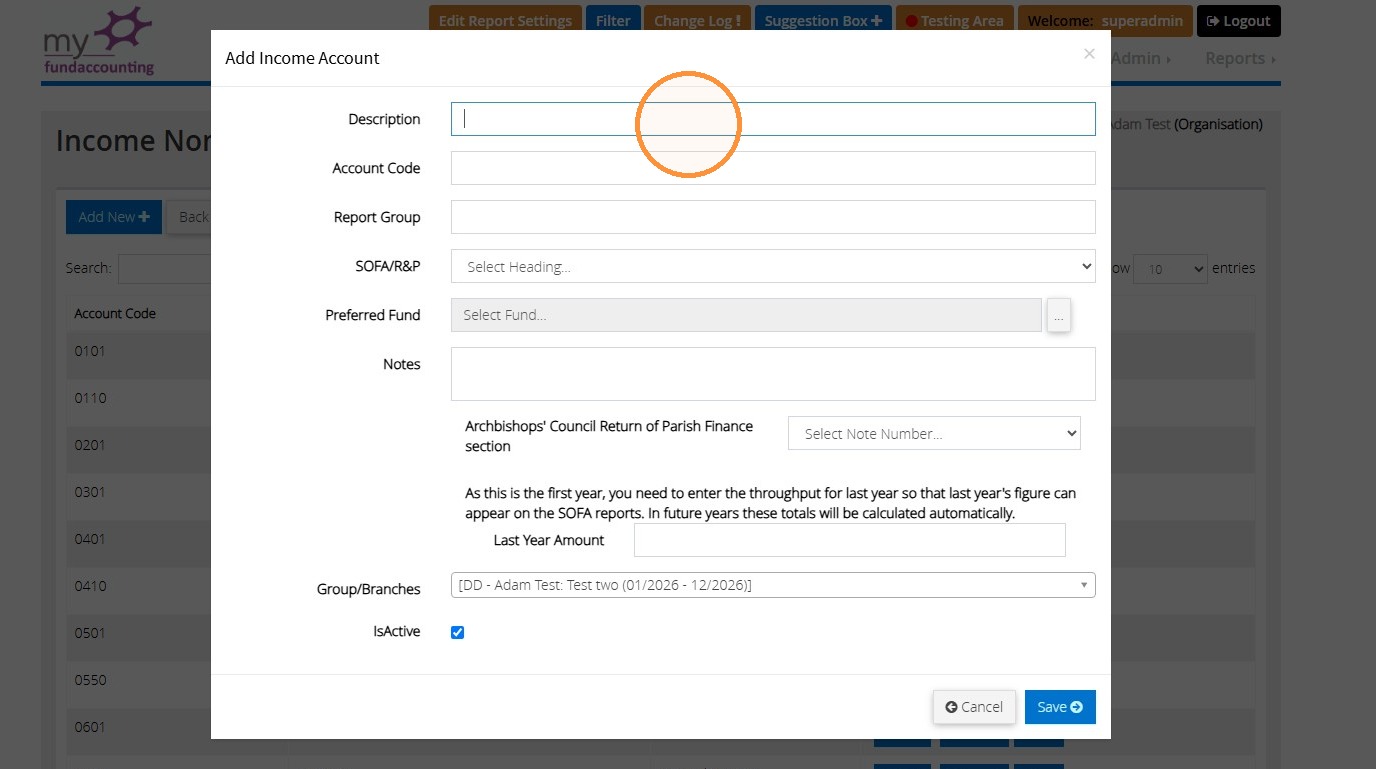
10. The below example shows the details for creating an income nominal code. This screen will be the same for creating a new expenditure code.
You can manually enter your own description and account code in the relevant text boxes. To assign a SOFA/R&P heading to your nominal code, use the dropdown menu to choose one.
You will have the option to add a 'preferred fund' to your nominal code. This means that when you record a transaction against this code, a fund will automatically be selected. To add an existing fund to your nominal code, select the ellipses next to the 'Preferred Fund' column.
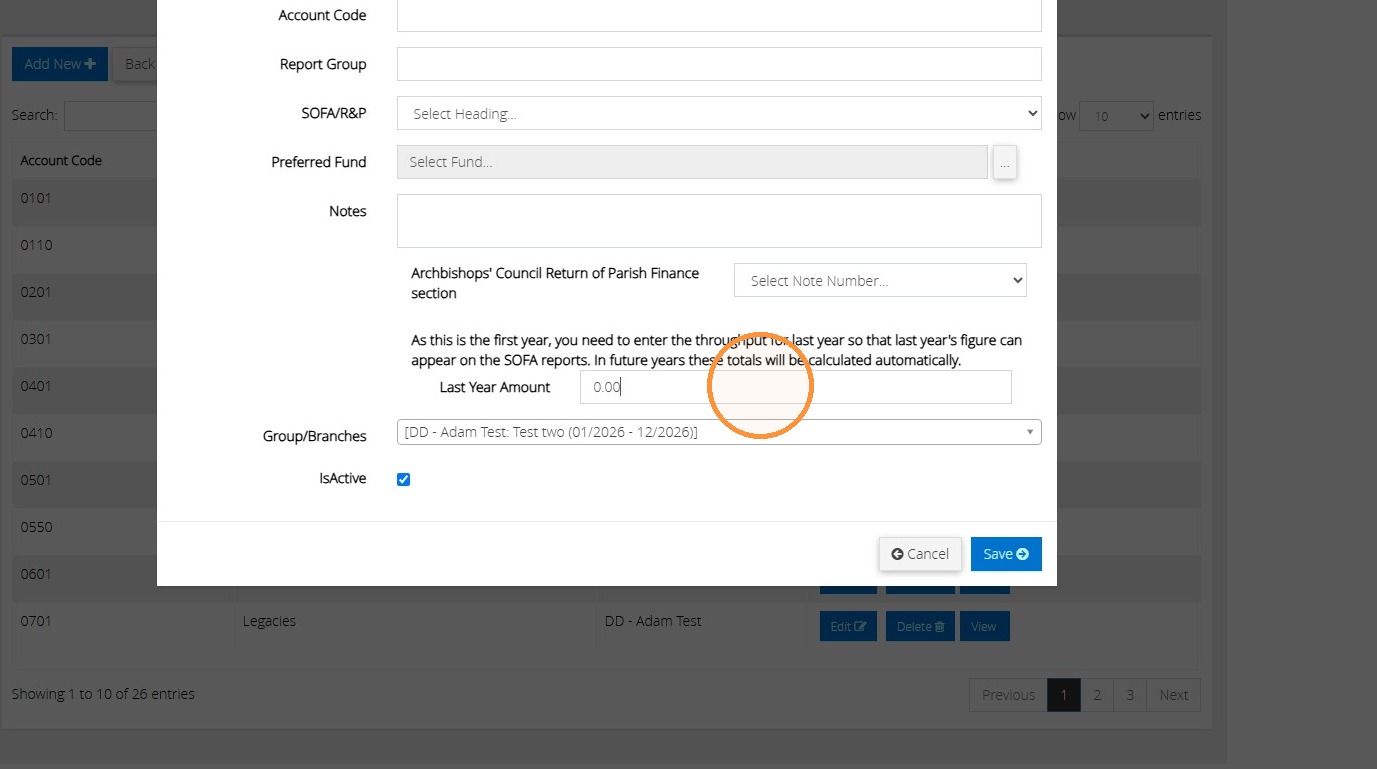
11. For both income and expenditure codes, you can enter a last year amount to have comparative figures populate your reports. Once completed, select 'Save' to create the code.
Fixed Asset Code Setup
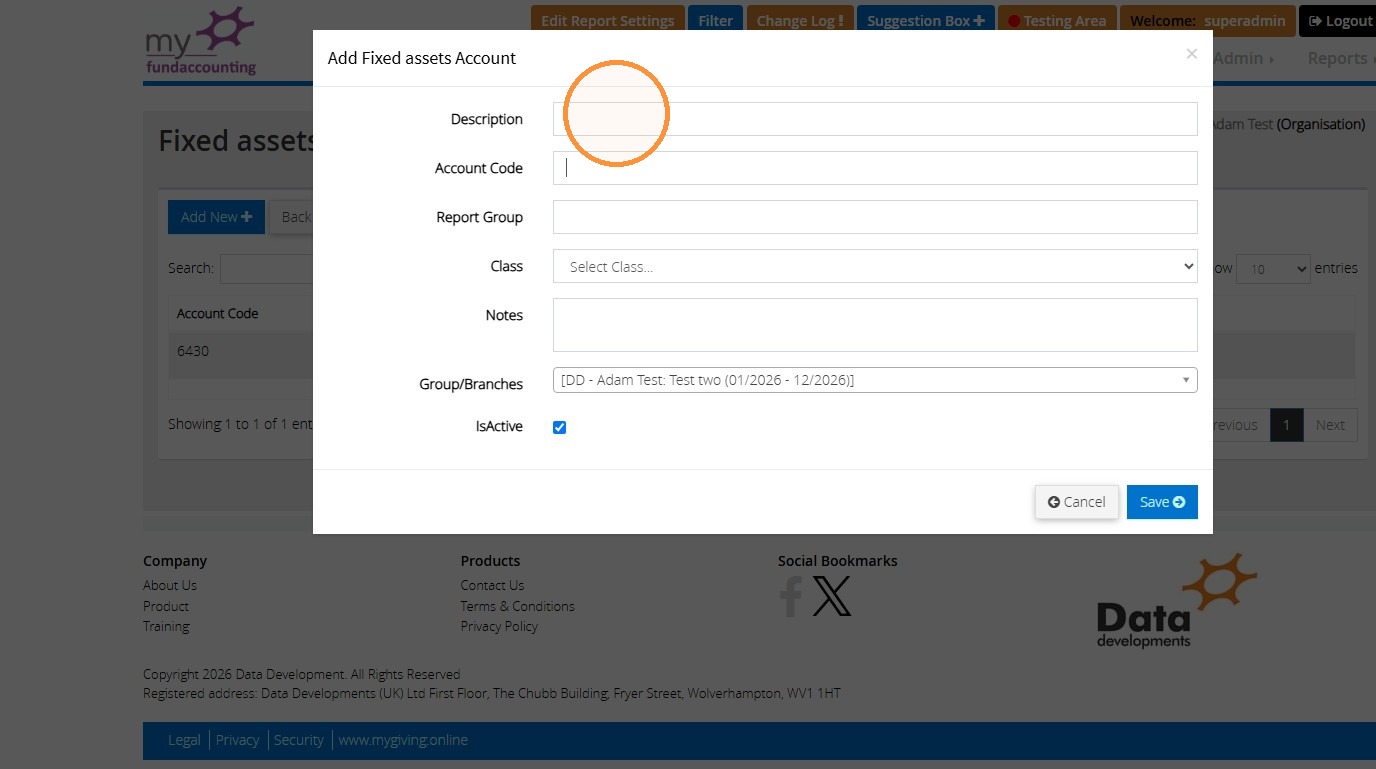
12. When adding a fixed asset, you can add a description, account code, and a report group (required for Church in Wales).
You will also need to choose the class of your fixed asset from the dropdown list provided, i.e. if the fixed asset you're creating is 'heritage', 'tangible', an 'investment asset', etc. Once completed, click 'Save' to create the code.
Current Asset Code Setup
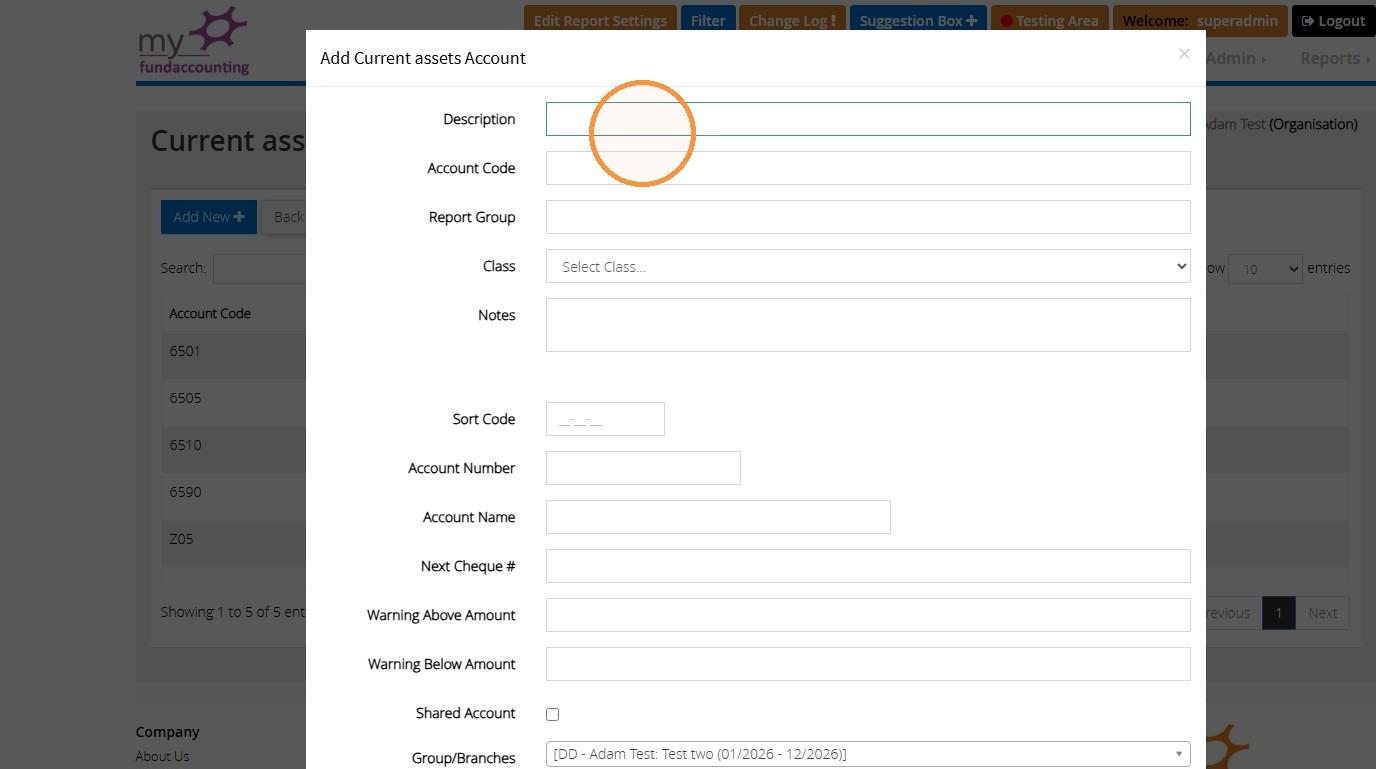
13. When adding a current asset/new bank account, you can enter a description account code, a reports group (for churches in Wales annual return) and class.
You are able to enter the bank details here, but this will only be necessary for invoicing as we will populate your details when selecting the bank account.
You will also have the option to tick this code to mark is as a 'shared account'. This is only necessary if two of your branches are using the same bank account (For more details on this please see our Shared bank account help article).
Liability Code Setup
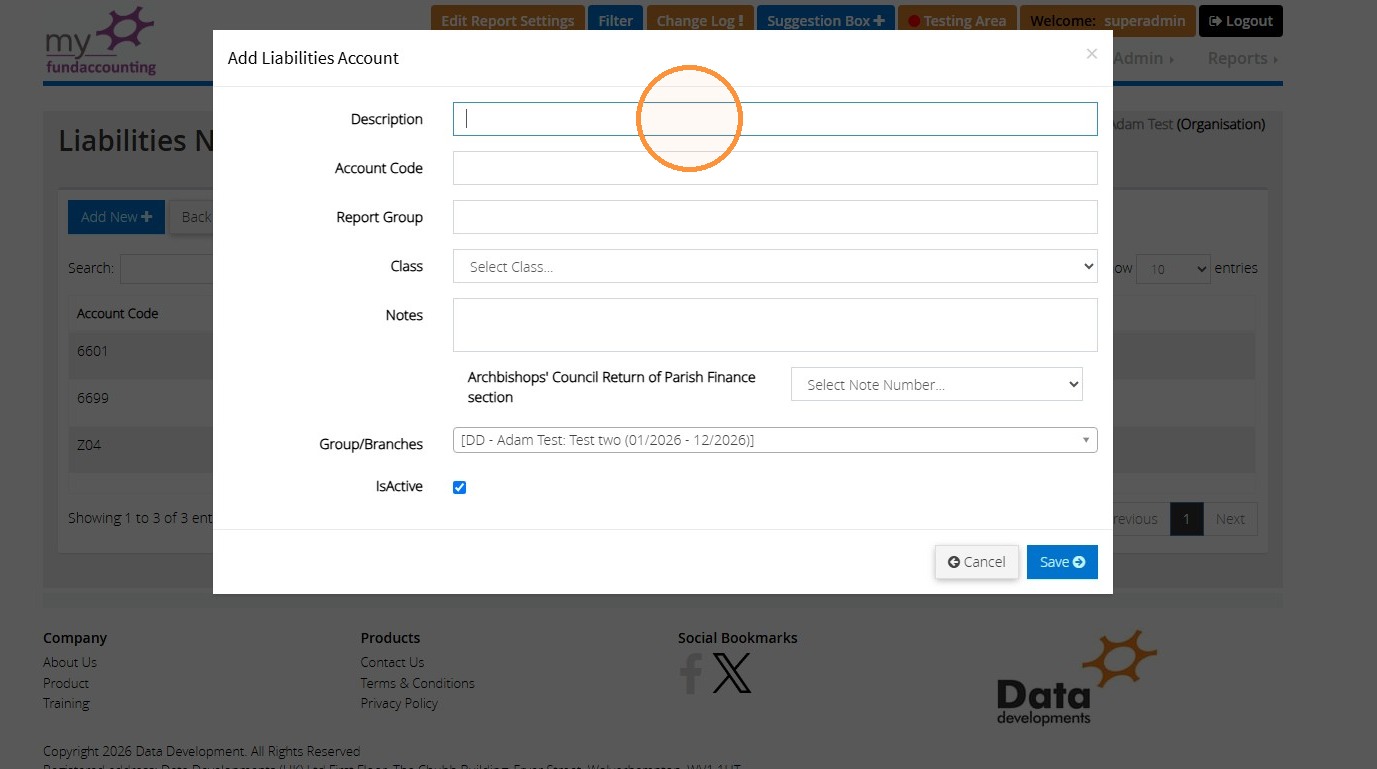
14. When adding liabilities, you can enter a description, account code and report group (required for church in Wales). This will also allow you to select a class so you can tell this system if the money you owe is due in under one year or over one year.
Fund Setup
15. Afterwards, you can create "funds" to assign your transactions to.
To do this, go to "Create", "Accounts Assistant," then "Funds".
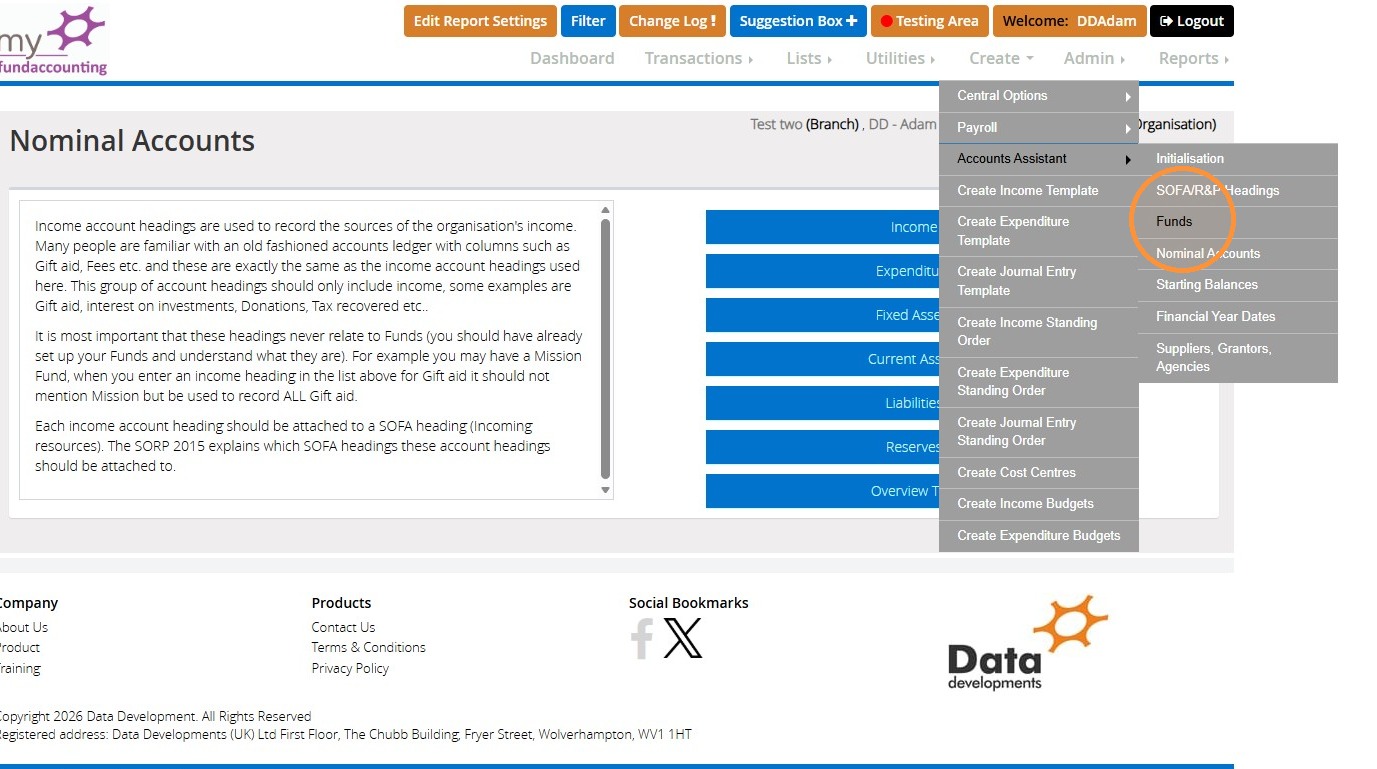
16. Here you will see some default system funds already added. To add a new fund of your own, click "Add New".
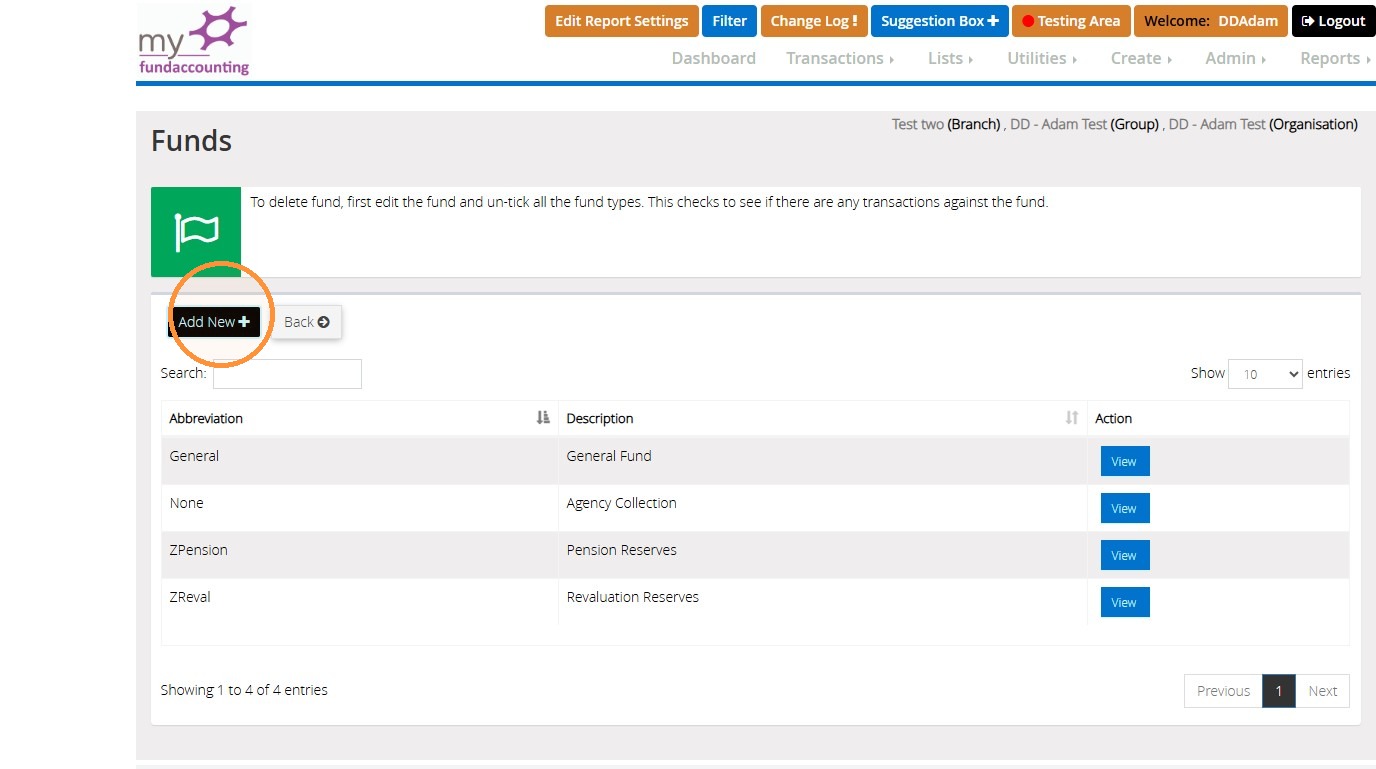
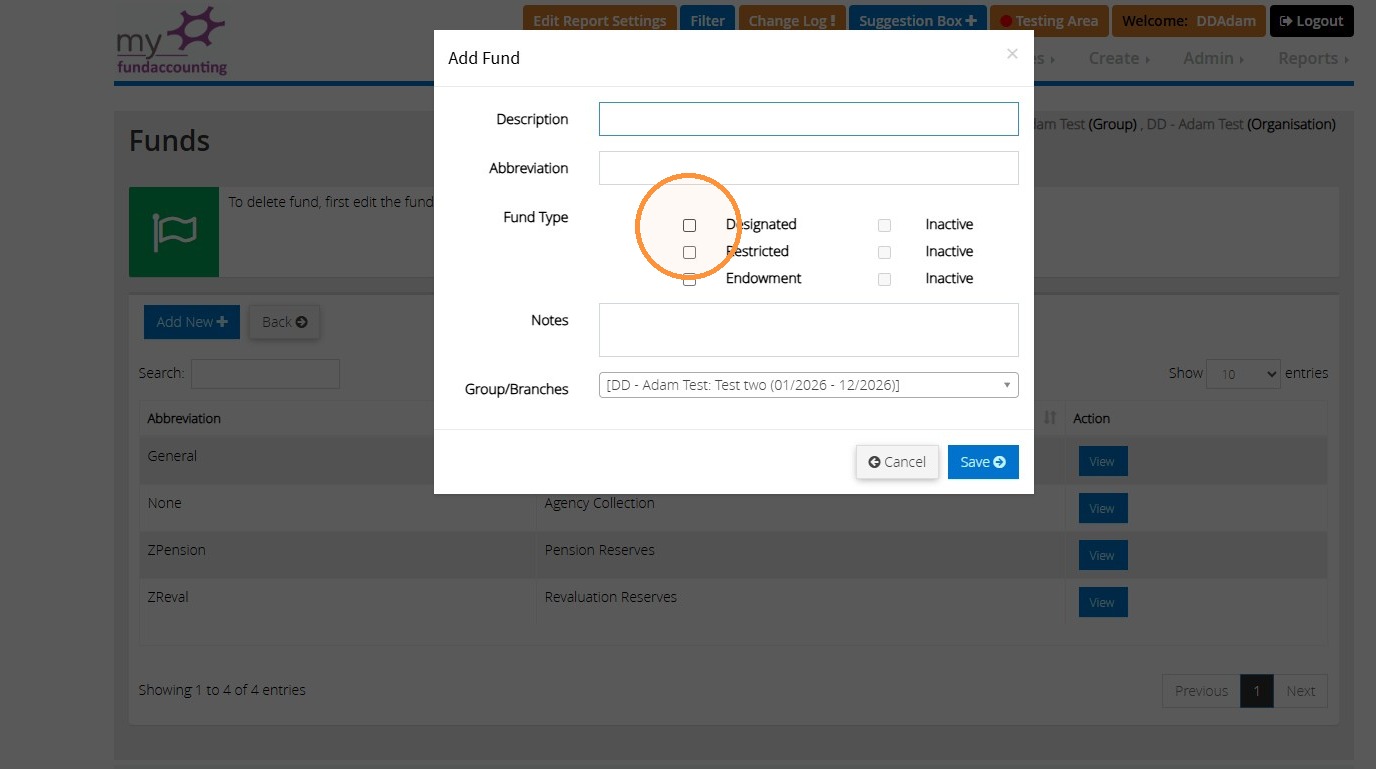
17. Once selected, you can enter a description abbreviation and choose the fund type.
You can choose between "designated", "restricted" or "endowment".
Tip: Tip!
Designated funds are funds you have decided to put aside for a specific purpose chosen by the organisation.
Restricted funds are given or donated for a particular purpose and can not be spent for any other purpose.
Endowment is usually a legacy given in a will. The interest can only be spent when certain conditions are met.
Starting Balance Entry
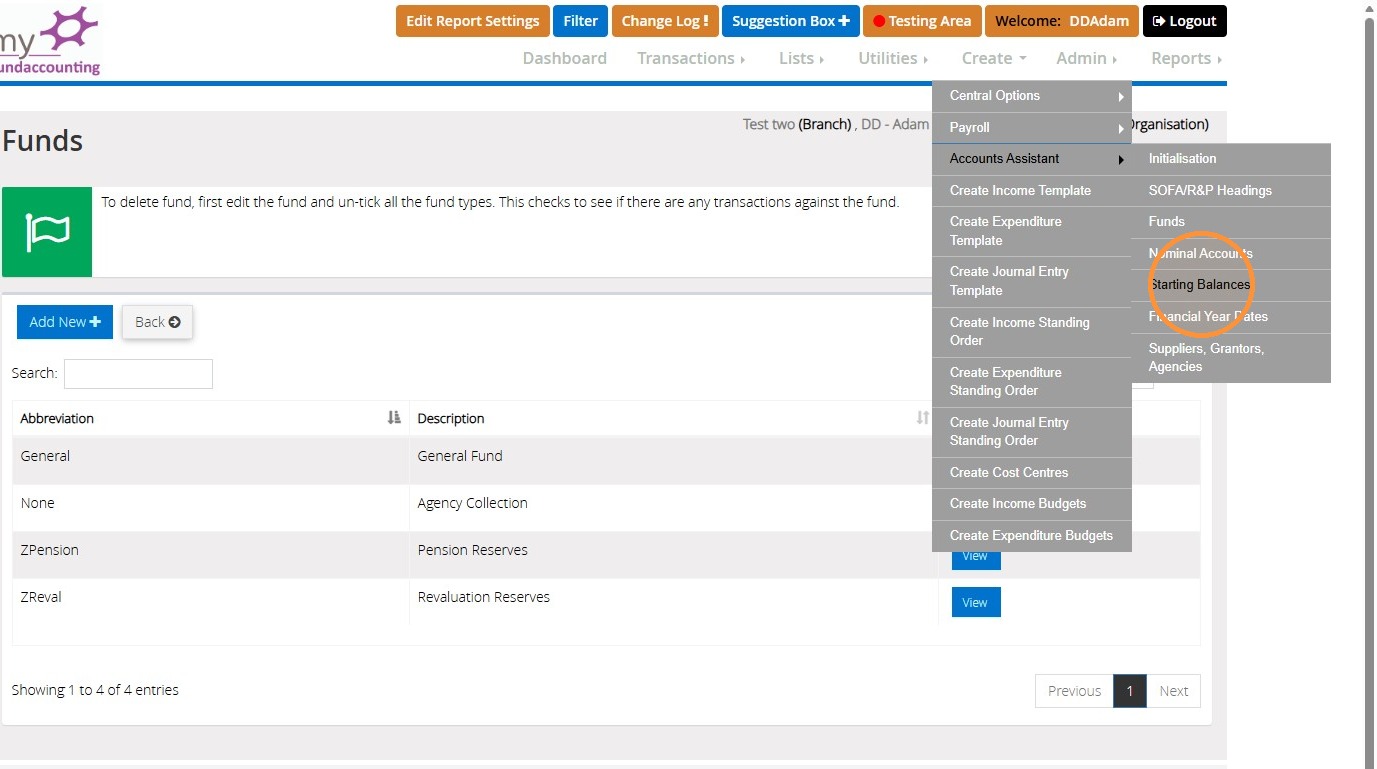
18. Now that you have your nominal codes set up, you can begin entering your starting balances.
To do this, go to "Create", "Accounts Assistant", and then click "Starting Balances".
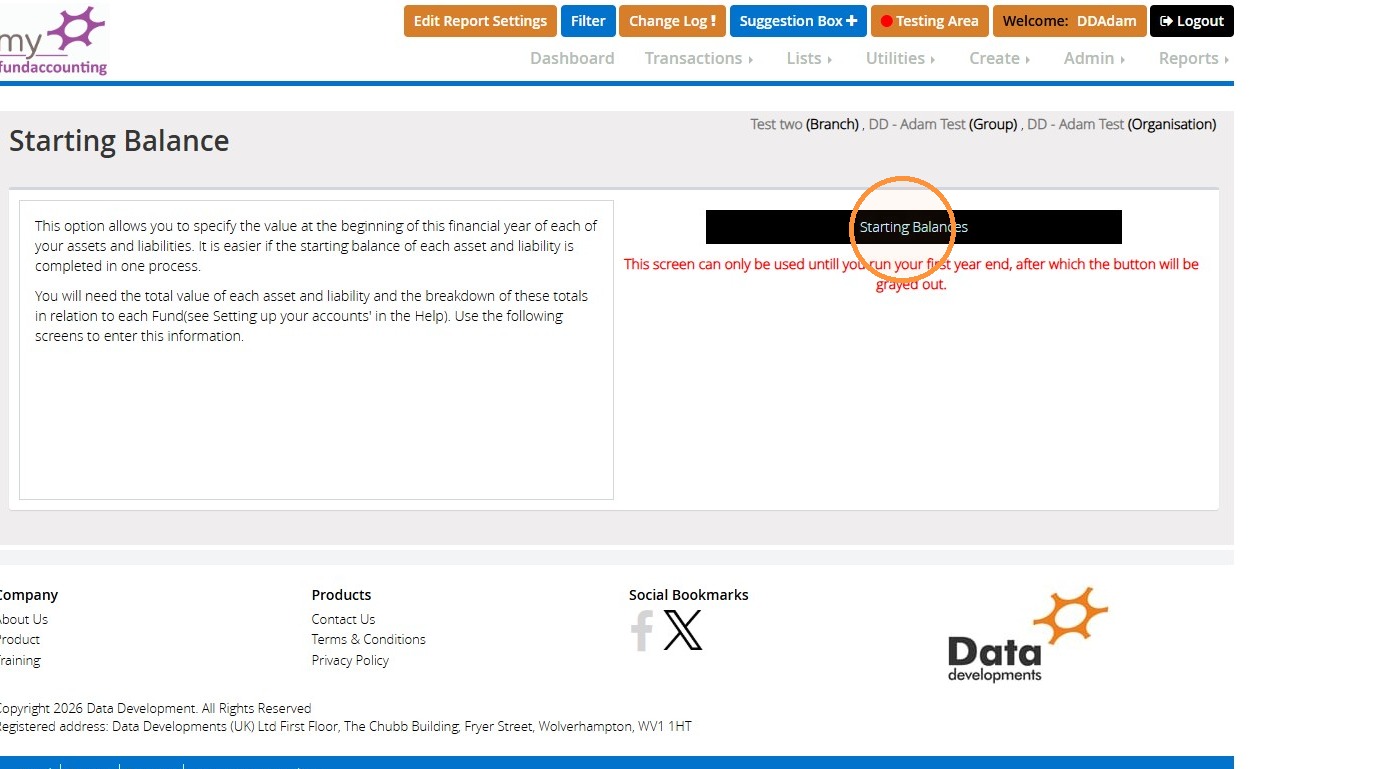
19. Select "Starting Balances".
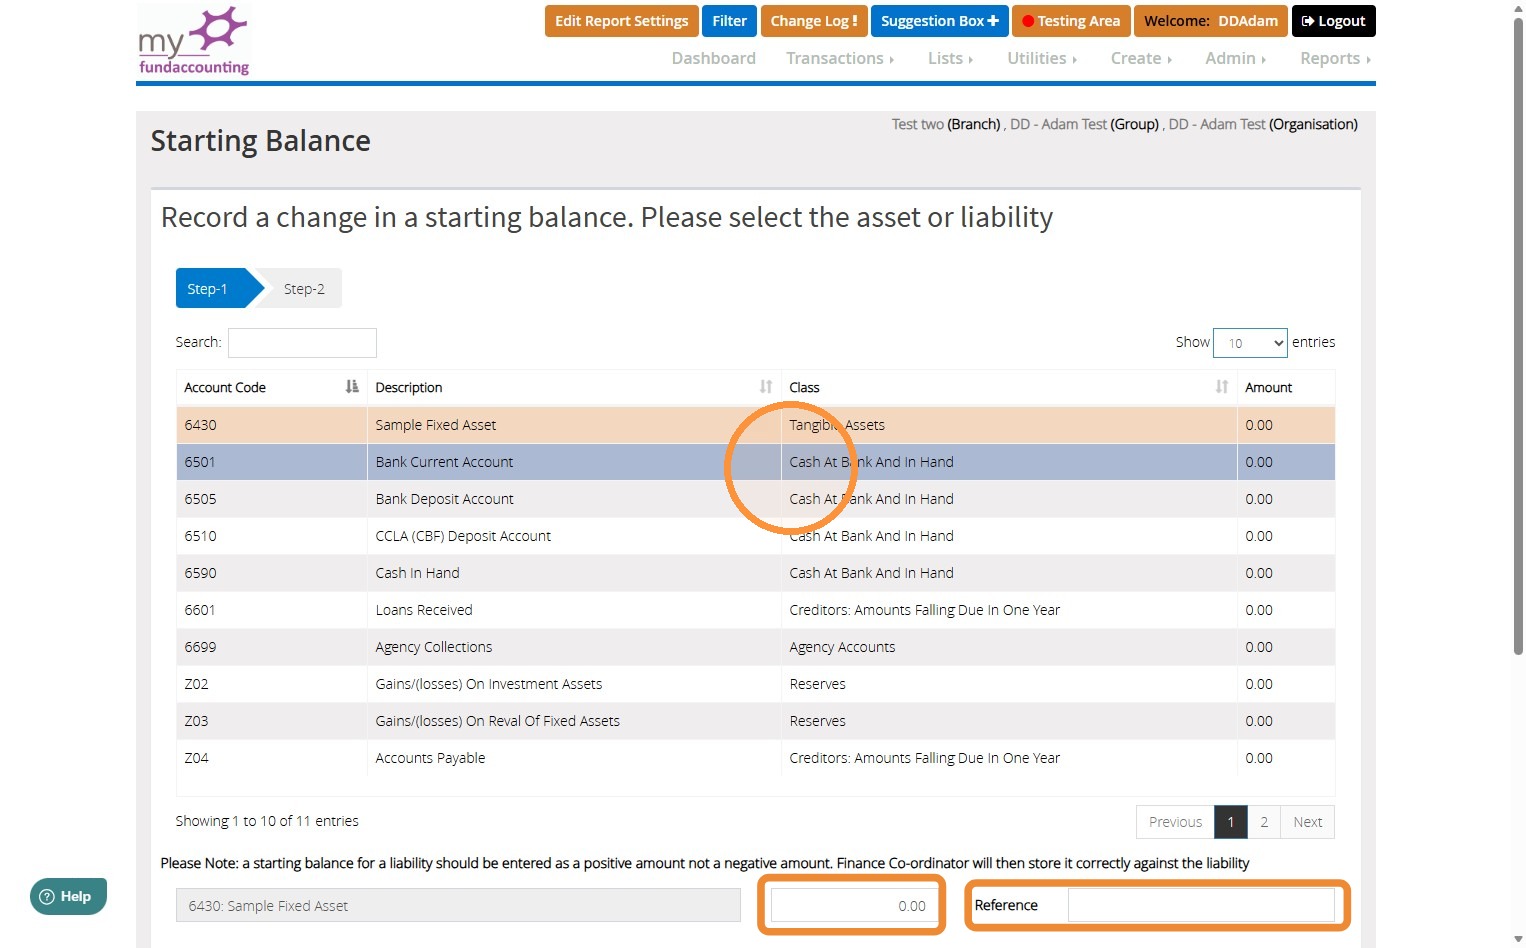
20. On Step 1, you will be given a list of your current assets, fixed assets, debtors and creditors. You will need to select one to begin entering the starting balance. You will then need to enter the balance at the bottom of the screen. You also have the option to add a reference.
Once complete, click "Next Step".
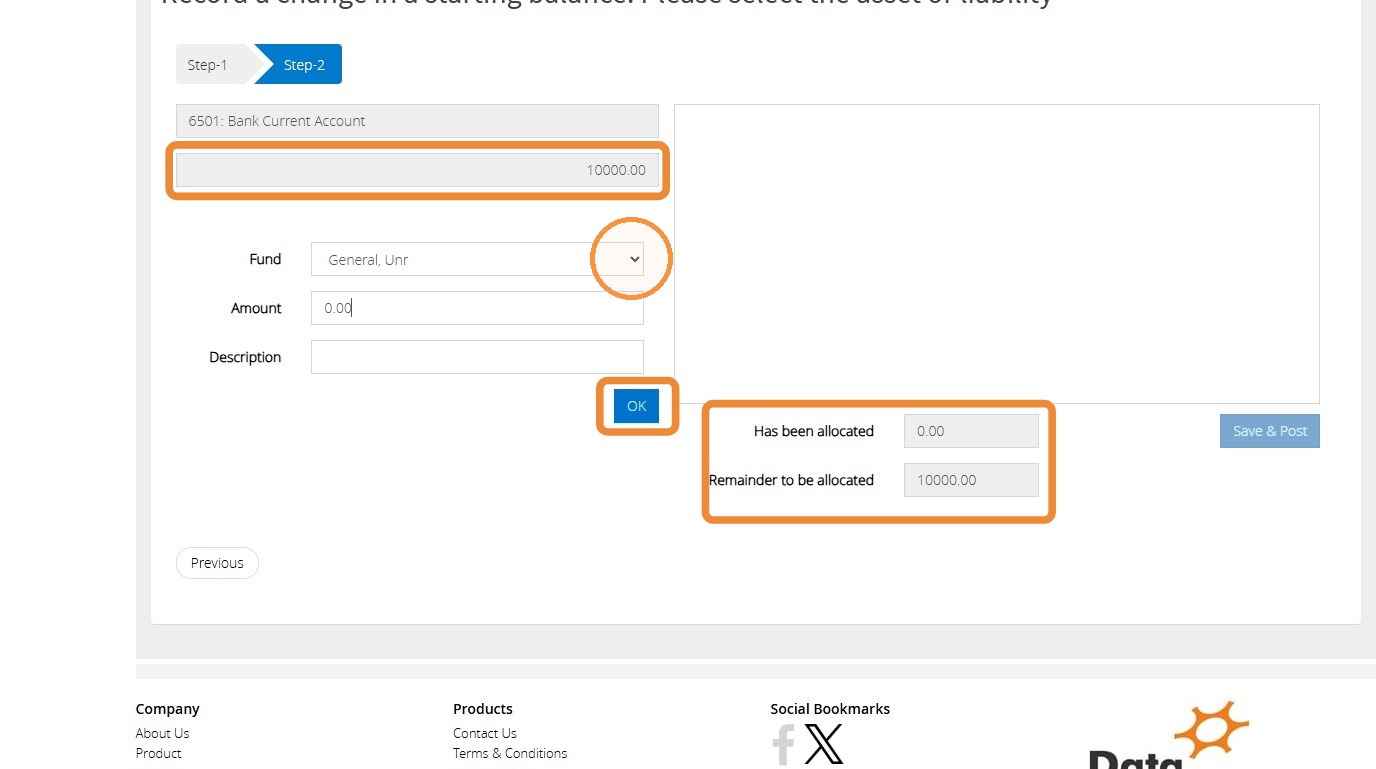
21. On Step 2, you will see the amount to be allocated at the top. There will also be a remainder to be allocated box, which will show your bank balance entered on Step 1.
You can use the dropdown menu under 'Fund' to select the fund you wish to allocate an amount to first. Enter the amount into the 'Amount' box and then click 'OK' to confirm. You can also add a description if required.
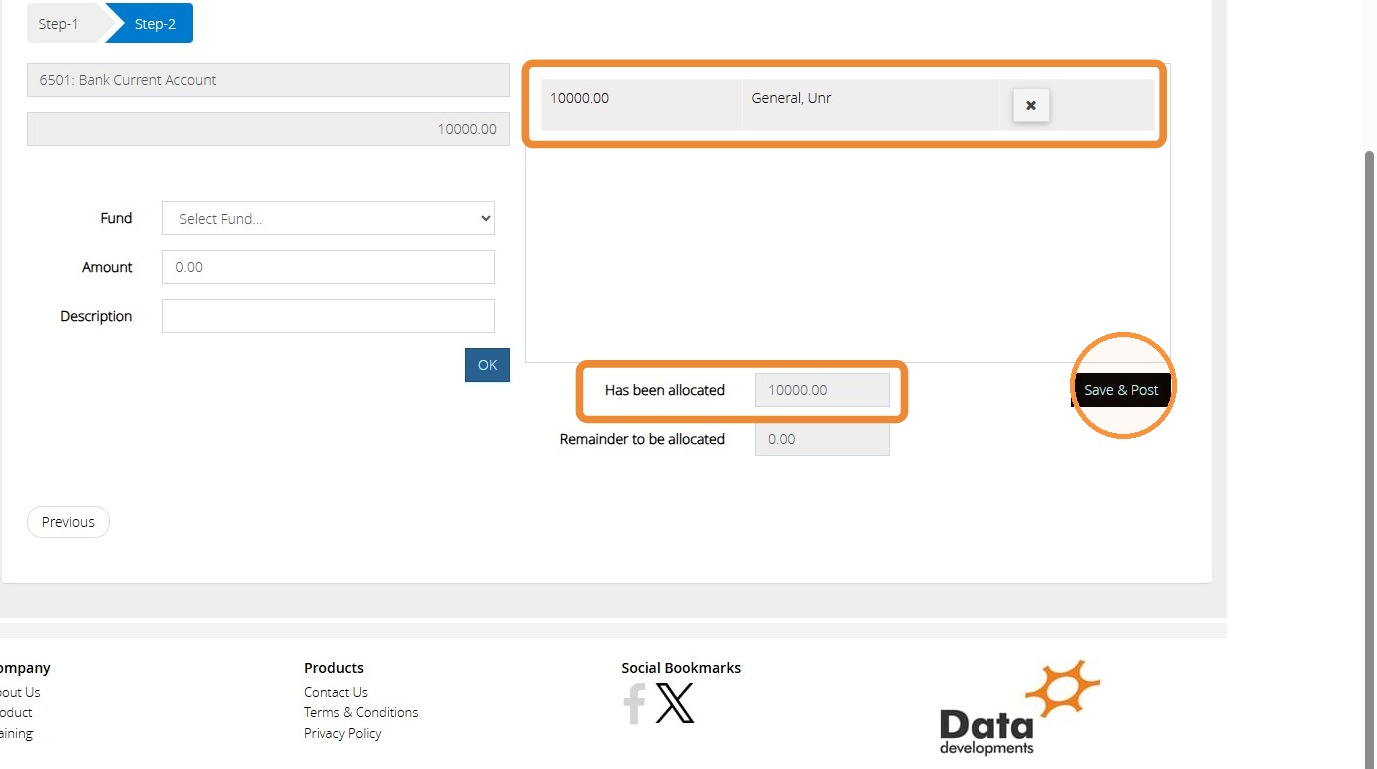
22. The allocated fund and amount should then appear in the box to the right-hand side of the screen. Doing this will then change the values in the 'Has been allocated' and 'Remainder to be allocated' boxes, telling you how much has been allocated to your chosen fund and how much is left for you to allocate. In our example below, we've allocated the entire bank balance to the general fund. This means that £10,000 has been allocated to the general fund, with the remainder to be allocated left at zero.
If you still have money left to be allocated to other funds, follow the previous step again to select a different fund and enter another amount. If you've entered the wrong amount or selected the wrong fund for any of your entries, you can select the tiny 'x' icon on each entry to delete it before re-entering it again.
Once the full amount has been allocated, the 'Save & Post' button will become available. Select this to post the transaction.
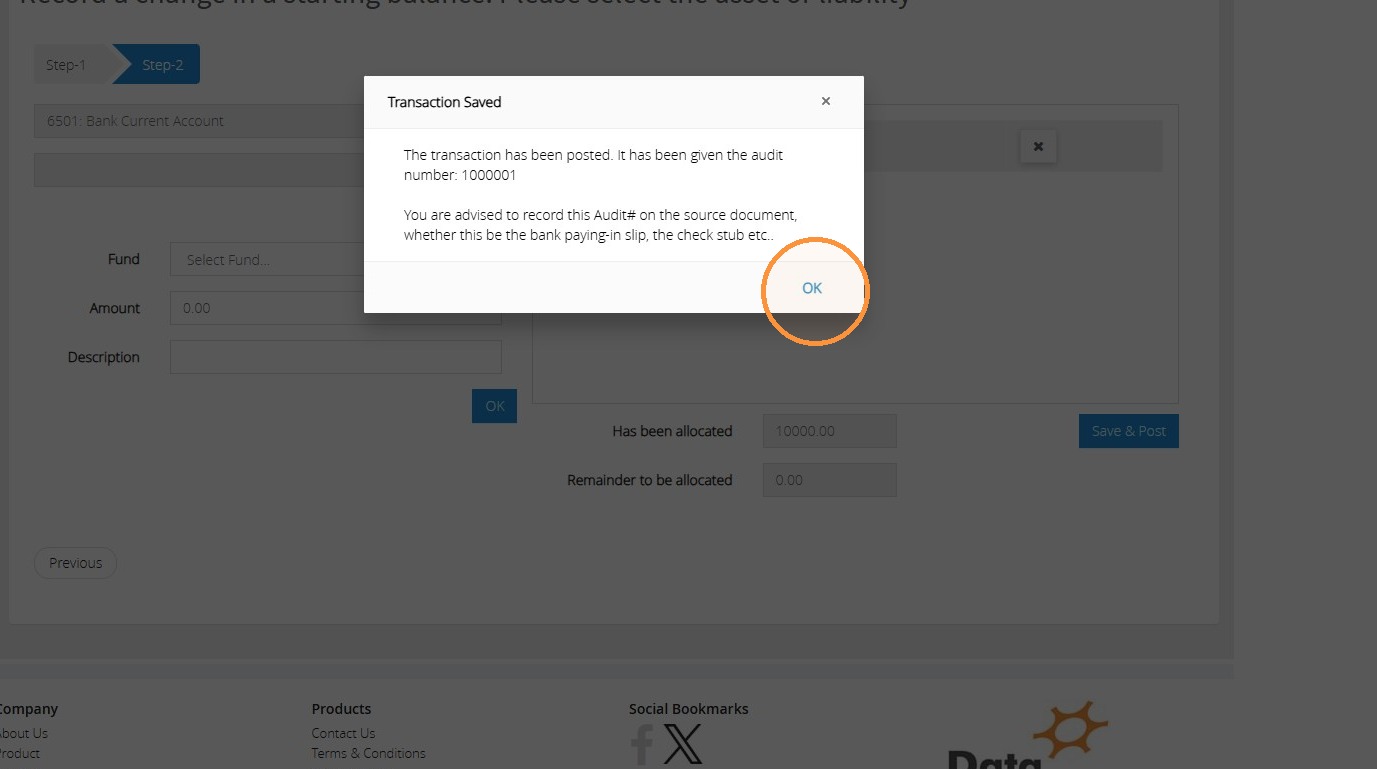
23. You will get an audit number for your starting balance. Click "OK" to dismiss the message.
We hope you found this guide helpful and easy to follow. If you require any further assistance, please contact our support team by telephone on 01902 714030 or by email at support@datadevelopments.co.uk