
Customising your invoice
1. Before recording a sale, you may want to customise the invoice so your details are provided to the customer. Please see the steps below.
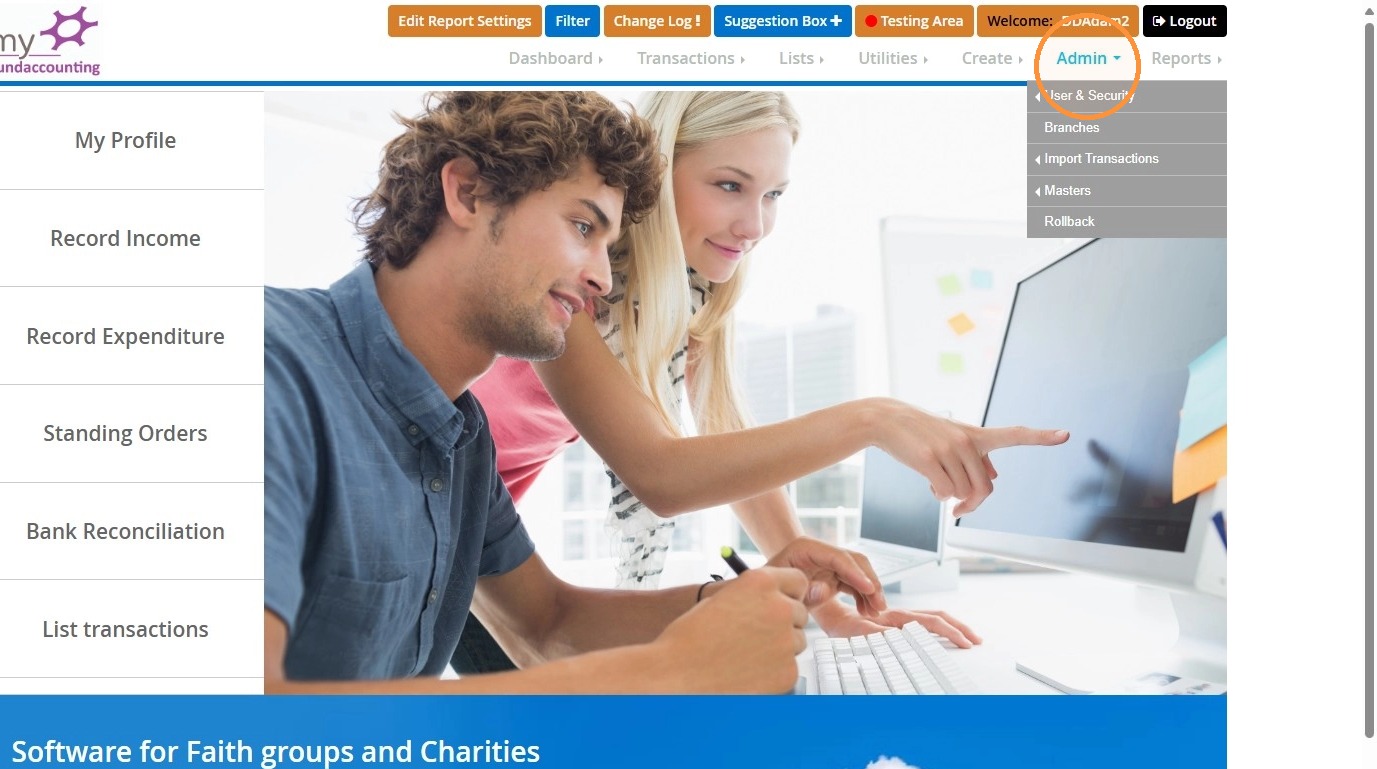
2. Click "Admin"
">
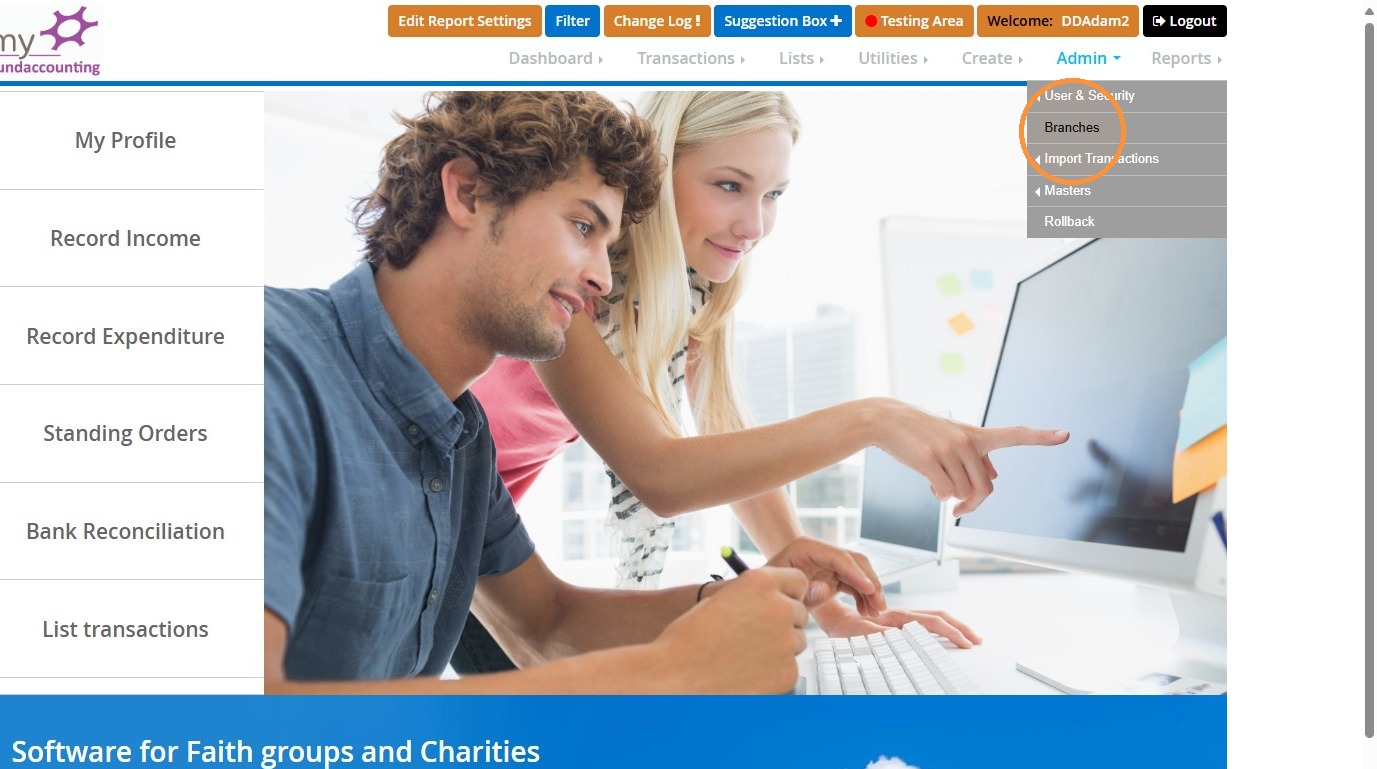
3. Click "Branches"
">
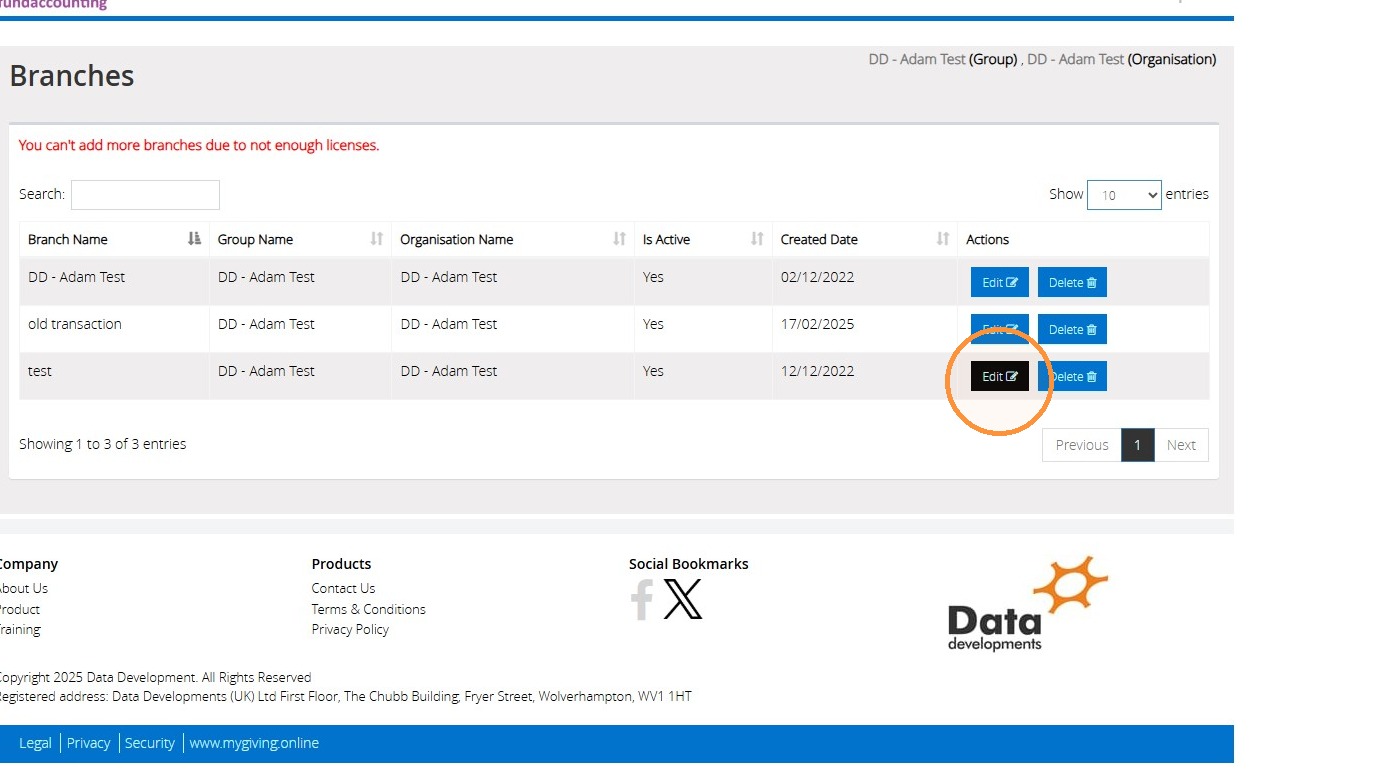
4. Click "Edit" on your branch
">
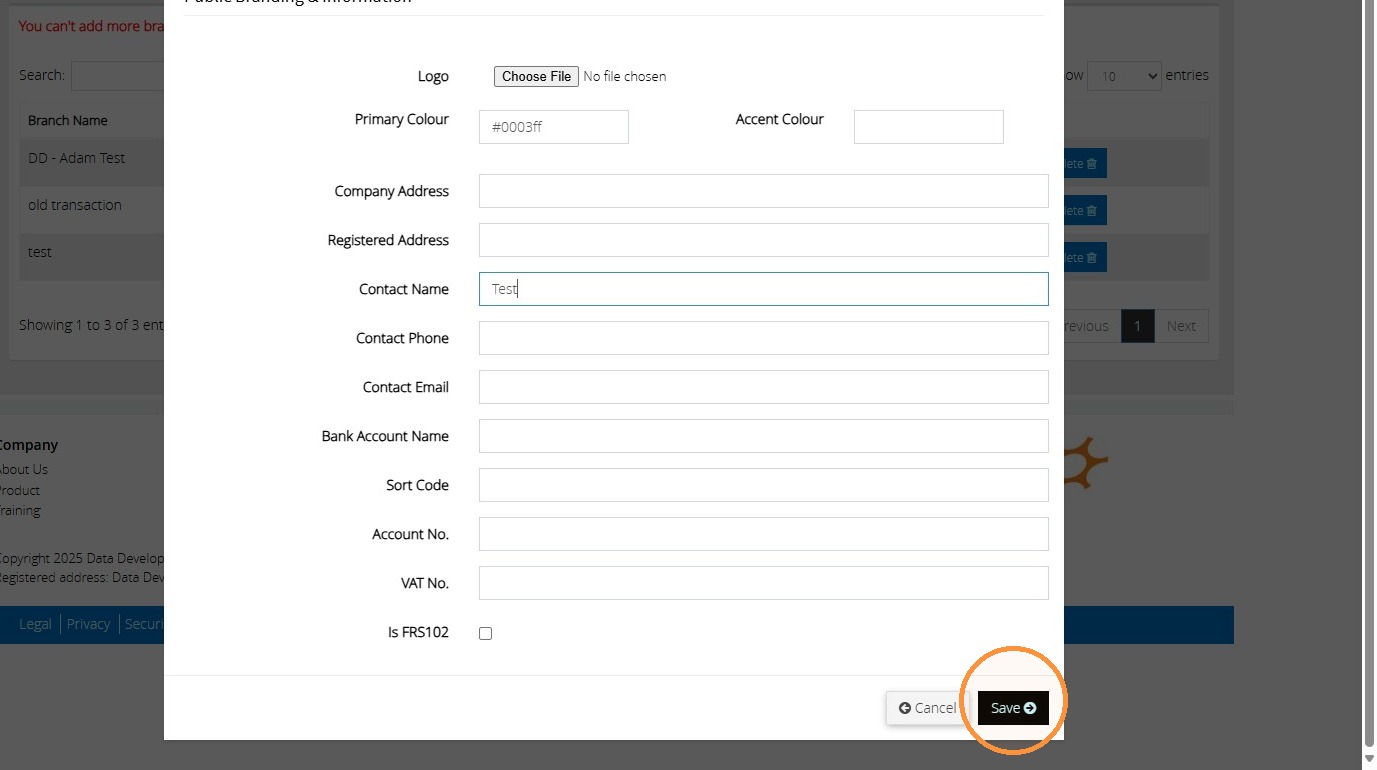
5. Enter the details you wish to appear on the invoice. You can also add a logo if you wish to.
">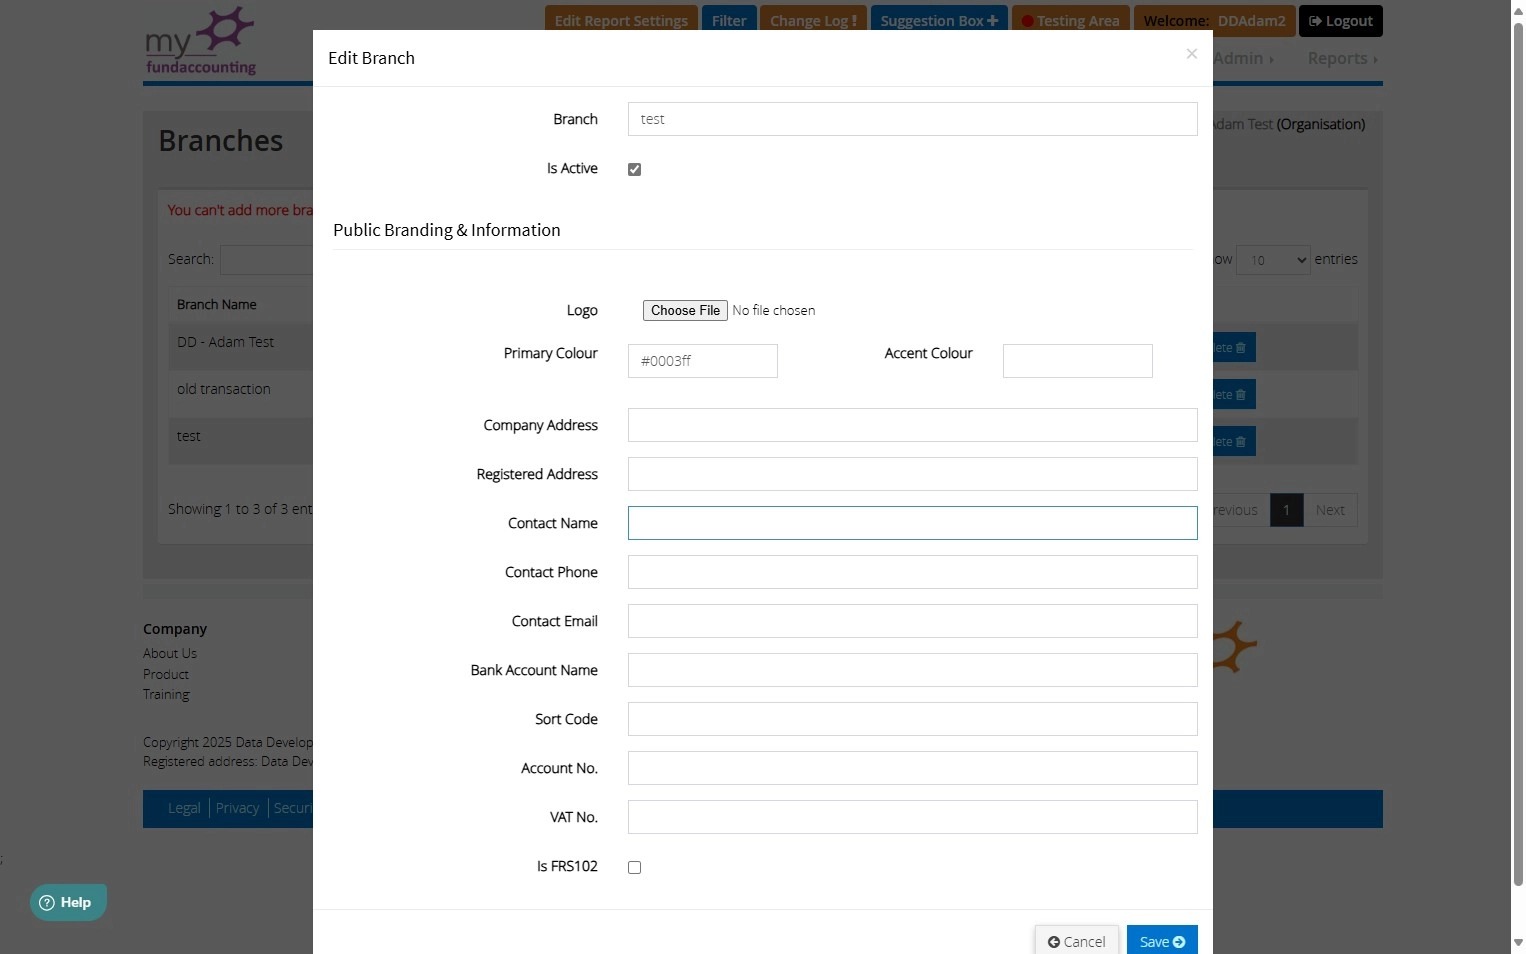
6. Once completed choose "Save". This will show on the invoice at a later stage.
">
How to set up your customers
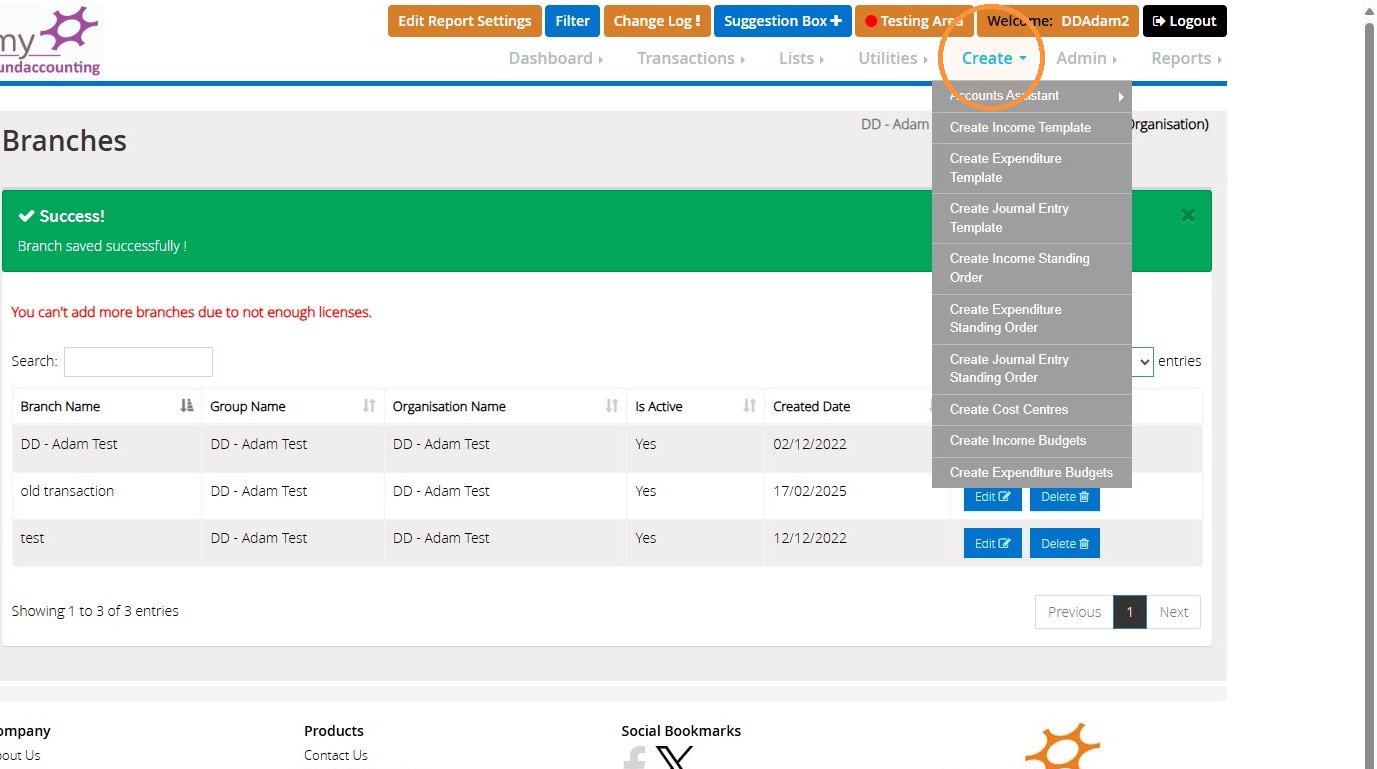
7. Click "Create"
">
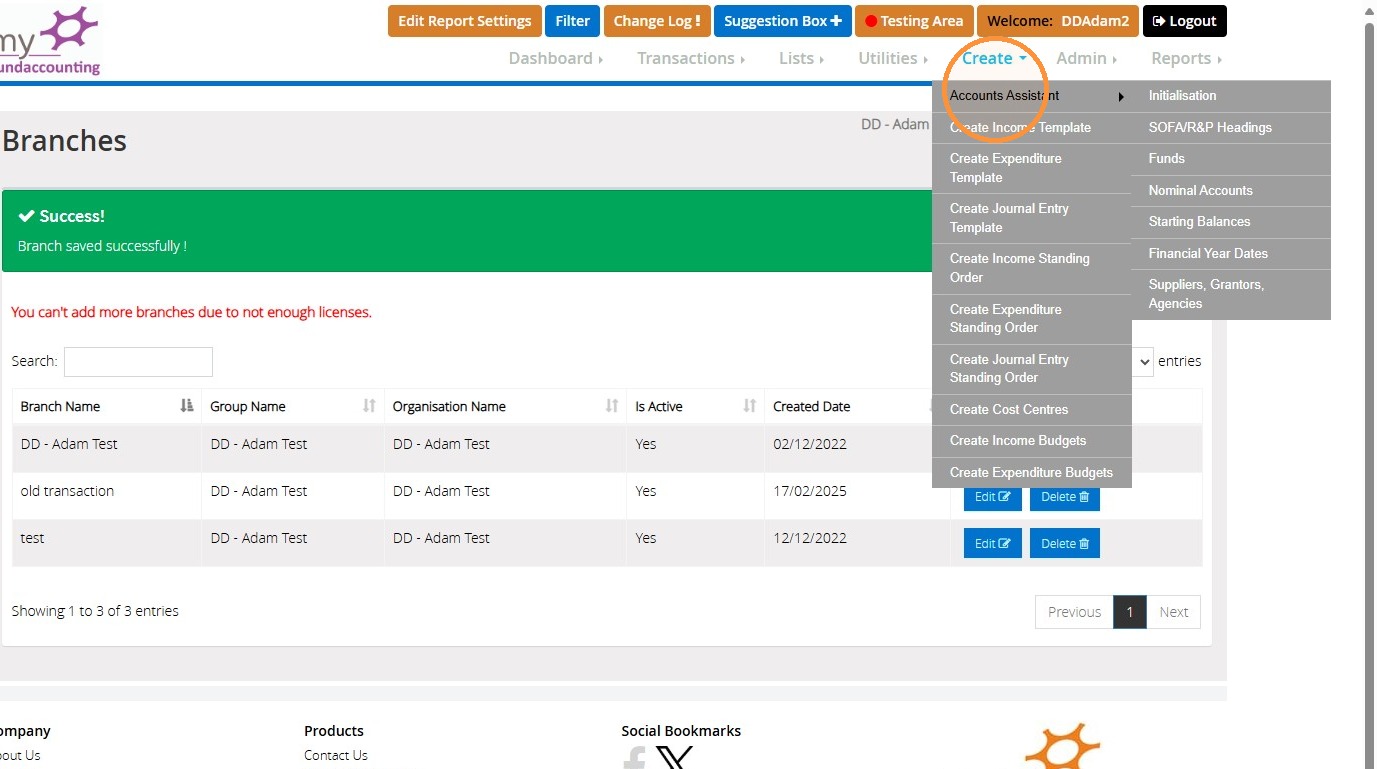
8. Click "Accounts Assistant"
">
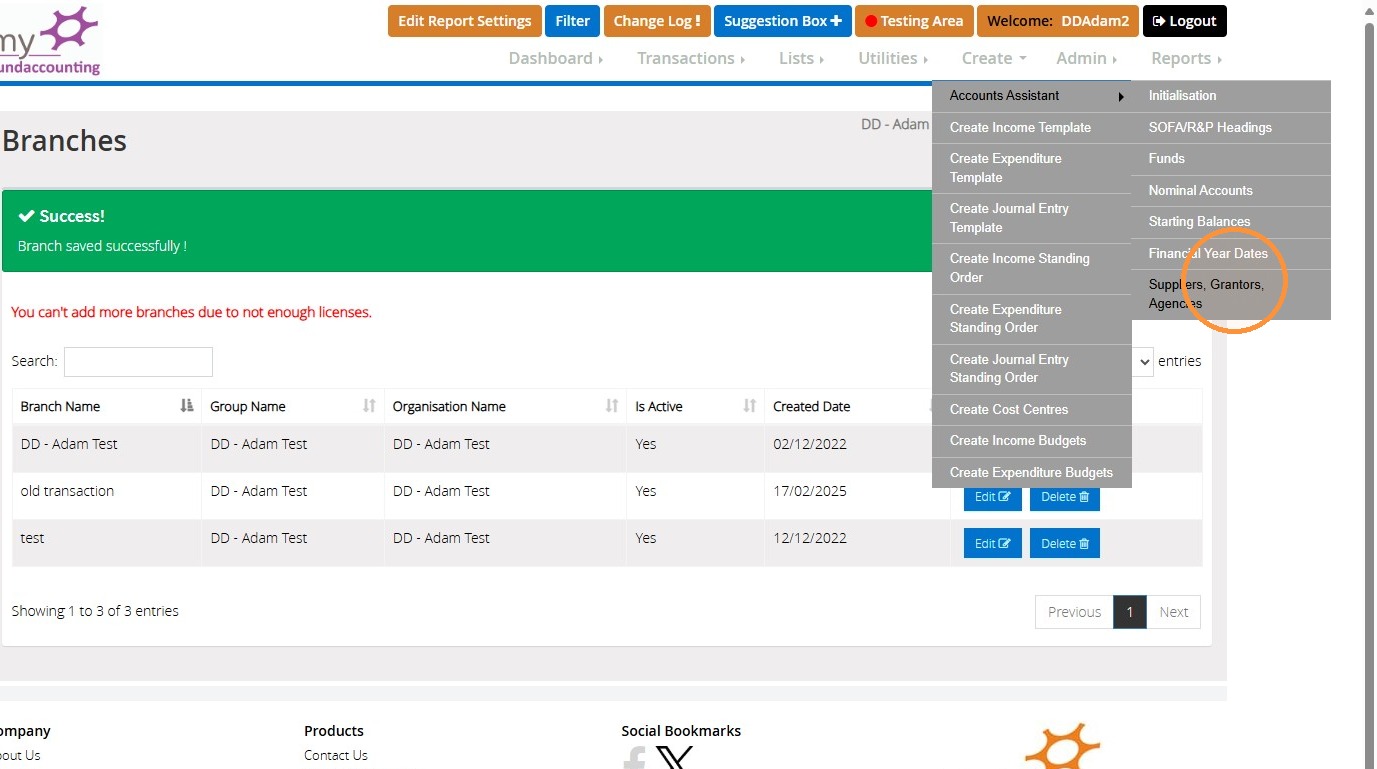
9. Click "Suppliers, Grantors, Agencies"
">
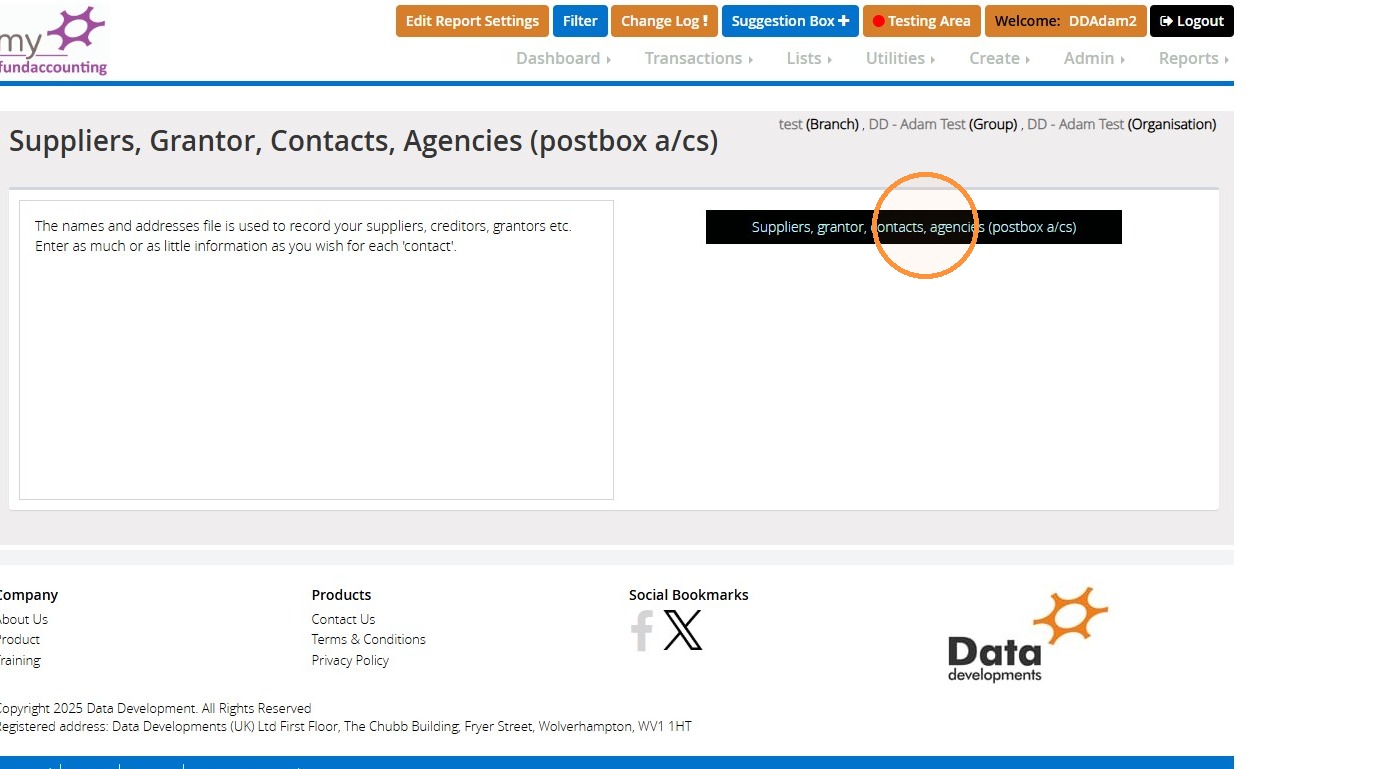
10. Click "Suppliers, grantor, contacts, agencies (postbox a/cs)"
">
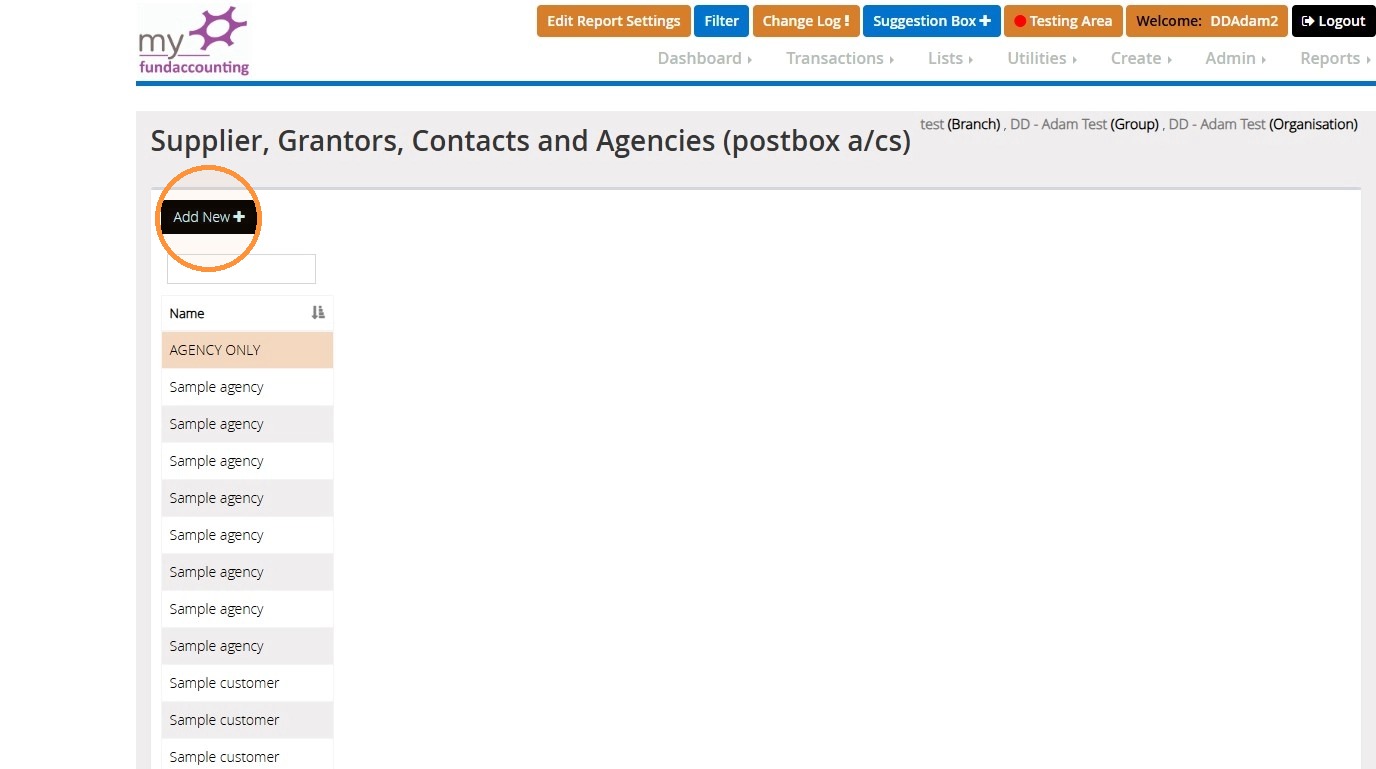
11. Click "Add New"
">
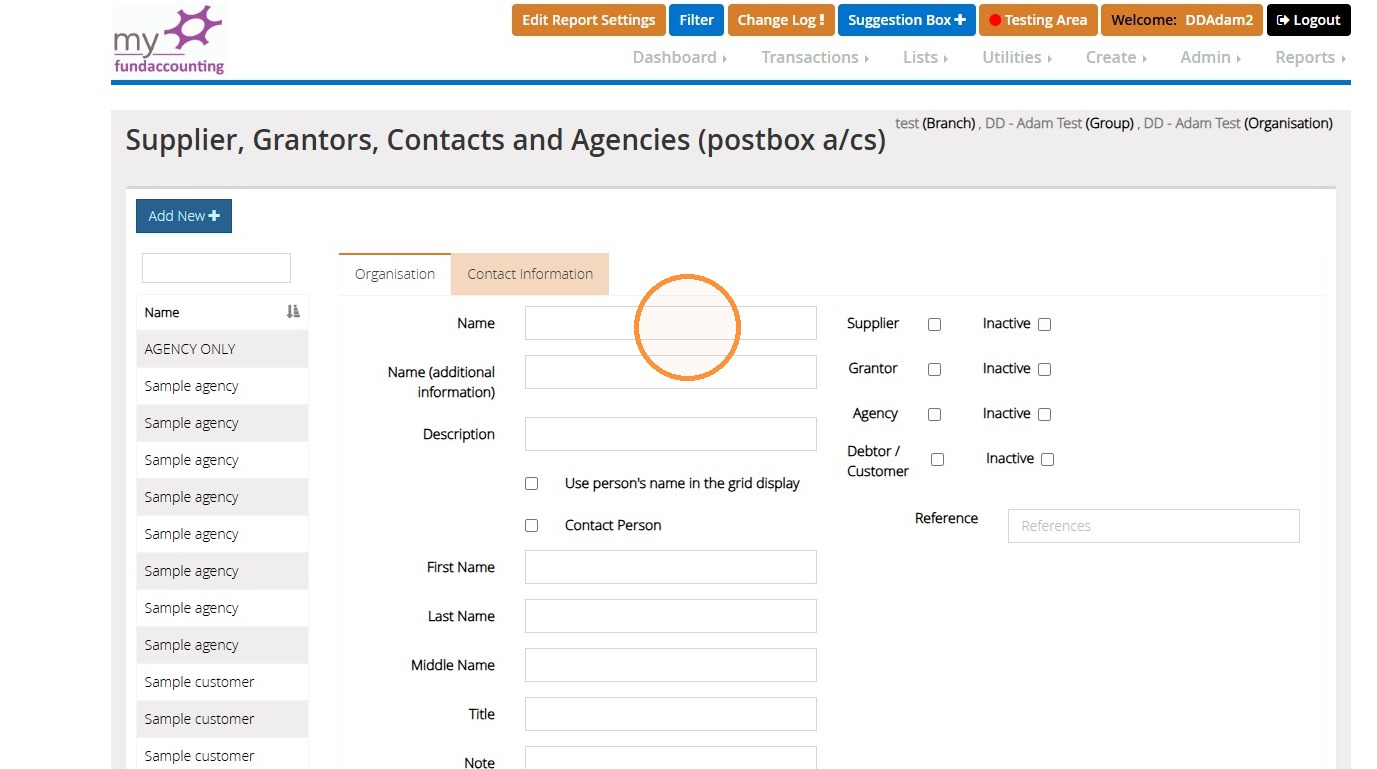
12. Enter the customer details.
">
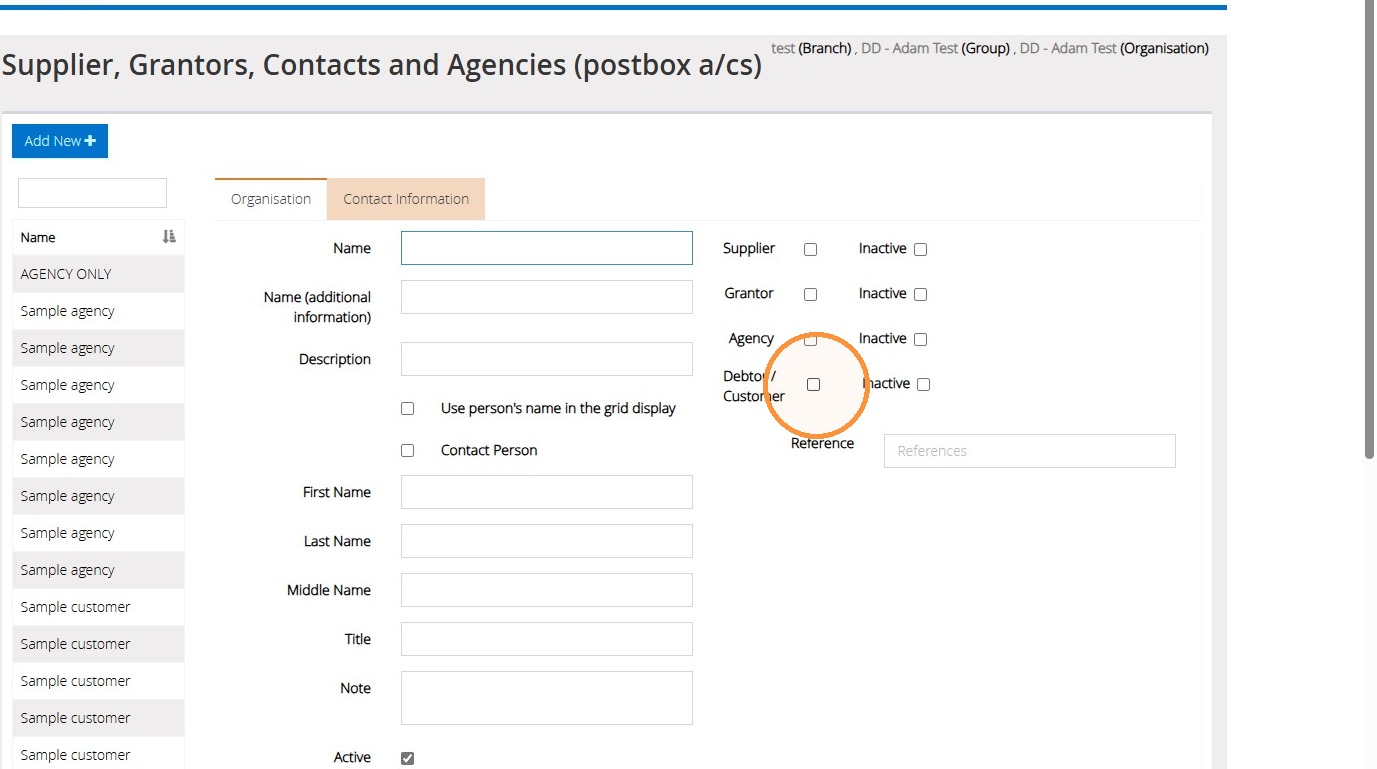
13. Tick the "Debtor / Customer" field.
">
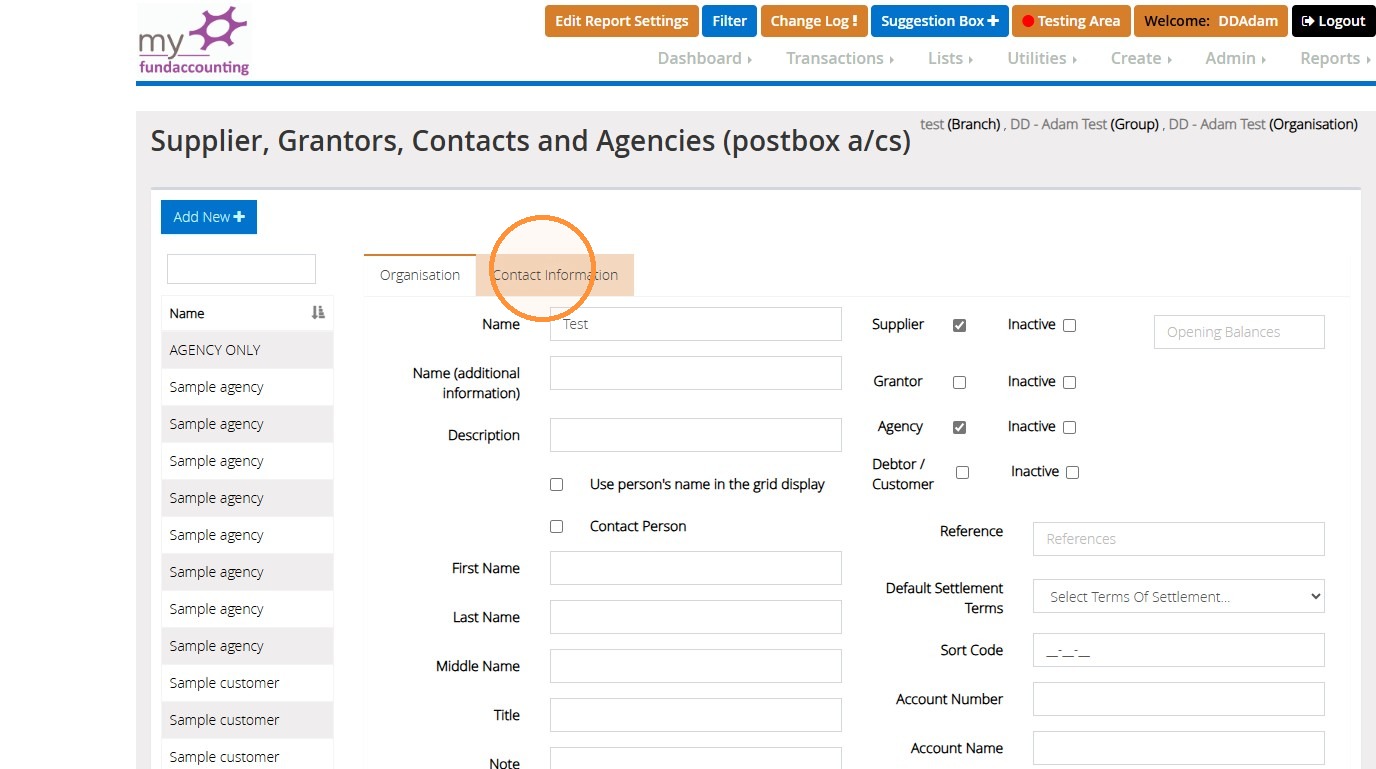
14. To add the customer details to the invoice click "Contact Information".
">
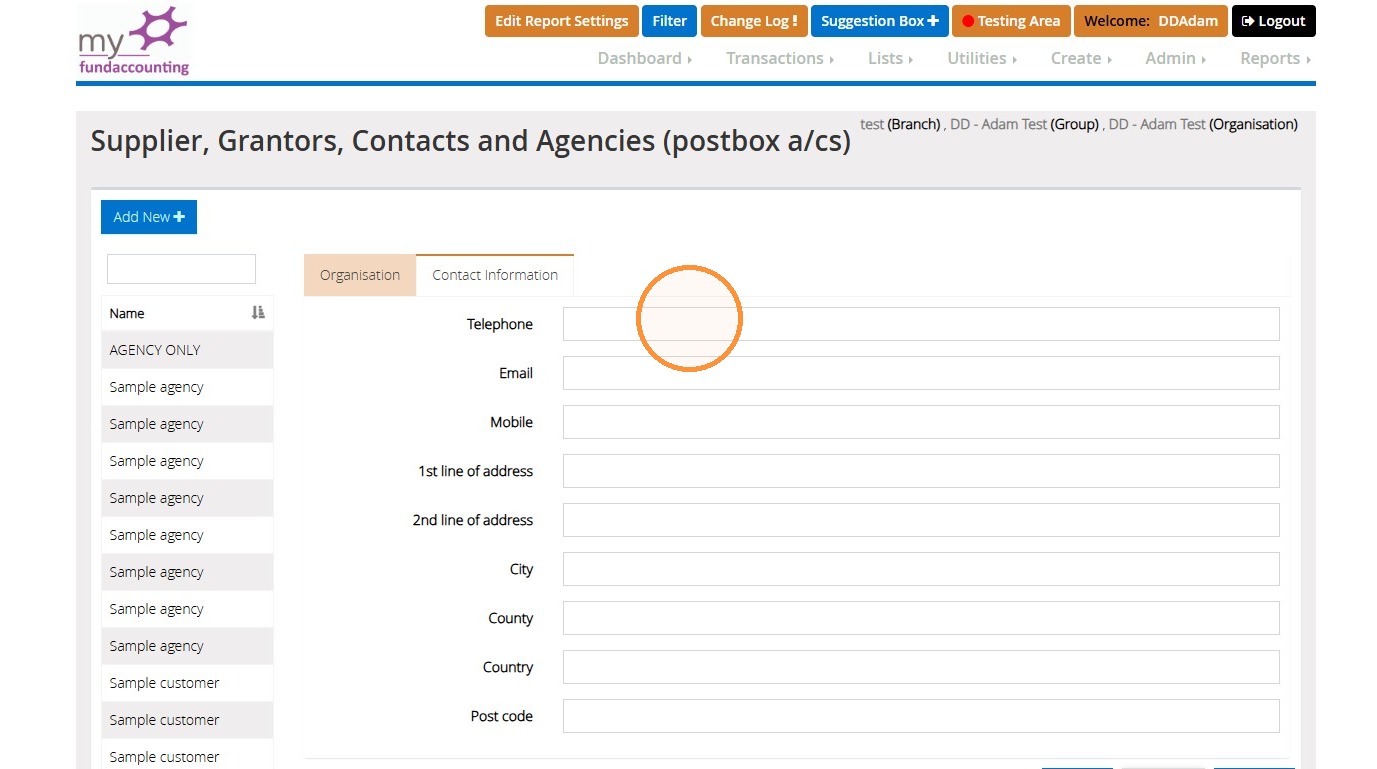
15. Fill in the fields required. Afterwards, click 'Save'.
">
How to add a product
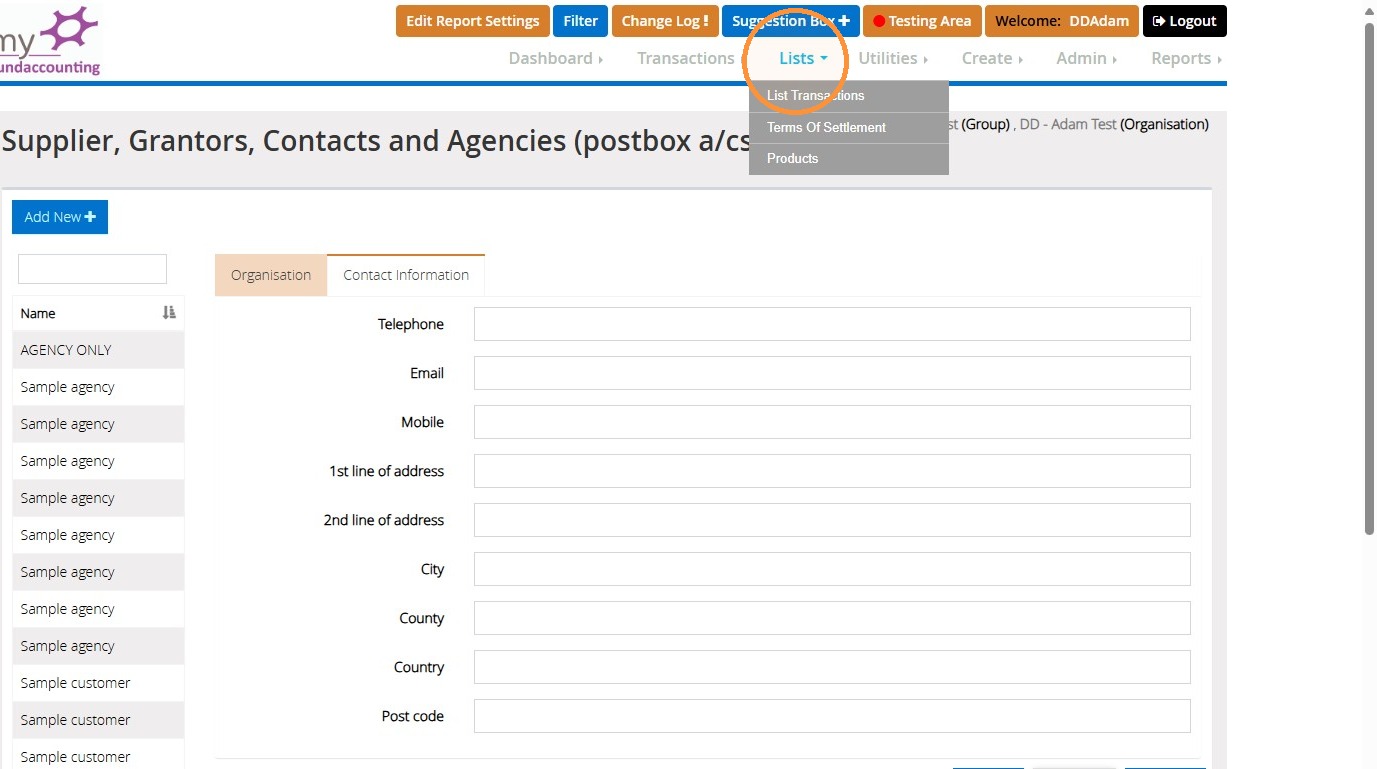
16. Click "Lists"
">
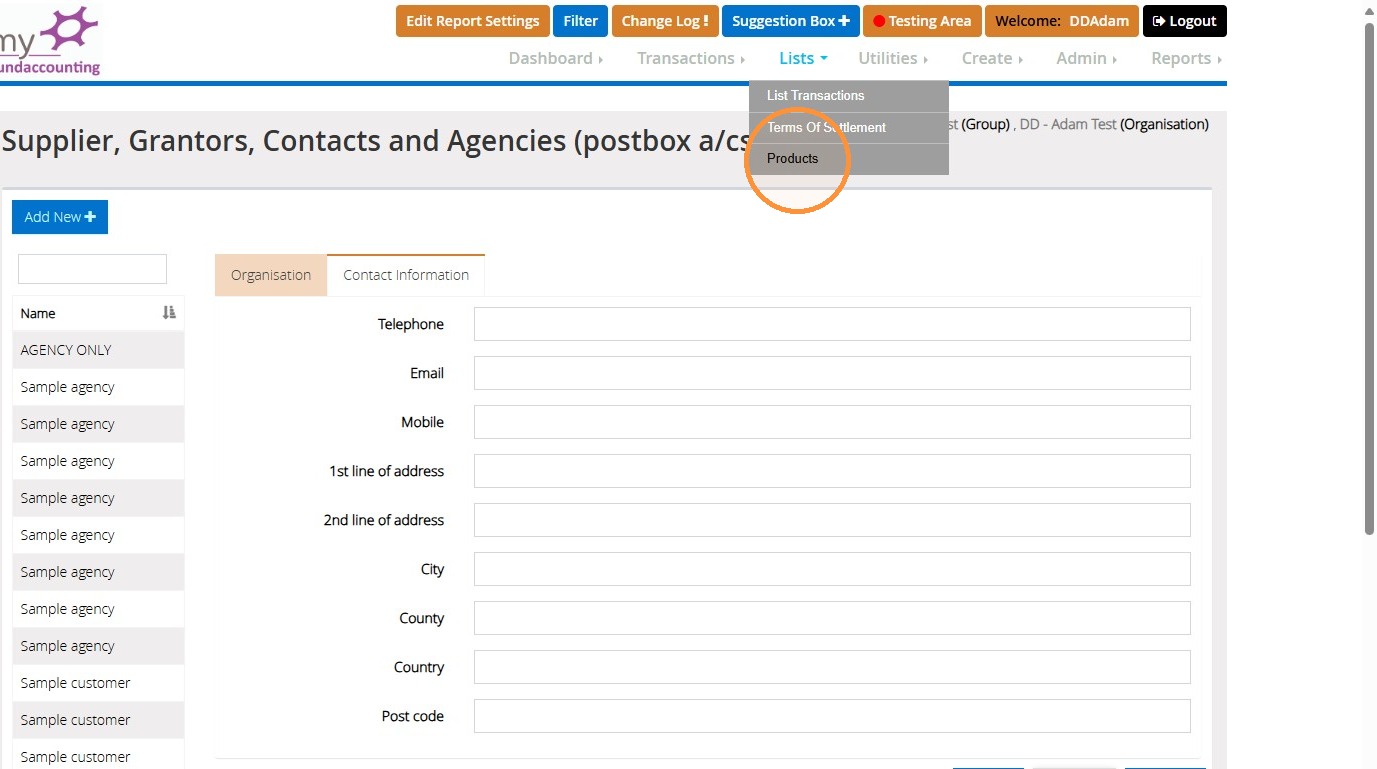
17. Click "Products"
">
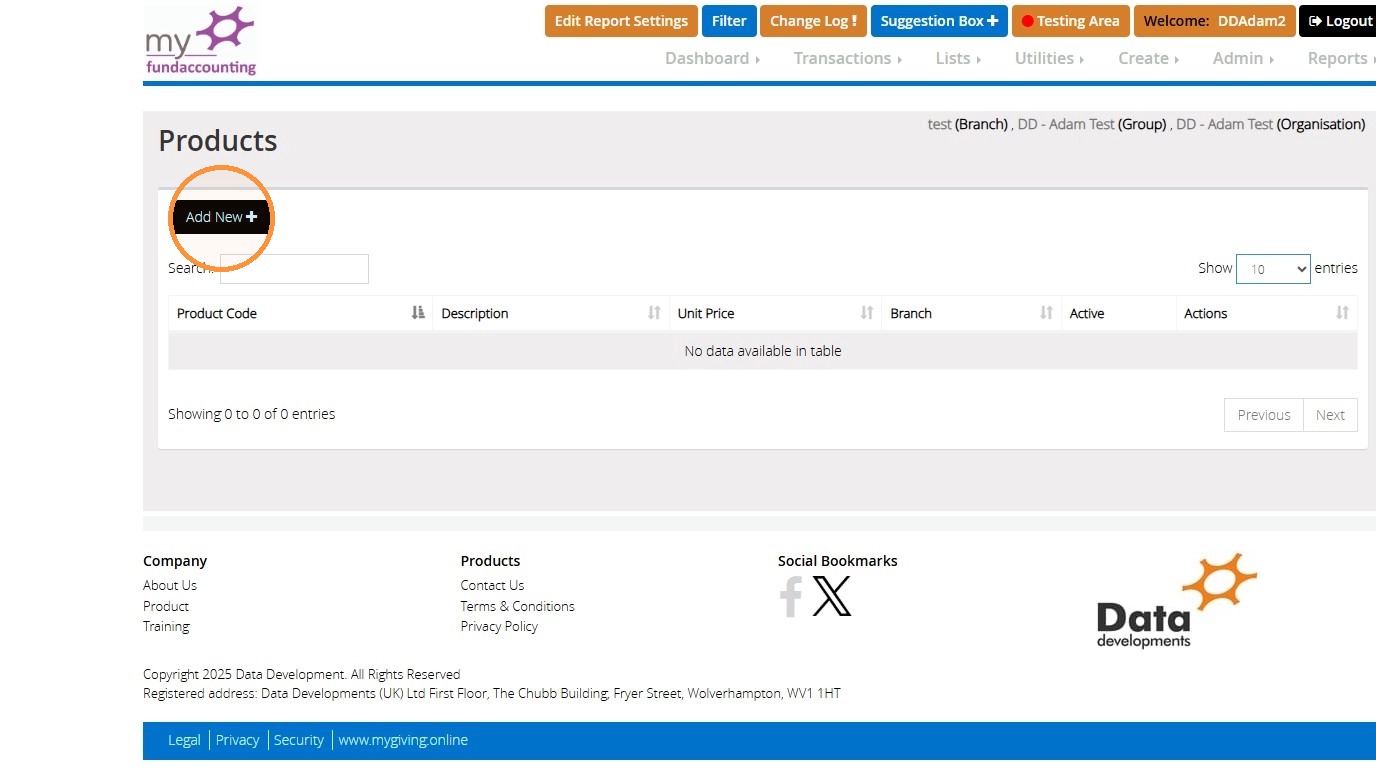
18. Click "Add New"
">
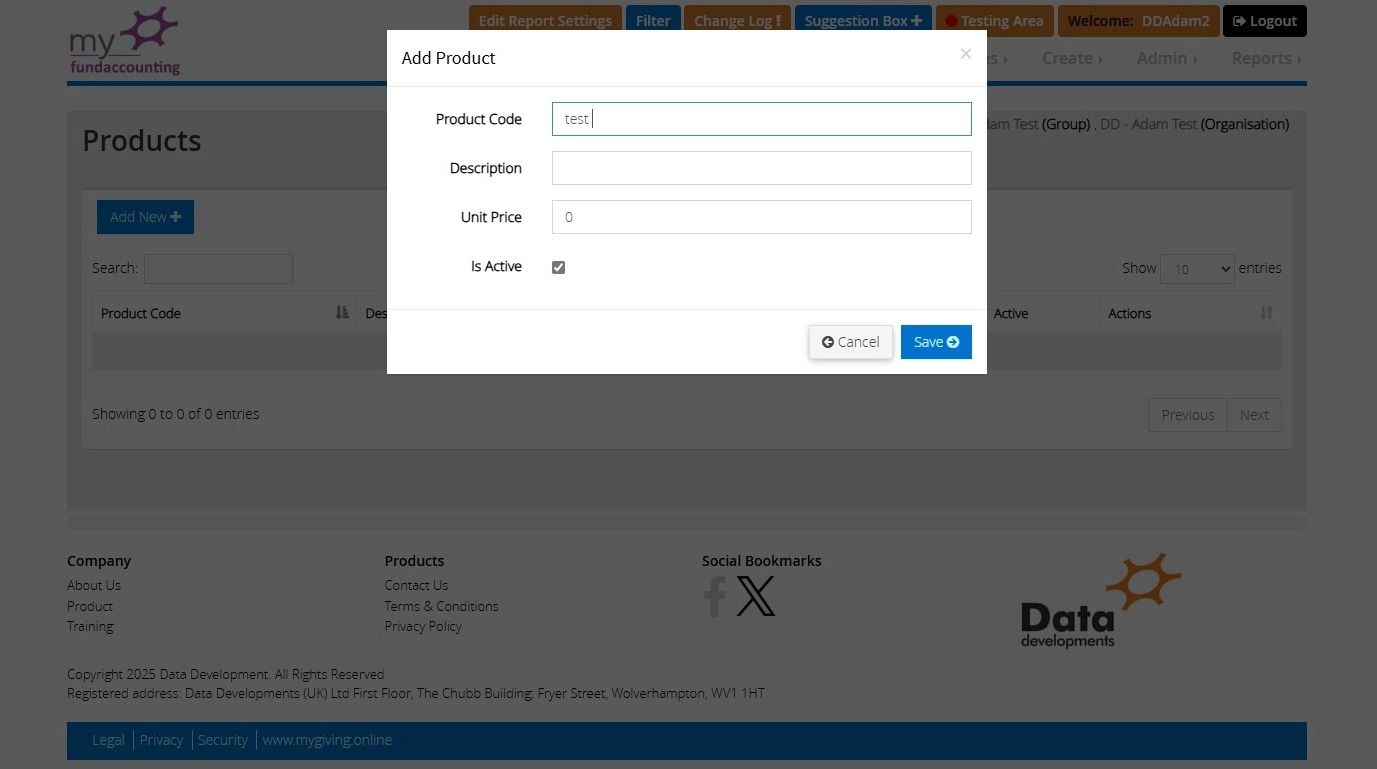
19. Enter the product code and description. Choose the unit price. If this is left as 0, you can manually adjust it on the invoice when selecting the product.
">
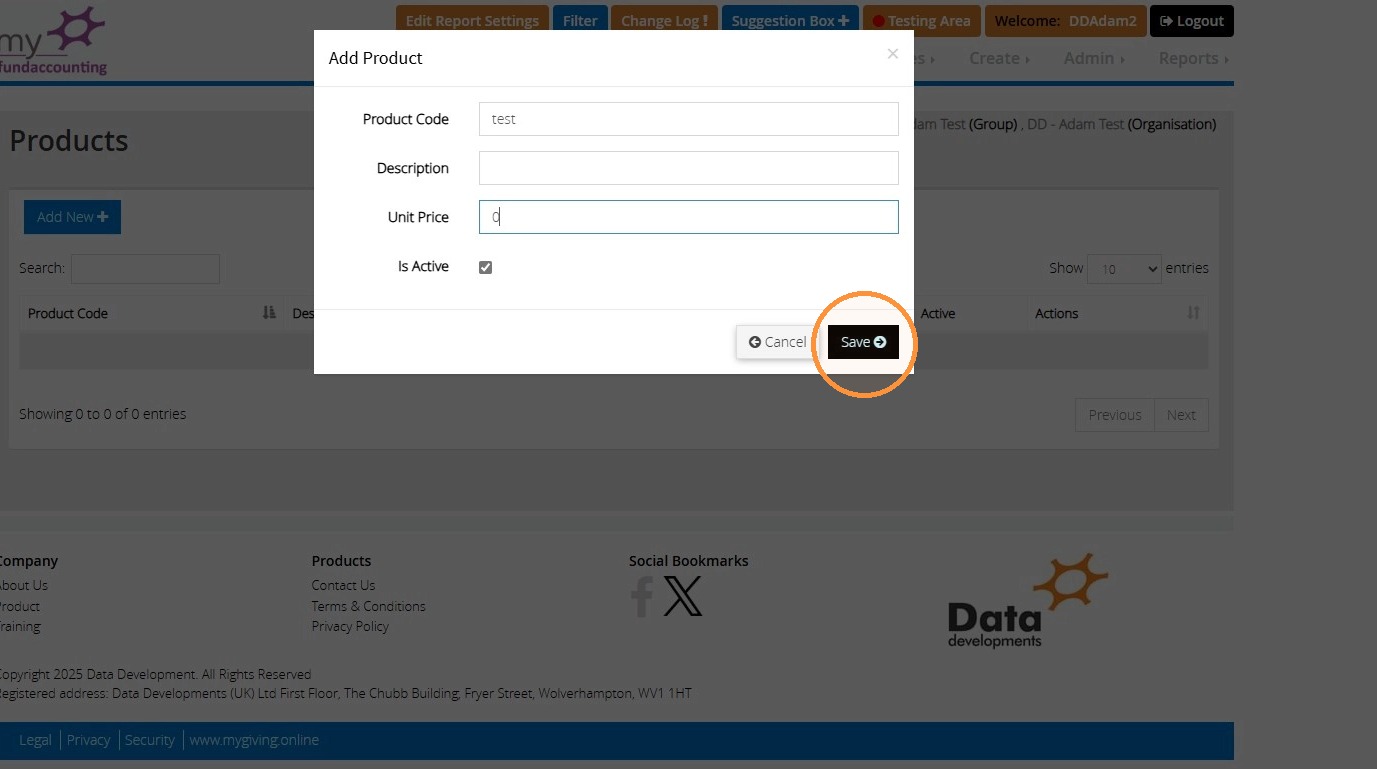
20. Click "Save"
">
How to add terms of settlement
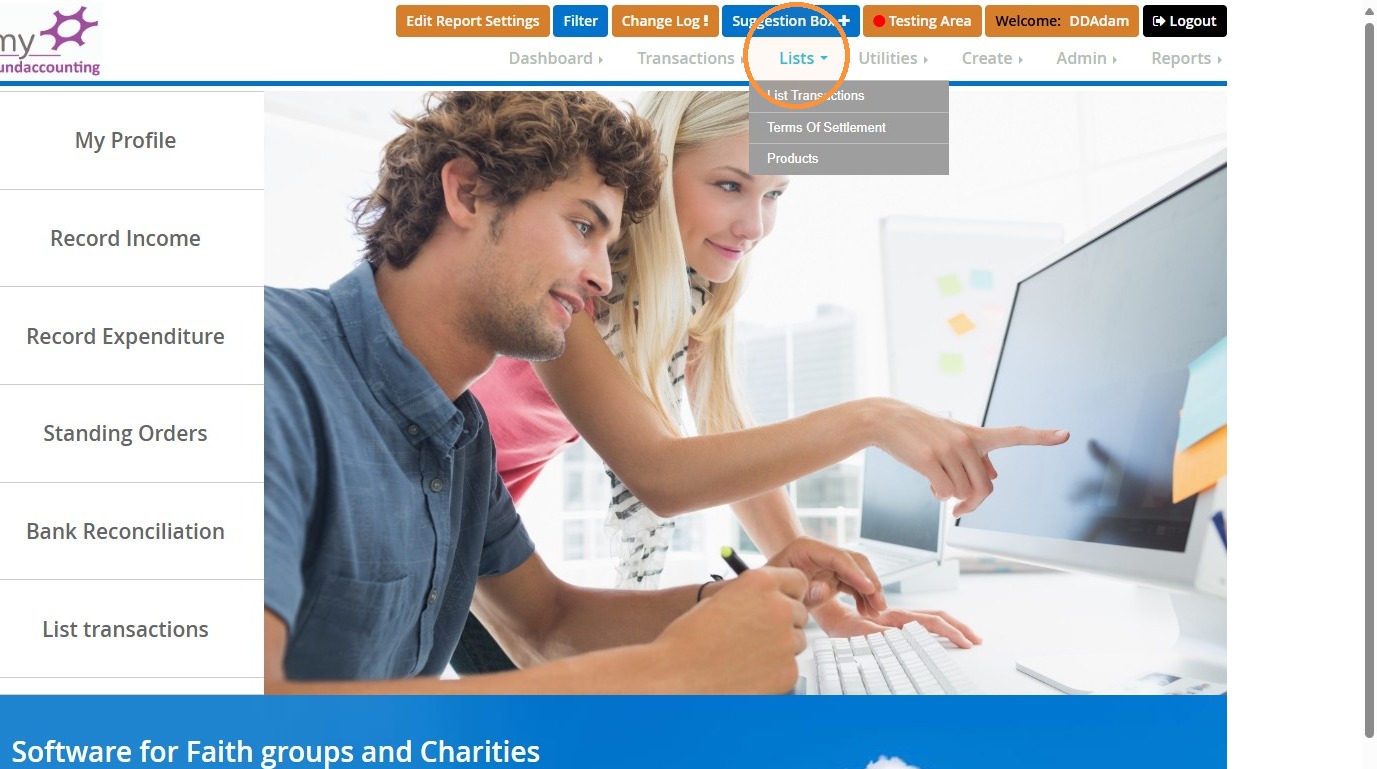
21. Click "Lists"
">
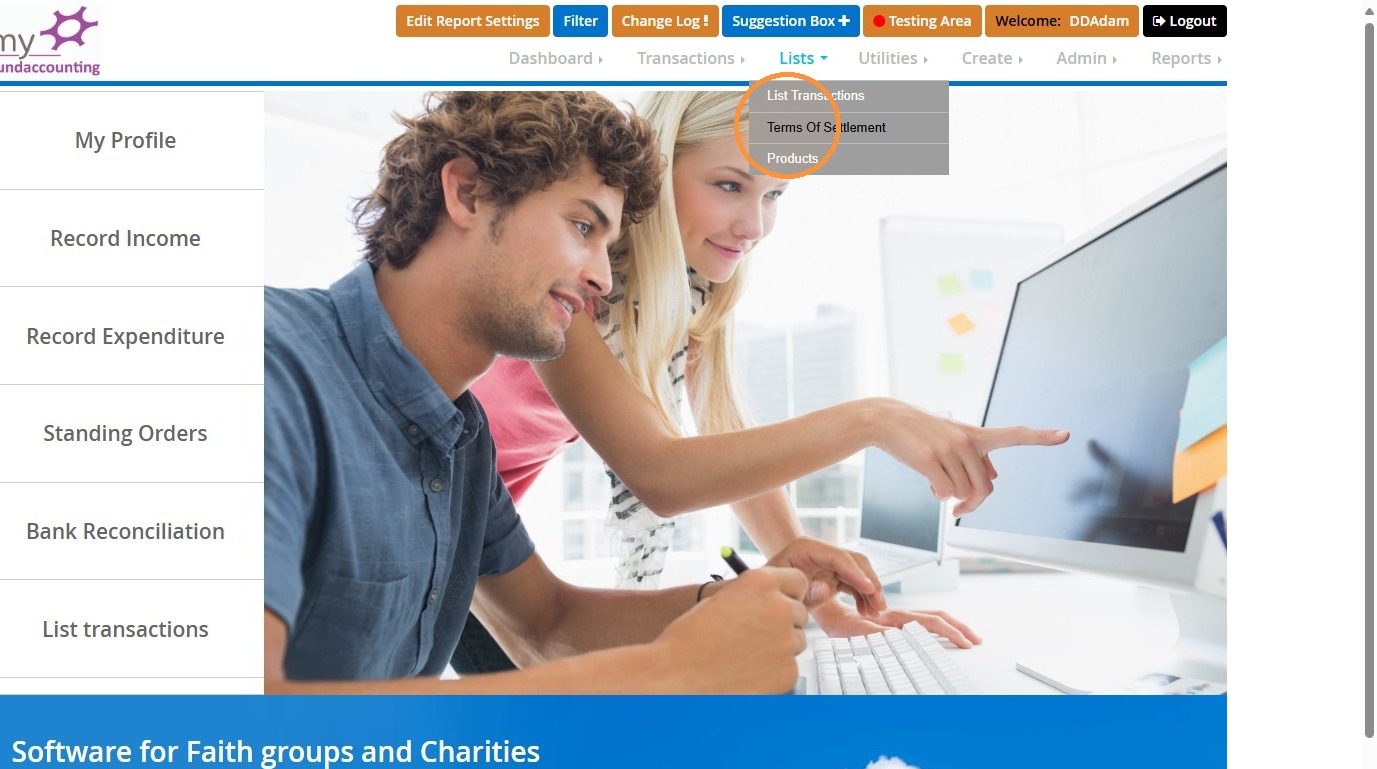
22. Click "Terms Of Settlement"
">
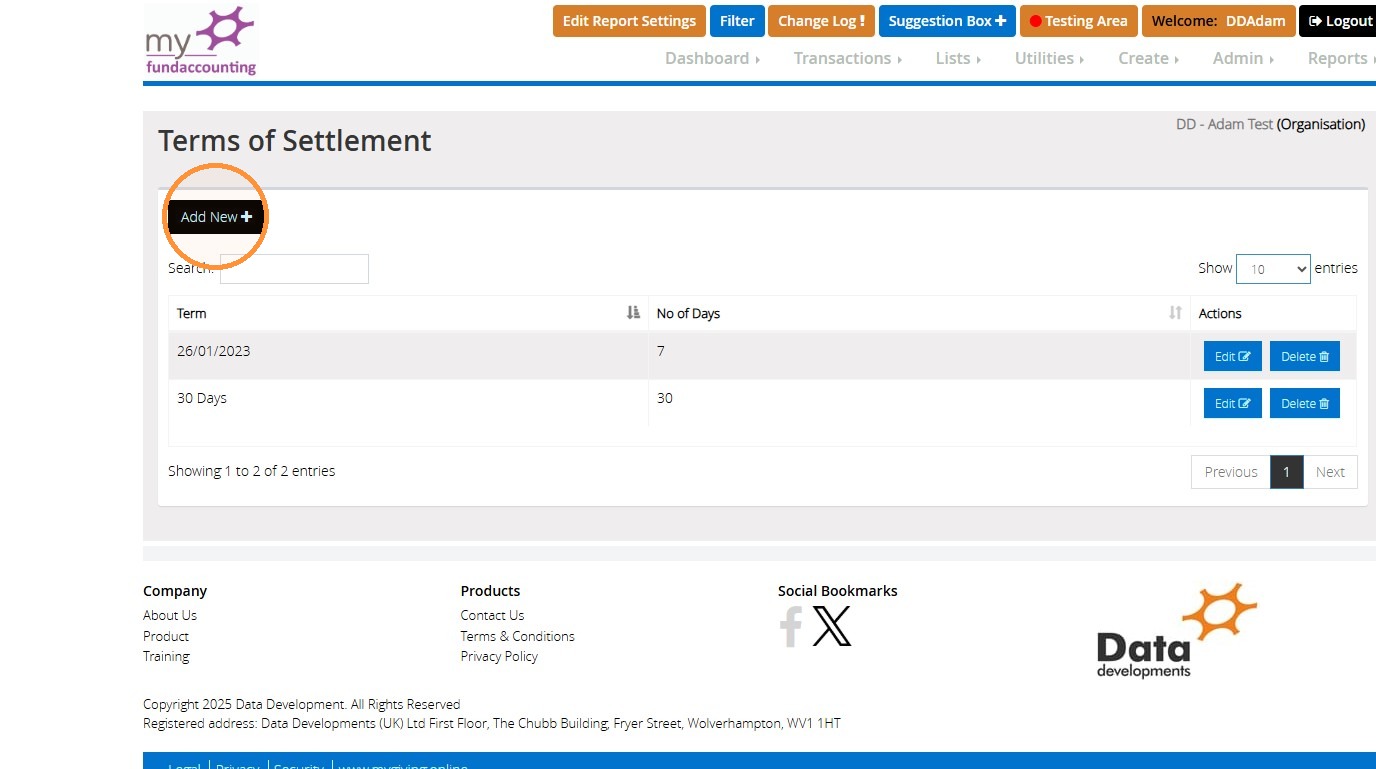
23. Click "Add New"
">
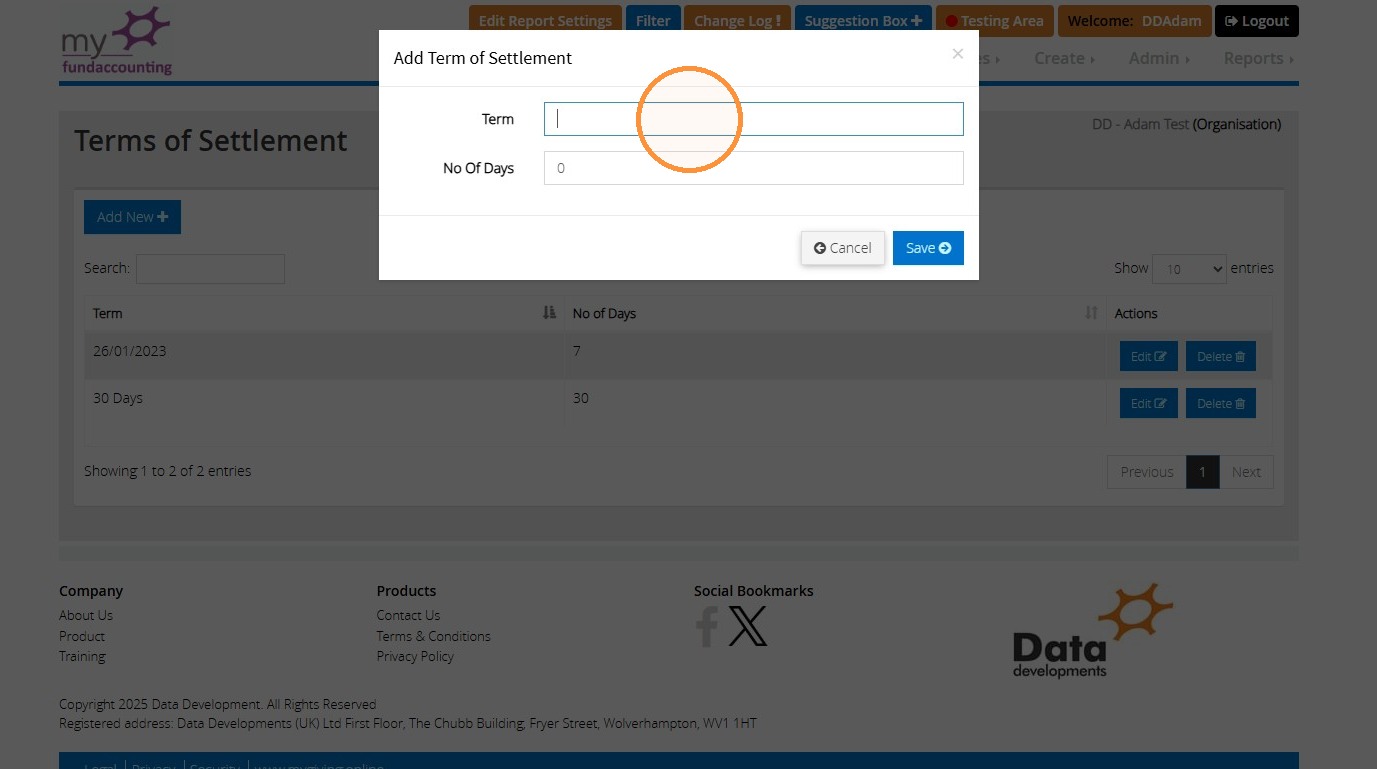
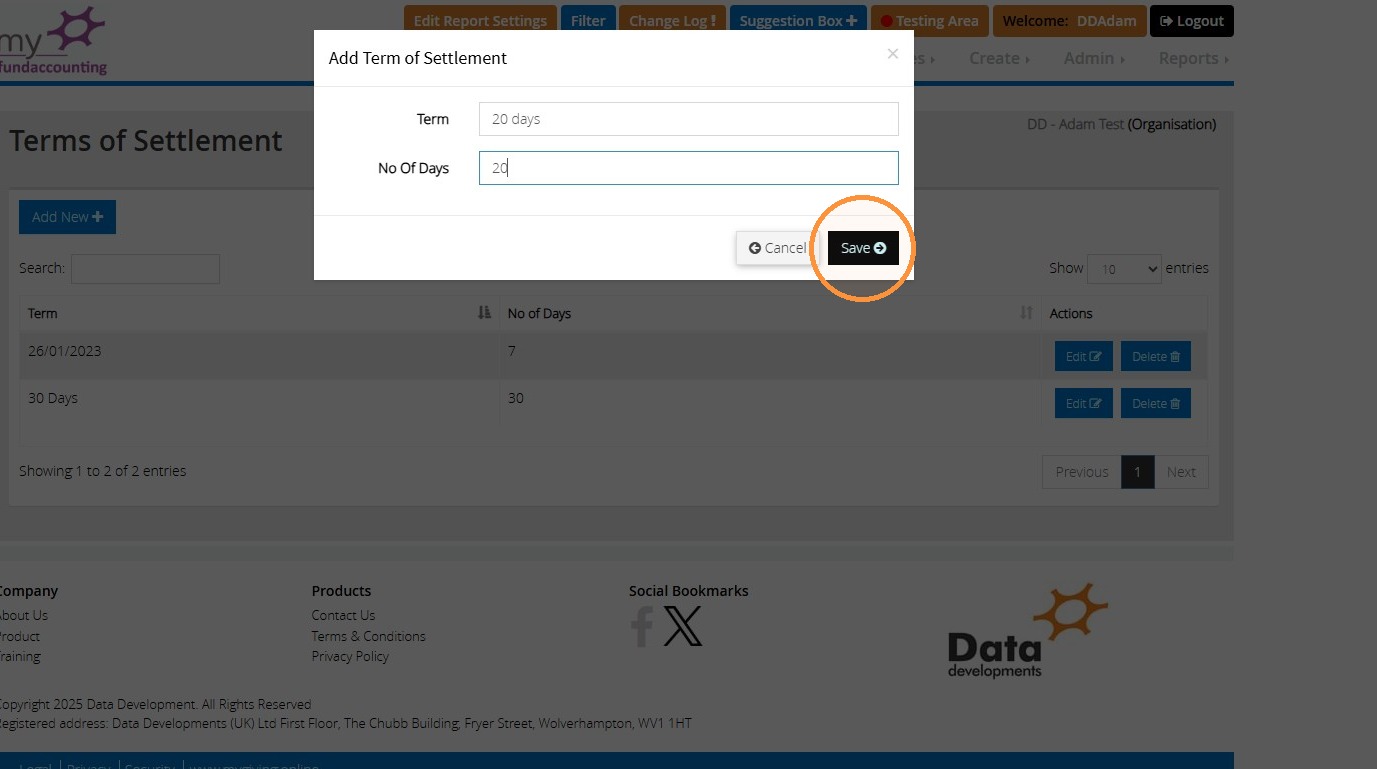
24. Enter the term you wish to create for your invoice.
">
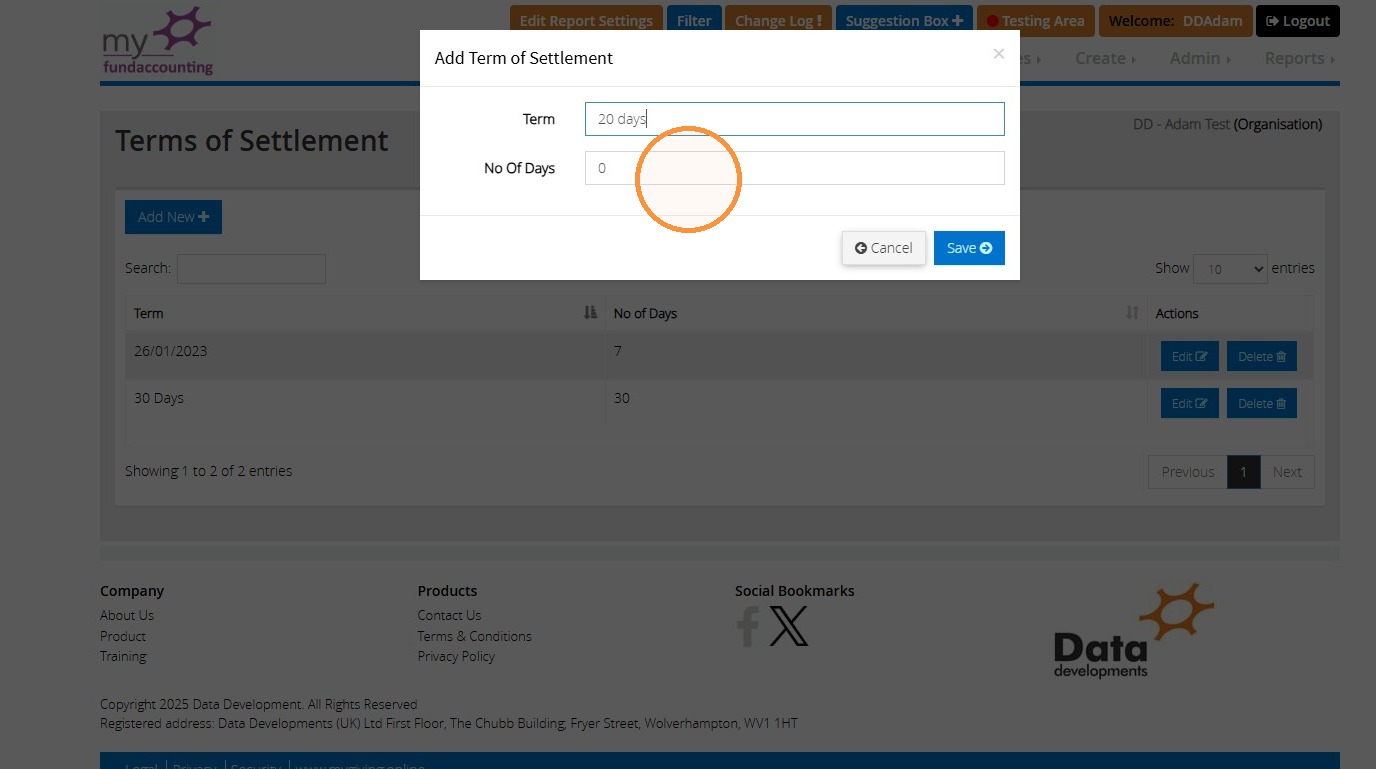
25. Choose the number of days this should be.
">
26. Then click "Save"
">
Recording Invoices
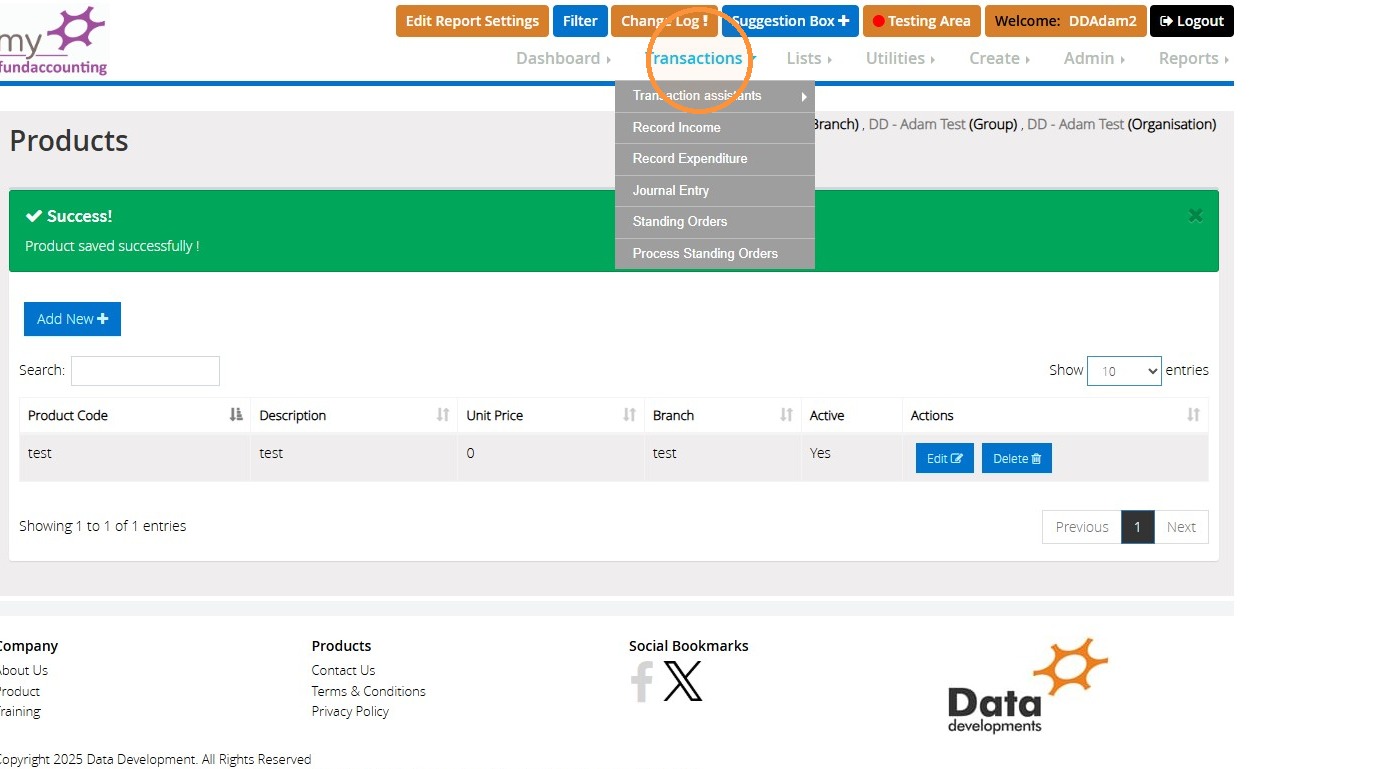
27. Click "Transactions"
">
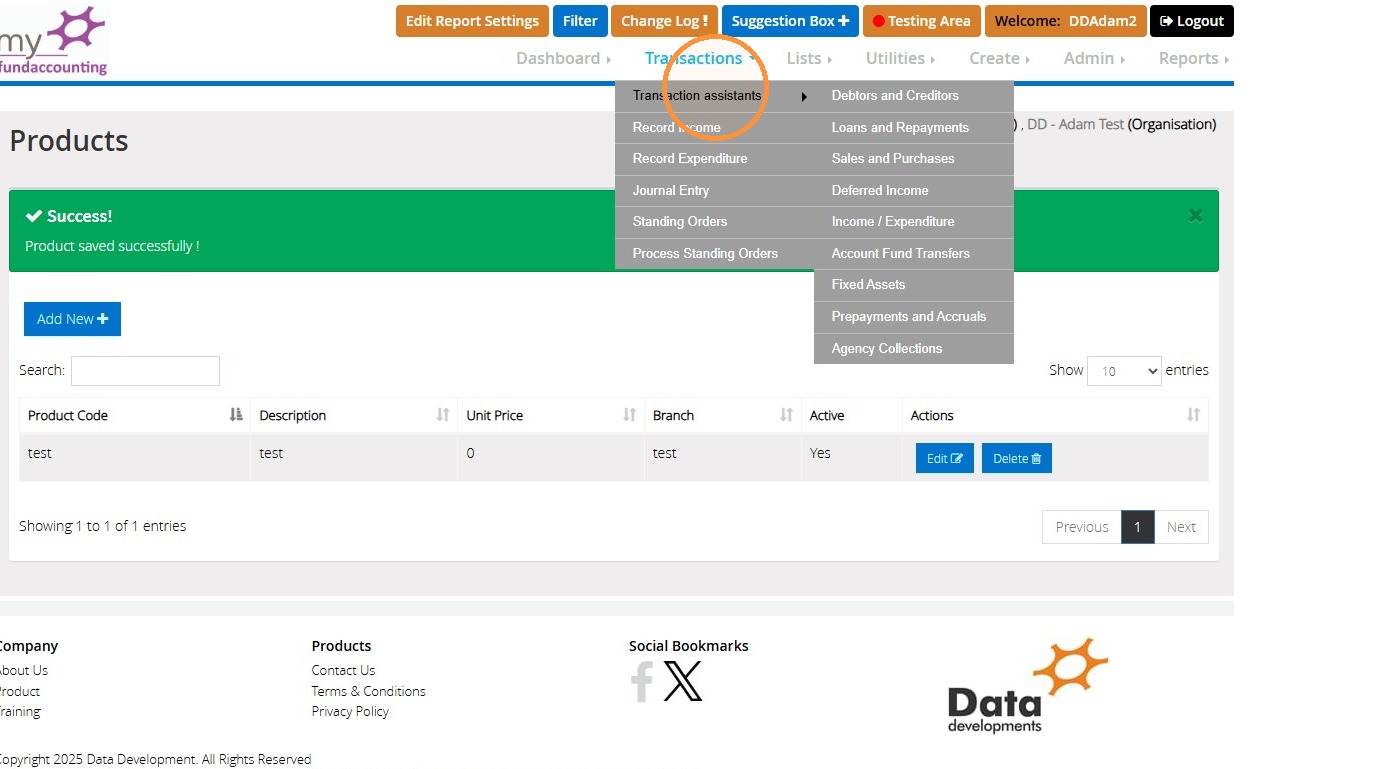
28. Click "Transaction assistants"
">
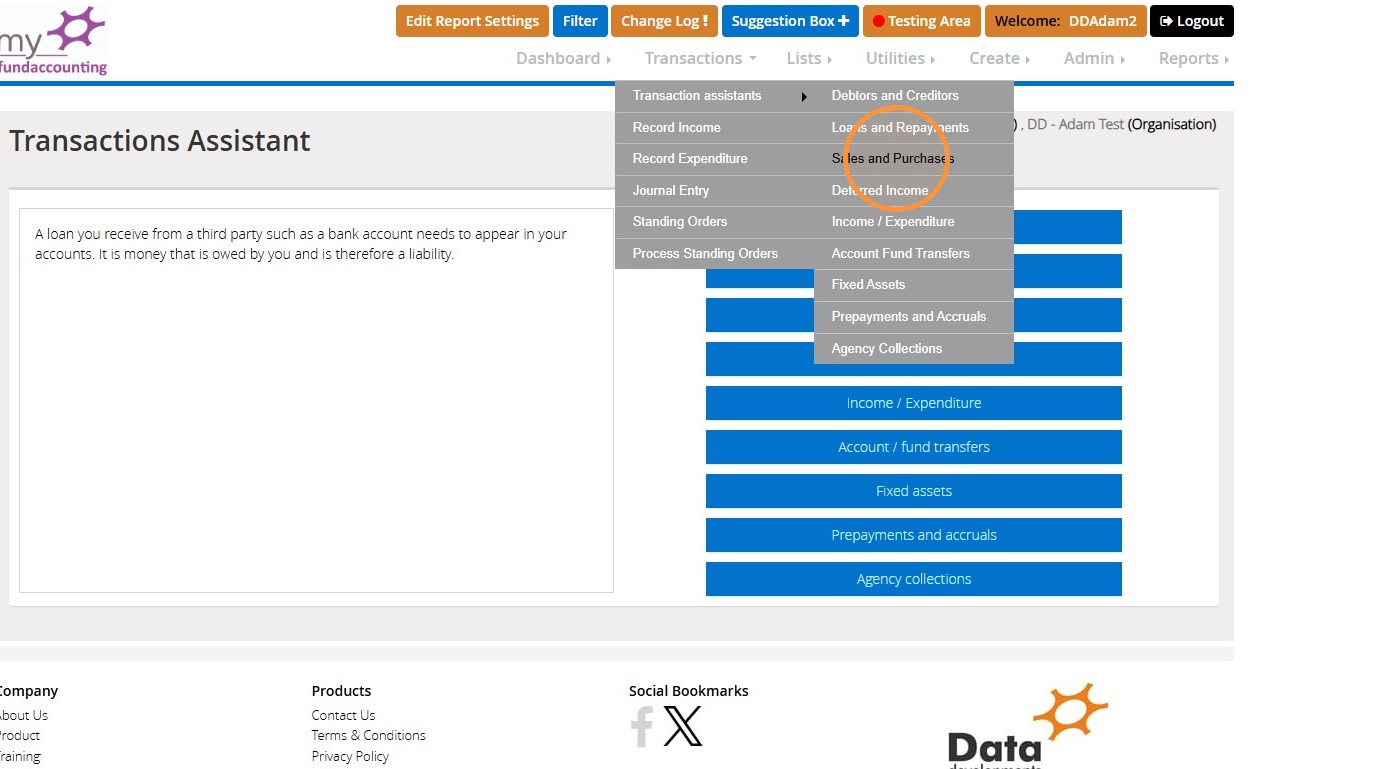
29. Click "Sales and Purchases"
">
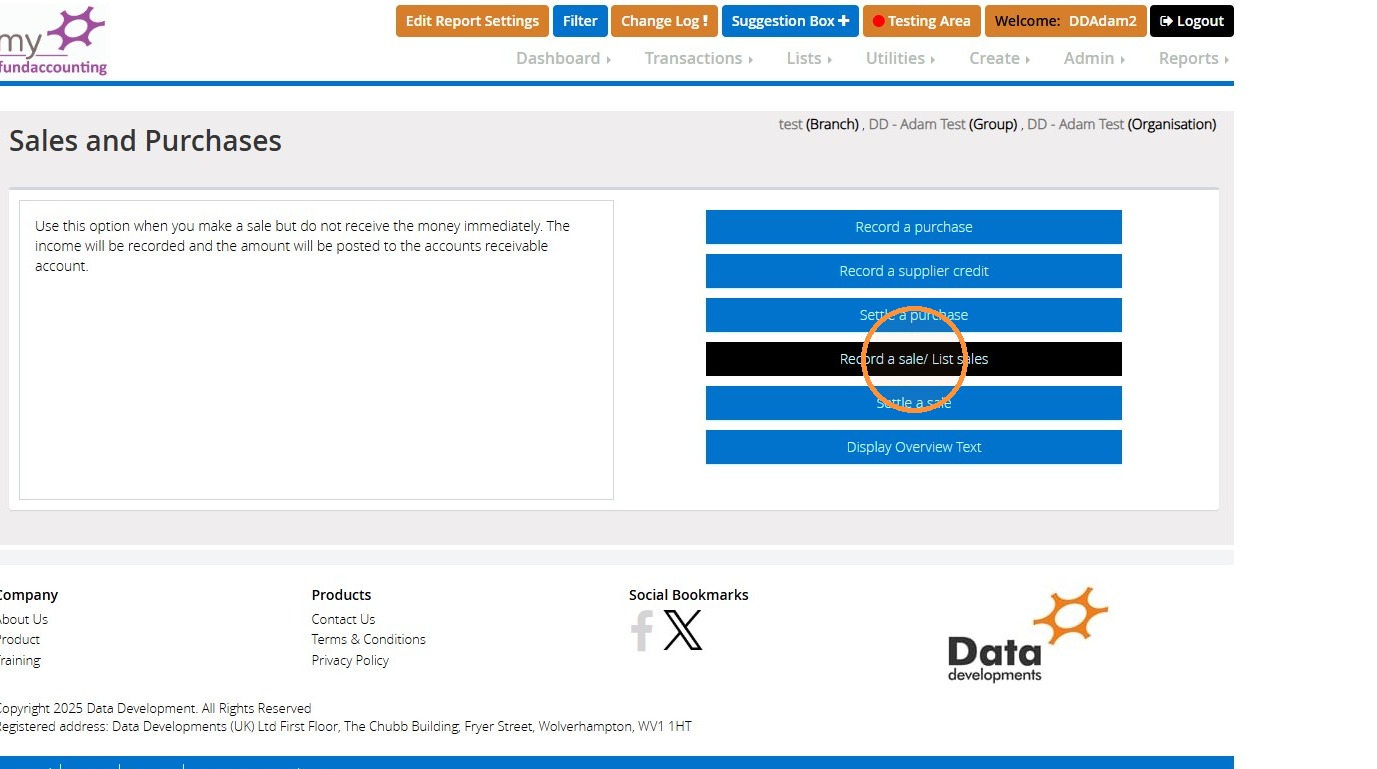
30. Click "Record a sale/ List sales"
">
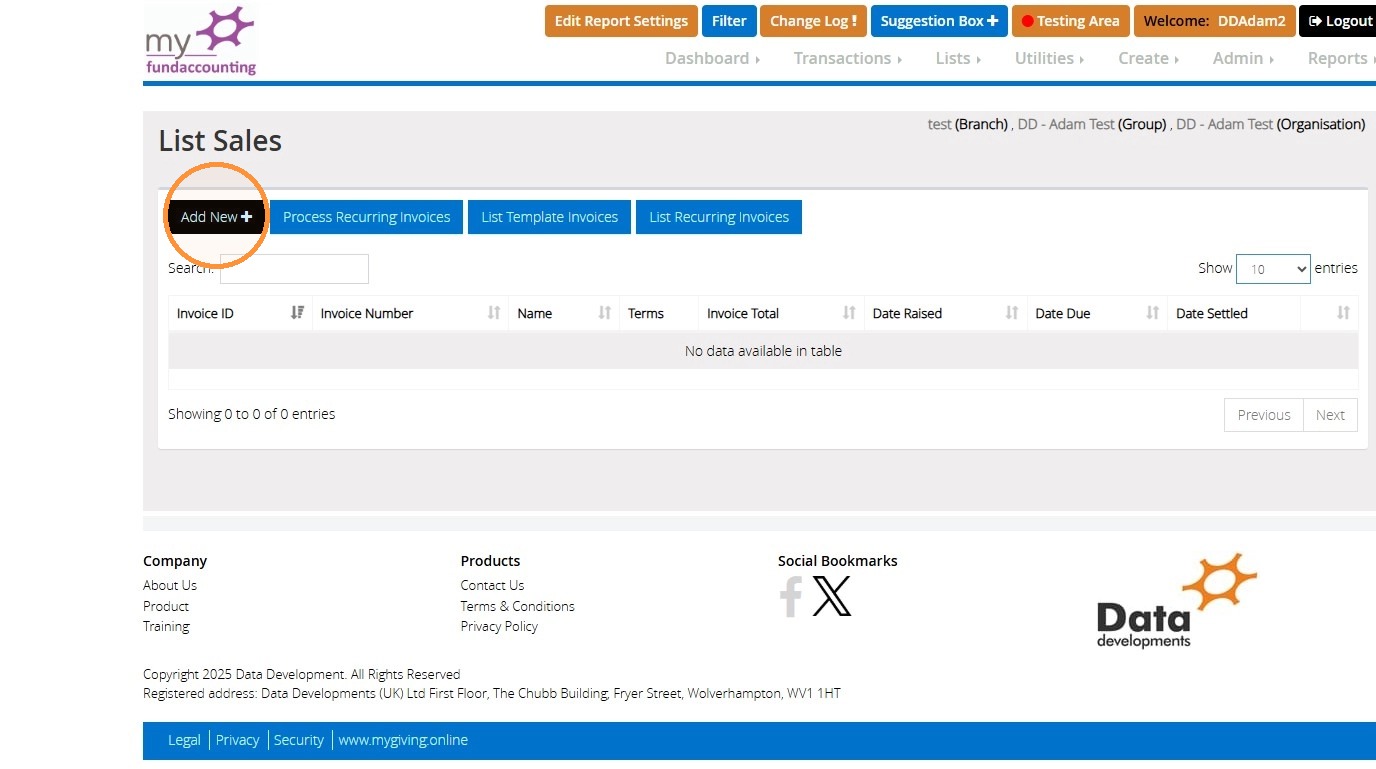
31. Click "Add New"
">
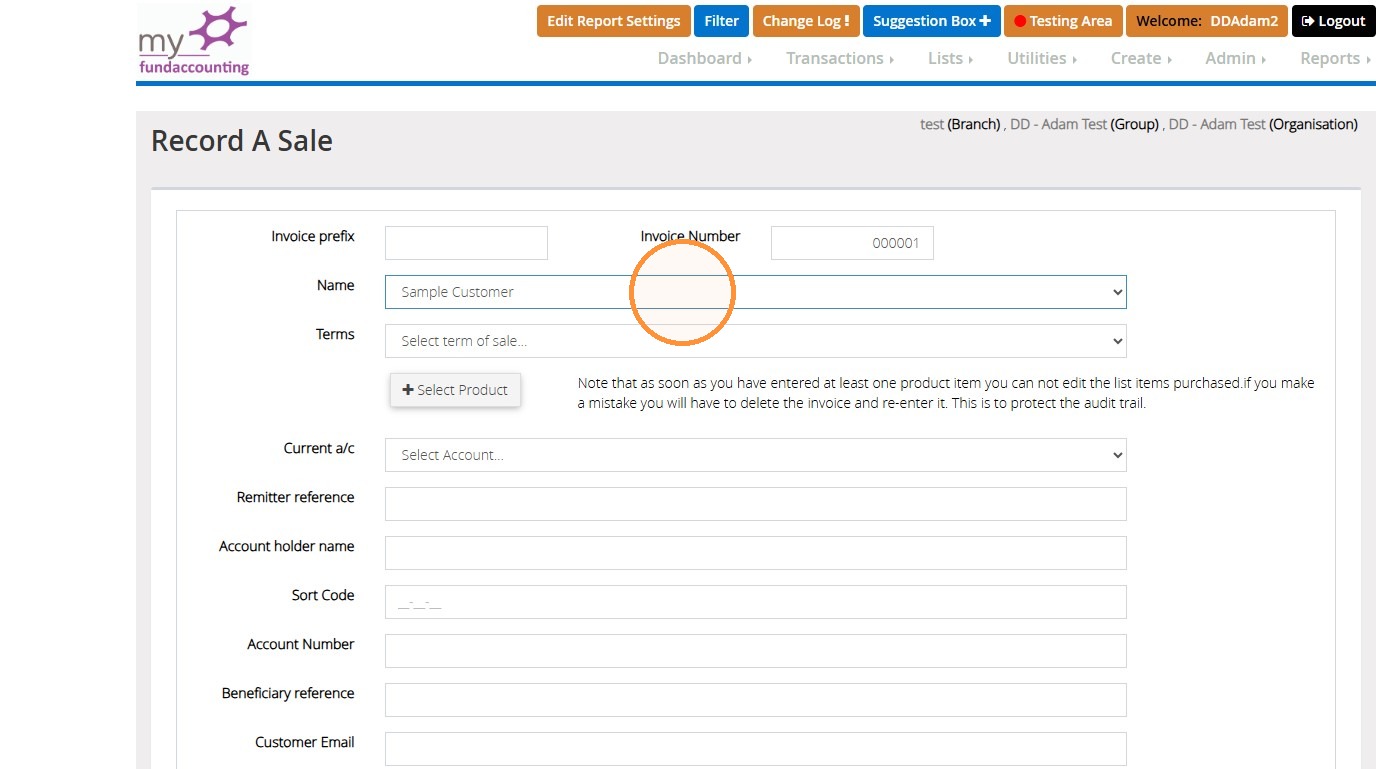
32. Select the "Customer" option.
">
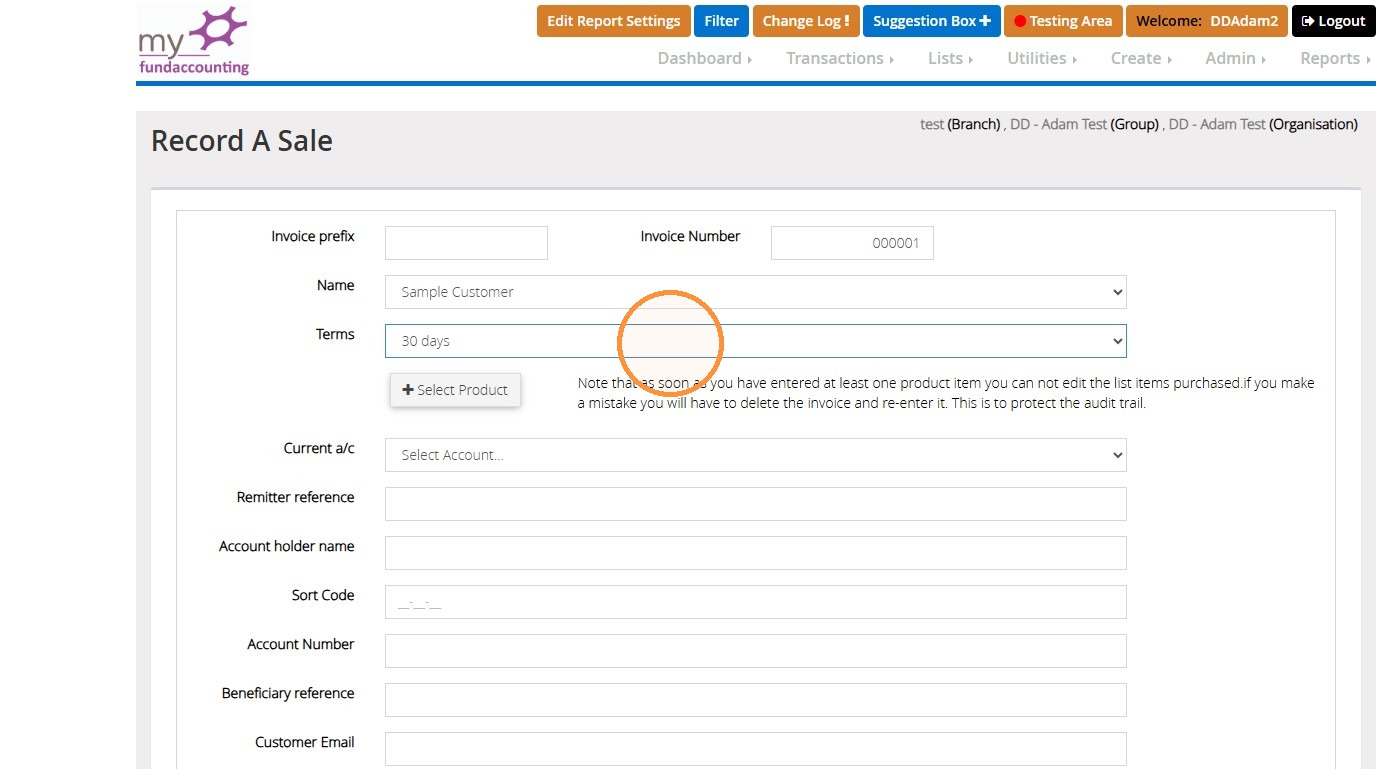
33. Select the "terms" option.
">
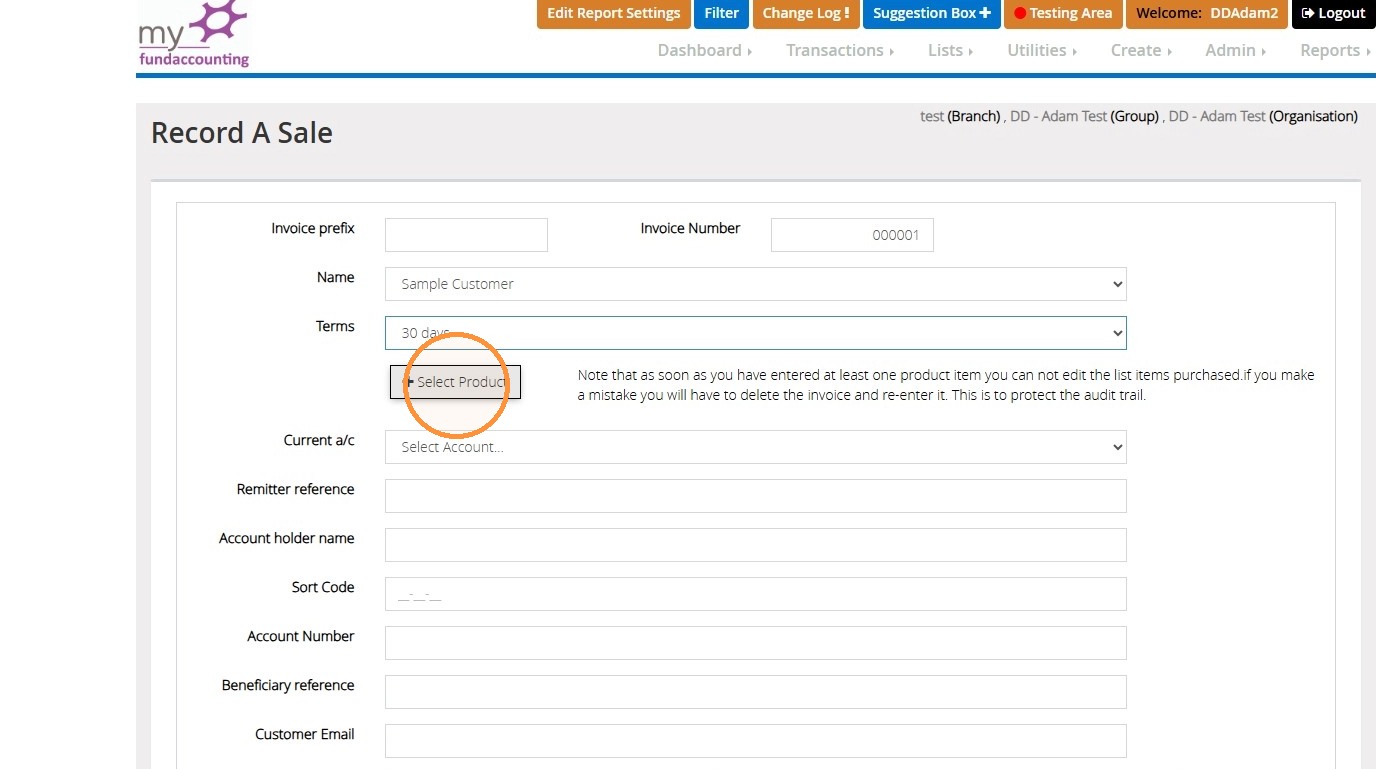
34. Click "Select Product"
">
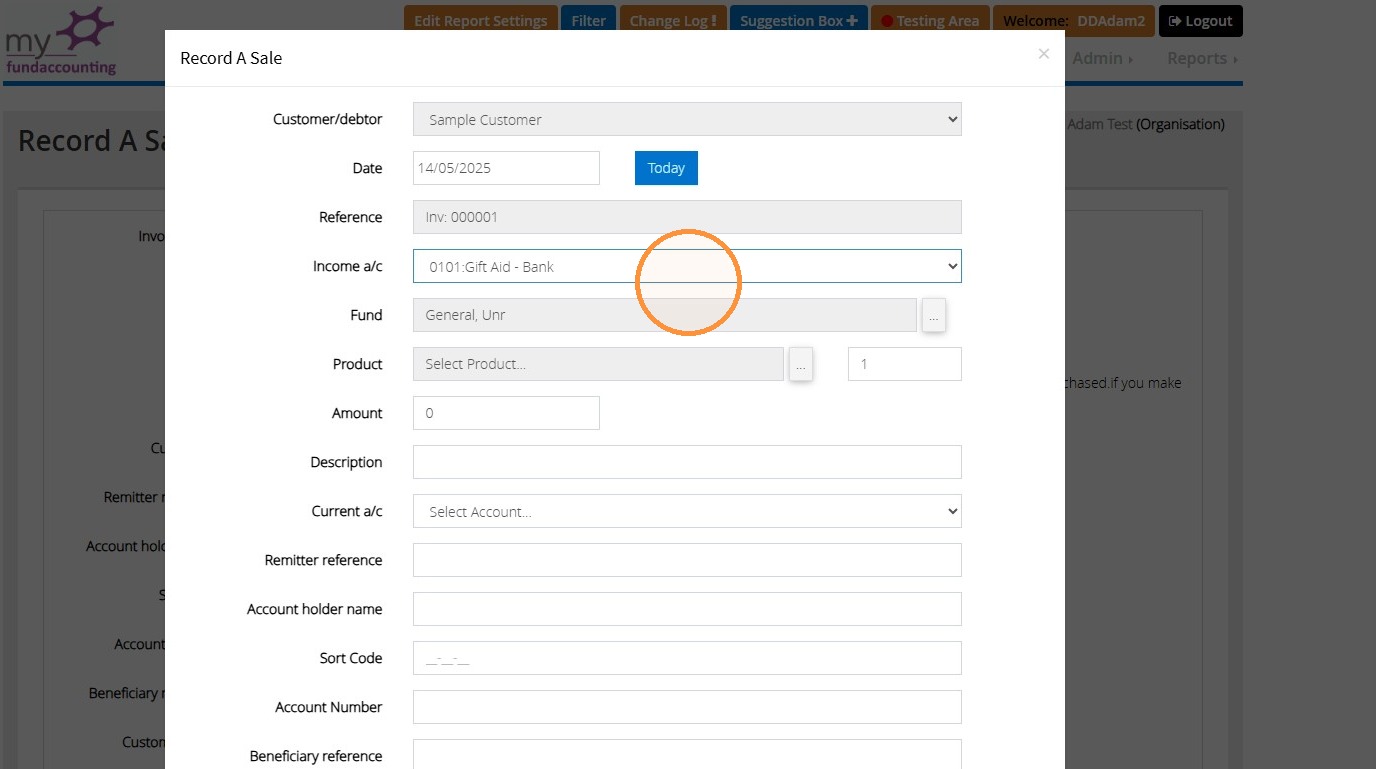
35. Select the "Income a/c" option.
">
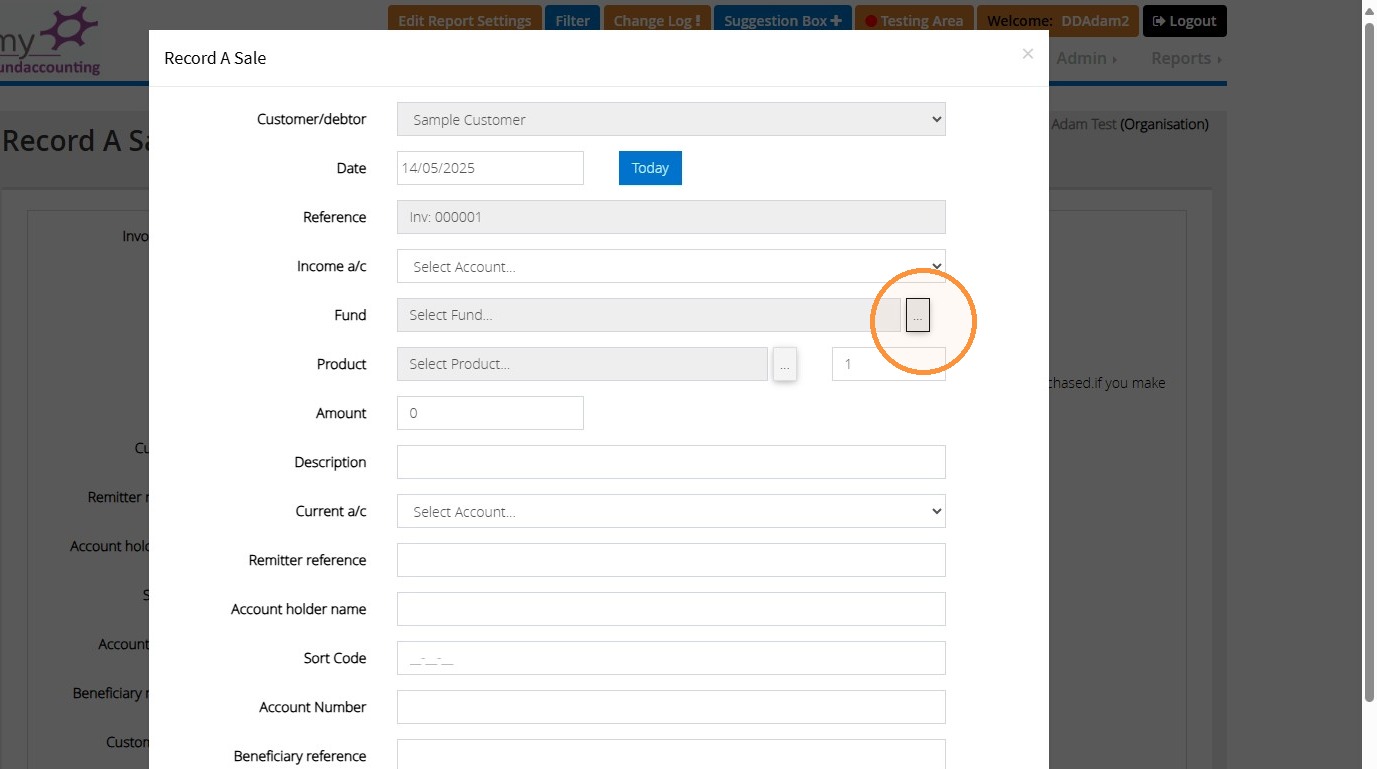
36. Click the square with the ellipses in the funds row to select the fund this should relate to
">
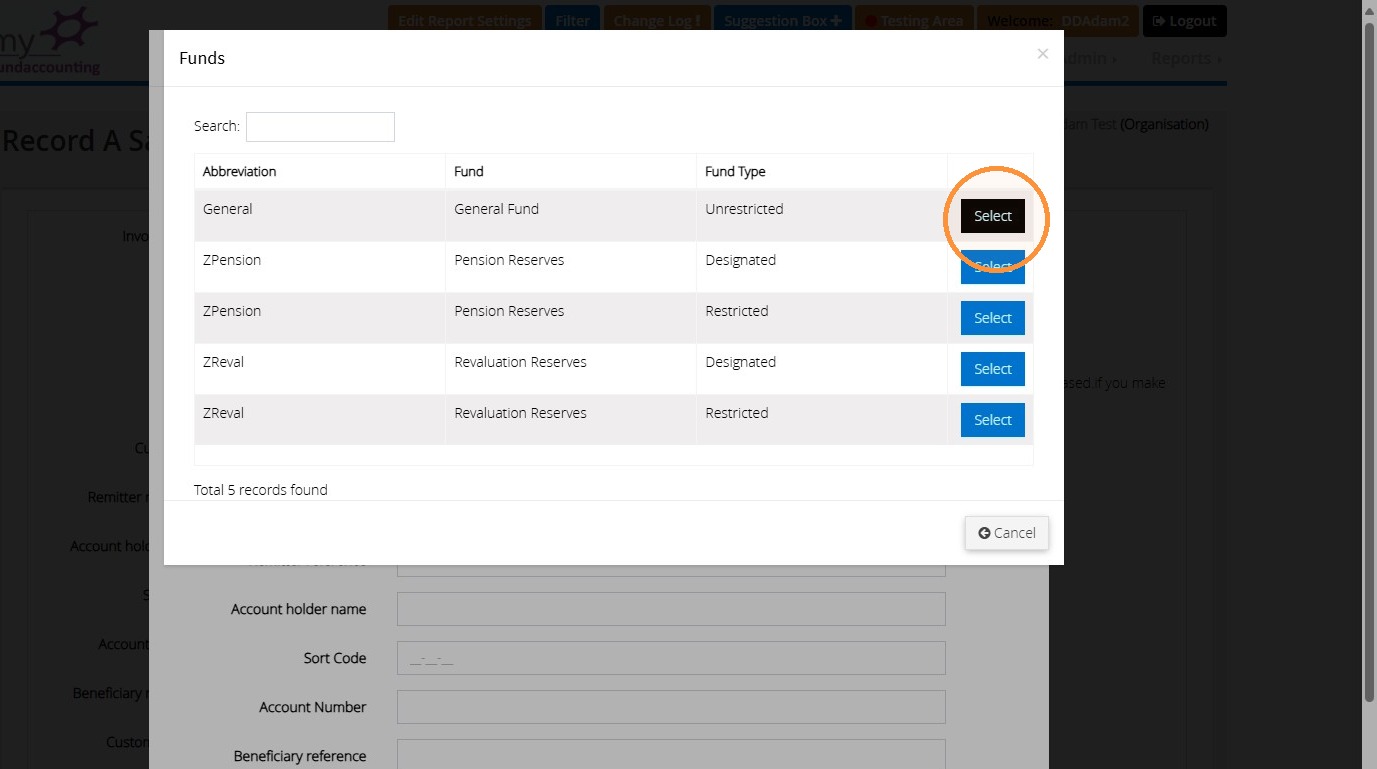
37. Select the desired fund.
">
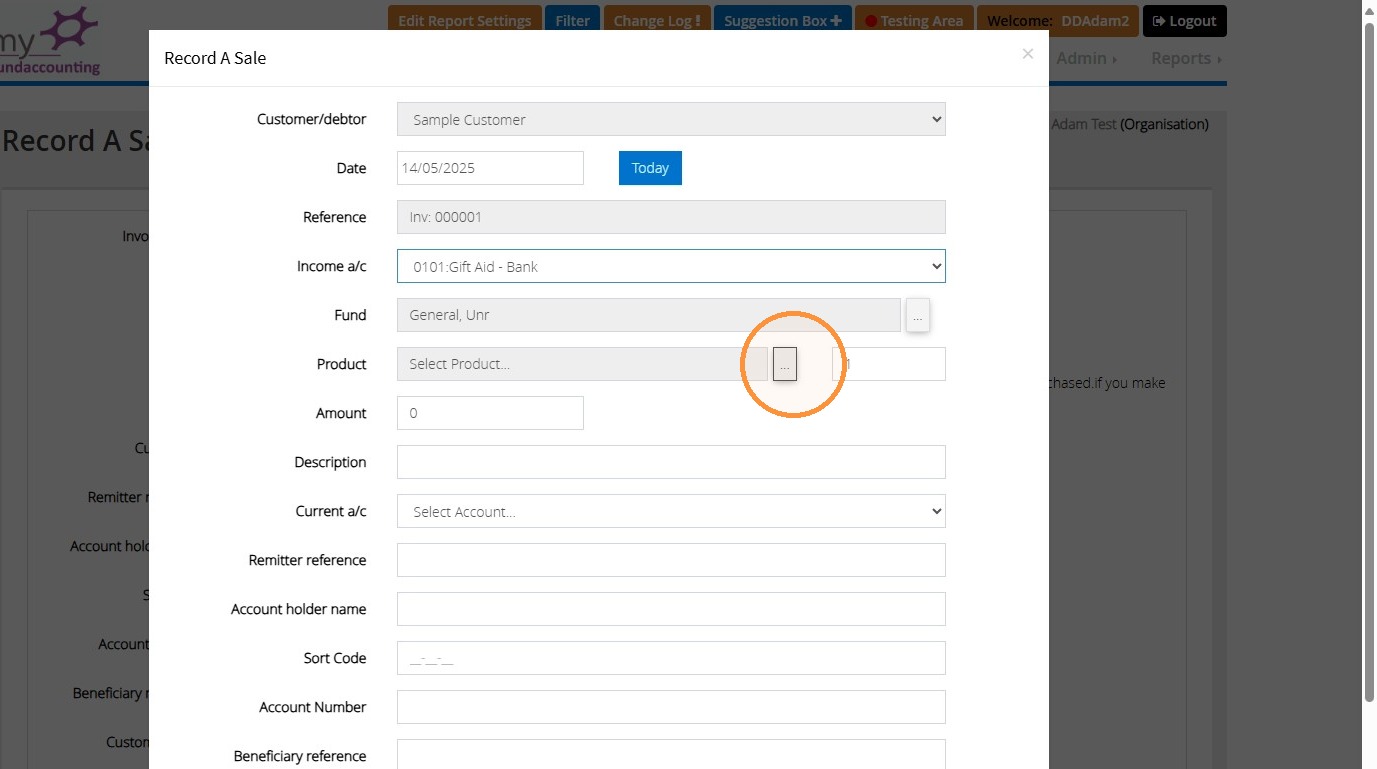
38. Click "..." in the product row to choose the product.
">
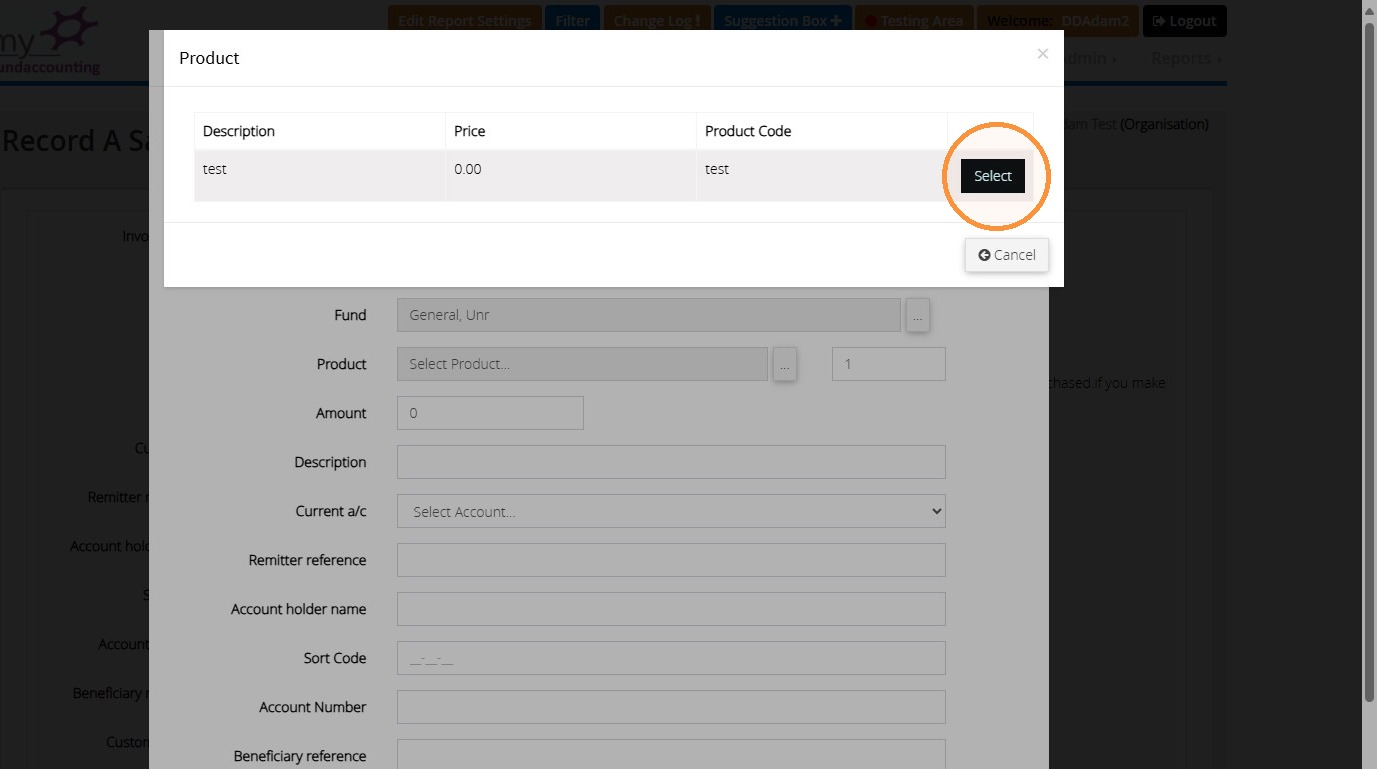
39. Select the product.
">
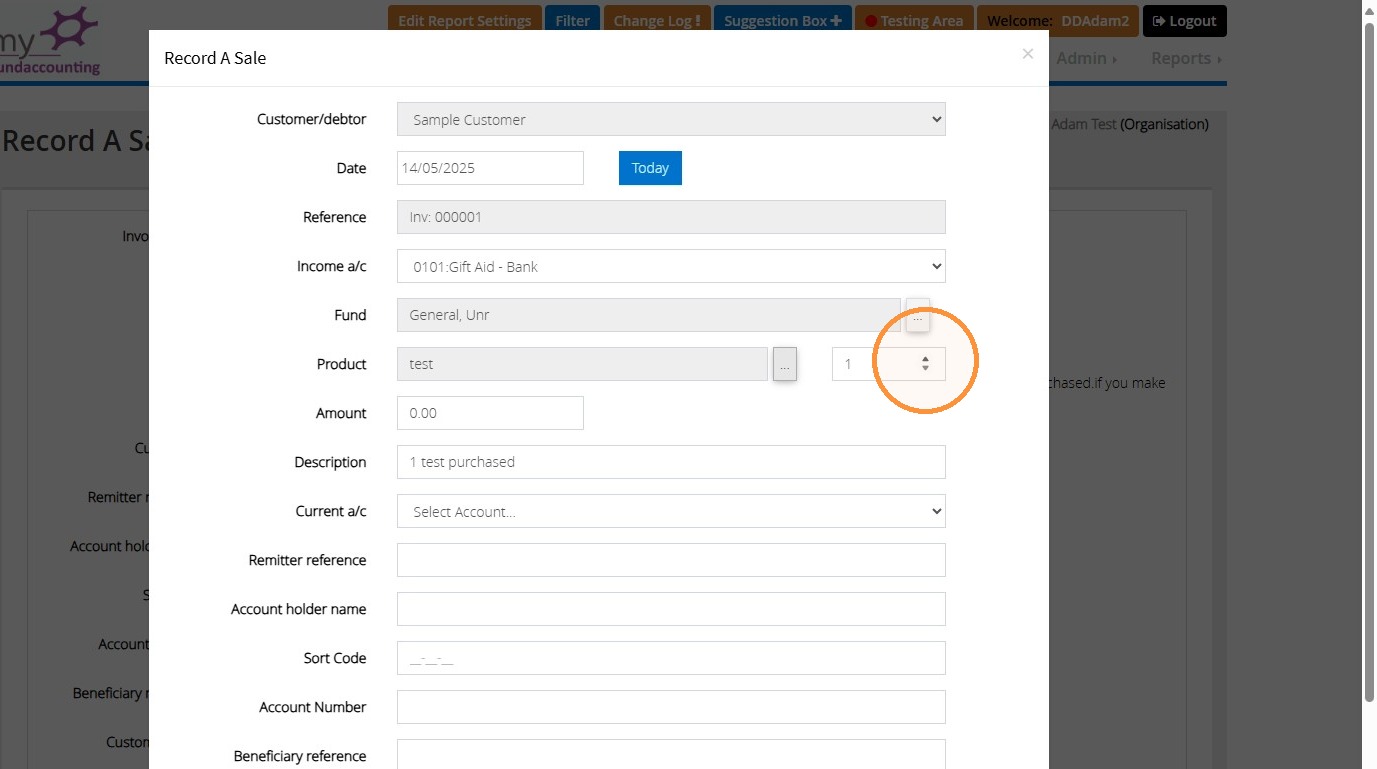
40. You may adjust the quantity of the product using the arrows highlighted here.
">
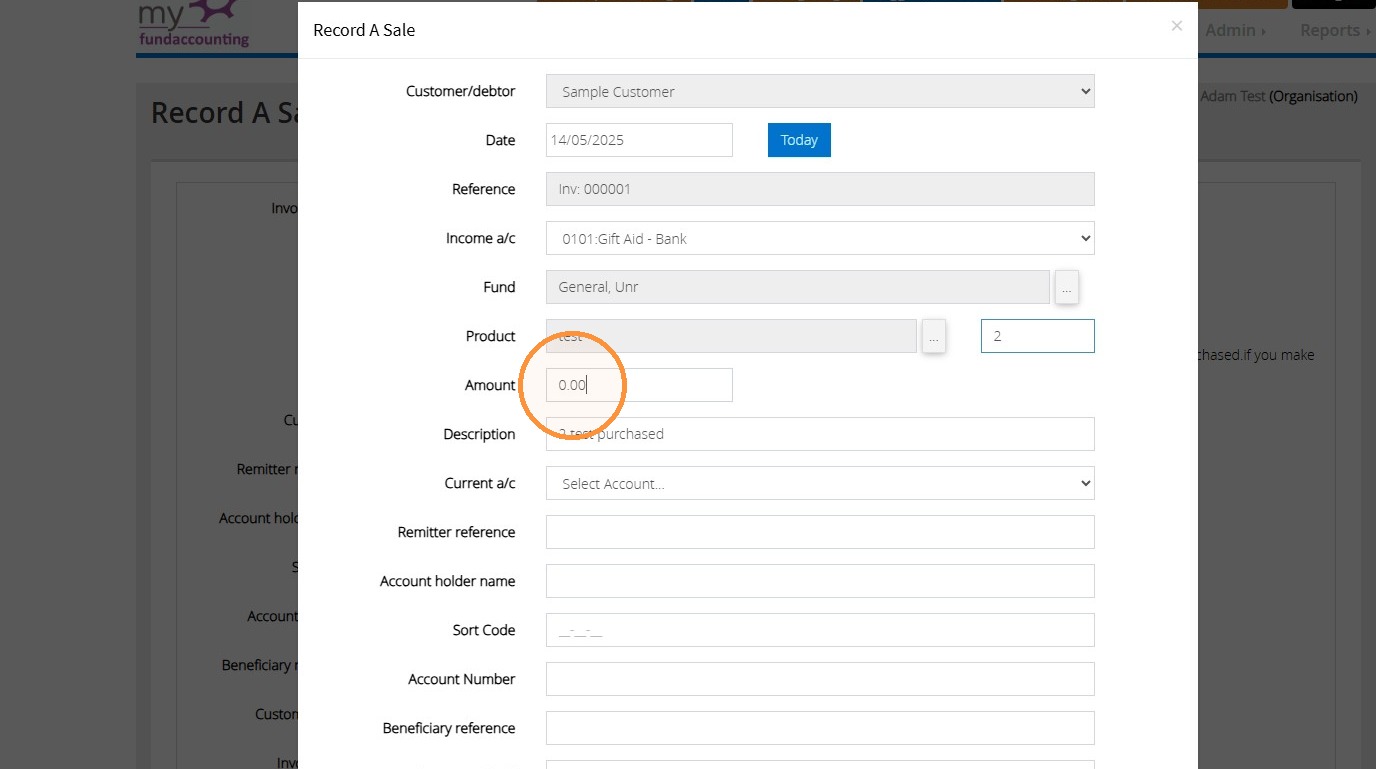
41. If the product amount wasn't prepopulated when you created your product, you may enter your own amount.
">
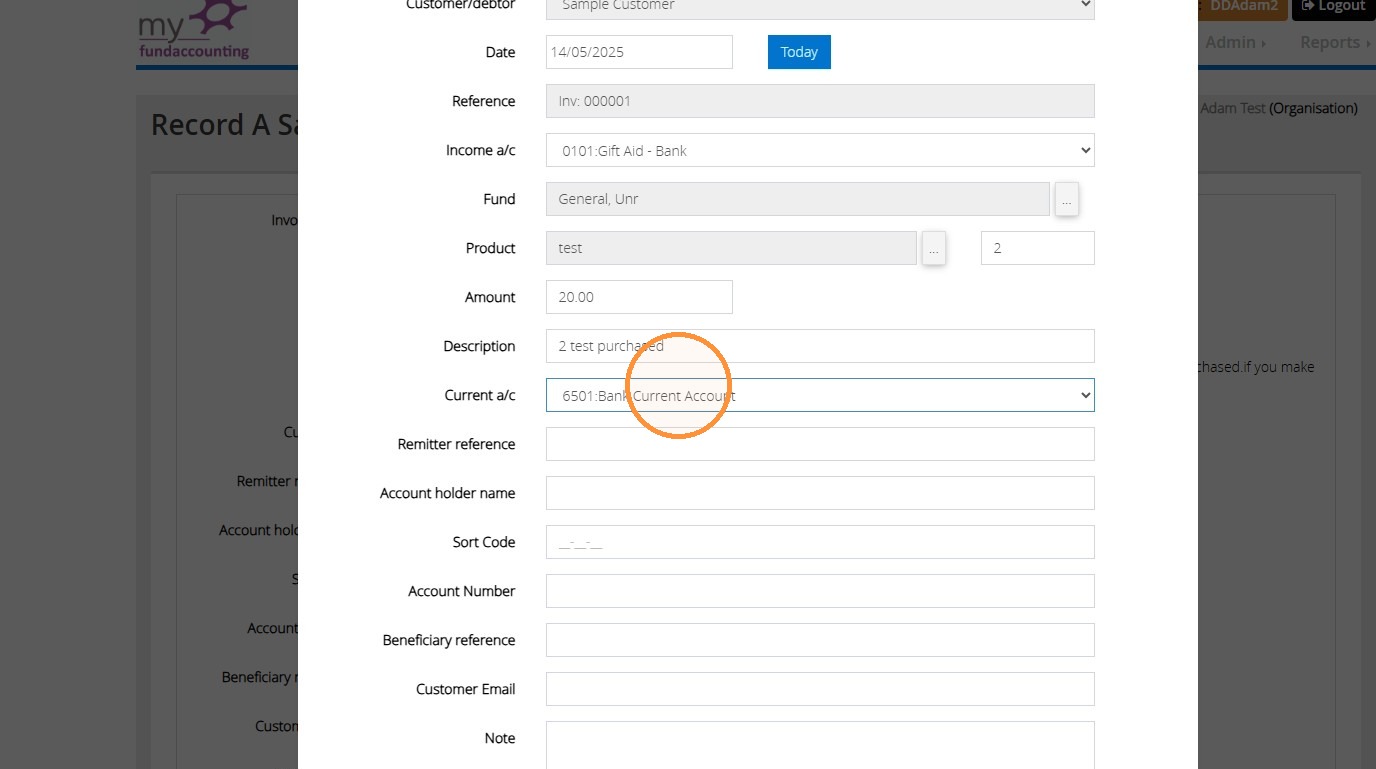
42. Afterwards, select the bank account this would relate to in the system.
">
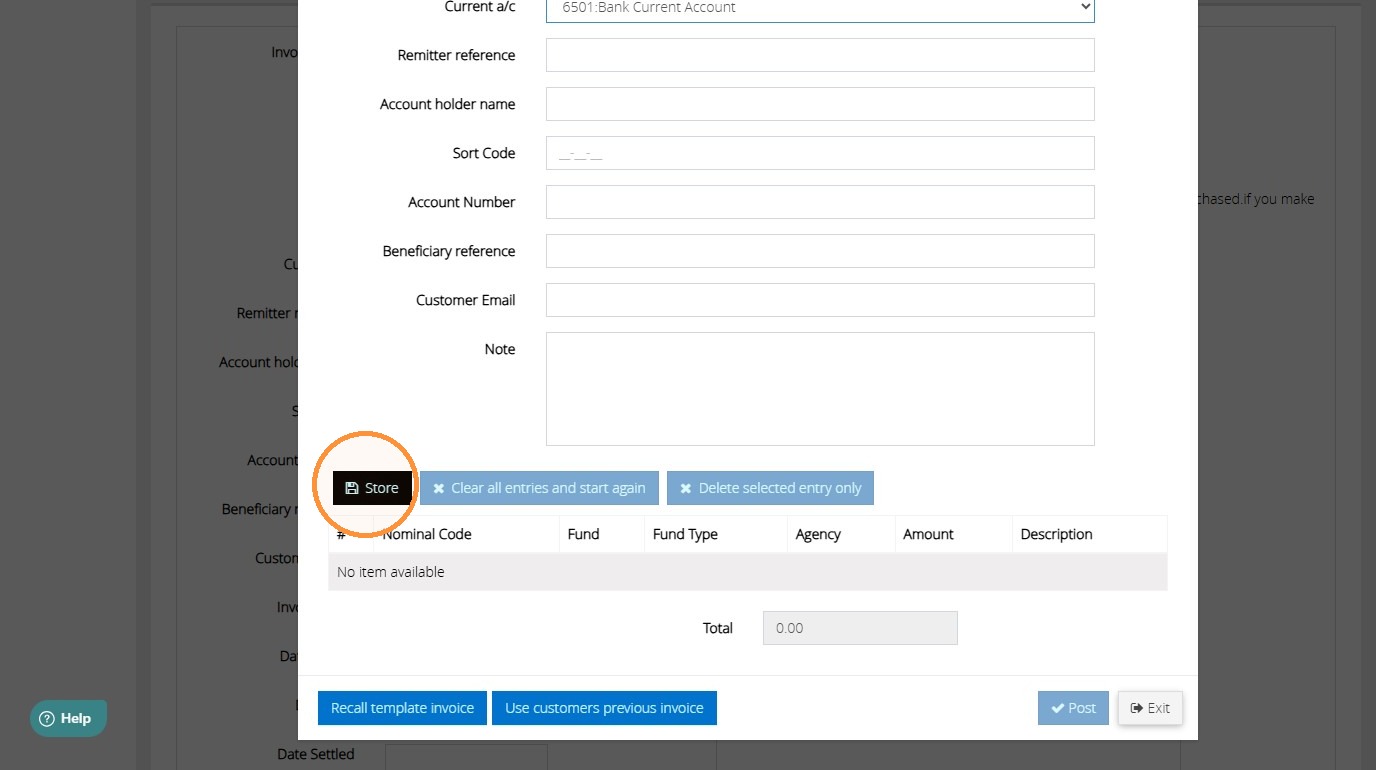
43. Then click "Store"
">
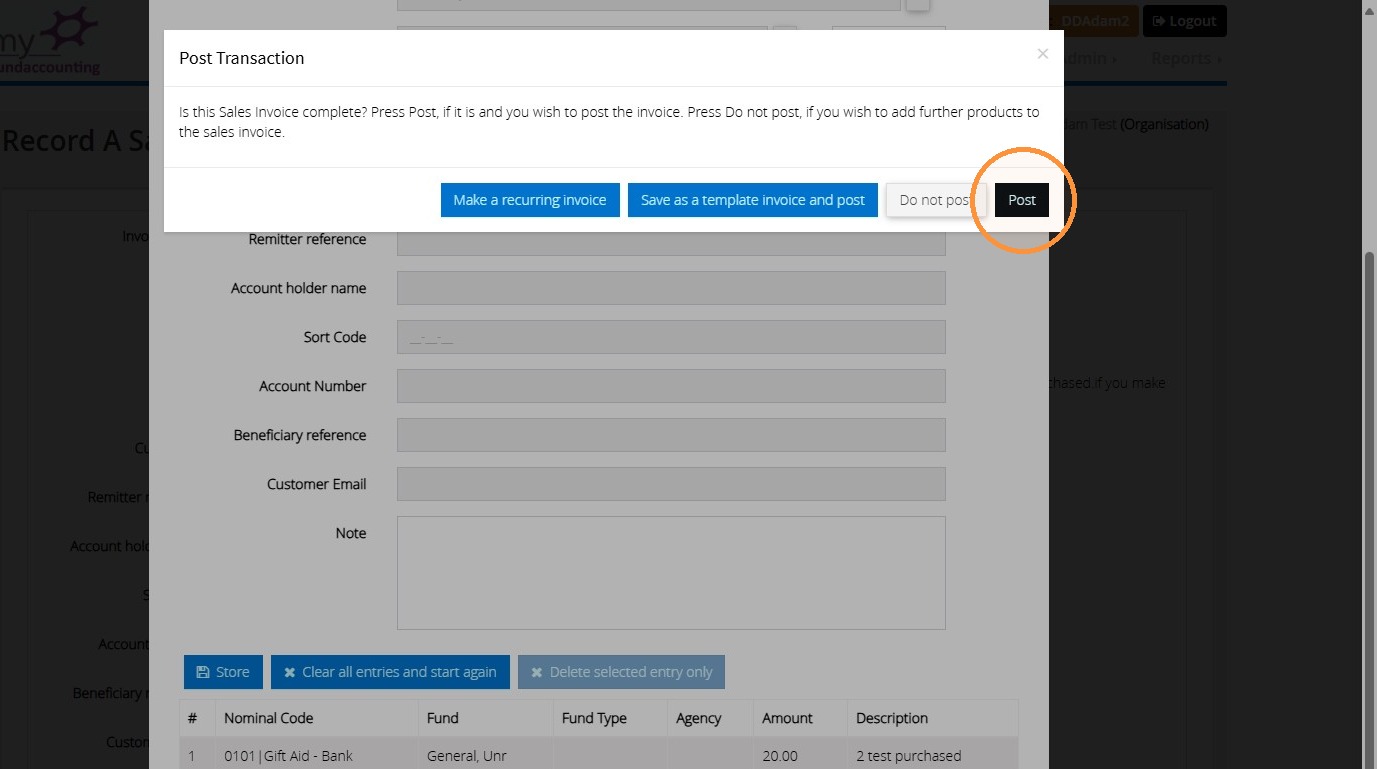
44. Choose "Post".
">
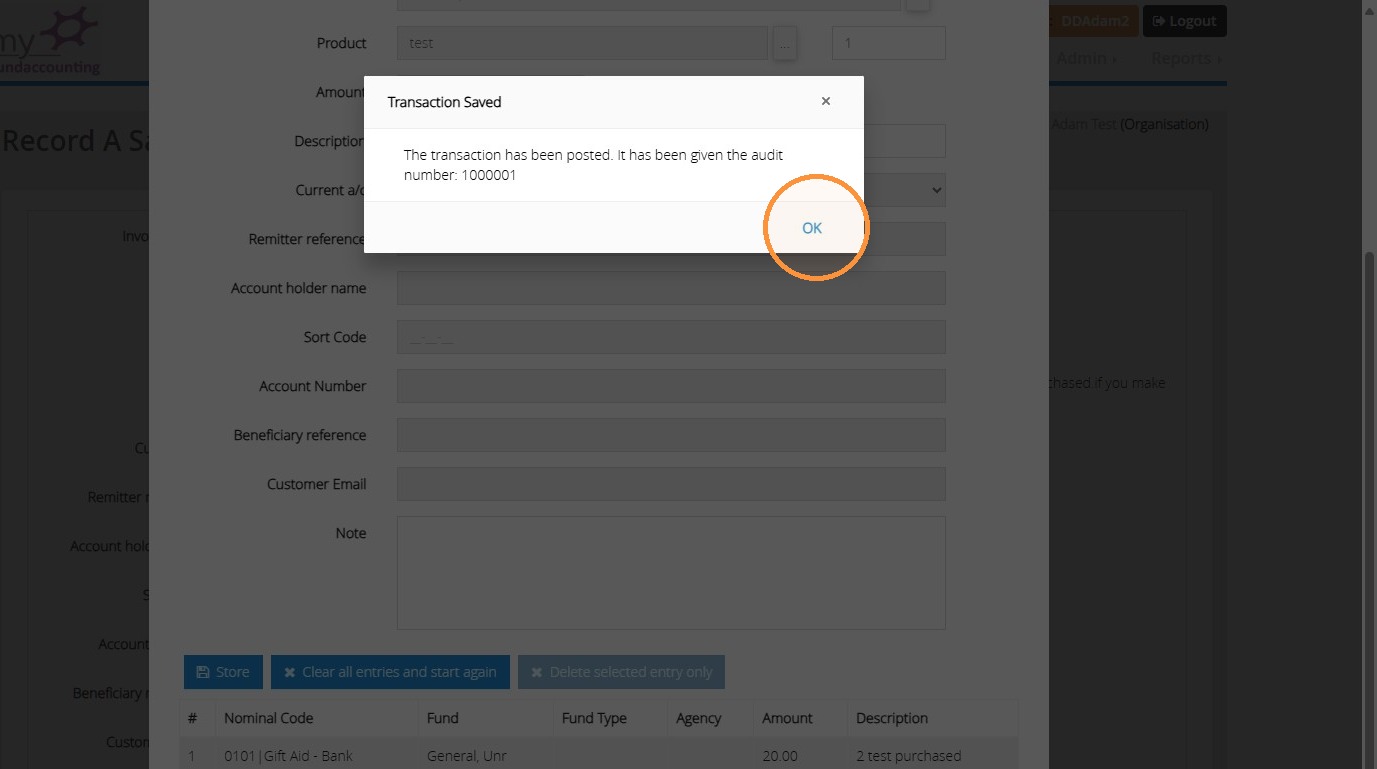
45. You will be provided with an audit number for your records. Select 'OK' to confirm.
">
How to produce the Invoice
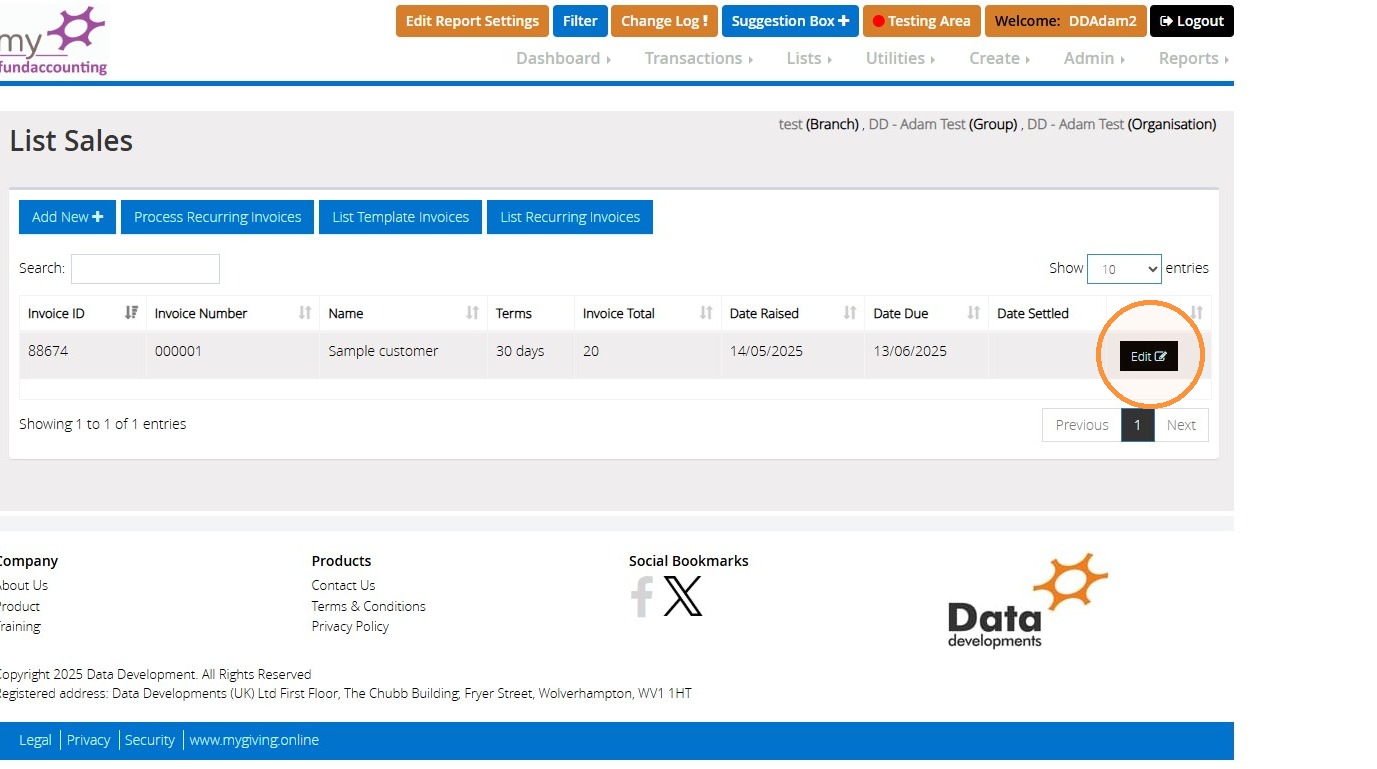
46. Click "Edit" on the invoice you have recorded.
">
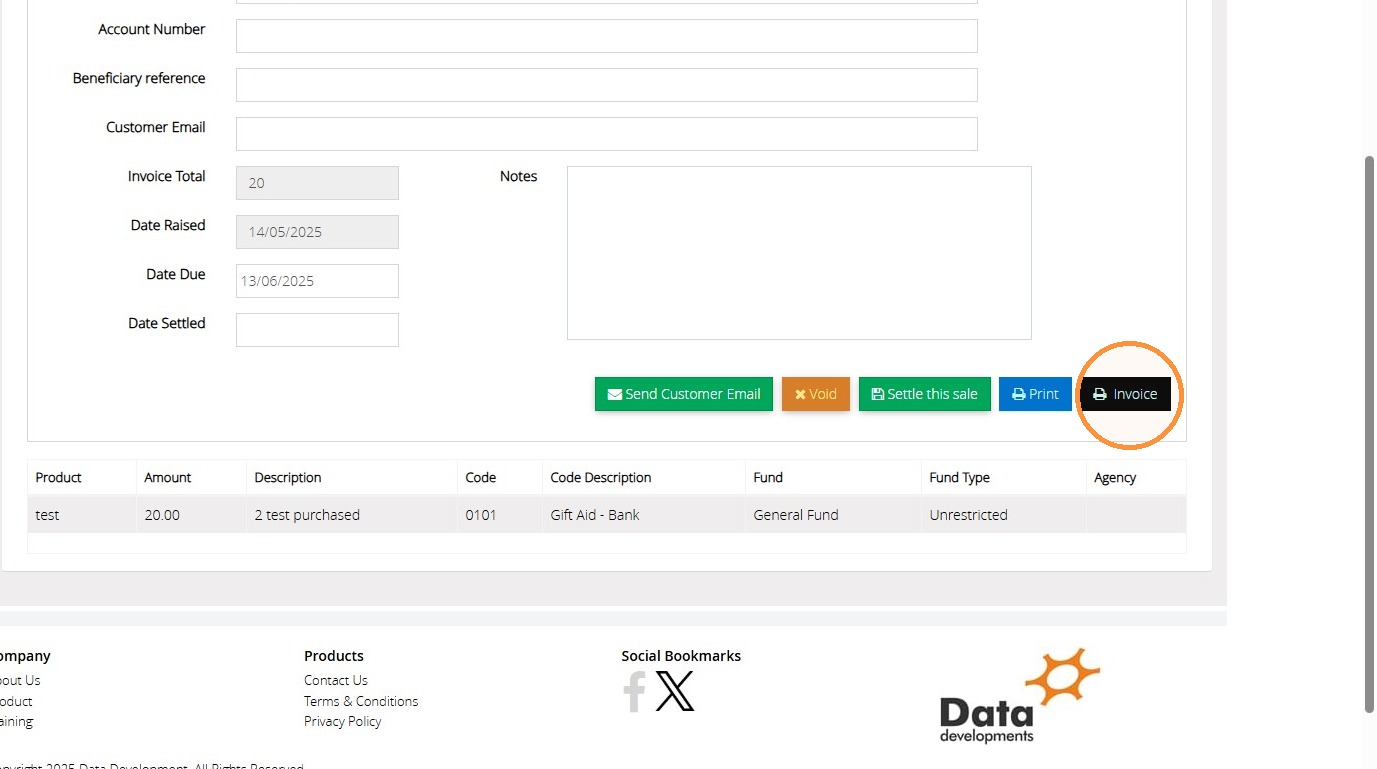
47. Click "Invoice"
">
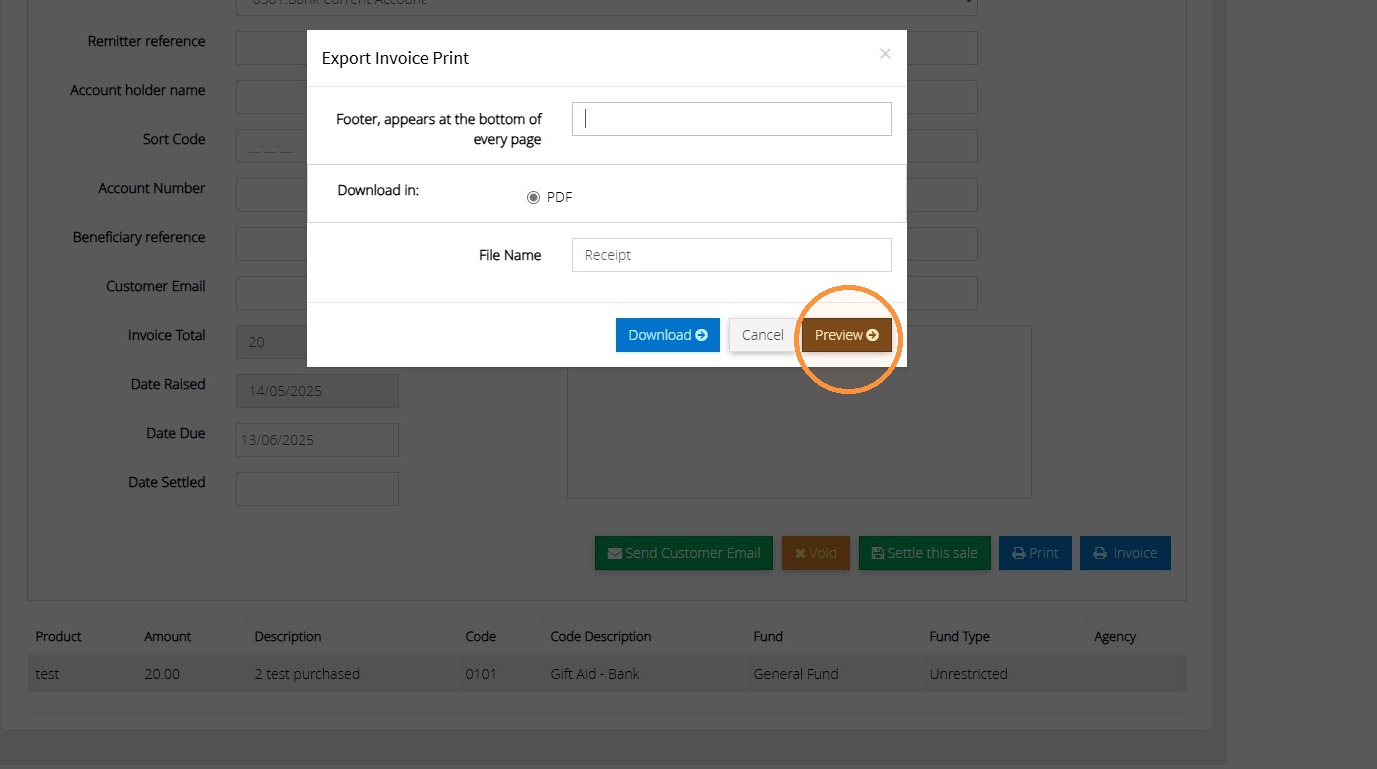
48. Click "Preview"
">
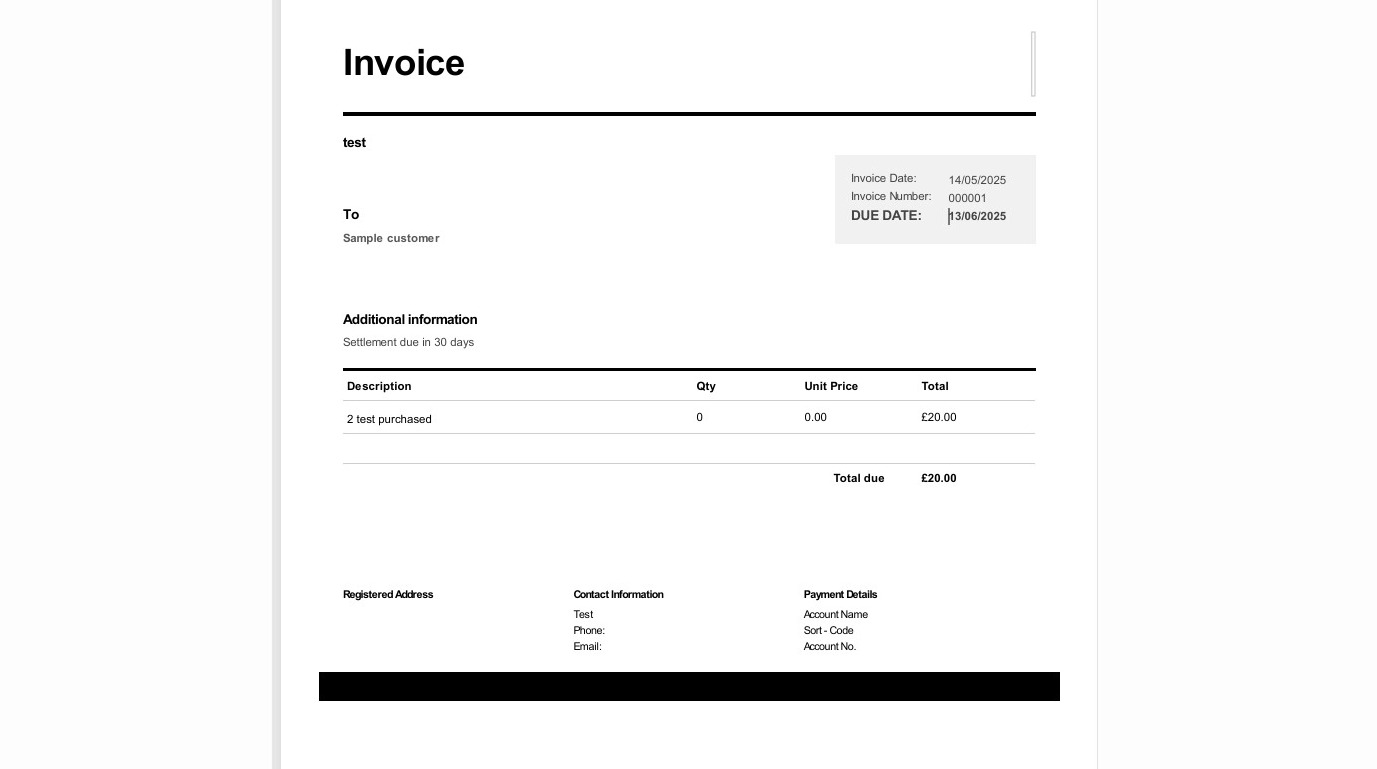
49. This is how the invoice will show for you to send to the customer.
">
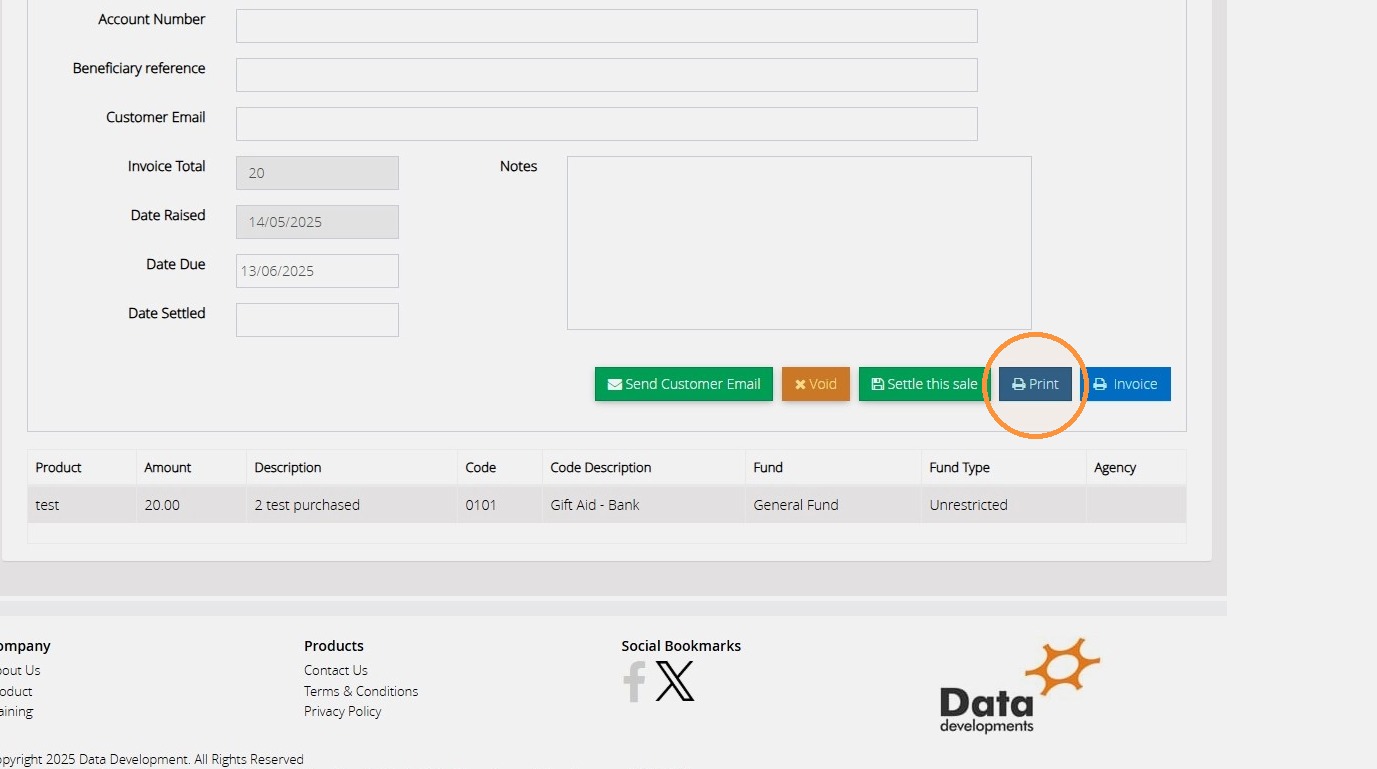
50. Clicking "Print" instead allows you to get a copy with an audit number for your records.
">
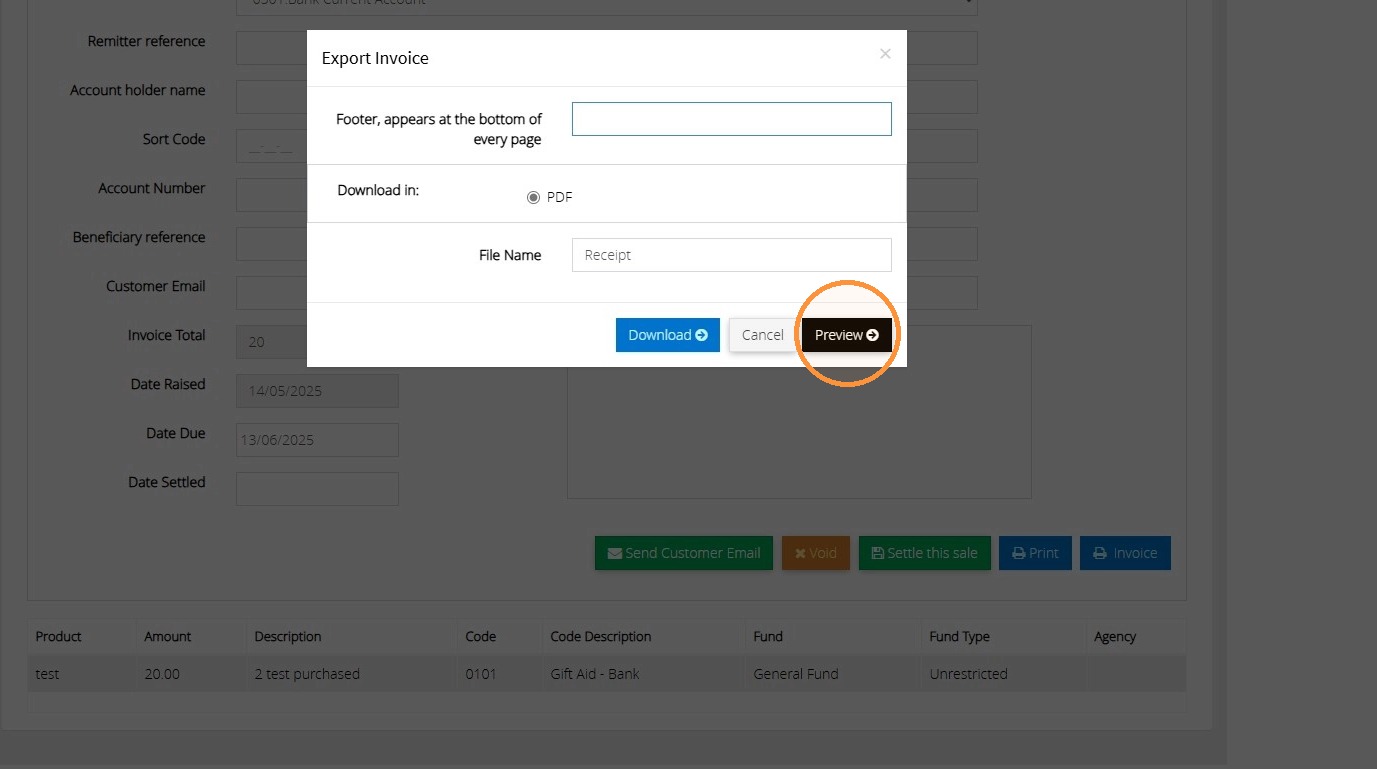
51. Click "Preview"
">
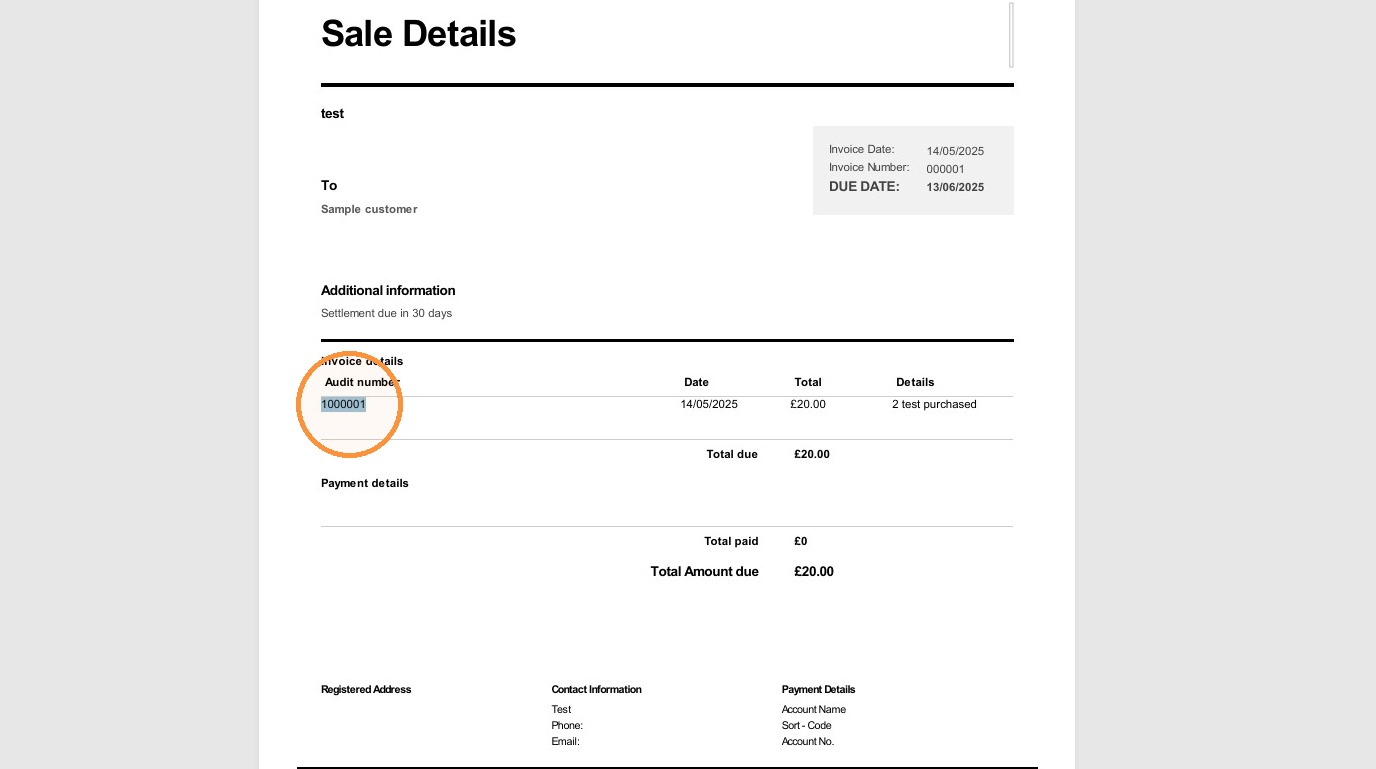
52. You will then see a copy with the audit number.
">
How to settle a sale
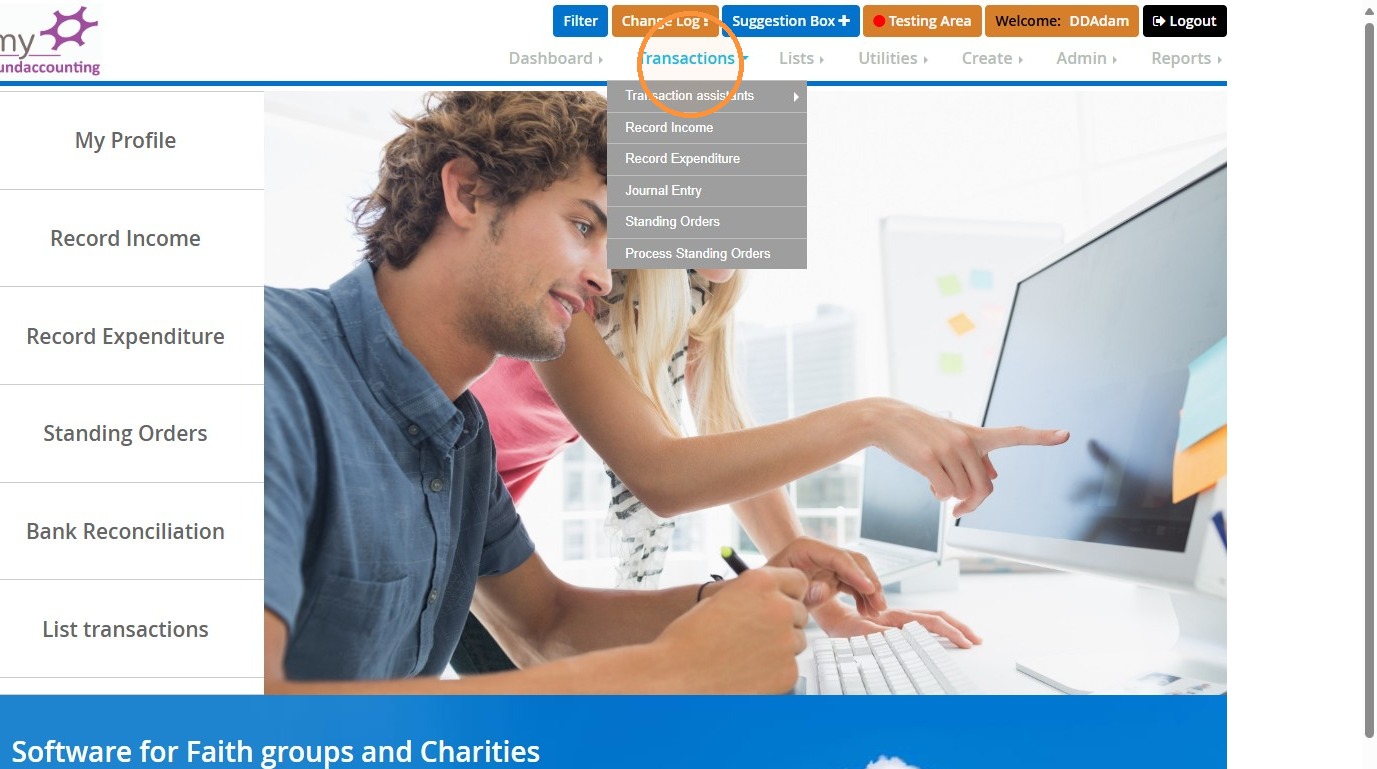
53. Click "Transactions"
">
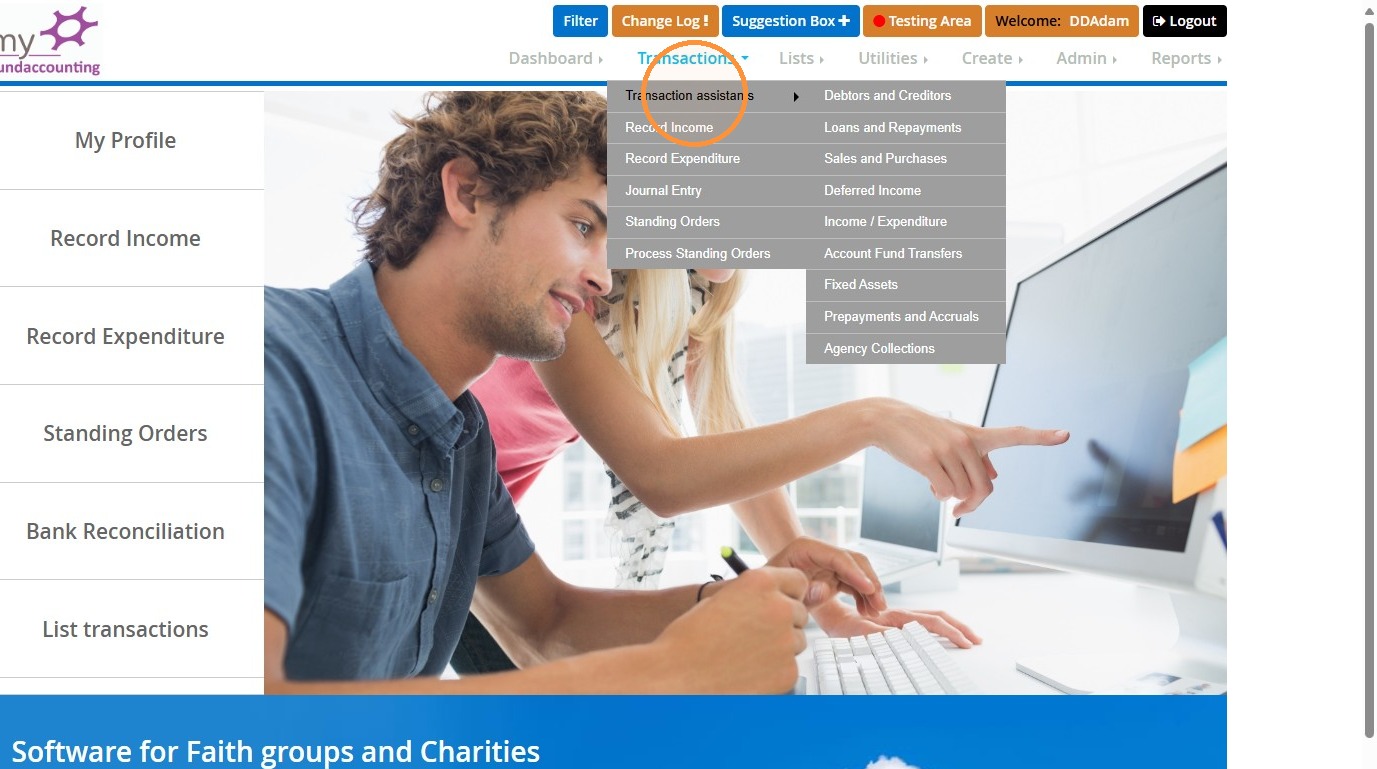
54. Click "Transaction assistants"
">
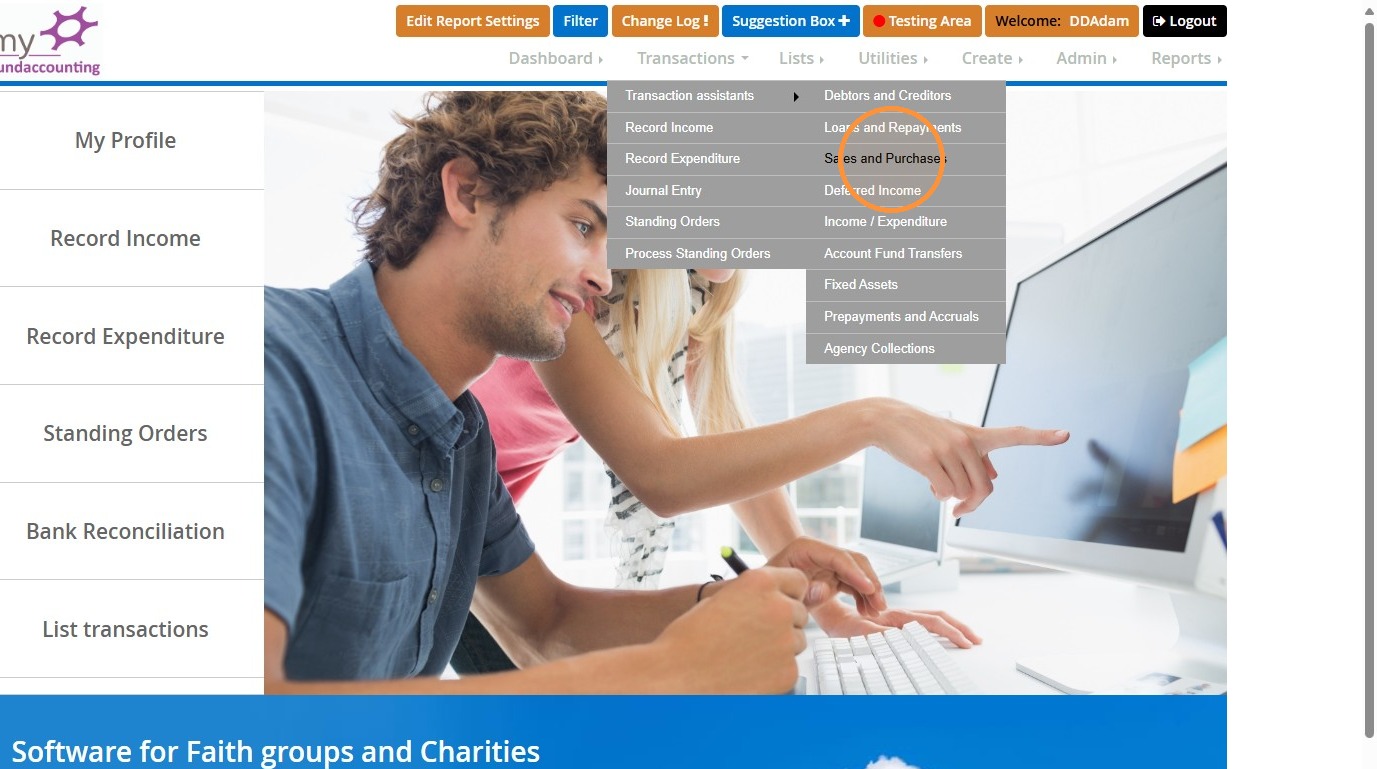
55. Click "Sales and Purchases"
">
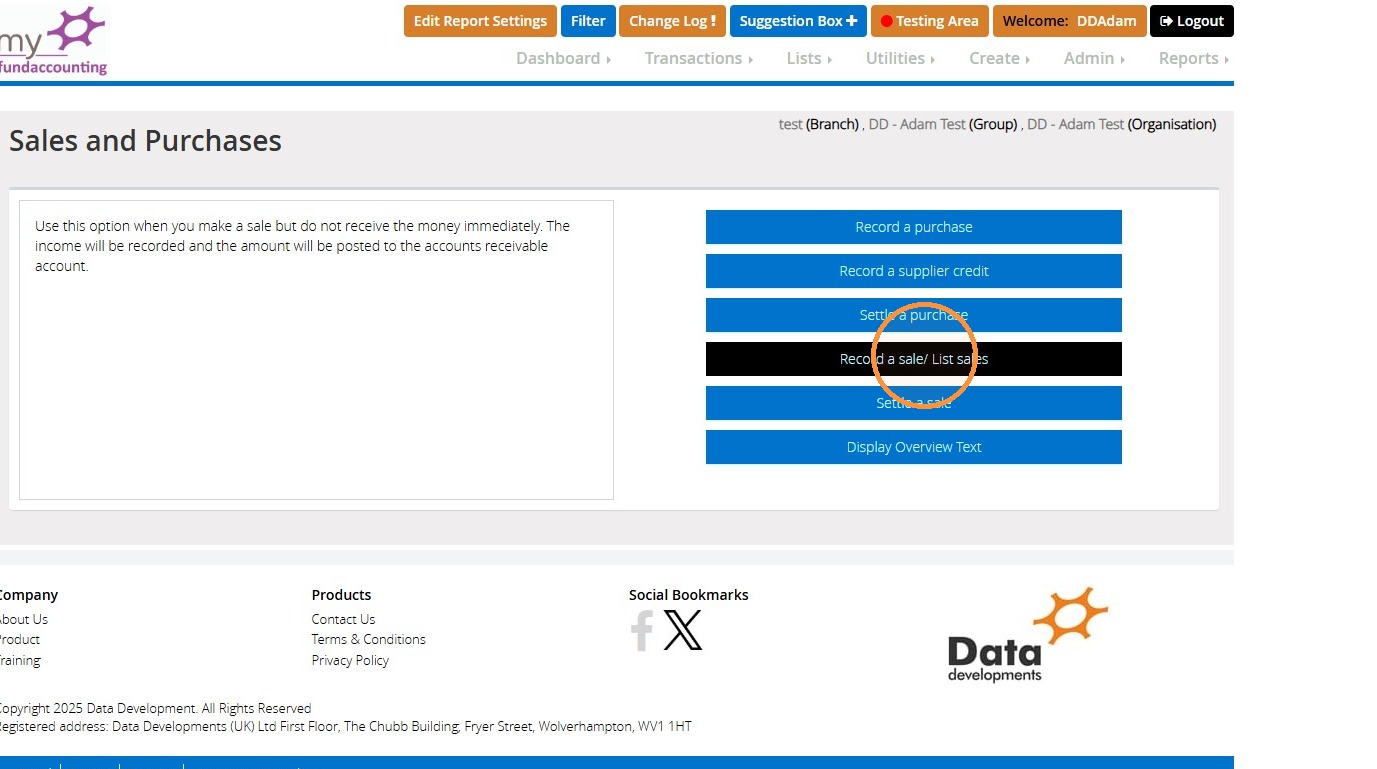
56. Click "Record a sale/ List sales"
">
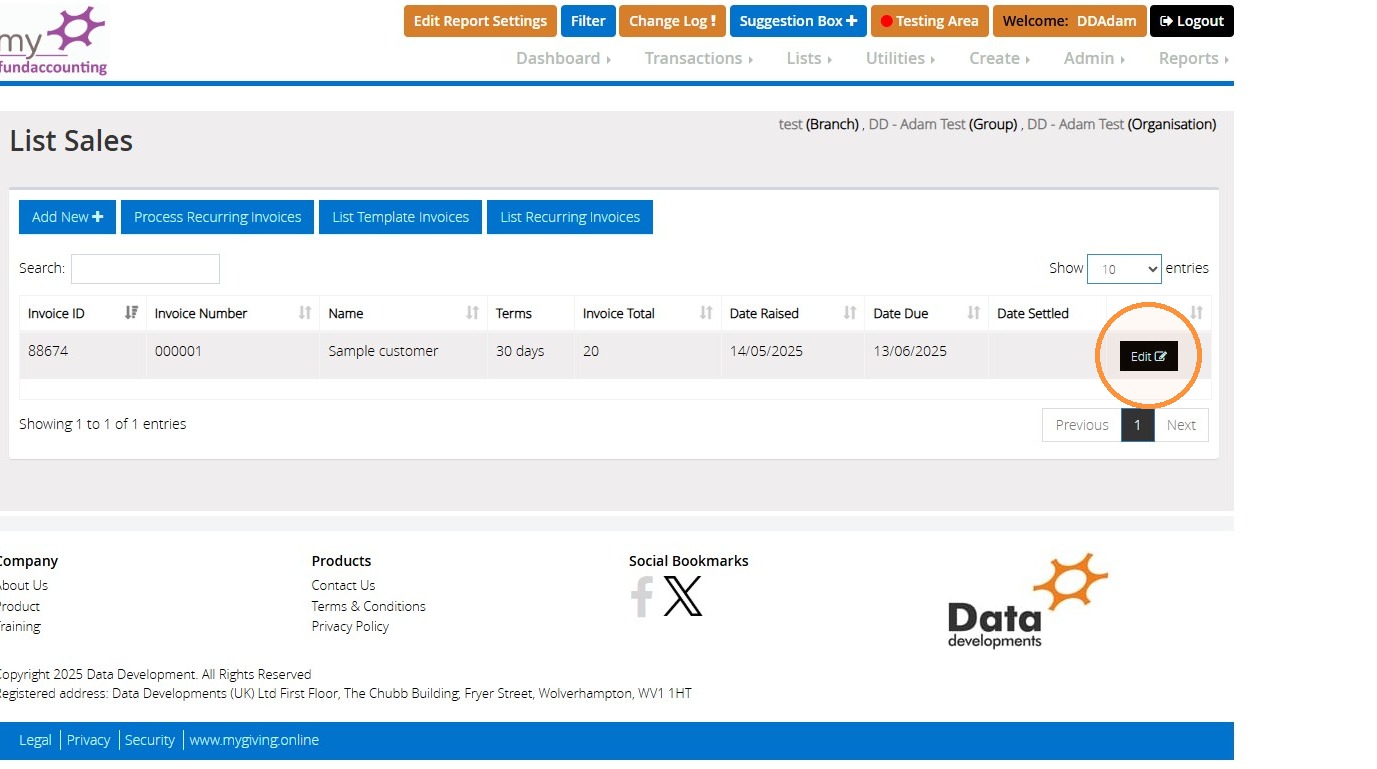
57. Click "Edit" on the invoice you wish to settle.
">
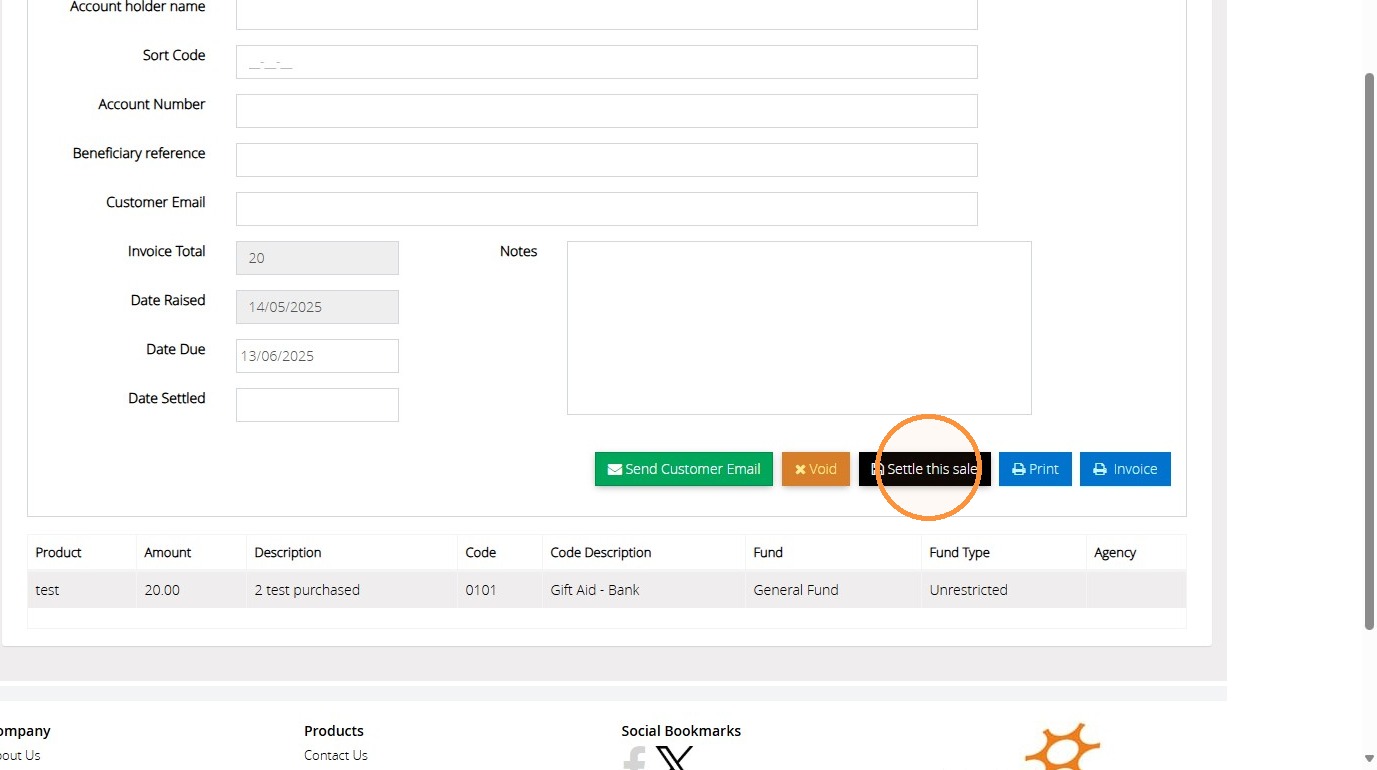
58. Click "Settle this sale"
">
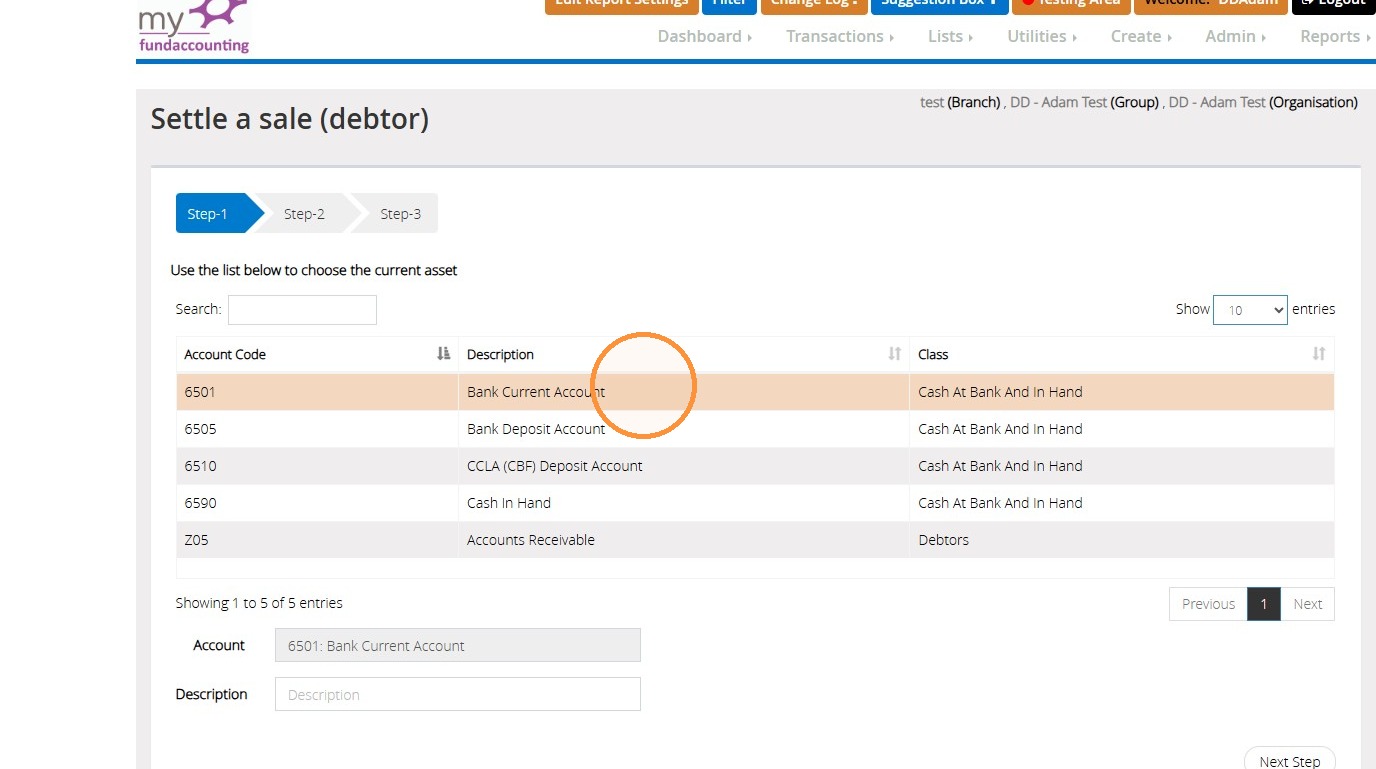
59. On Step 1
Choose the bank account the payment was received into.
Then click "Next Step".
">
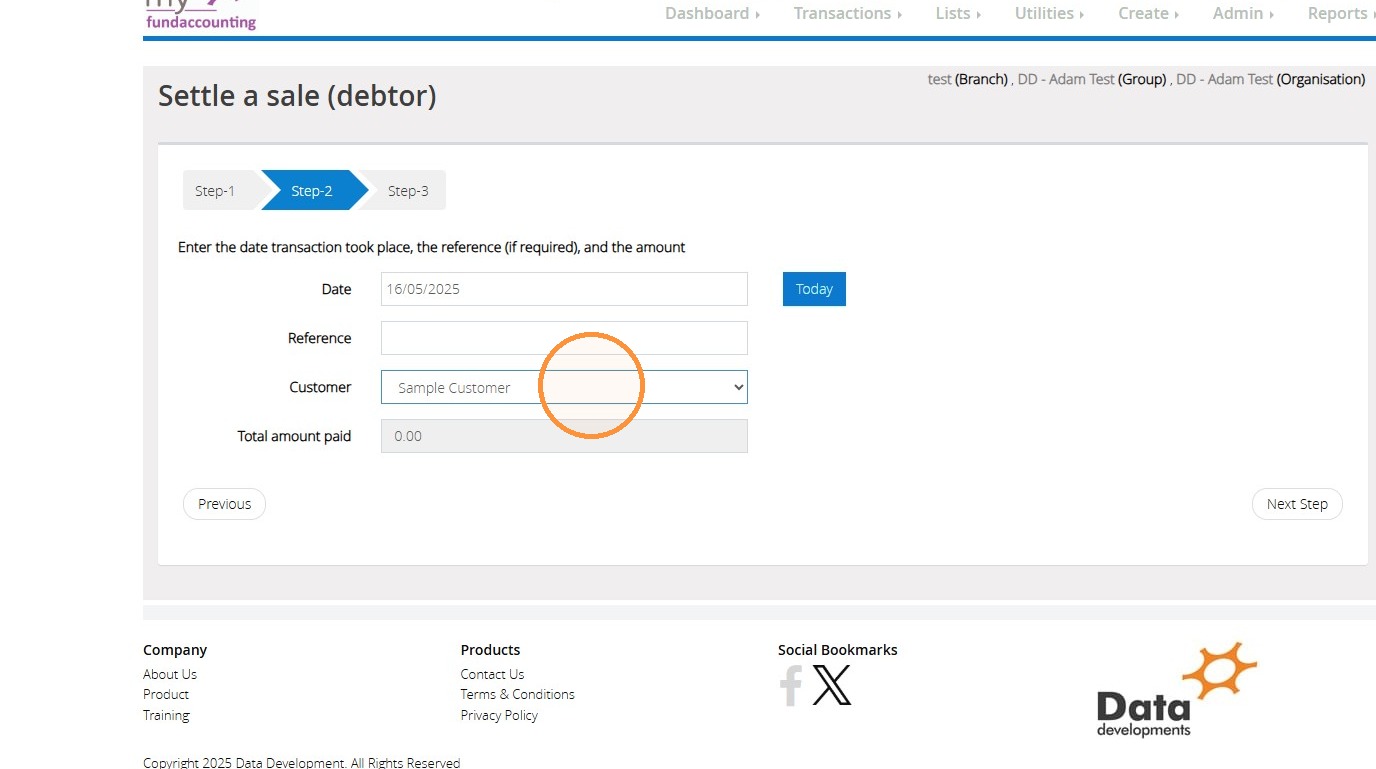
60. On Step 2
Choose the date, enter the amount and then select the customer the invoice was raised against.
">
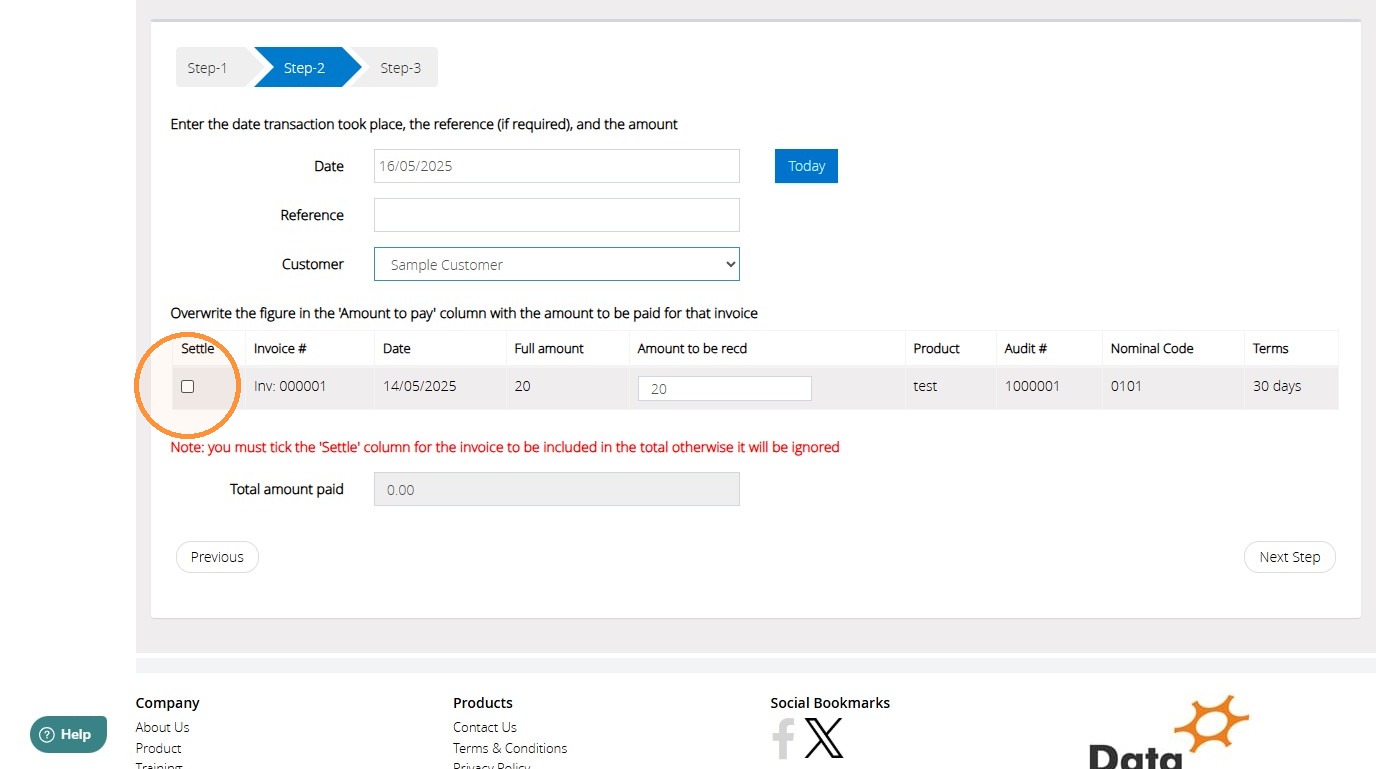
61. Tick the invoice you want to settle.
Once complete click "Next Step".
">
62. On Step 3
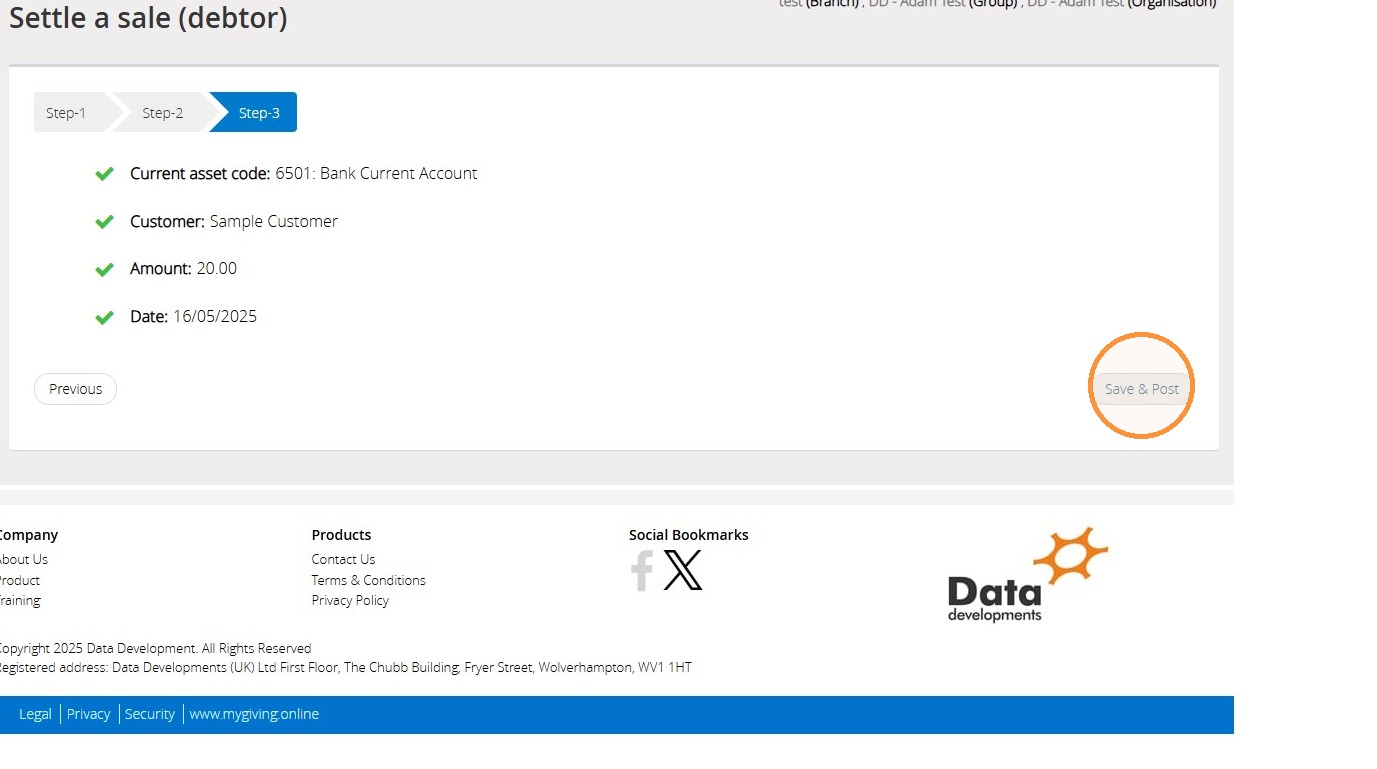
Review the information entered for the previous steps. If you're happy with your choices, click 'Save & Post'. Otherwise, select 'Previous' to return to the previous steps and amend the information.
">
We hope you found this guide helpful and easy to follow. If you require any further assistance, please contact our support team by telephone on 01902 714030 or by email at support@datadevelopments.co.uk