Add a contact and link them to an event
1. Navigate to https://www.mygiving.online/dashboard
New Contact/Speaker
2. Click "Contacts"

3. Click "Add New"

4. Fill out the form with the contact persons details
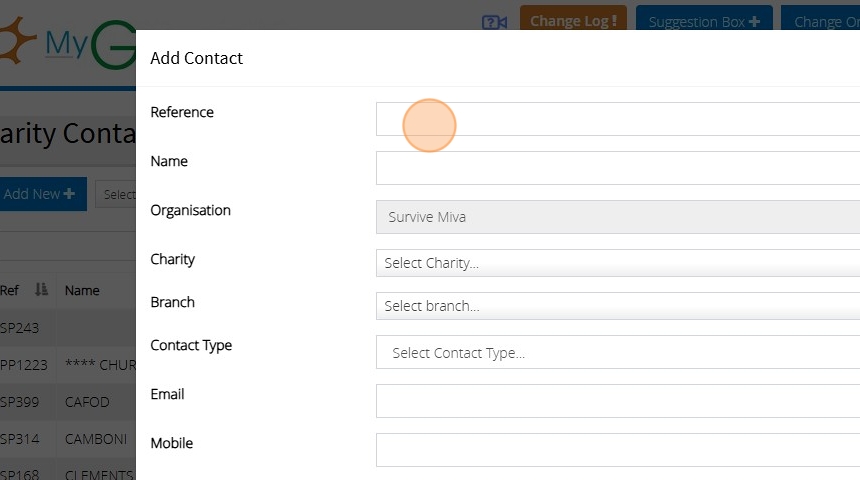
5. Click "Select Charity..." (Diocese) that the contact is being initially associated with

6. Click "Select branch..." (Church), if relevant, and select the church the contact is initially being associated with

7. Click "Save"

Associate the contact with other Churches
Tip: You can assign the contact to an event and the link with the Church will automatically created for you. So you only need to do this where there isn't an appeal yet for the Church the person needs to be associated with
8. Click the search field and type in the reference or the name of the contact
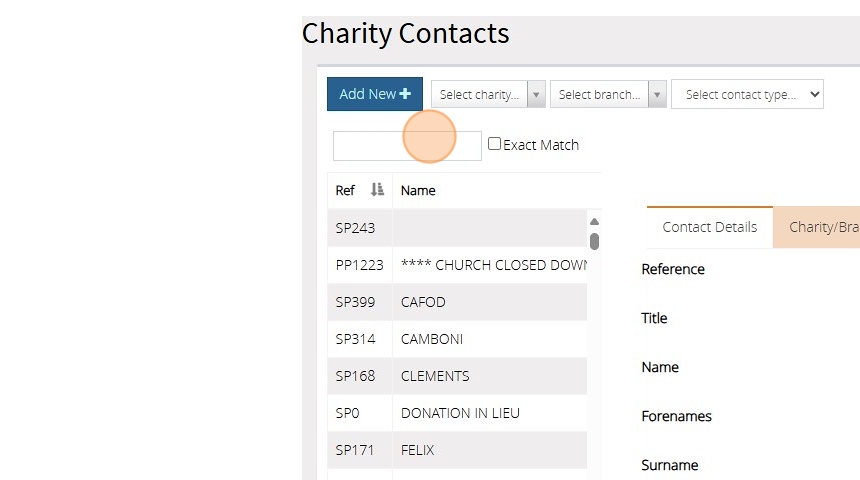
9. Click on the contacts name
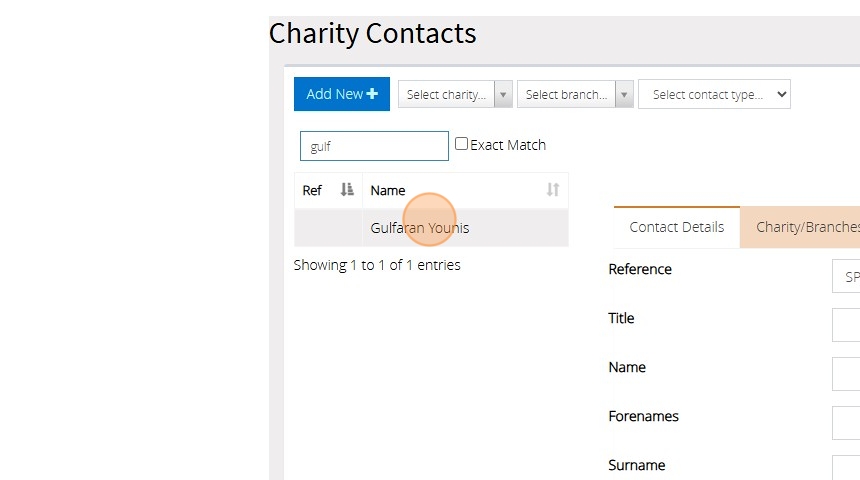
10. Click "Charity/Branches"

11. Click "Add Link"

12. Click "Select Charity..." (Diocese) and the Church and then click save

Tip: You can add as many links as you need
Link a contact to an Event
13. Click "Events"
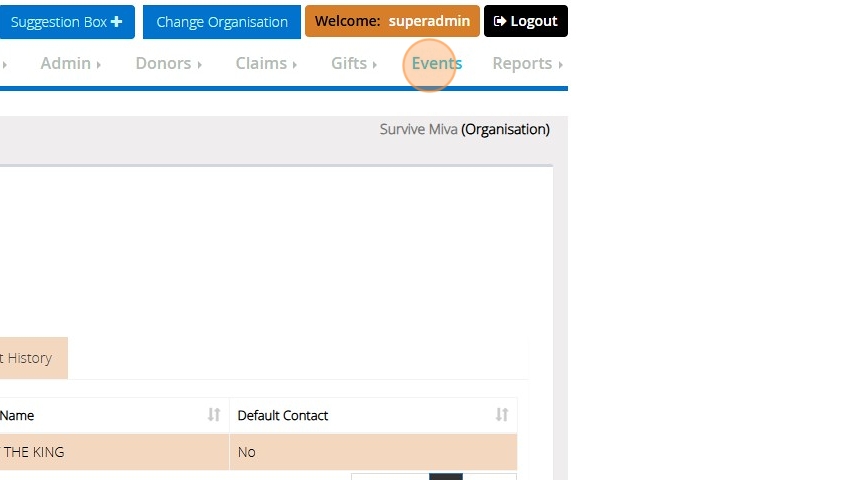
14. Click "Select charity..." (Diocese)

15. Click "Select branch..." (Church)
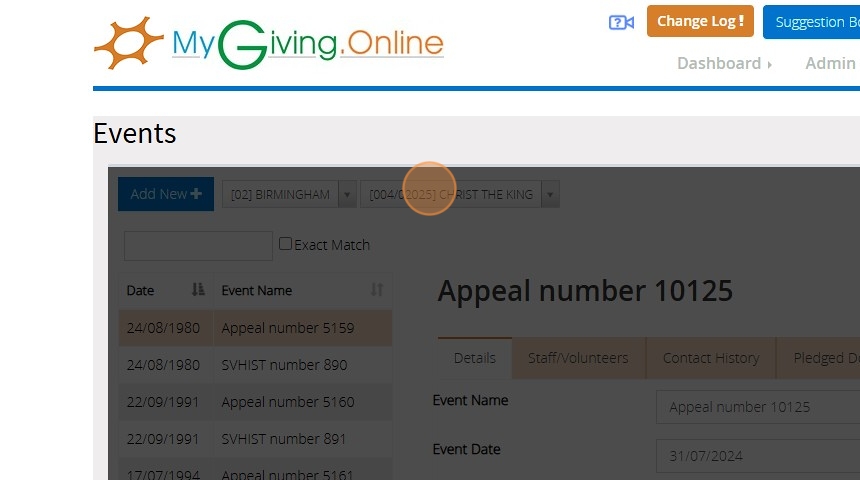
16. Click on the appeal on the left hand side

17. Click "Staff/Volunteers"

18. Click "Select contacts . . ."

19. Type the name of the contact in the searchbox
20. Click "Gulfaran Younis (|Speaker)" check the box on the left hand side

21. Click "Add to Event"

Tip: You can select and add multiple contacts to an event using the dropdown
Adding a Method
Tip: You can create as many Methods as you require to indicate how each donor has made their donation.
Tip: The below steps will guide you in creating a new method.
1. Navigate to https://www.mygiving.online
2. Click "Admin"

3. Click "Masters"

4. Click "Methods"

5. Depending on your access level, you might need to select the church you want to enter a method for.

6. Click "Add New"

7. Type the "Method" of payment in this box

8. Ensure that the checkbox next to "Active" is selected.
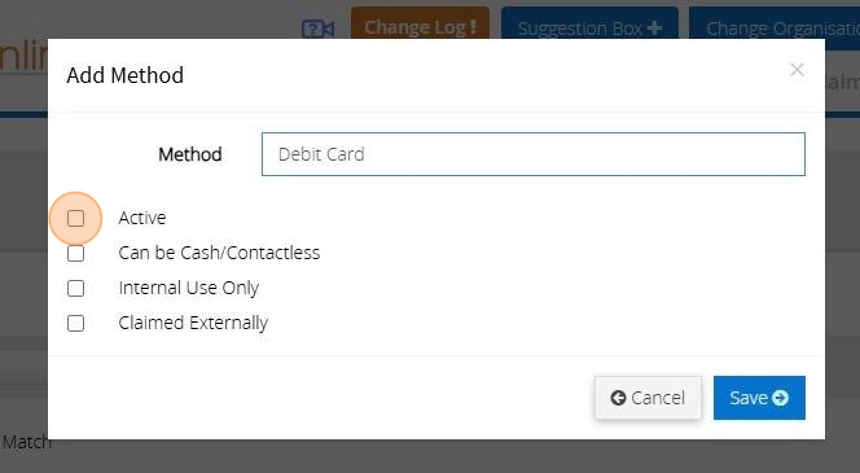
9. Tick the boxes that you want to correspond to the payment method.
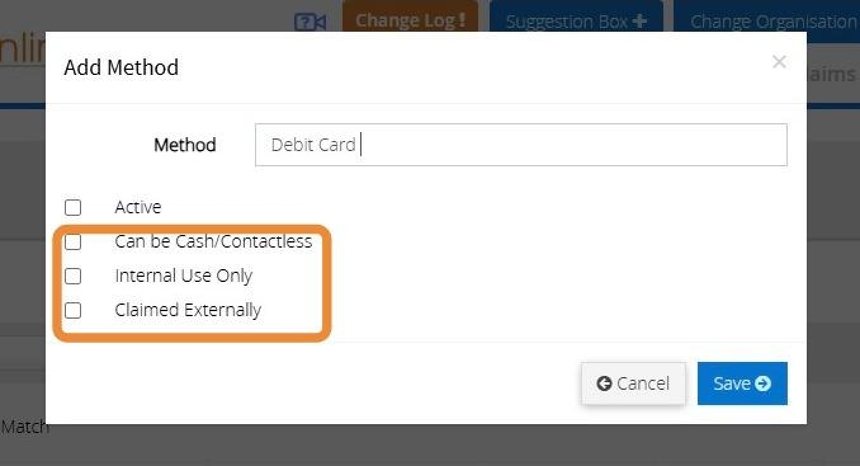
Tip: Tip! If the method you are creating is GASDS eligible please ensure you have ticked "Can be Cash/Contactless" otherwise you will not be able to mark donations as GASDS eligible when selecting this method.
10. Click "Save"
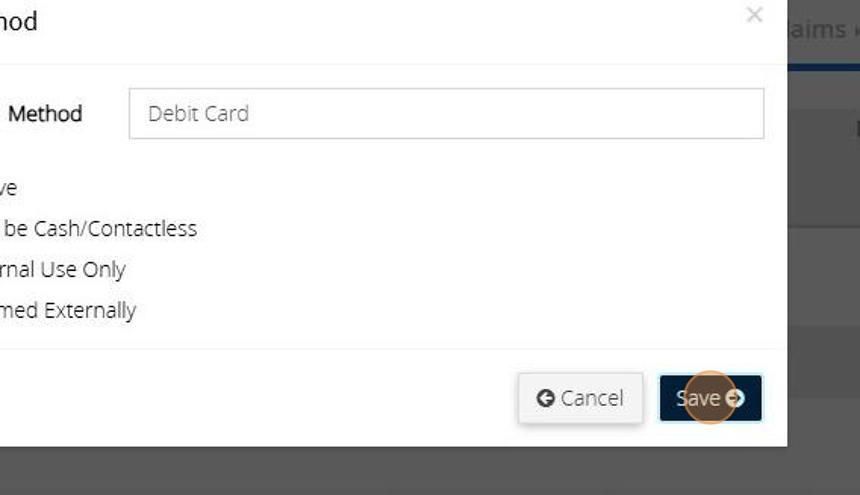
11. The below message will display to confirm the method has been saved successfully.

Edit a Method
12. Click "Edit"

13. Make any amendments to the method that you require.
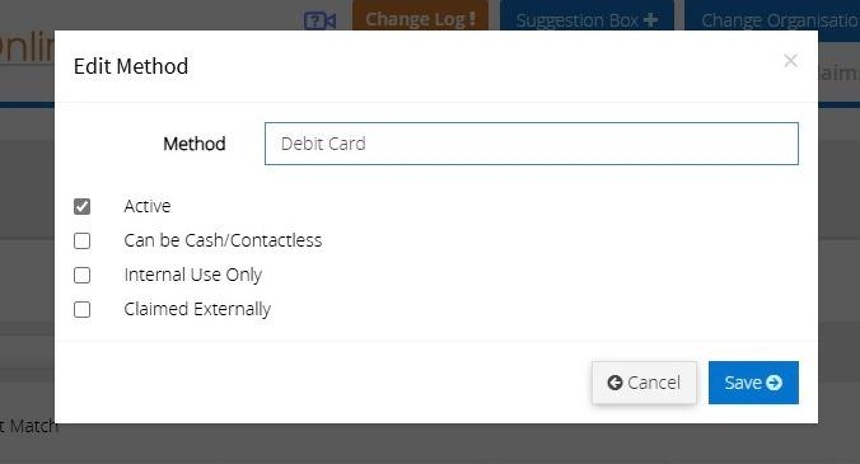
14. Click "Save"

15. The below message will appear once the method has been updated.

Delete a Method
16. Click "Delete" next to the method you do not require.
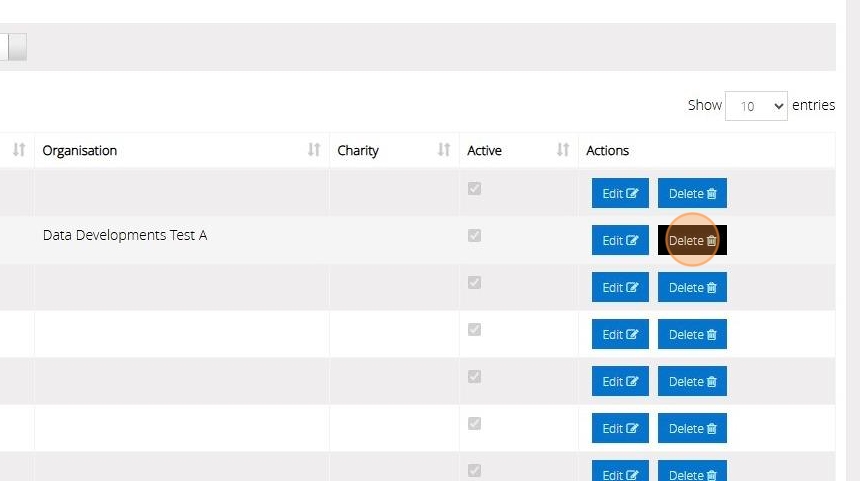
17. Click "Yes"

18. The below message will display to confirm the deletion.
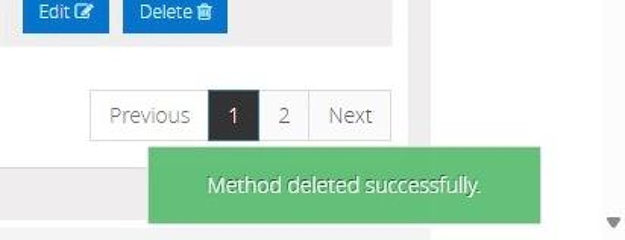
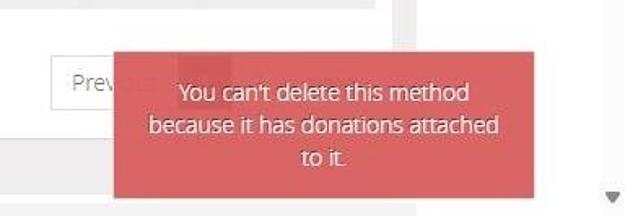
Alert: Alert! If the method is being used for a donors default method or as the method of a donation you will not be able to delete the method as this forms part of your audit trail.
Alternatively, click "Edit" against the method and mark the method as inactive by unchecking the "Active" checkbox.
Adding Anonymous Donations (GASDS)
Tip: Within MyGiving.Online you can record gifts which do not come from a known donor. Gifts of this type are not eligible for Gift Aid, however, anonymous cash gifts may be eligible for the Gift Aid Small Donations Scheme (GASDS). These are usually donations that have been made via a loose plate or bucket collections.
1. Navigate to https://www.mygiving.online
2. Click "Gifts"
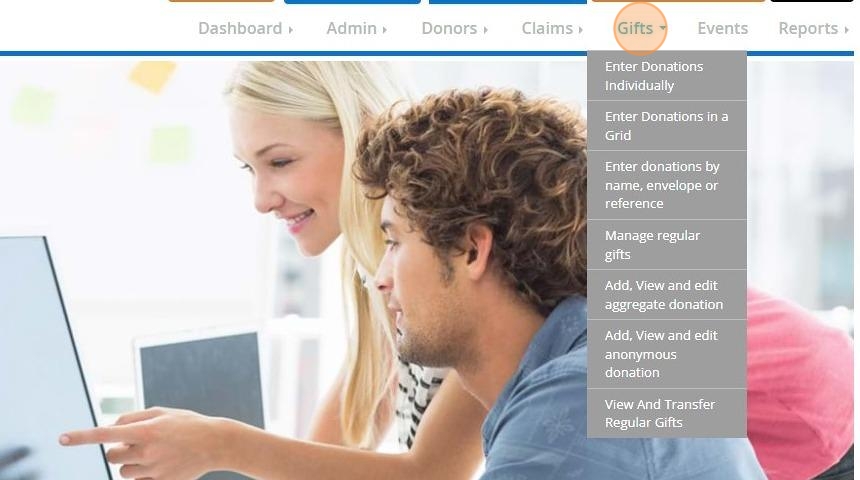
3. Click "Add, View and edit anonymous donation"

4. Click "Add New"
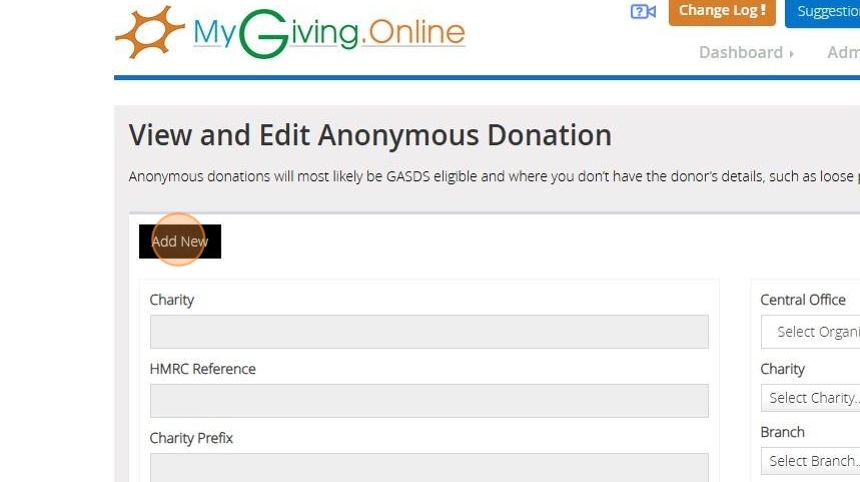
5. Confirm your Charity and Branch by selecting them from the drop drown menus. If you have just the one Charity and Branch they will be automatically selected for you
Tick the "Lock" option to the left of your selection to retain your choice when you go to input your next donation after saving this one.

6. Enter the date of the donation.
Click "Today" to enter todays date.
Tick next to "Lock Date" to retain the date on your next input

Tip: Tip! You will see at the top of the screen, the 'tax year' box will show the tax year that this date falls in, and the GASDS entered boxes will reflect the amount that has already been entered for that tax year so you can keep a track as you are entering.
7. Enter the amount of the donation here.

Tip: Tip! You can enter the total amount of donations that have been collected as long as each individual donation has been given anonymously and is under £30
8. Select a "Purpose" and a "Method" from the drop down menus provided.
Click "Lock Purpose" to retain your selection on the next input. You can also lock the Method.

Alert: If the Method selected has not been set up as "can be cash" you will not be able to tick the donation as Eligible for GASDS. For further information please see our guide on "Adding a Method"
9. Tick here to confirm the amount is eligible for GASDS
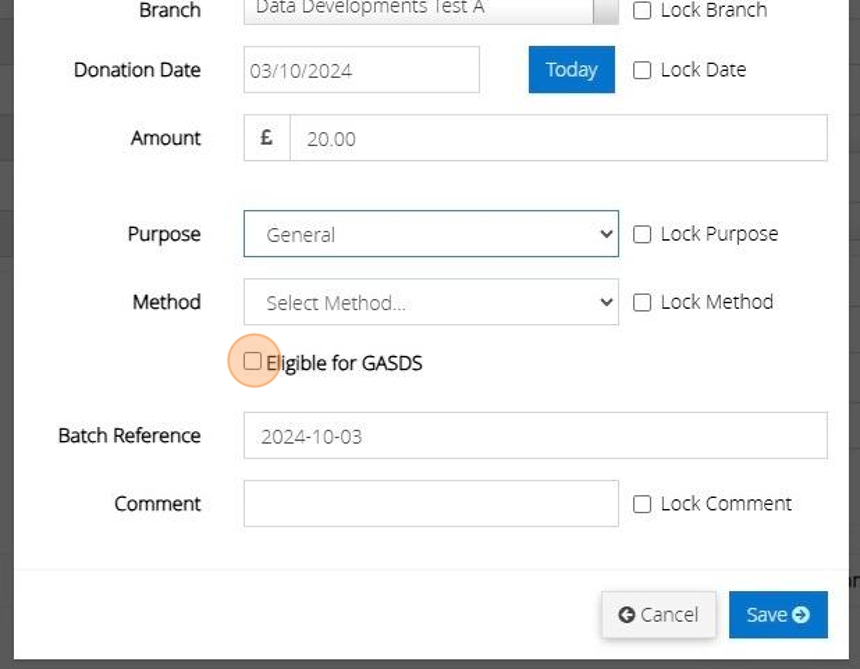
Alert: Alert! If you do not tick to confirm the donation is eligible for GASDS this will not be included within your claim
10. Enter a "Batch Reference" and "Comment"

11. Click "Save"
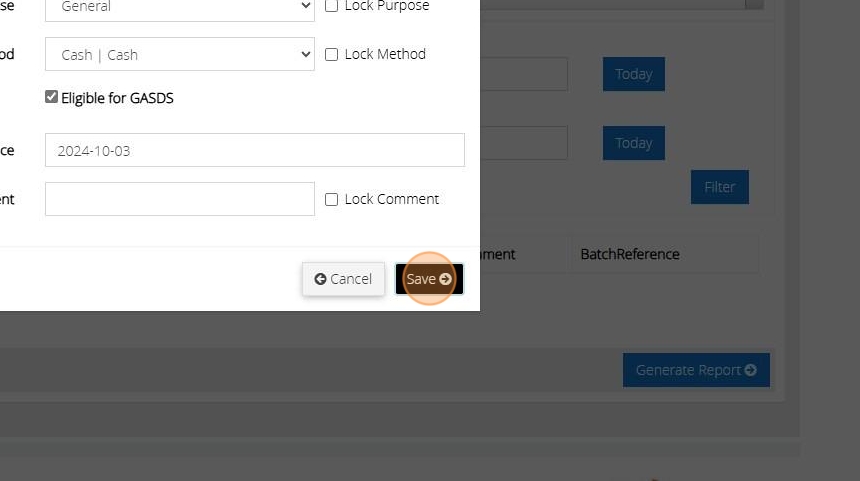
12. The below message will appear once the donation has been saved successfully.

Adding envelope numbers to donor's records
Adding an envelope number to an individual's record.
1. Click "View and edit donors"

2. Locate the donor record you wish to update.
3. Click "Declaration, Defaults and Pledge"

4. Click "Add New Envelope"

5. Type in the envelope number you wish to use, in this example we have used the number "24001". If you reassign your envelope numbers each year, adding the year as a prefix can help you keep track of which donor was using this number, each year.
6. Click "Save"

Adding envelope numbers to multiple records.
7. Click "Admin"
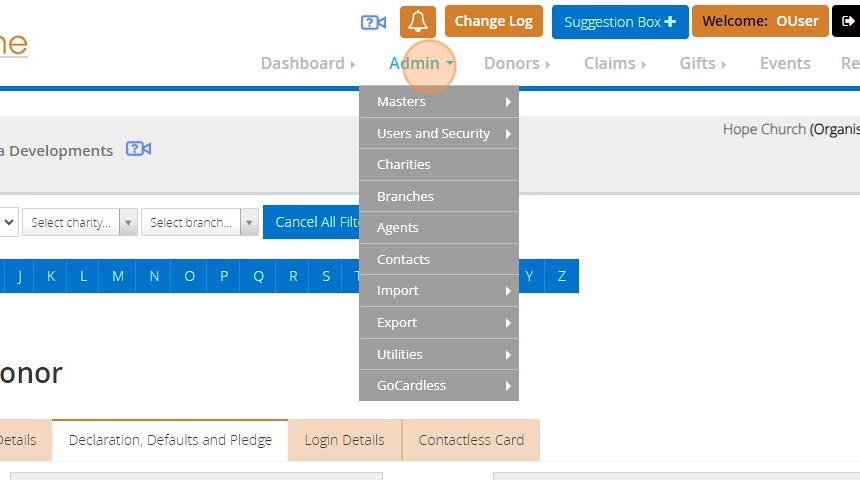
8. Click "Masters"
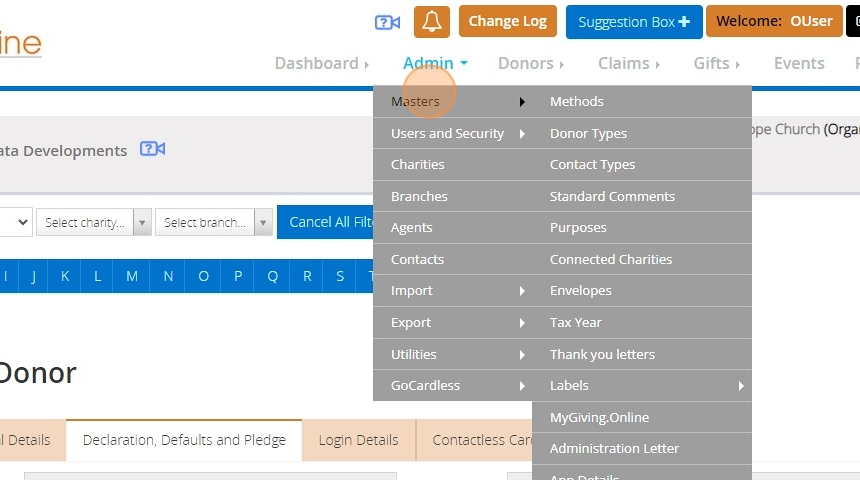
9. Click "Envelopes"

10. Click "Add New"

11. Select the Charity and the Branch the donor is linked to.
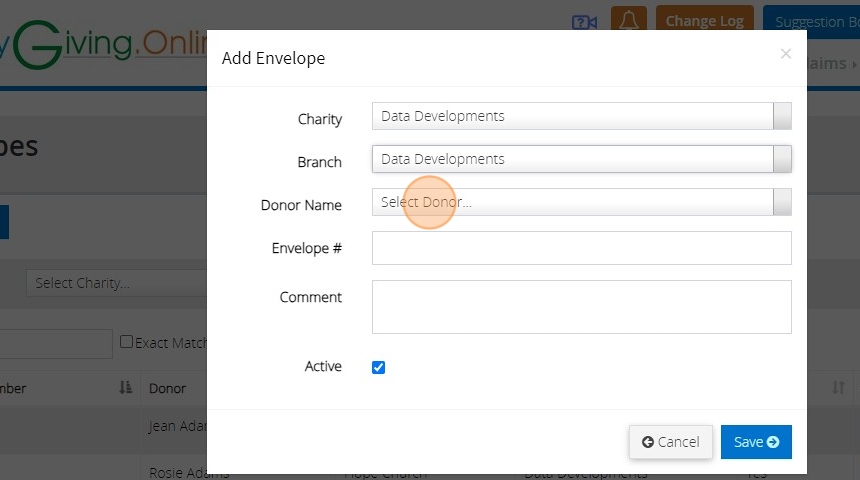
12. Select the relevant donor from the dropdown list.

13. Click the "Envelope #" field.

14. Enter the envelope number you wish to use. In this example we have used "23002".
15. Click "Save"

16. You can then repeat the process (from Steps 7 to 15) to add any additional envelope numbers you need.
Add New Donation to an Appeal
1. Navigate to https://www.mygiving.online/dashboard
Add the donor if they do not already exist
Tip: This section is for creating a donor if you have donor details to go with the donation and the donor does not already exist under the church record. Otherwise you can skip this section
2. Click "View and edit donors"

3. Click "Add New"
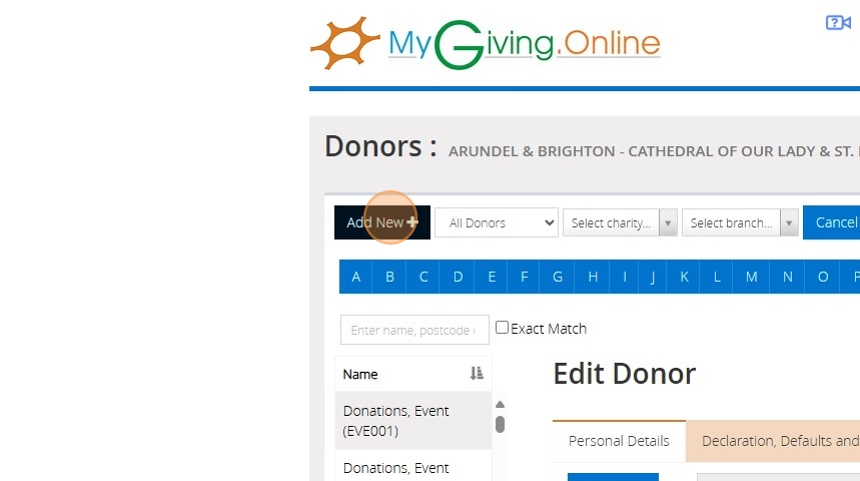
4. Fill in the donor details and Click "Select Charity..." to choose the Diocese the Church is under for the appeal

5. Click "Select Charity or Branches" to select the Church(es) to record the donor under for the appeal(s) they have donated to

6. You can select one or more church to save having to enter the details again should the same donor donate to multiple churches

7. Fill in the address and reference field. The username and password section is optional

8. Click save.

Record the donation
9. Click "Events"

10. Select the relevant appeal from the left hand side

11. Click "Pledged Donations"

12. Click "Add Gift"

13. By default you will need to select a donor to record the donation against. There is a default donor against every church you can use. Alternatively, there are two other options when recording a donation. "Is Aggregate" can be used where you have multiple donations from donors for which you have the details for and can claim gift aid but rather than entering each donors details you want to record it as a lump sum.

14. "Is Anonymous" is for donations you do not have the donor details for and can potentially claim GASDS on
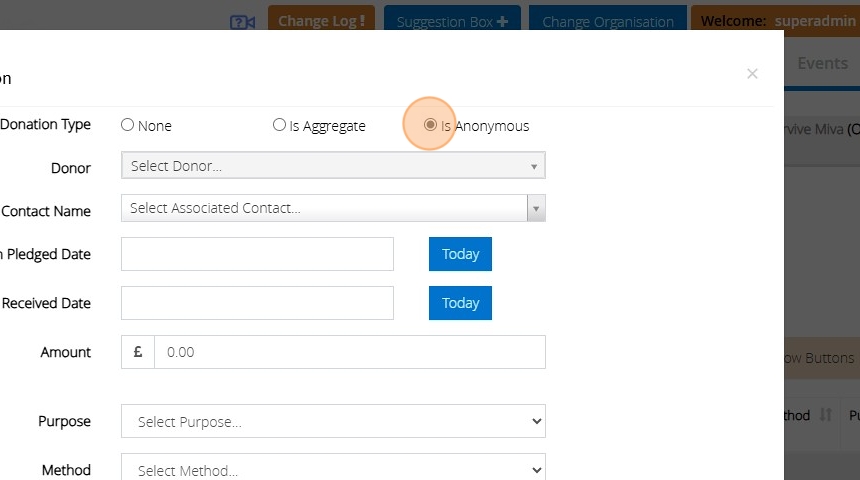
15. Using the default option you would need to select the donor otherwise this option is greyed out
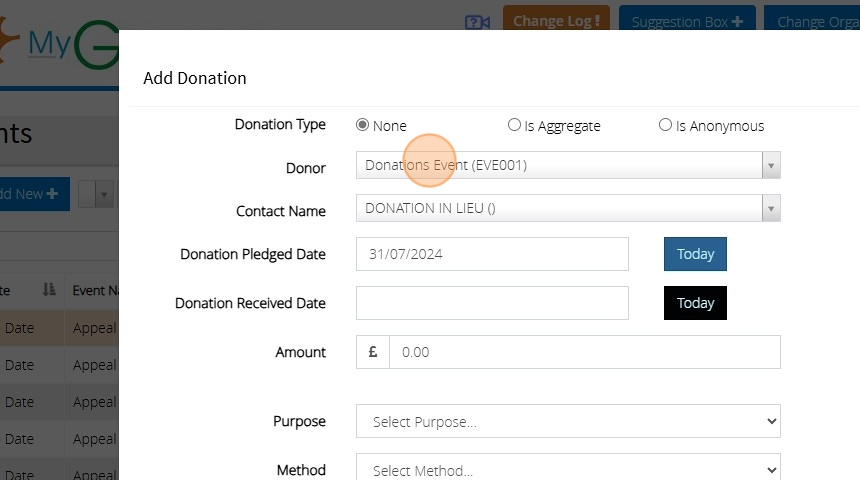
16. Click "Select Associated Contact..." to attach the donation to the speaker
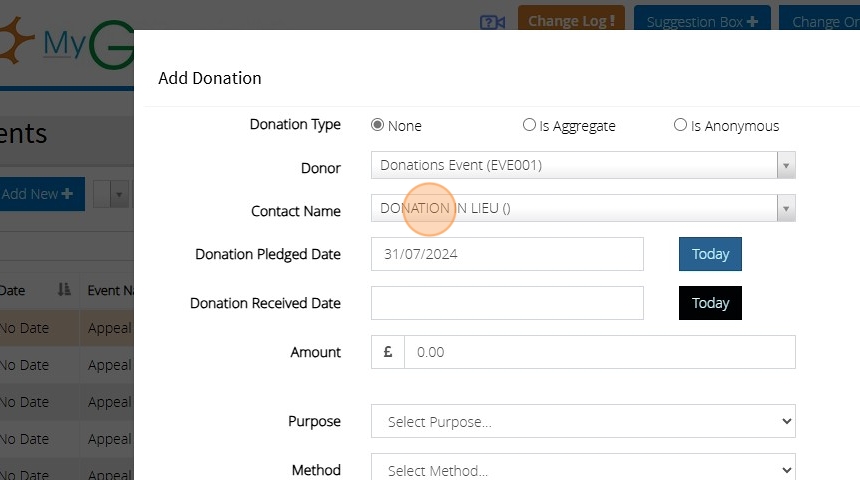
17. Click here to give the date you expect to receive the donation

18. Click here to record the date you have received the donation. If you haven't yet received the donation you can leave this blank and come back to the pledged donation section to edit the donation and add the date at a later date.

19. Select the relevant options for the amount, purpose and method. Envelope is optional and then click save.
Add New Event
1. Navigate to https://staging.mygiving.online/
2. Click "Events"

3. Click "Add New"

4. Name the event
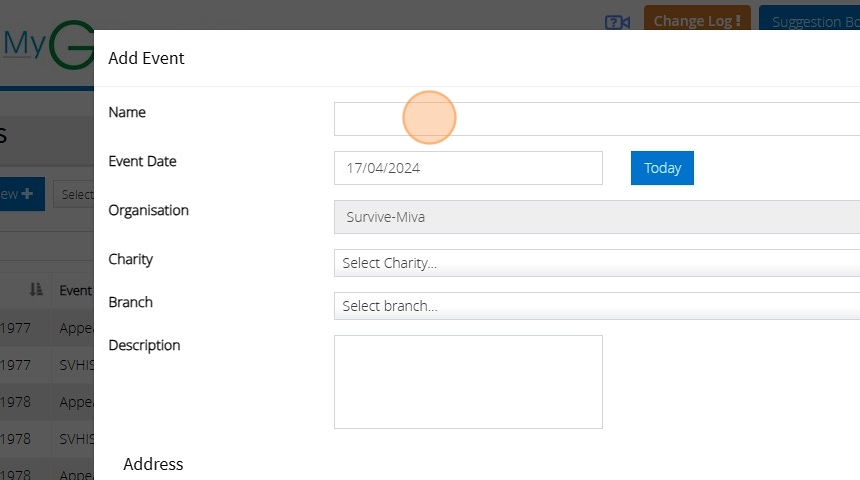
5. Set the date the event will take place
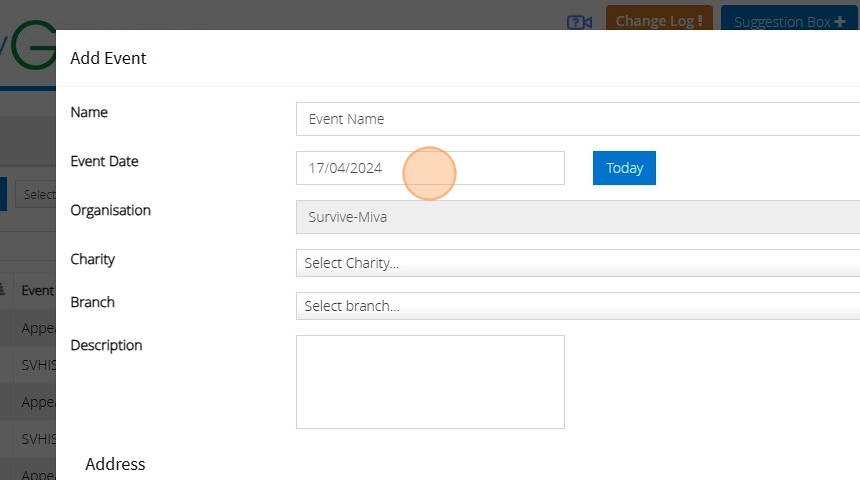
6. Click "Select Charity" to pick the Diocese/Parish the event is for

7. Click "Select branch..." to pick the Parish/Church the event is for

8. Give the location of the event if you wish to

9. Click "Select contact..." to view the contacts available for the selected Charity and Branch

Alert: Alert! If you cannot see any contacts listed this will be due to no contact being assigned to the selected Charity/Branch. To add the contacts details or assign a contact to the Charity/Branch go to Admin > Charity Contacts.
10. Click this dropdown and pick the letter you want to send to the selected contact upon clicking save e.g. Appeal Confirmation

Aggregated donations
Tip: You can 'Aggregate' (or add together) donations of £20 or less from different donors without having to submit all the donor details to the HMRC.
An example of this would be if you have a Baptism service and a number of donor's make a donation and fill in the Gift Aid envelope declaration
Tip: For all donations that are £20 or less, instead of having to create a donor record for each individual donation you can total them all together for this event, and record it as one aggregated donation.
The total donations must not exceed more than £1,000 and you MUST keep all the envelope declarations as this is your audit trail.
The below steps will guide you in entering an Aggregated Donation
1. Click "Gifts"
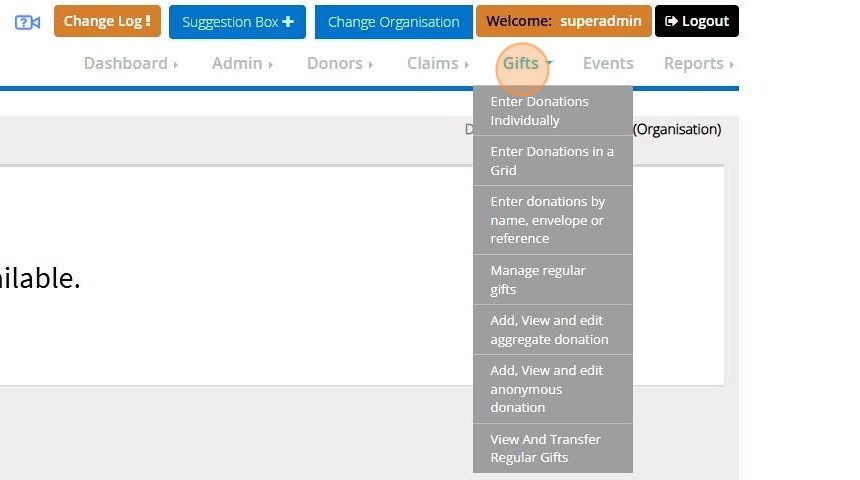
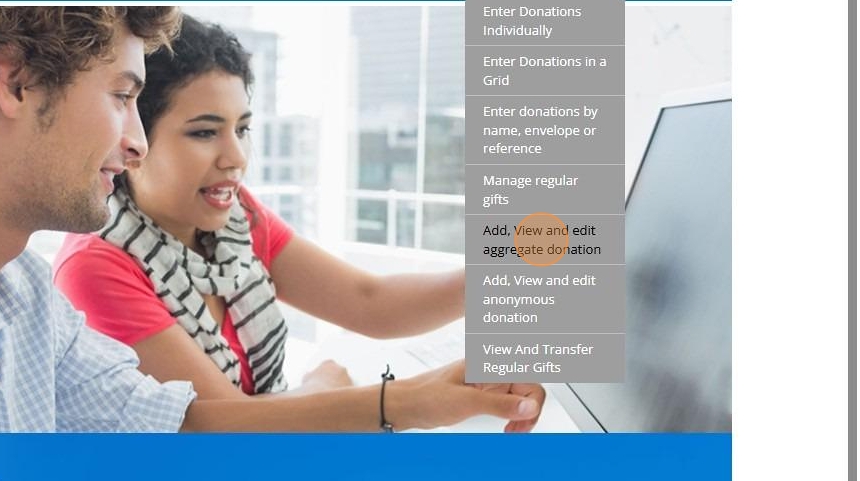
2. Click "Add, View and edit aggregate donation"
3. Click "Add New"

4. Enter the "Donation Date"

5. Enter the Total Amount of your aggregated donations.
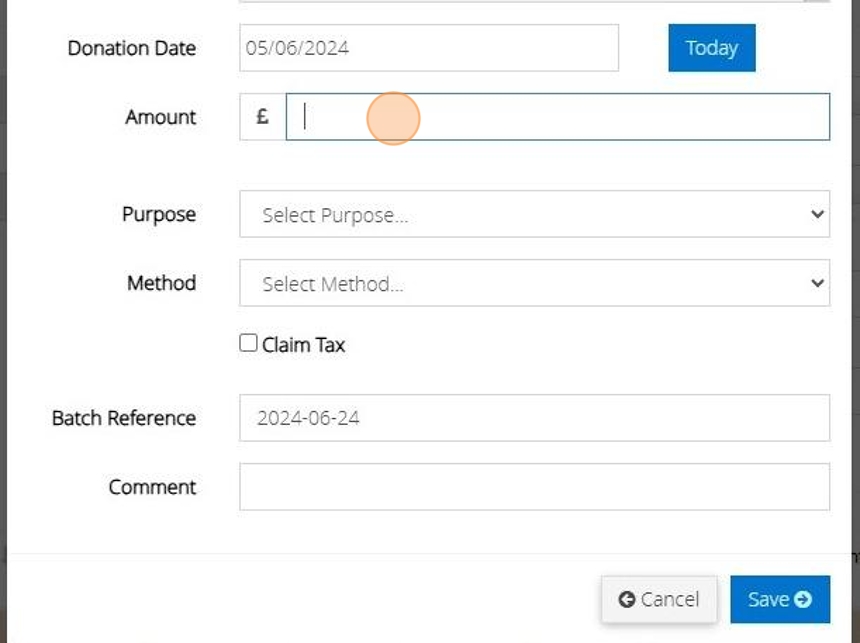
6. Select the Purpose

7. Select the Method

8. Tick the box to claim tax.

9. Click "Save"

Change Password on MyGiving.Online
1. Navigate to https://www.mygiving.online/
2. Click "Dashboard"

3. Click "My Profile"

4. Click "General"

5. Click the "Change Password"

6. Enter your old password, the new password you wish to change this to and the password question and answer

7. Alternatively Click "Generate Random Password" for the application to generate a unique random password. You will still be required to enter your old password and password question and answer

8. The random password will generate as per the below. You can then copy and past this into the New password Field

9. Once you are happy with the changes made click "Save"
Correct a GASDS Over-claim
Tip: The following steps will assist you in correcting a GASDS Claim that has already been submitted to HMRC.
1. Navigate to https://www.mygiving.online/
2. Click on "Claims"
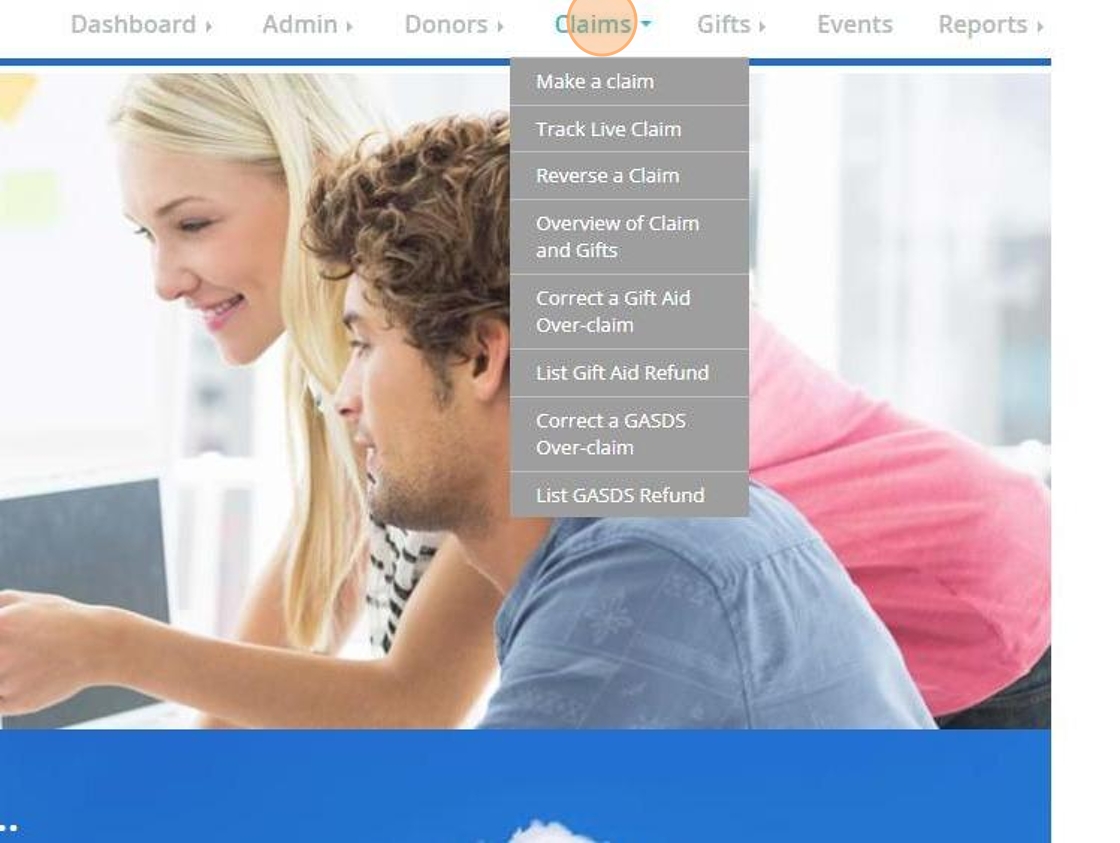
3. Click "Correct a GASDS Over-claim"
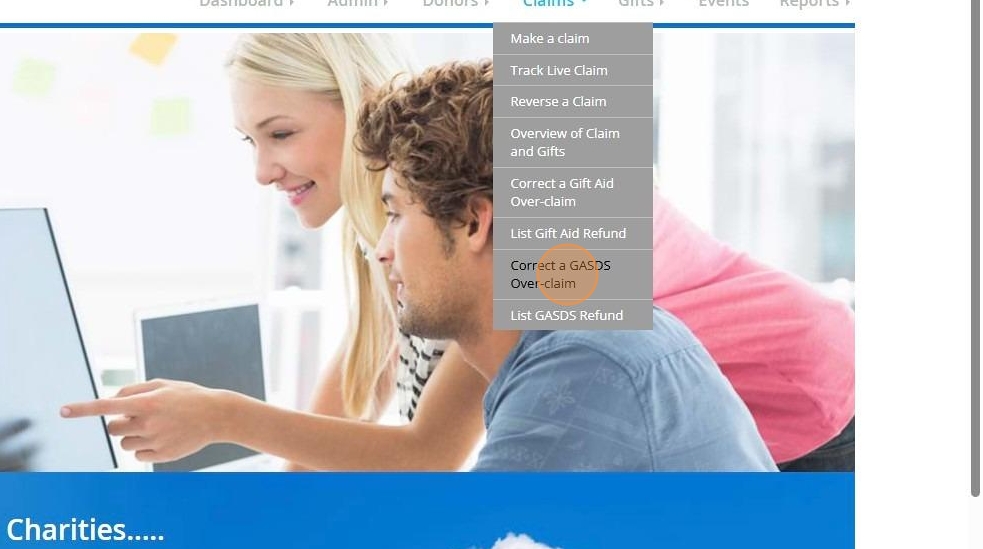
4. Select your charity from the drop down bar

5. Select your branch from the drop down bar

6. Enter the date of the correction. This must be within the Tax year the refund needs to be recorded for

7. Enter the amount given
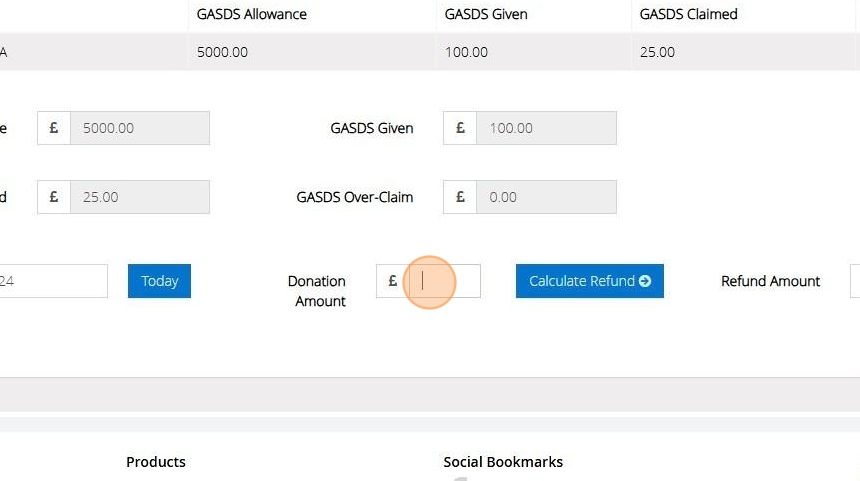
8. Click "Calculate Refund"

9. The amount that will be refunded to the HMRC will be displayed here

10. Click "Process tax refund"

11. Once the refund has been processed the below message will display

Assign a refund to your claim
12. Click "Claims"

13. Click "Make a claim"
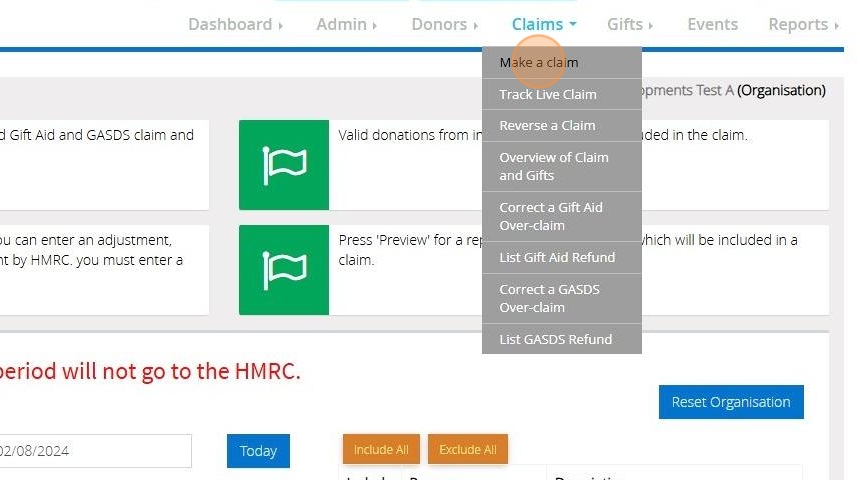
14. Click "Submit a claim to HMRC"

15. Click "Find Tax Refund"
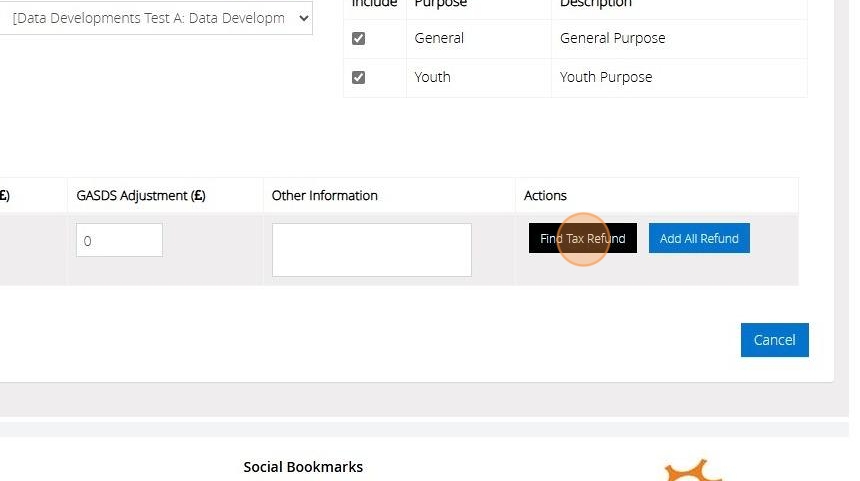
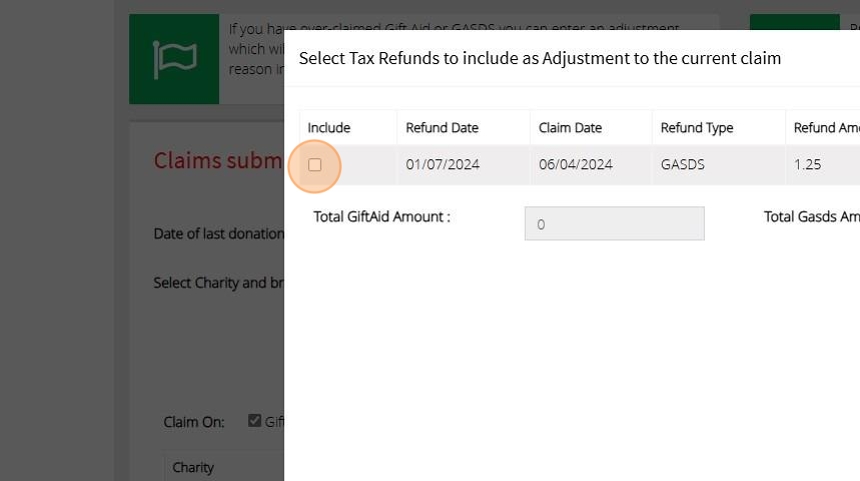
16. Click the checkbox next to your GASDS refund
17. Click "Ok"
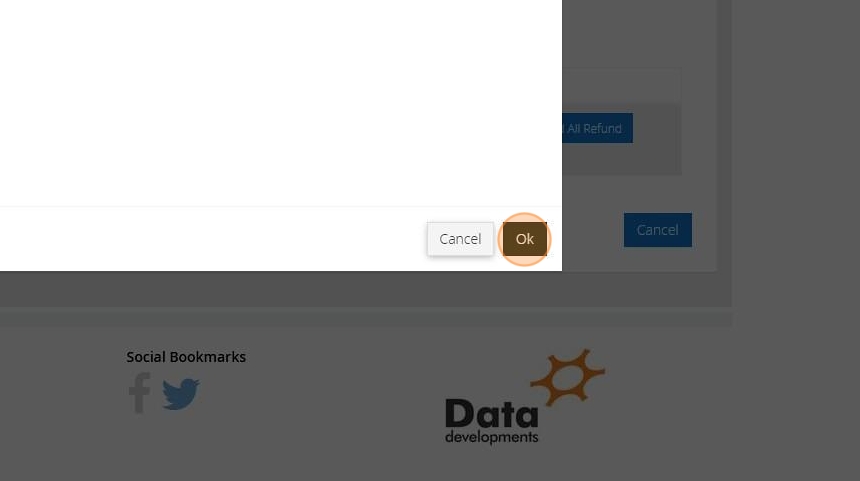
18. You may continue to submit your claim to the HMRC with your refund attached
Create a Contact Record
Tip: The following instructions will assist you in creating contact records. These are useful for maintaining information about charity contacts, guest speakers, and potential sponsors.
After the records are created, you will have the ability to link them to specific events.
For additional details on Events, please refer click here
1. Navigate to https://www.mygiving.online/
2. Click "Admin"
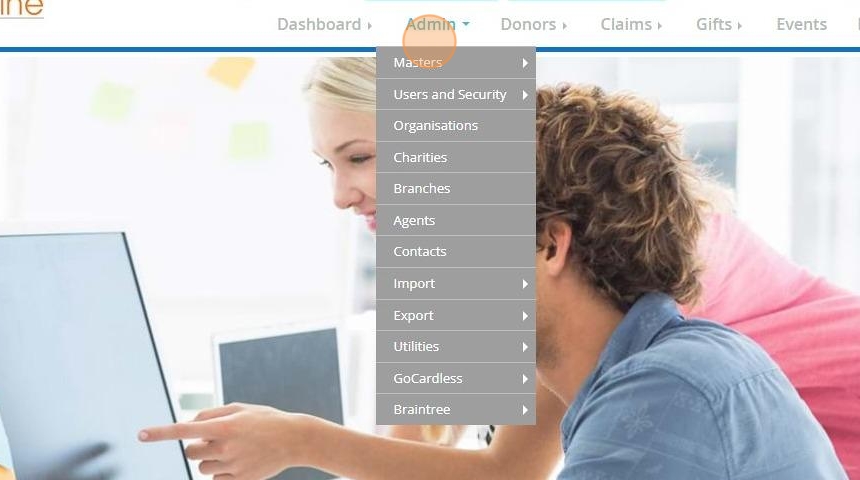
3. Click "Contacts"

4. Click "Add New"
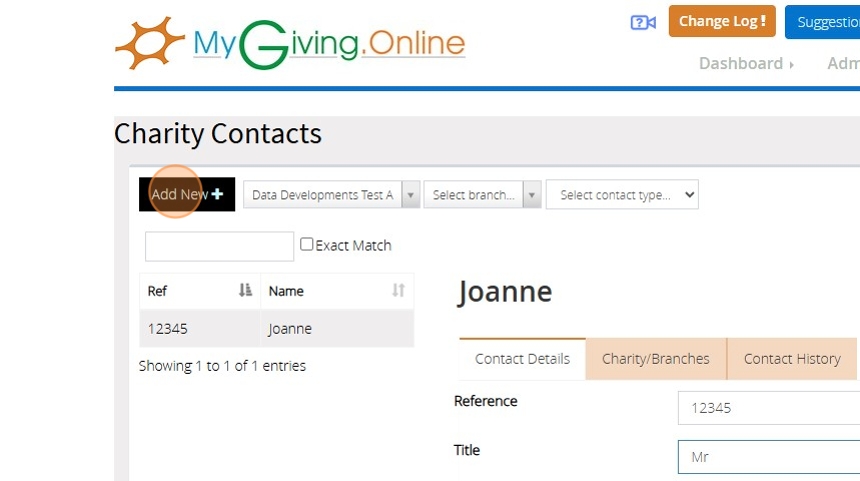
5. Enter a reference and name for your contact

6. Select your branch

7. Click the drop down bar to select the contact type
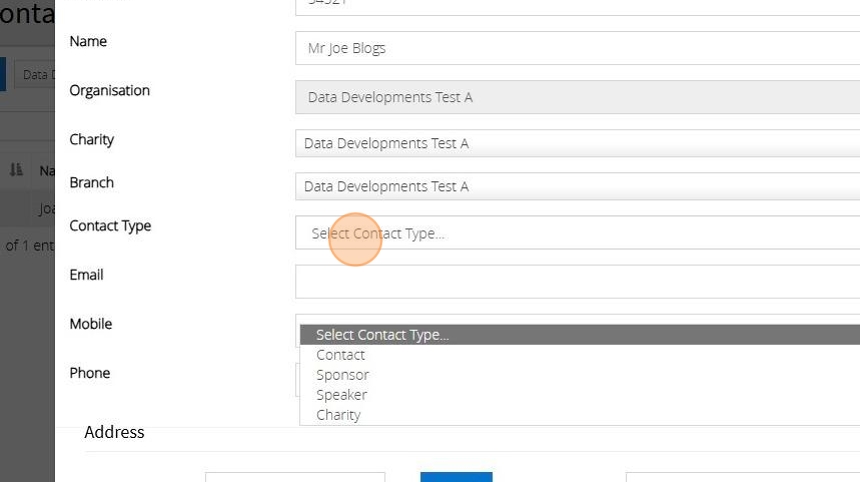
8. Enter the email and contact numbers

9. Enter the Postcode

10. Click "Look up"

11. Click the dropdown and select the contact address

12. Select the preferred contact method

13. Click "Save"

Create an administration letter template
1. Navigate to https://www.mygiving.online/
2. Click "Admin"

3. Click "Masters"

4. Click "Administration Letter"

5. Click "Add New"

6. Click the "Description" field and enter a description for your letter

7. Type your letter text in the Content box
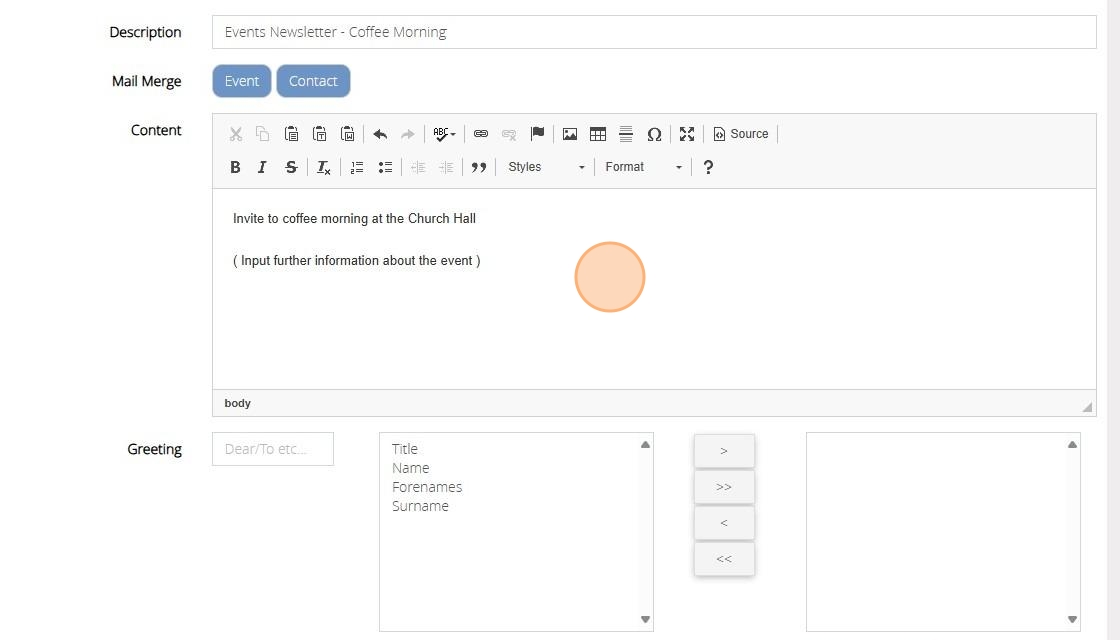
8. Select the greeting to be used

9. Click the organisation name to be used

10. Select if you are going to use Letter Headed paper or click file to choose a letterhead image

11. If you are using the letter head enter the space needed in inches within this box

12. Enter the organisation Post code and click "Lookup"

13. Select the address from the dropdown bar

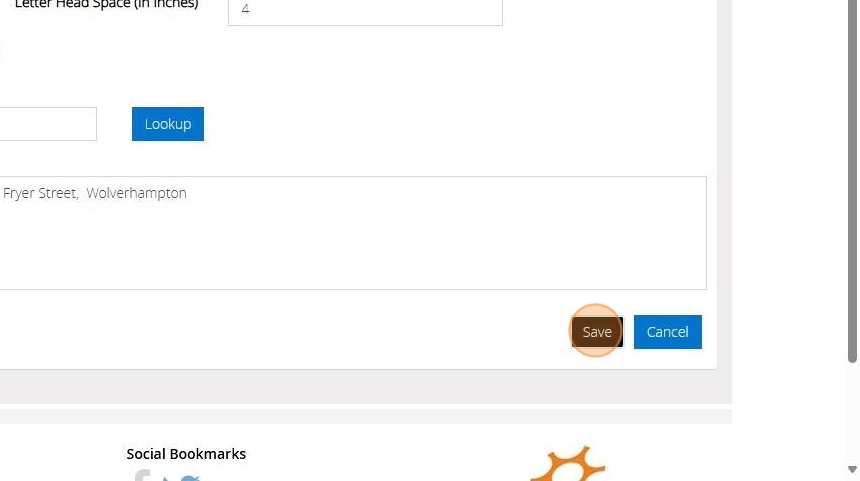
14. Click save
Create an Event
1. Navigate to https://www.mygiving.online/
2. Click "Events"

3. Click "Add New"

4. Enter a name for your event

5. Enter a date for your event

6. Here you can enter a description for your event

7. Enter the postcode

8. Click "Look up"

9. Click the dropdown and select the address

10. Click here to select your event contact. For further guidance on entering Contact details click here

11. Click the drop down bar and select your letter template
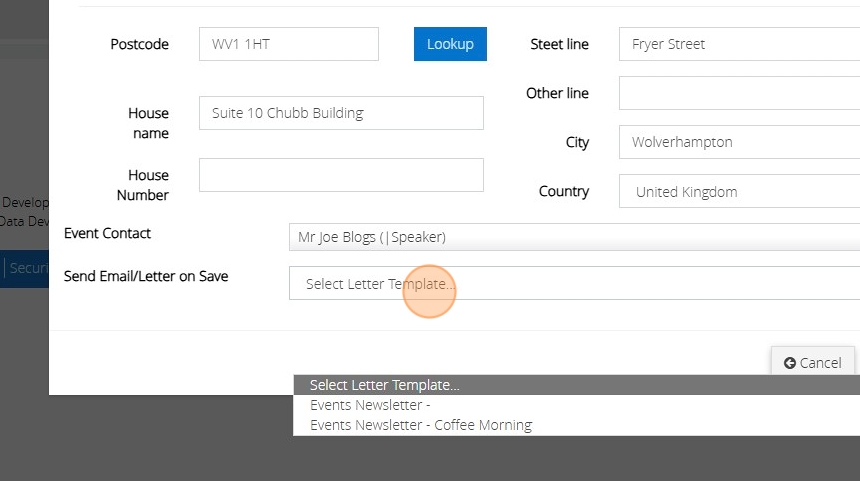
12. Click "Save"

13. Your Event has been created and email will now be sent to your contact with your event details.
Create a New Donor Record
1. Navigate to https://www.mygiving.online/
2. Click "Donors"

3. Click "View and edit donors"

4. Click "Add New"
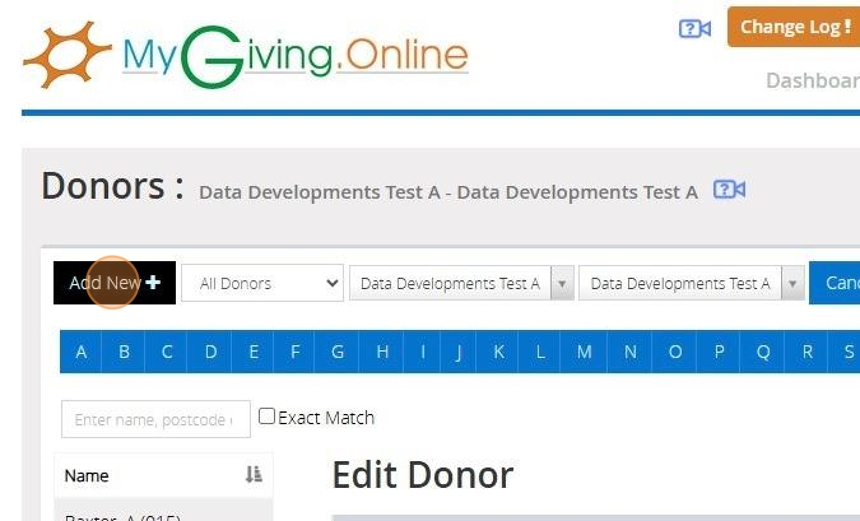
Tip: The mandatory fields for donor records include Name, Address, and Reference
5. Enter your Donor details into the Name Section

6. Select your Organisation, Charity and Branches from the drop down bar

Tip: Tip: You can tick the 'MyMembership' option to make this record accessible in MyMembershipManager.Online. An active subscription to 'MyMembershipManager.online is required to use this feature. Click here for further information
7. Click the "Postcode" field and enter the Donor Postcode

8. Click "Lookup"

9. Click the dropdown and select the Donor Address

10. Enter your Donor Reference

11. Alternatively, click "Last Reference" to generate a reference that follows on.

Tip: Tip! The last reference button may appear different in your account depending on if you have selected your Donor reference type as Alpha- numeric or numeric within your branch settings.
12. Click "Save"
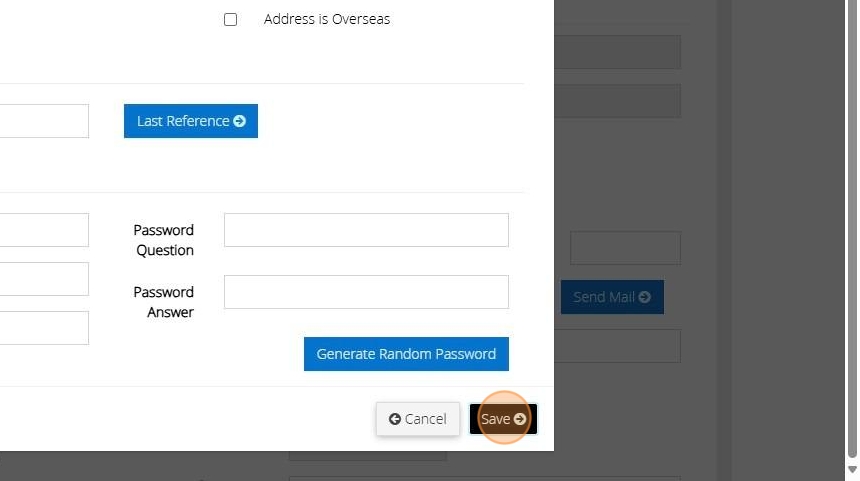
Tip: The donor record has now been created. The next step would be to enter their declaration dates
13. Click the tab "Declaration, Defaults and Pledge"

14. Click the "Declaration Date" field. Enter the date the Donor has signed their declaration

15. You can free type the date into the box or click to bring up a colander. Alternatively, click on the button "Today"

16. Enter the date the Declaration is Valid from and the date this is Valid to

Tip: Tip: If the donor has provided confirmation that you can claim on past and future donations, enter a 'valid from' date four years prior (e.g., 29/07/2020) and leave the 'valid to' field blank.
17. Click "Save"

Tip: Tip: To streamline the process of entering donations, you can set default values for donors on their records. These defaults will automatically populate when you select the donor.
18. Select the method of payment from the dropdown menu to specify how the donor will make the payment.

19. Select the purpose of the donation

20. If the Donor gives via envelope select their number via the drop down or click Add new Envelope to enter their number

Tip: Tip! A donor may pledge an amount they wish to donate over a certain period of time. This can also be entered on their record.
21. Click the "Giving type" to select the frequency of the pledged donation

22. Enter the Amount the donor wishes to pledge

23. Click "Save"

Tip: Tip! You can now record donations directly onto the Donor record or by going to the Gifts heading on your Dashboard
Creating and managing sponsored events.
Creating Sponsored Events
1. Click "Events"
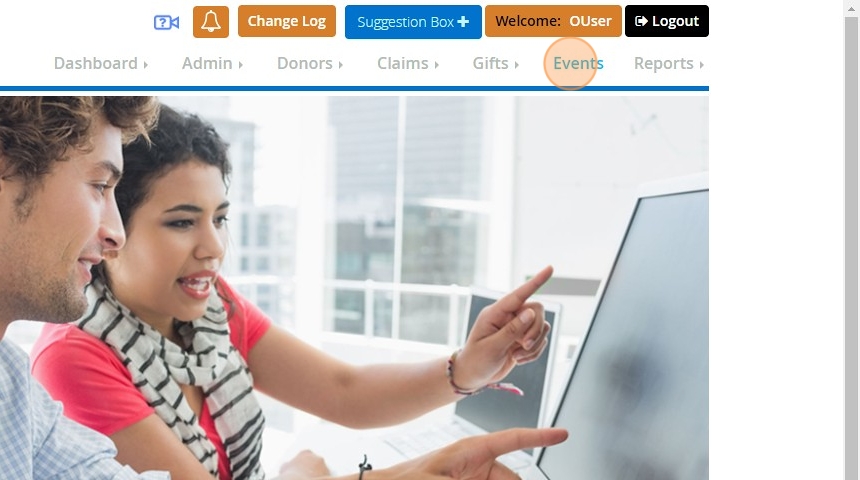
2. Click "Add New"

3. Enter the details of the sponsored event you wish to create including its name, date, location and a brief description if you wish.

4. Once you have entered all of the details, click "Save"
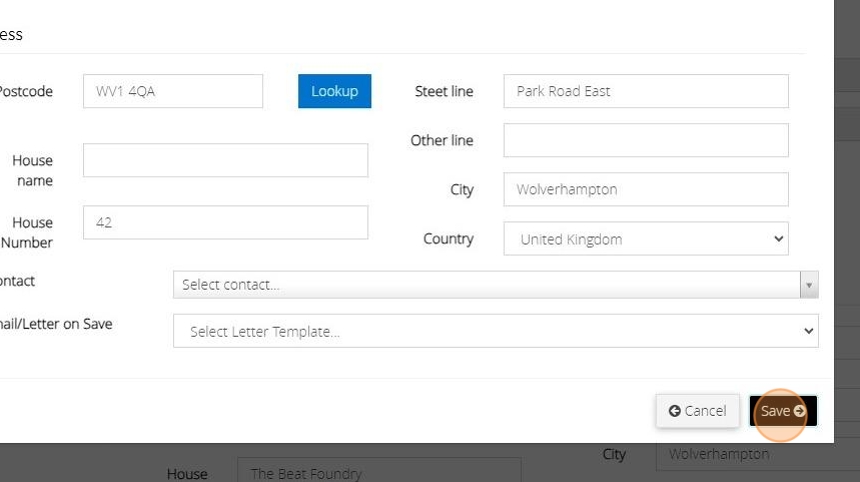
Creating participant records.
5. To add the individuals, taking part in the sponsored event click on the "Admin" menu.
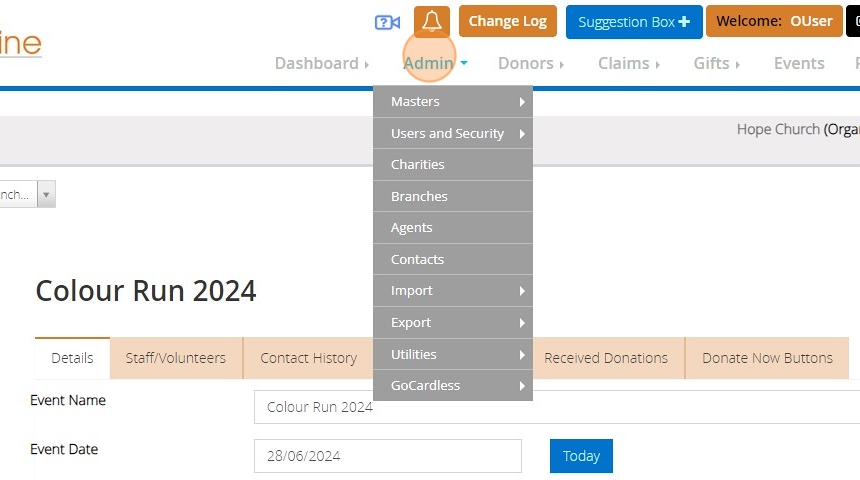
6. Select "Contacts"

7. Click "Add New"

8. Enter the individuals details and select 'Sponsor' as the Contact Type.
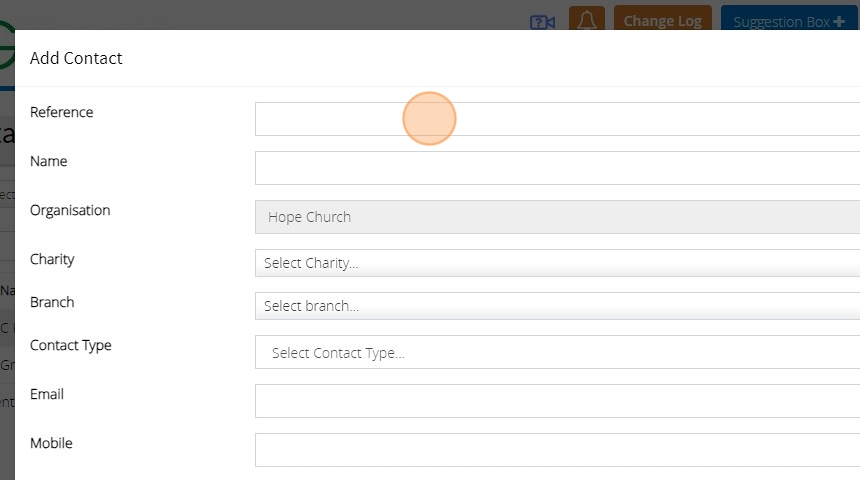
9. You can use the 'Contact Preference' option to record how the participant wishes to be contacted about this and future events.
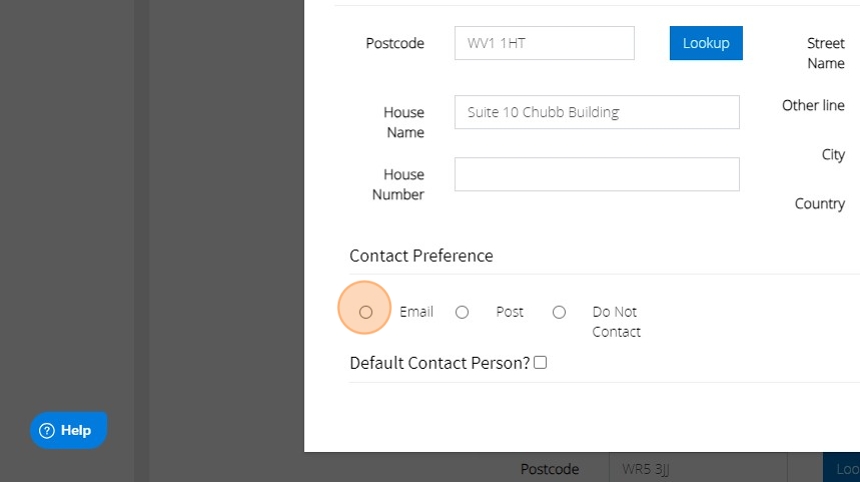
10. Click "Save"

Adding participants to the sponsored event.
11. Now that you have created your participants, you can add them to the sponsored event, click "Events"
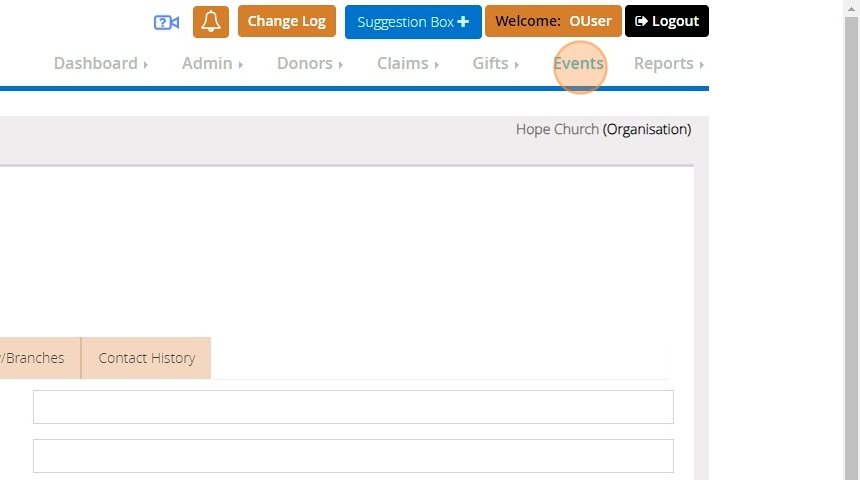
12. Select the event you wish to add them to.
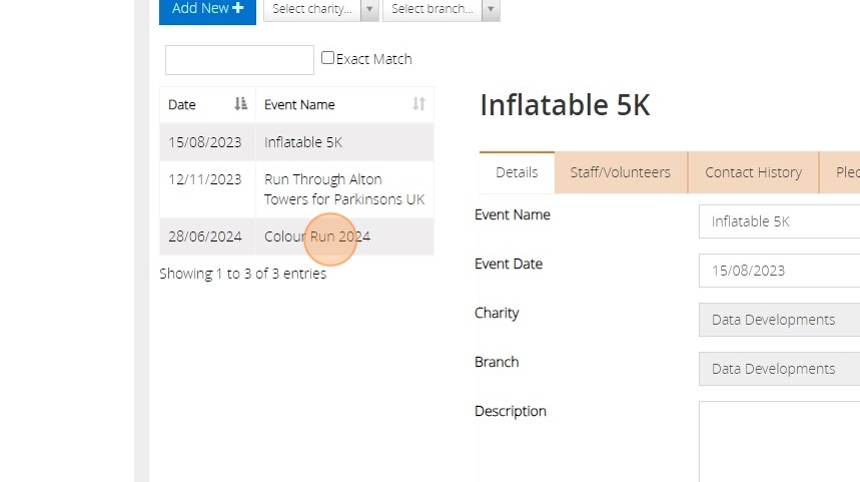
13. Click the "Staff/Volunteers" tab.

14. Use the check boxes, to select the participants from the dropdown list.

15. Click "Add to Event"

Adding pledged amounts.
16. To add an amount that has been pledged to the participant, from the 'Events' page select the event and click "Pledged Donations"

17. Click "Add Gift"

18. Enter the details of the pledged amount including the donor, the date it was pledged, the amount and the purpose and method.

19. Click "Save"

Recording donations that have been collected.
20. From the 'Events' page, select the event and then click on the 'Pledged Donations' tab. Select the pledged amount that you wish to update.

21. Click "Edit"

22. Enter the date, of when the donation was received.
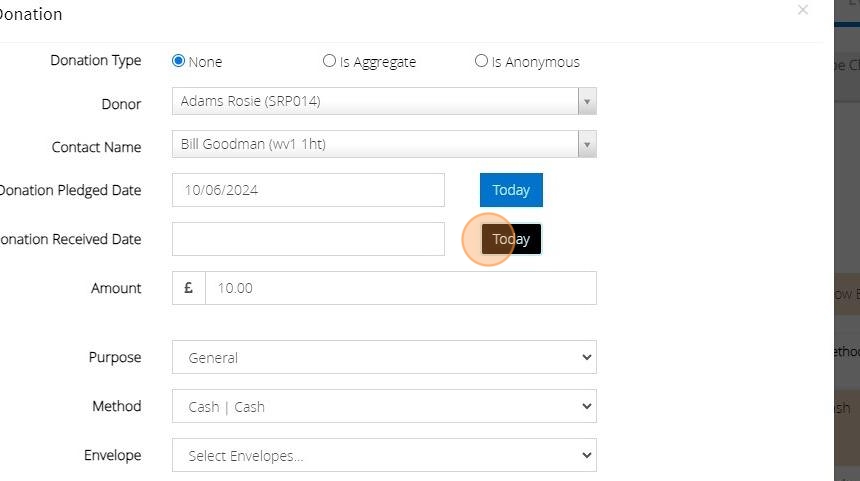
23. Click "Save"
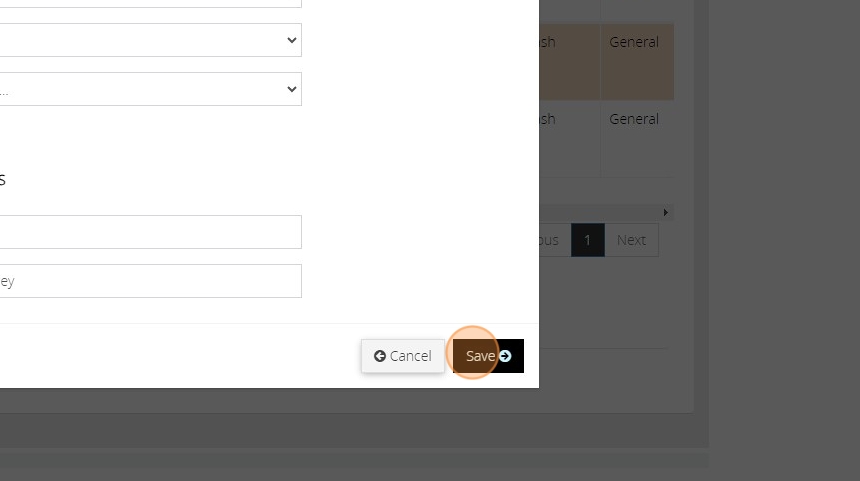
24. You'll now be able to see the donation on the 'Received Donations' tab, this will also show on the donor's record ready to be included as part of your next claim if applicable.

Creating 'Donate Now' buttons for the event and it's participants.
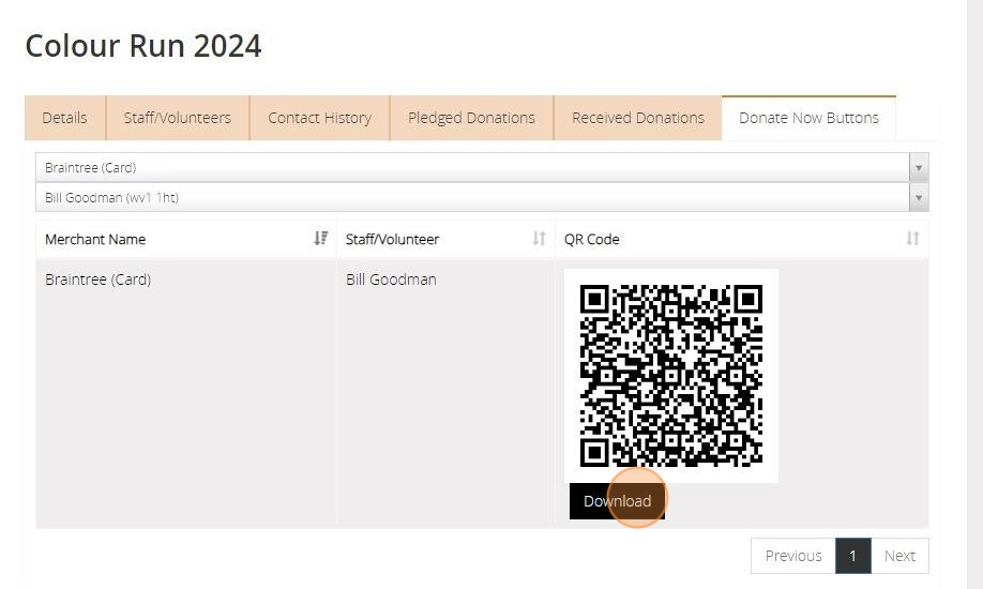
25. To enable online giving for this event, click the "Donate Now Buttons" tab on the events page.

26. Here you will see some automatically generated QR codes for this event.

27. You can use the dropdown menus at the top of the window, to limit the QR codes shown to a particular donation method, or a participant.

28. Click "Select merchant..." to choose the payment method.

29. Click "Select contact..." to limit the QR codes to a particular participant.

30. This will then show you the QR codes, for the options you have selected. You can use the 'Download' button to download the QR code to your device, for use on your website or other marketing materials.
Creating A New User Account
Tip: On MyFundAccounting.Online you can create user accounts with a custom roles and permissions that tailors each user's access.
This ensures they only see the parts of the application that are relevant to their role.
The below steps will guide you in creating a custom role with specific permissions.
1. Navigate to https://www.mygiving.online/dashboard
2. Click "Admin" > "Users and Security" > "Custom Roles & Permissions"
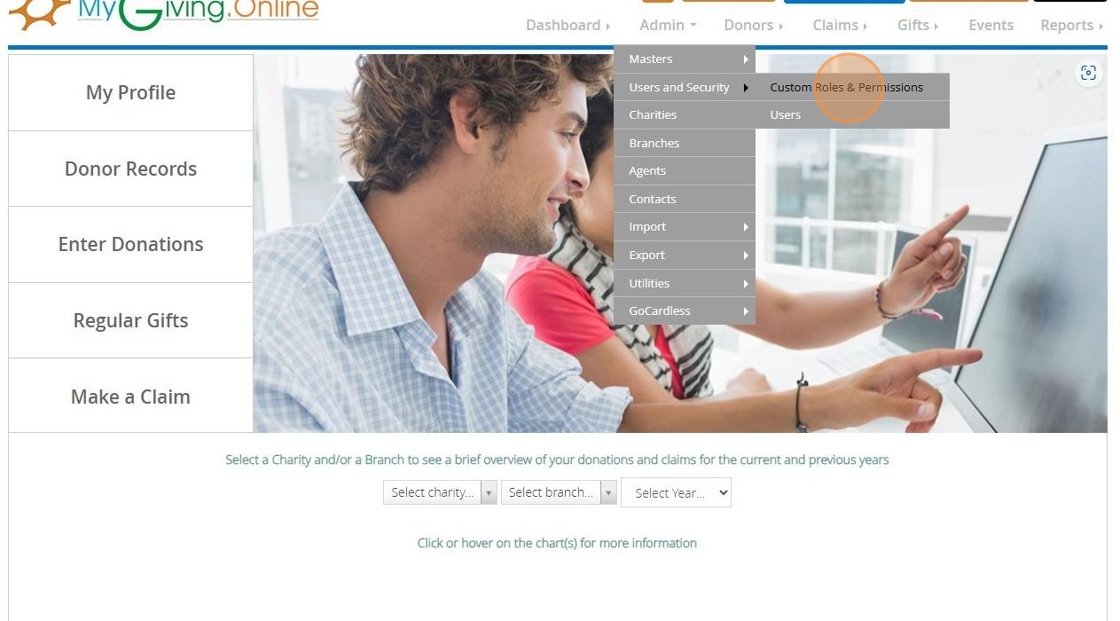
3. Click "Add New"
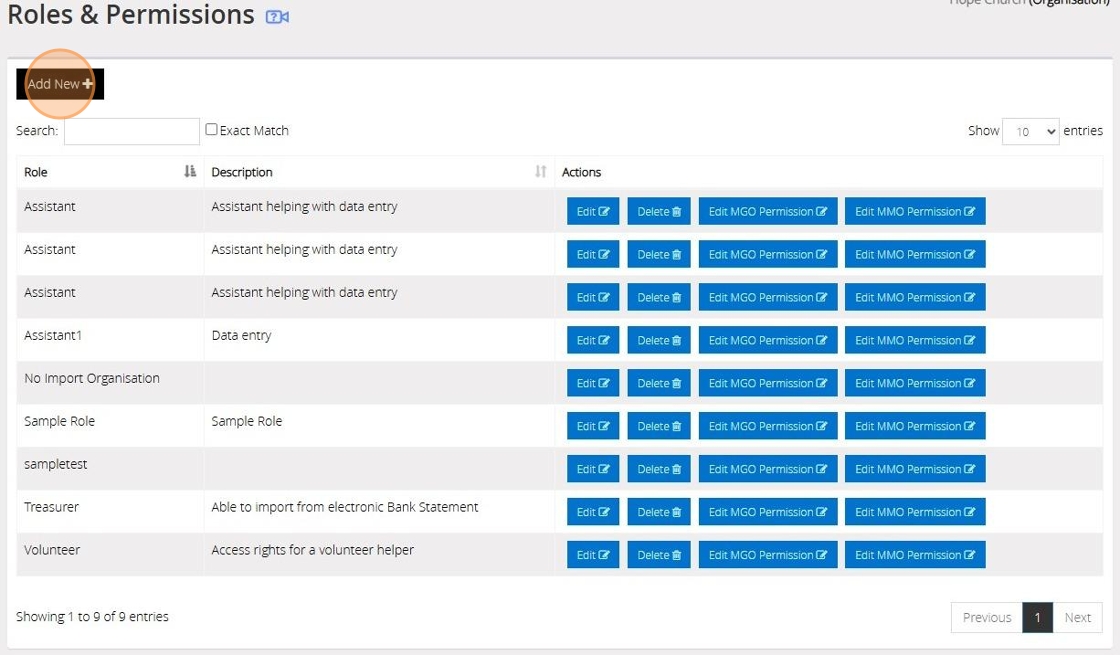
4. Name the new role depending on who you would assign it to e.g. Assistant, Gift Aid Secretary
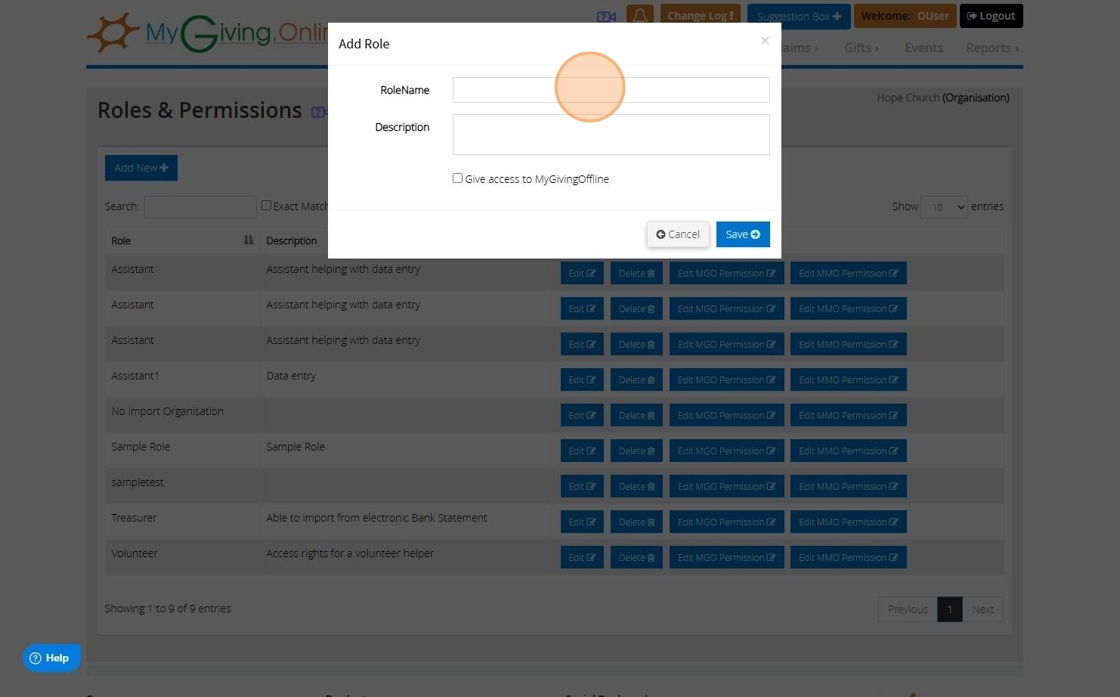
5. Click "Save"
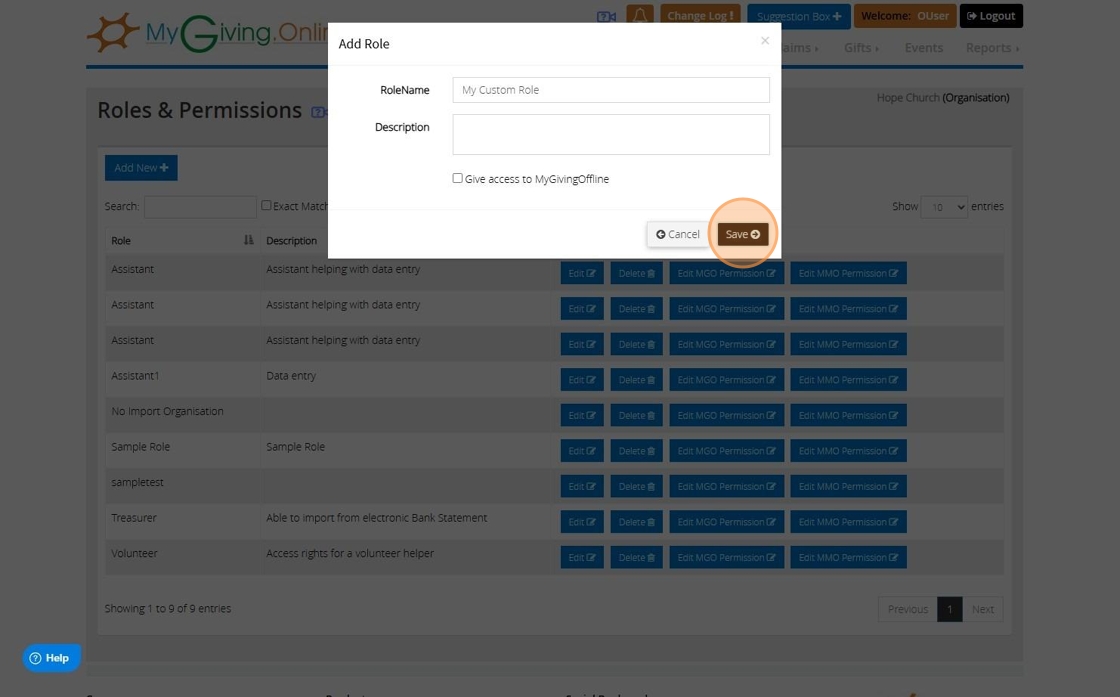
6. Your new role will appear in the list
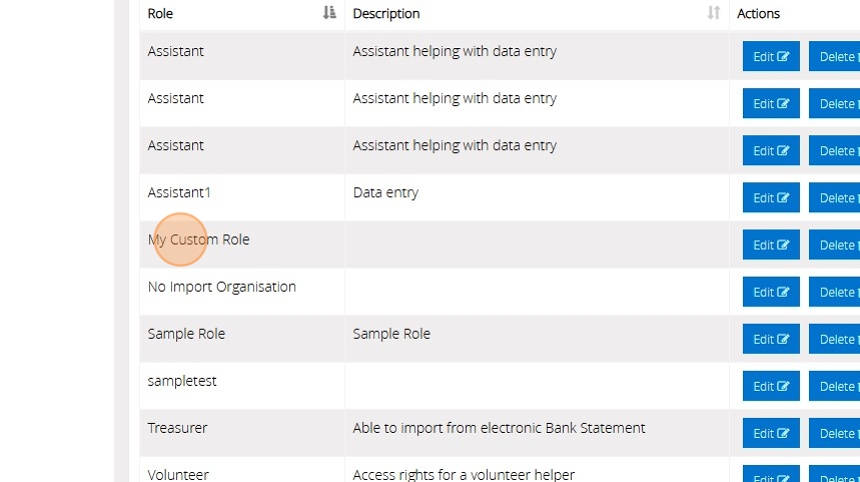
7. Click "Edit" to bring up the form you filled in step 4 to amend any details
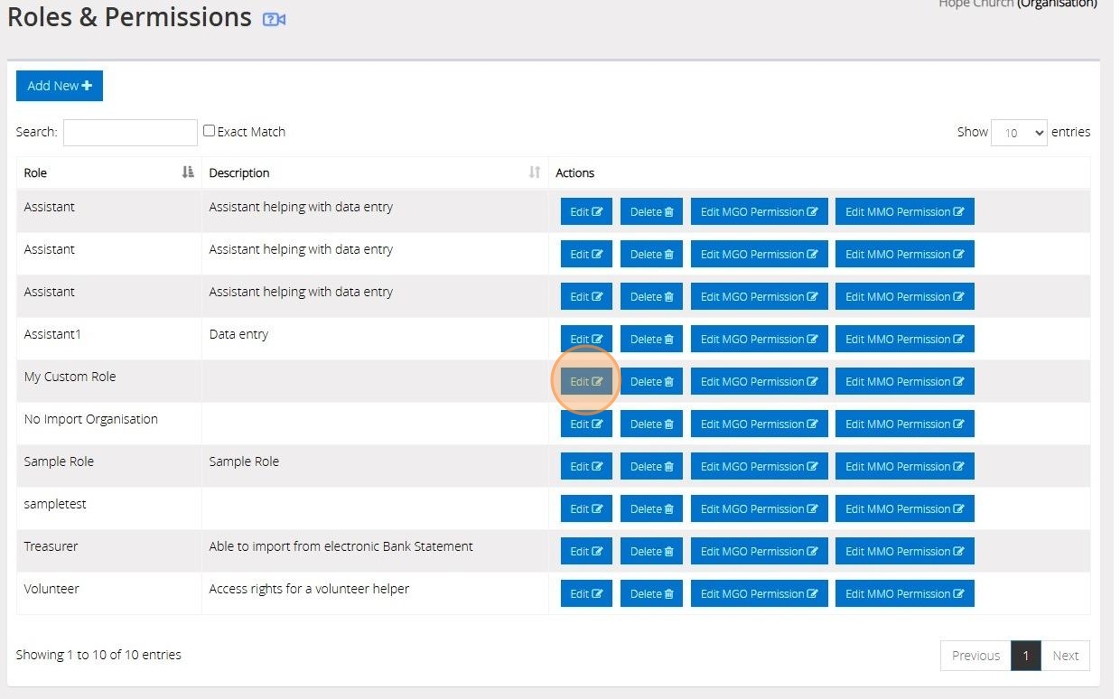
8. You can remove the role by clicking "Delete"
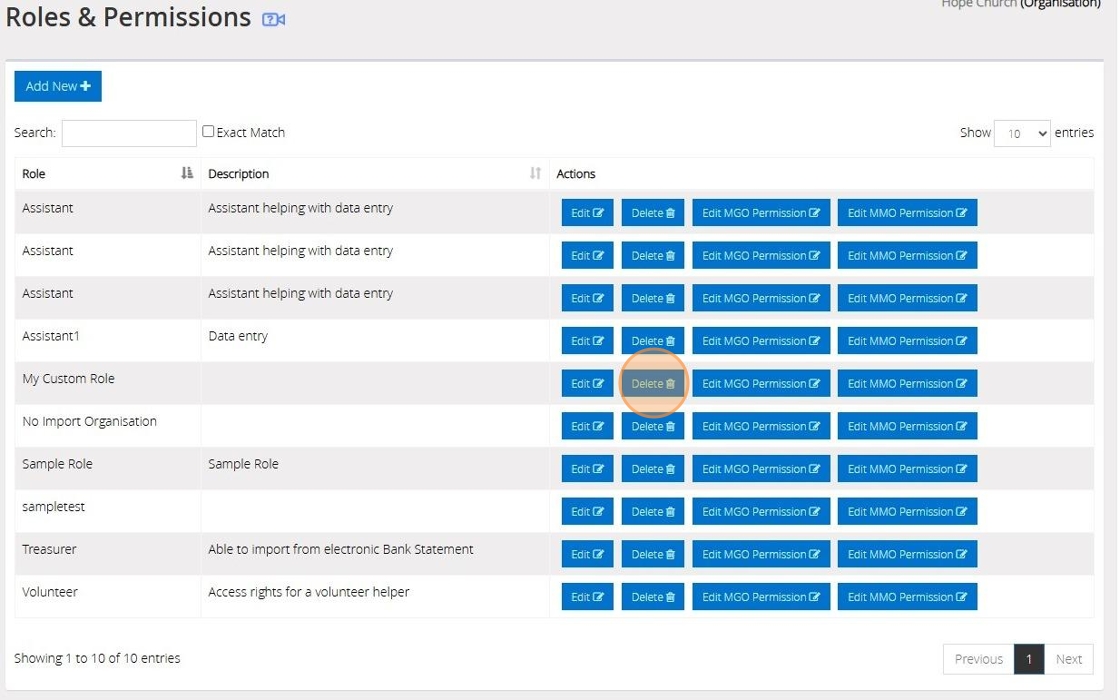
Alert: Alert! If the role has been assigned to a user it cannot be removed until the user is reassigned to another role or deleted
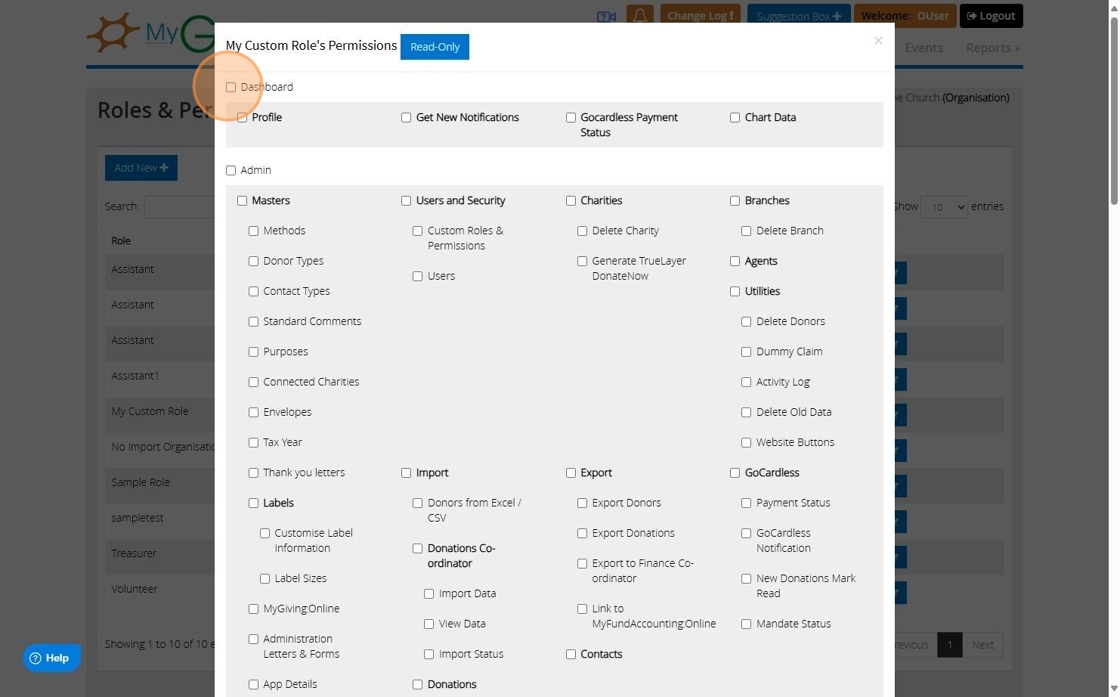
9. Click "Edit MGO Permission" to begin choosing what permissions this role will give the user. "Edit MMO Permission" may be available if you use MyMembershipManager.Online.

10. Click the checkbox of the options you want available to the user and uncheck the ones you wish to hide or block
11. Click "Save" once you are happy with your selection.
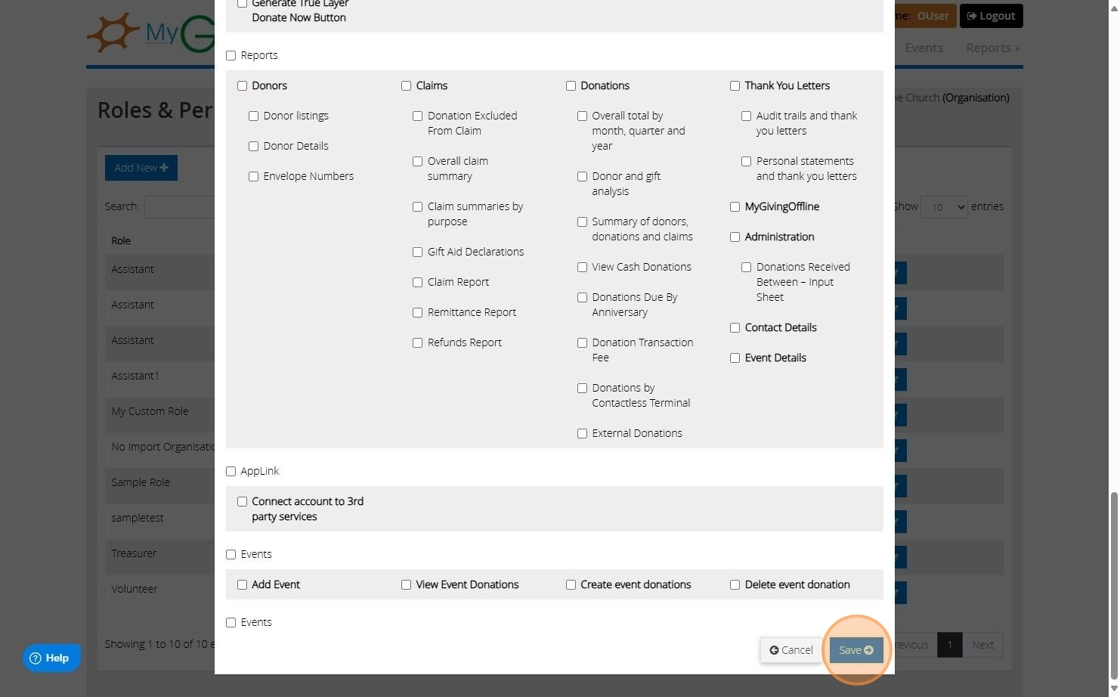
Tip: Tip! If you do have access to MyMembershipManager.Online (MMO) you can set up the permissions for MMO by now clicking "Edit MMO Permission"
Creating the User
12. Click "Users"
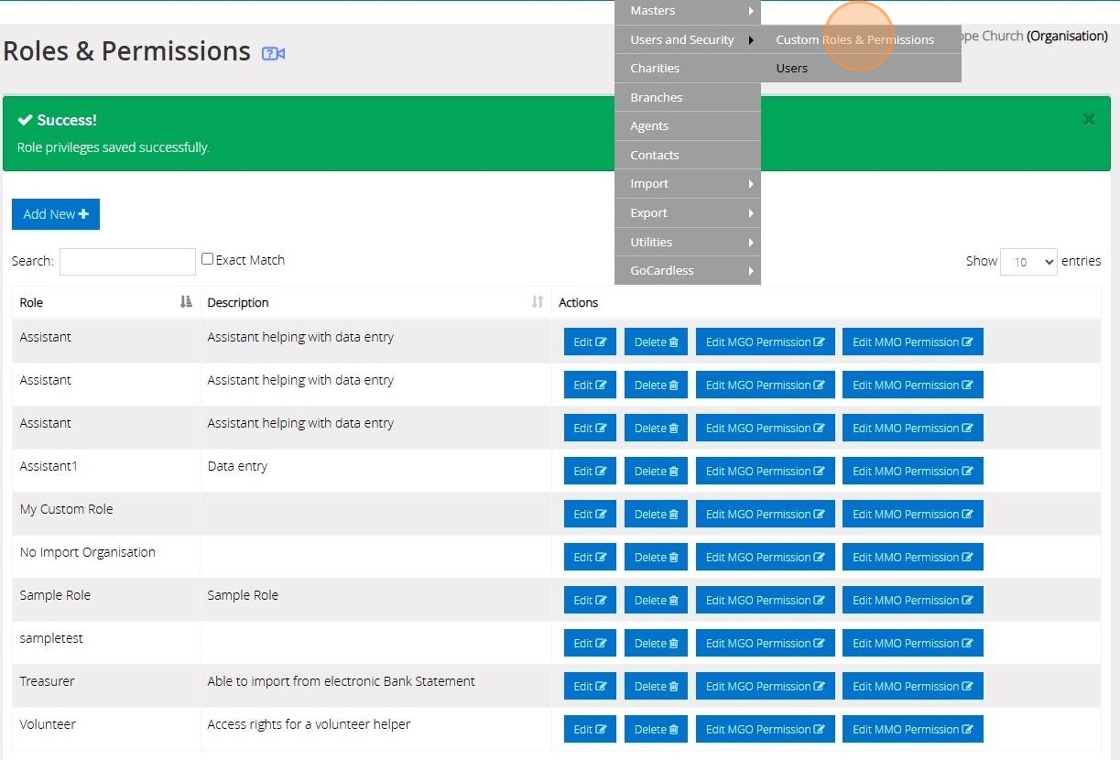
13. Click "Add New"

14. Click this dropdown to select a default role or a custom role you have created
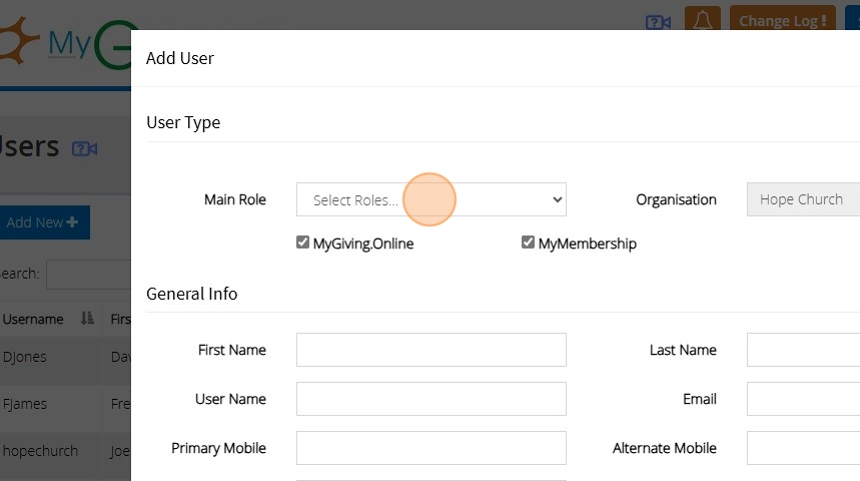
15. If you select to use a "Custom" role you will see a new dropdown where the roles you have created will appear. Click this dropdown to select the relevant role you wish to assign the user.

16. Checking "MyGiving.Online" will allow the user to log into MyGiving using the details you set up

17. Checking "MyMembershipManager.Online" will allow the user to log into MyMembershipManager using the details you set up

18. Fill out the rest of the form with the users personal details
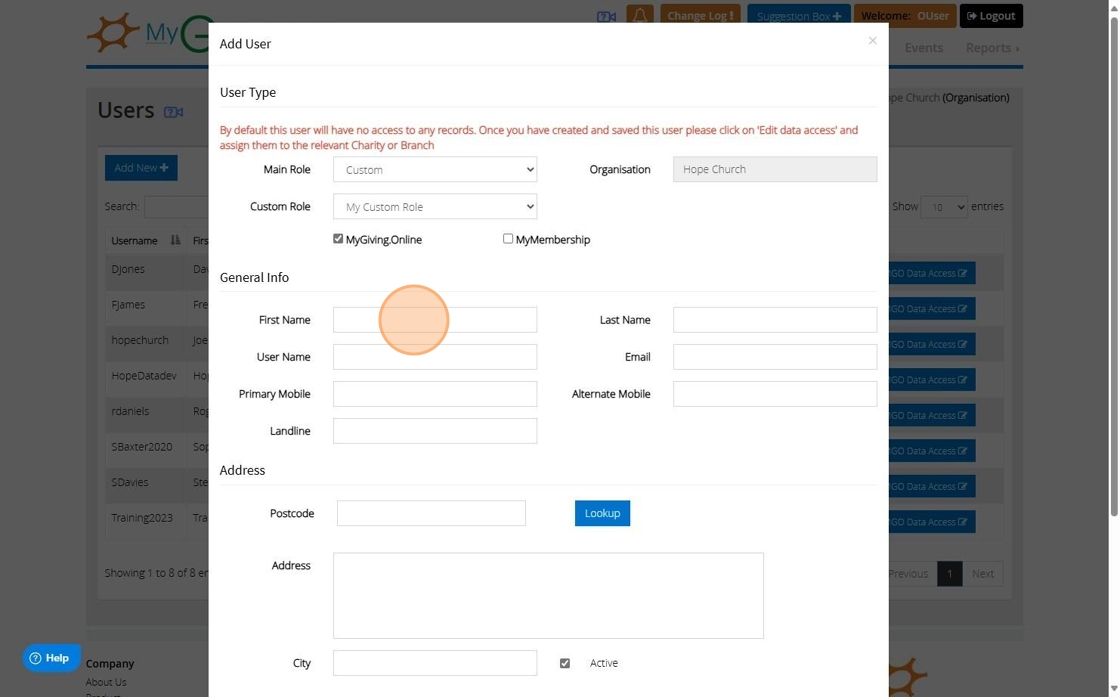
19. You can use the lookup option after entering the postcode to autofill the address from a dropdown
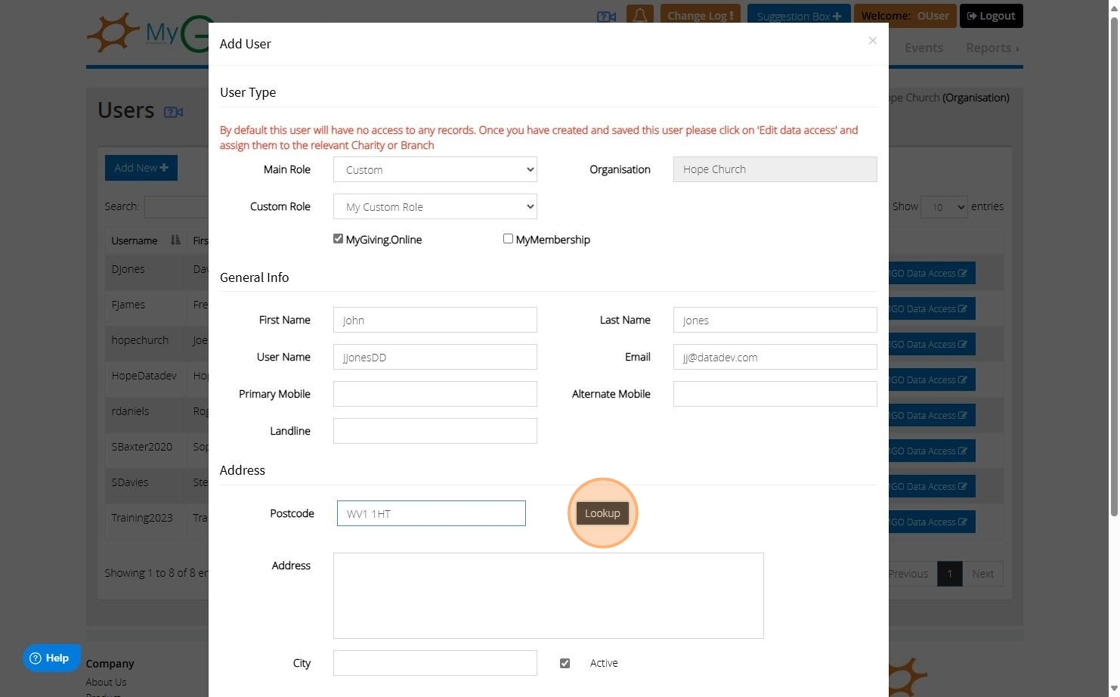
20. Click this dropdown after clicking the lookup for all the addresses that have been found for the postcode

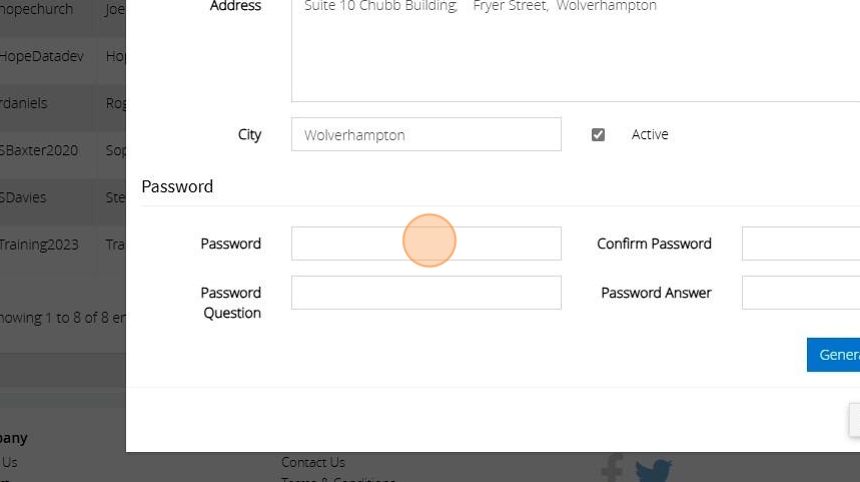
21. Click the "Password" field and enter a password for the user to use when they first log into the account
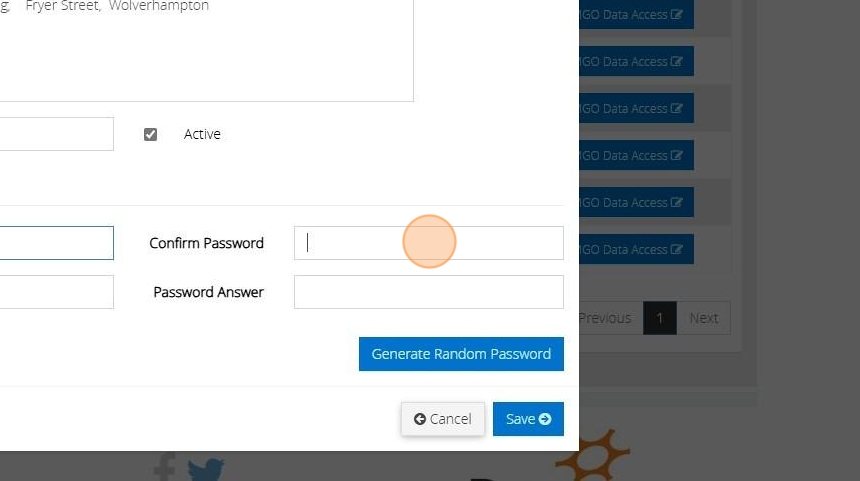
22. Click the "Confirm Password" field and re-enter the same password
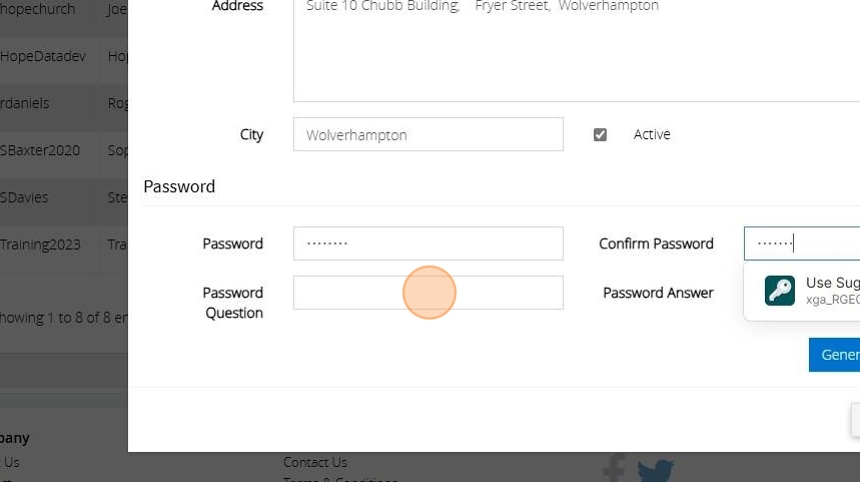
23. Enter in a password question and answer. The user can update these once they log into the account
24. Click "Save"
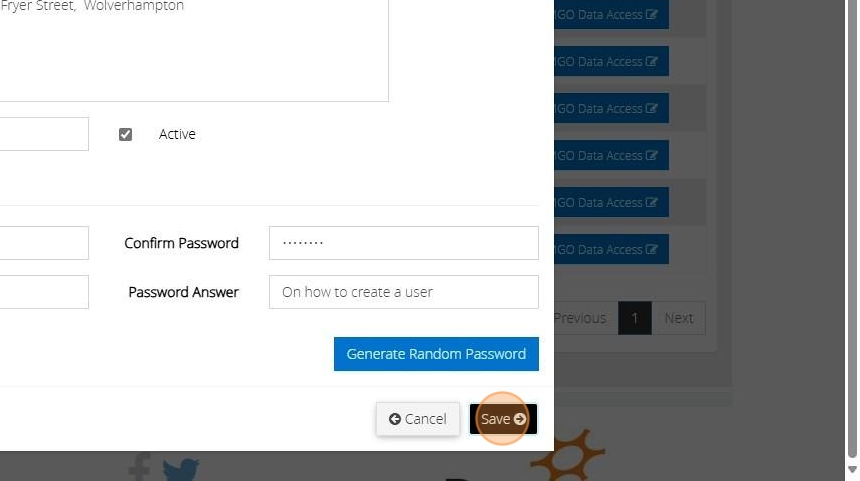
Tip: Tip! After saving the details you can send the username and password you have created to the user in an email
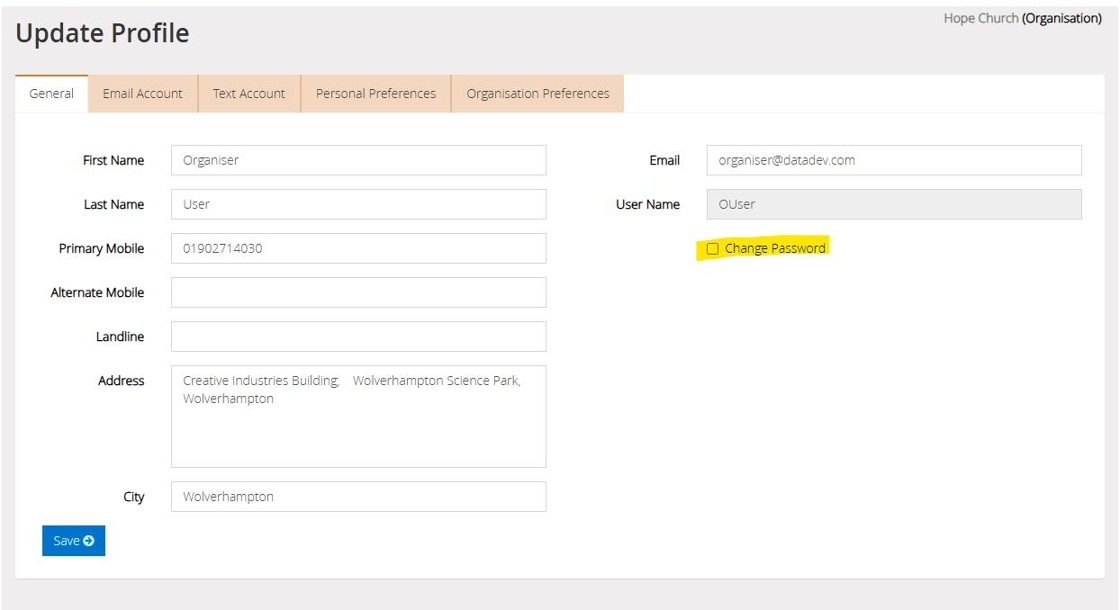
Tip: Tip! Once the user logs in they can update their password and password answer and question by going to "My Profile" on the left hand side of the dashboard and checking the change password checkbox on the right
Delete a Donor Record
Tip: There may be instances where a donor record is created in error.
The following steps will guide you through the process of deleting a donor record.
1. Navigate to https://www.mygiving.online/
2. Click "Admin"

3. Click "Utilities"

4. Click "Delete Donors"

5. You can either search for the donor or locate from the list

6. Click this checkbox.

7. Click "Delete"

8. Click this password field.

9. Click "Ok"

10. Click "Yes"

11. The below message will appear to confirm the record has been deleted

Delete Old Data
Tip: All Gift Aid declarations and records must be retained for six years after the conclusion of the accounting period to which they relate to.
The following instructions will assist you in discarding data that exceeds the six-year limit.
1. Navigate to https://www.mygiving.online/
2. Click "Admin"

3. Click "Utilities"

4. Click "Delete Old Data"

5. Click the "Records older than Years" field and enter a year 6 or above

Tip: Tip! Note that figures below 6 cannot be entered because records for anything less than 6 years must be retained.
6. Check the box next to each statement to confirm which data should be erased.

7. Click here.

8. When you are ready to remove the data Click "Delete"
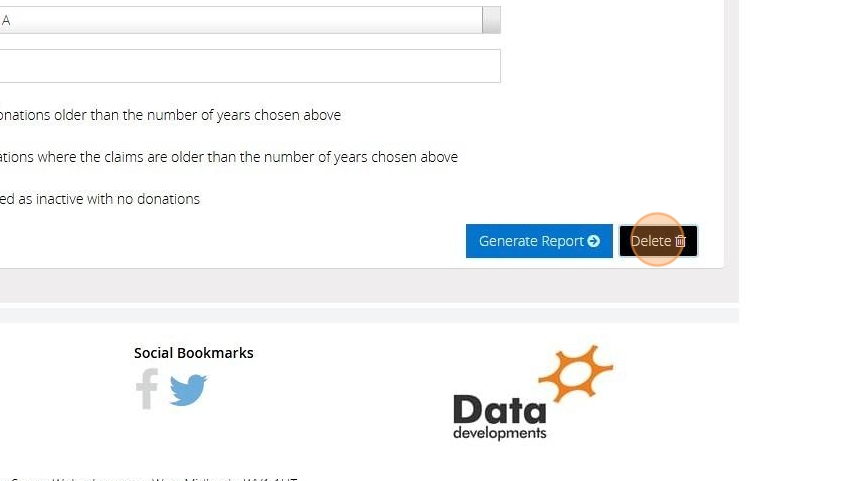
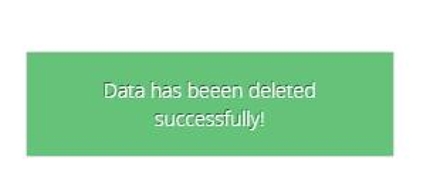
9. Once deleted, the below message will display
Tip: To configure your account to automatically delete any data older than six years, please follow the guidance below!
10. Navigate to https://www.mygiving.online/Donor
11. Click "Dashboard" and go to "Profile"

12. Click "Organisation Preferences"

13. Place a tick in the checkbox next to the preferences you want to set for automatic deletion.

14. Click "Select Charity or Branches" and select your branch or charity from the drop down menu

15. Click "save"

Dummy Claim
Tip: In certain situations, you may need to carry out a Dummy Claim to record donations as claimed without reporting this information to HMRC.
The following instructions will guide you through this process
1. Navigate to https://www.mygiving.online/Donor
2. Click "Admin"
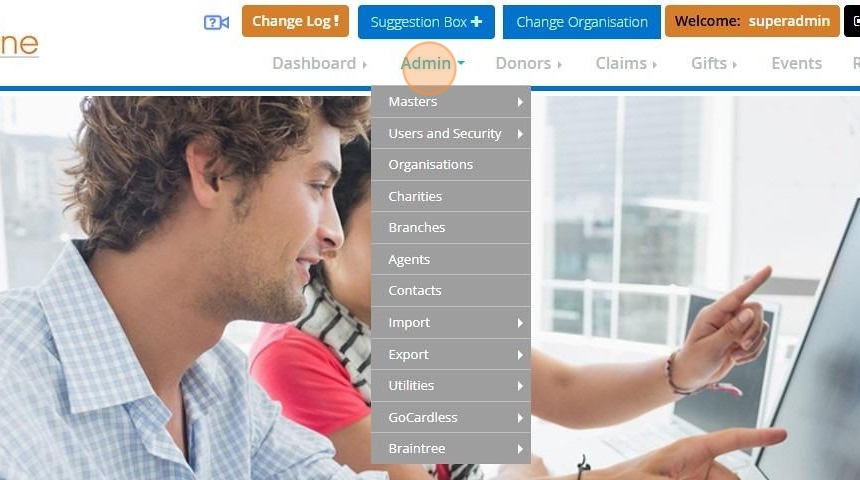
3. Click "Utilities"

4. Click "Dummy Claim"

5. Enter the date of the last donation to be included
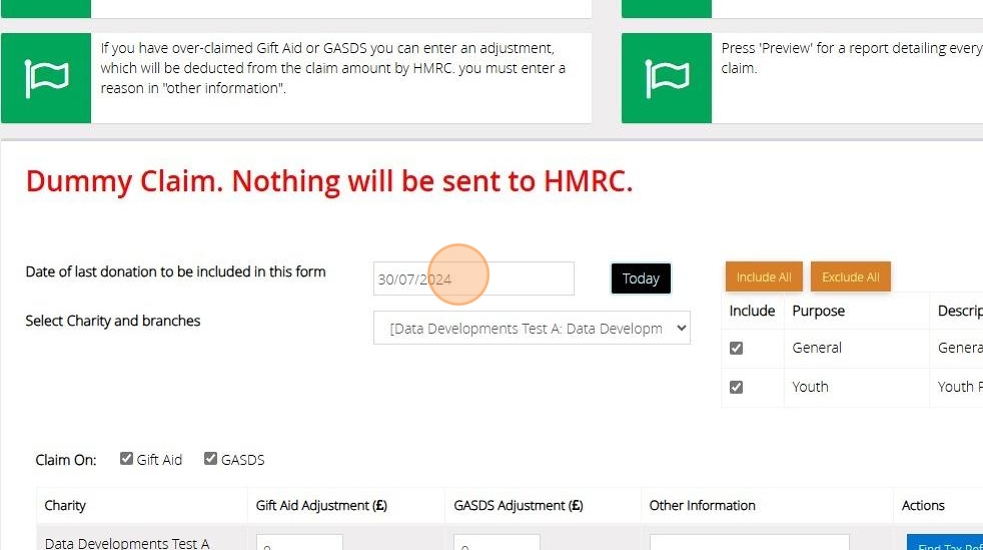
Tip: Tip! Click on the bar to open up a calendar and select the date
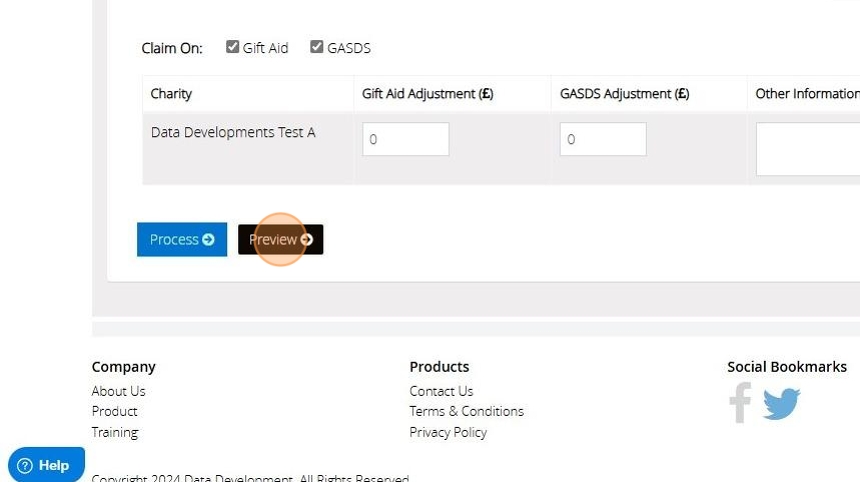
6. Click Preview to generate a report and confirm the balances are as you expect
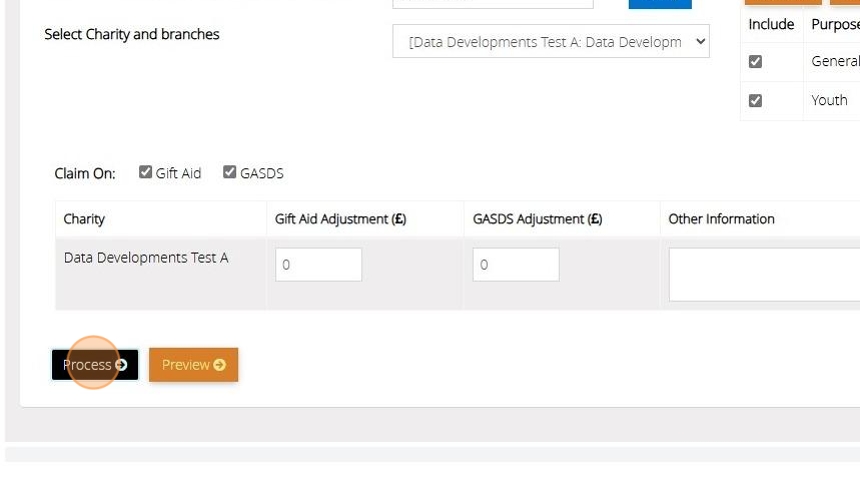
7. Once you are ready to perform the dummy claim select process
8. Click "YES"

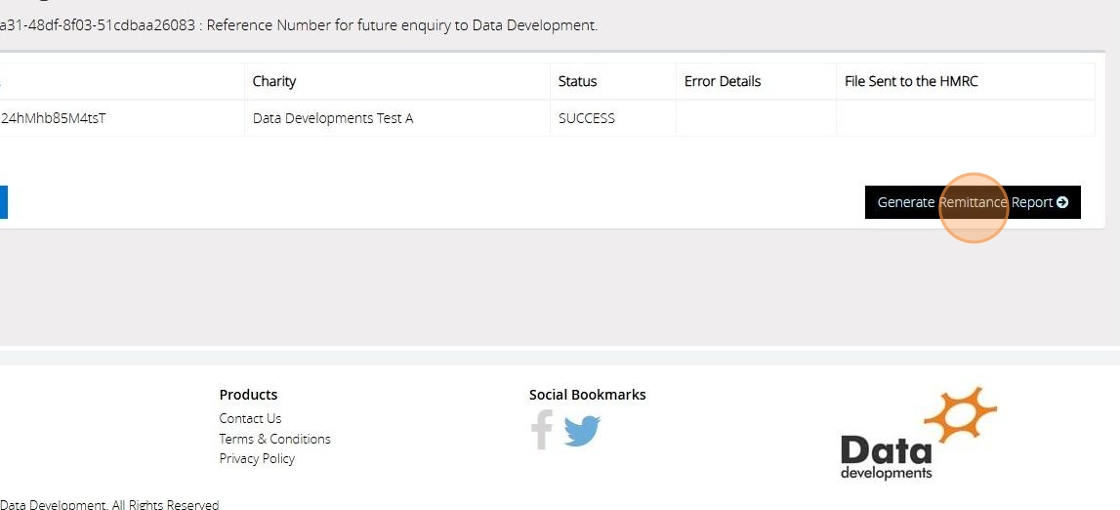
9. You will receive a message to show if your dummy claim has been run successfully. Click "Generate Remittance Report" to generate a report of the donations that have been marked as claimed.
Enter an Agents Details
Tip: Your organisation might have an agent responsible for submitting Gift Aid claims to HMRC on its behalf.
The following instructions will assist you in entering your Agent Details.
1. Navigate to https://www.mygiving.online/agent
2. Click "Admin"
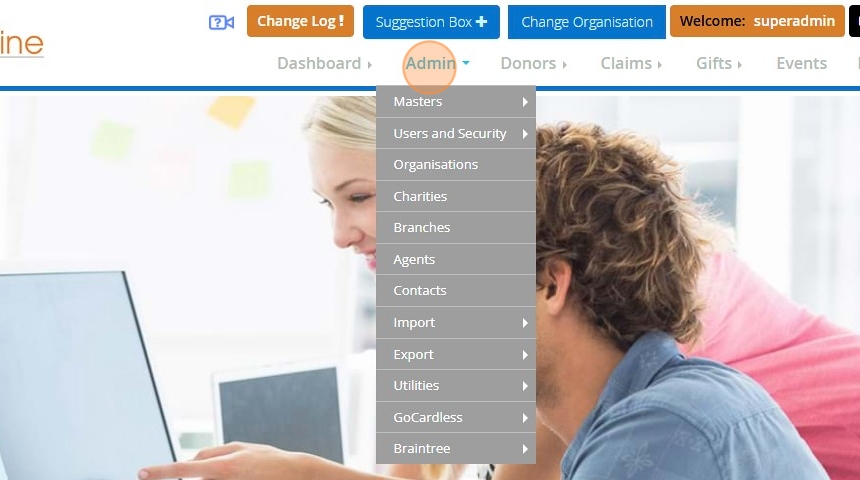
3. Click "Agents"

4. Click "Add New"
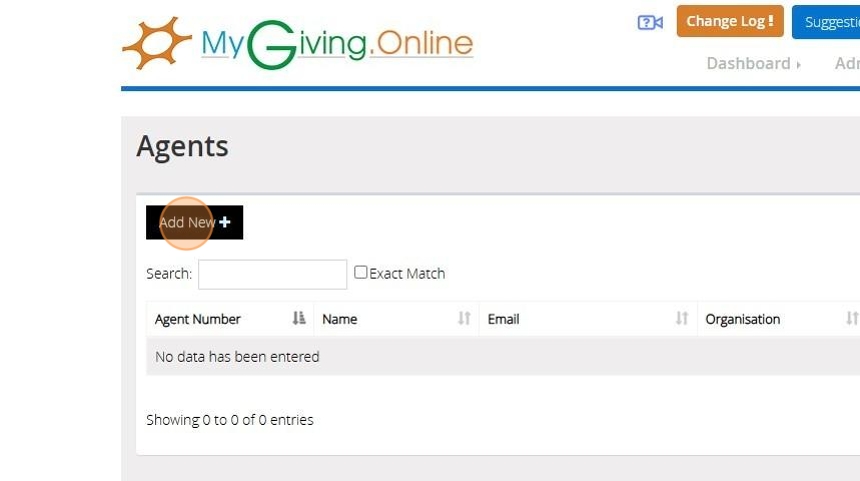
5. Enter the General Information for your Agent
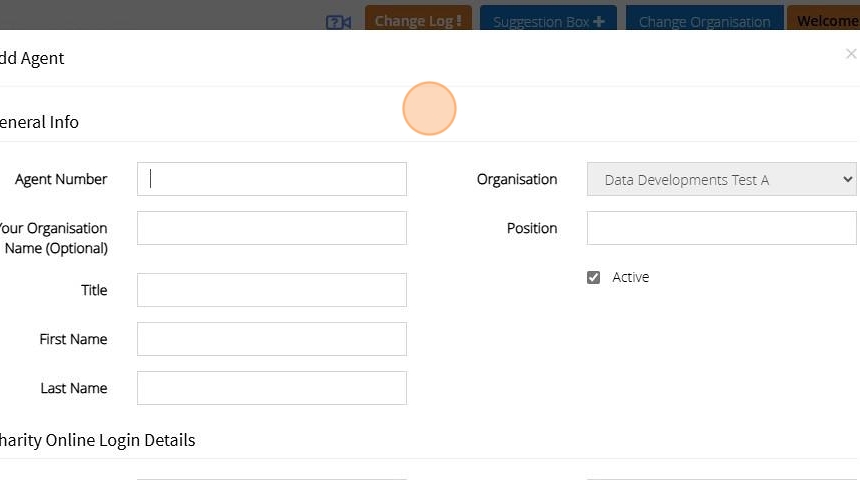
6. Enter the Charity Online log in details and select the Agents MyGiving user account from the drop down bar
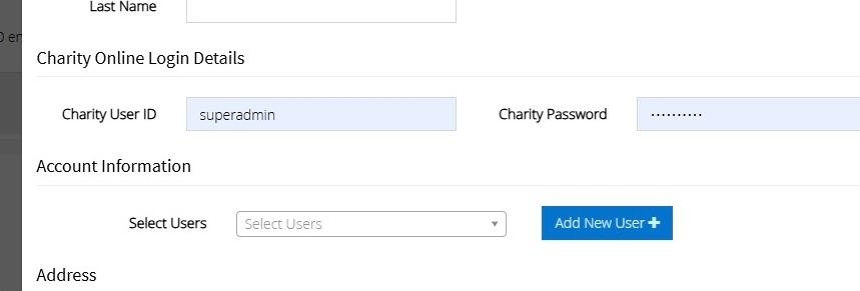
Tip: Tip! If you have not yet created the user account for your Agent you can do this by clicking on Add New User
7. Click the "Postcode" field and enter the postcode

8. Click "Lookup"

9. Select the address from the dropdown

10. Enter your Agents email and telephone number

11. Click "Save"
Export Data for Finance Co-ordinator
Tip: If you use our Finance Co-ordinator program you can export donations from MyGiving.Online in a format that can be read by Finance Co-ordinator.
This eliminates the need to re-enter the information manually.
The following instructions will lead you through this process.
1. Navigate to https://www.mygiving.online/
2. Click "Admin"

3. Click "Export"

4. Click "Export to Finance Co-ordinator"

5. Select how you would like to limit the donations included in the export

6. Enter the date range of the donations date you wish to be used as the limit

7. You can limit the donations to be transferred to those containing a particular comment by entering the comment in the first white box.

8. You can also limit to a particular batch reference by entering the batch reference in the second white box.
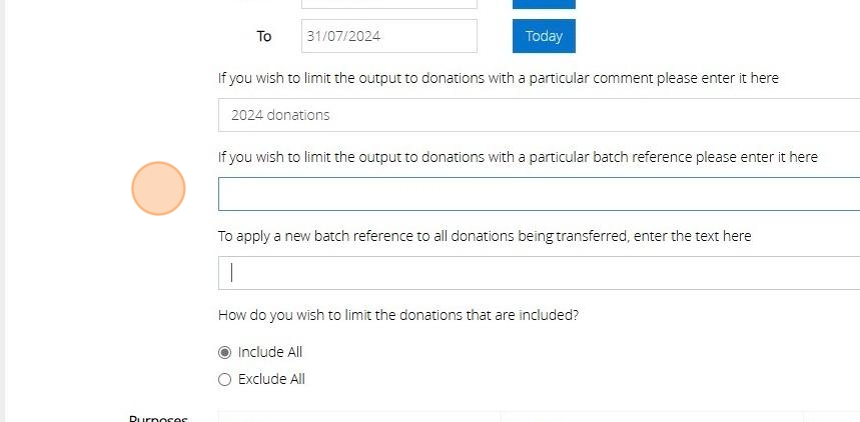
9. If you wish to apply a new batch reference to all the donations to be exported enter this in the third box.
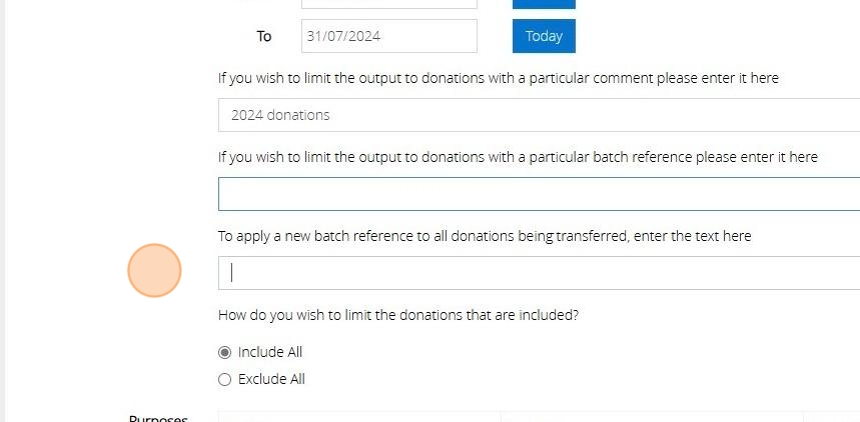
10. You can choose to include all donations or exclude donations if they do not meet the entered criteria
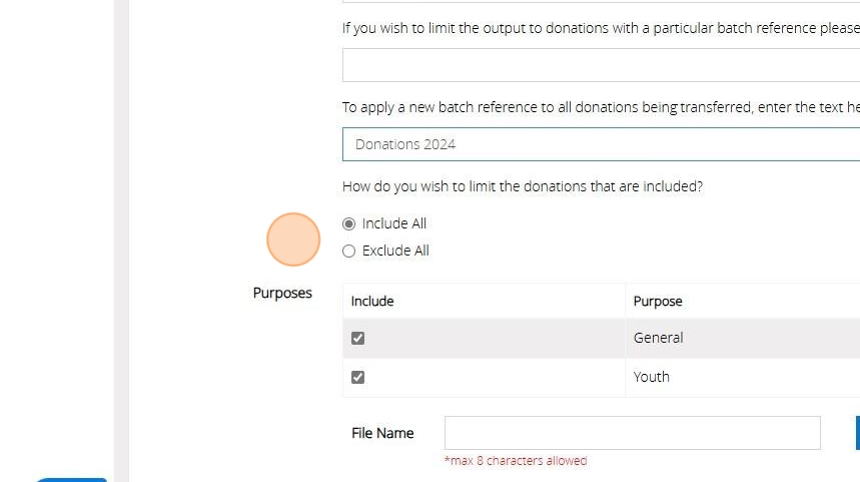
11. Check the boxes next to each purpose you wish to include

12. Enter a file name

13. Click here to create the export file for Finance Co-ordinator

14. Click here to generate a report

Export Donations
Tip: The following instructions will assist you in exporting a report of your donations.
1. Navigate to https://www.mygiving.online/
2. Click "Admin"

3. Click "Export"

4. Click "Export Donations"

5. Select how you wish the donations to be limited

6. Choose your preferred method to set the date range limit. After selection, input the start and end dates in the respective 'from' and 'to' fields.

7. Check the box next to each purpose you wish to include

8. Click "Show Donations" to list all donations that meet the criteria

9. Enter a file name for your export file

10. Click "Export to Excel"

Export Donors
Tip: The following instructions will assist you in exporting a list of your donors.
1. Navigate to https://www.mygiving.online/
2. Click "Admin"

3. Click "Export"

4. Click "Export Donors"

5. Choose your preferred method for filtering donors.

6. Check to include the types of donors by their giving type

7. Click "Show Donors" to list all donors that meet the criteria
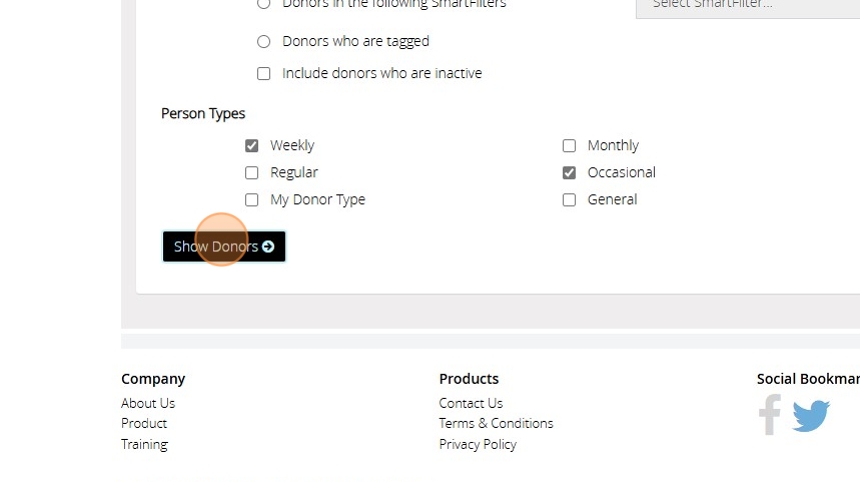
8. Enter a file name for your Donor List
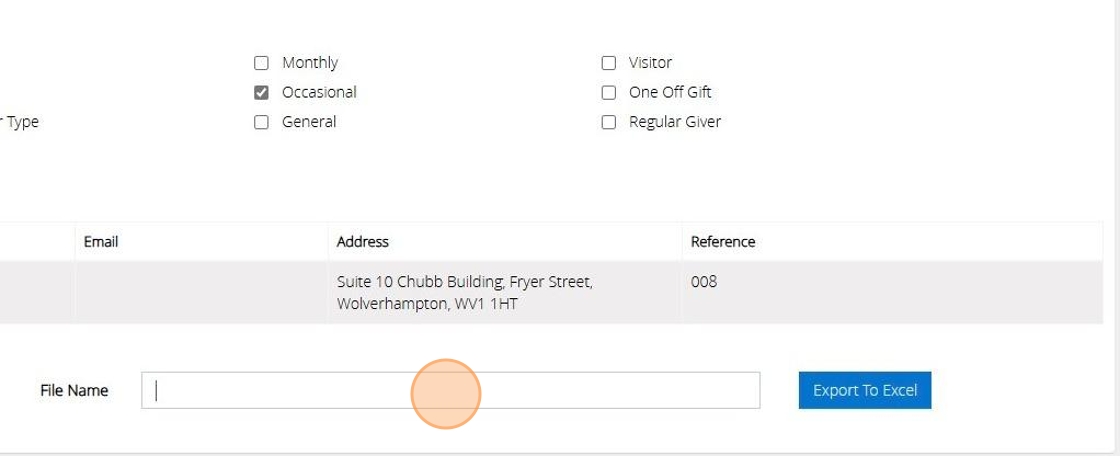
9. Click here to Export to Excel

Export Donors
Tip: The following instructions will assist you in exporting a list of your donors.
1. Navigate to https://www.mygiving.online/
2. Click "Admin"

3. Click "Export"

4. Click "Export Donors"

5. Choose your preferred method for filtering donors.

6. Check to include the types of donors by their giving type

7. Click "Show Donors" to list all donors that meet the criteria

8. Enter a file name for your Donor List

9. Click here to Export to Excel

Generate a Donor and Gift Analysis Report
Tip: This report will analyse the donations you have received between two dates based on information you have stored about the donors to help identify where the growth points are in the giving to your organisation.
1. Navigate to https://www.mygiving.online/dashboard
2. Click "Reports"
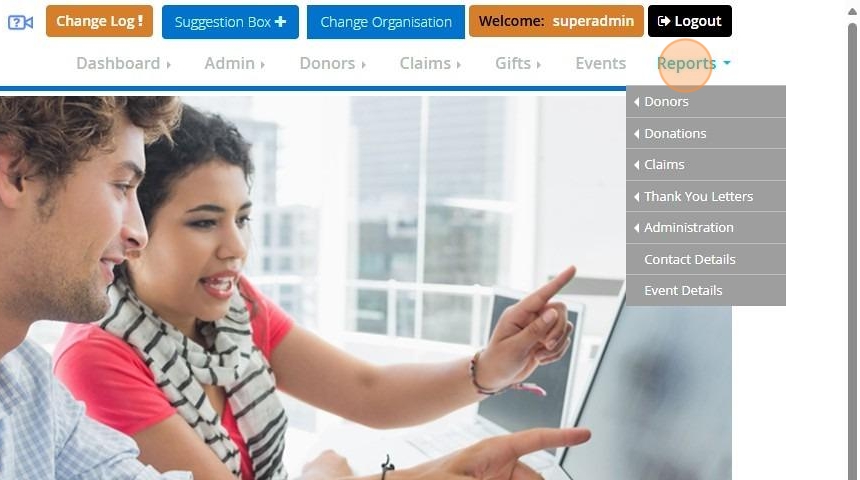
3. Click "Donations"

4. Click "Donor and gift analysis"
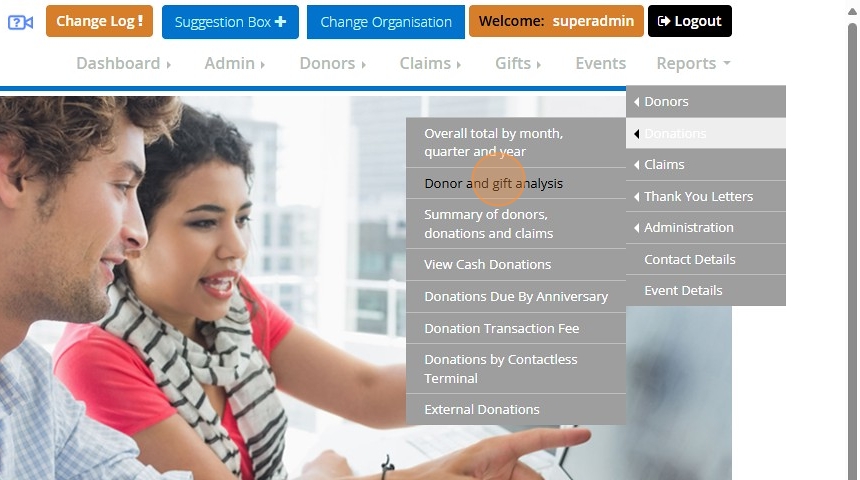
5. Enter a range of dates to limit the donations being included

6. Select the criteria by which the donations are to be analysed.

7. Tick here to sub-divide the data by the comments entered against the donations

8. Click "Next"

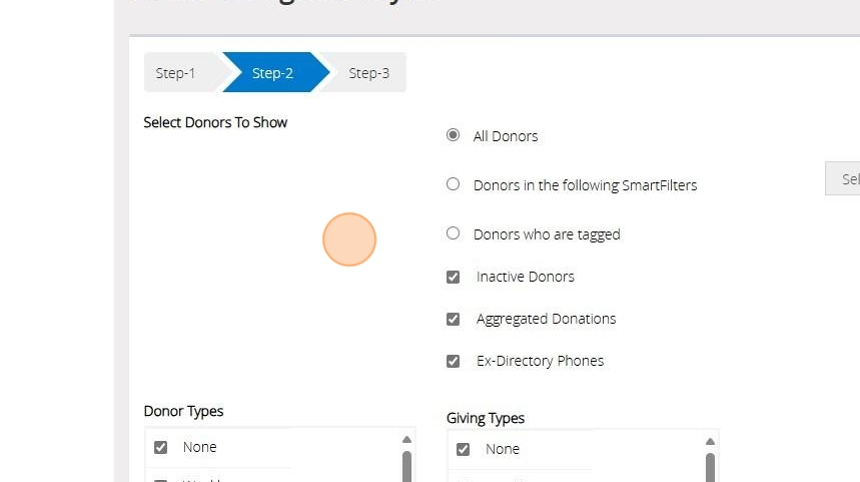
9. Select the donors to be included in the report.
You can filter your donors using Smart Filters. For more guidance on Smart Filters please click here
You can filter via donors who are tagged. For further guidance on Tagged Donors please click here
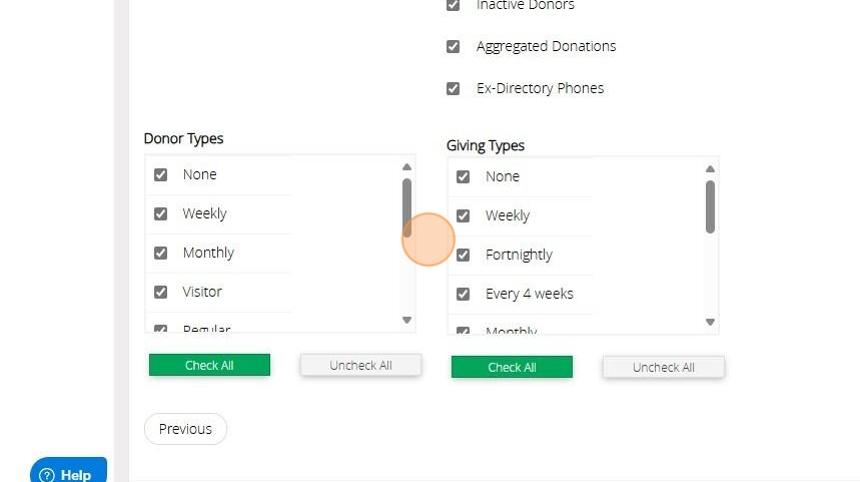
10. [[Tick the box next to each Donor Type and Giving Type you wish to include]]
11. Click "Next"
12. Select the information you require by moving the fields from the left box to the right box. You can do this by double clicking on the desired field or using the buttons between the 2 lists

13. Click ">" to move the selected field in the direction of the arrow
Click ">>" to move all fields from one list to the other depending on the direction of the arrow

14. Click "Generate Report"

Generate a list of contacts due a callback
1. Click "Contact Details Report"

2. Click "Select type of correspondense . . ."

3. Click "CALLBACK"
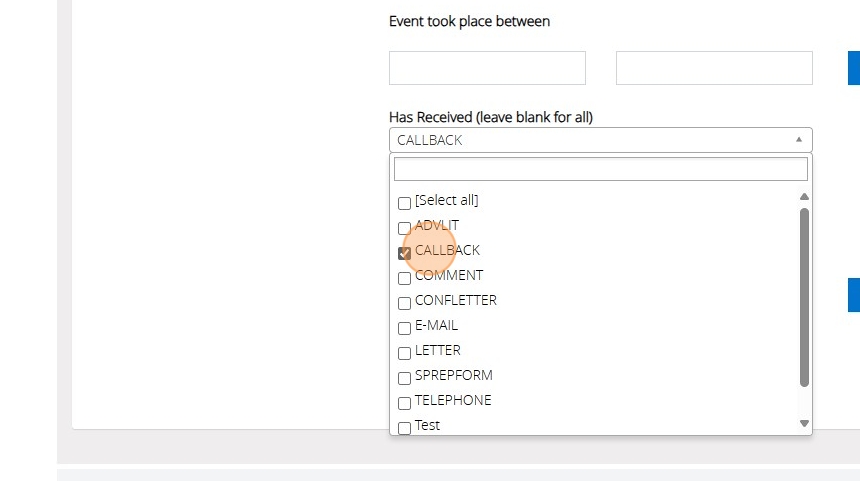
4. Click this text field and type or select the beginning of the month you want to view callbacks for

5. Click this text field and type or select the end of the month you want to view callbacks for
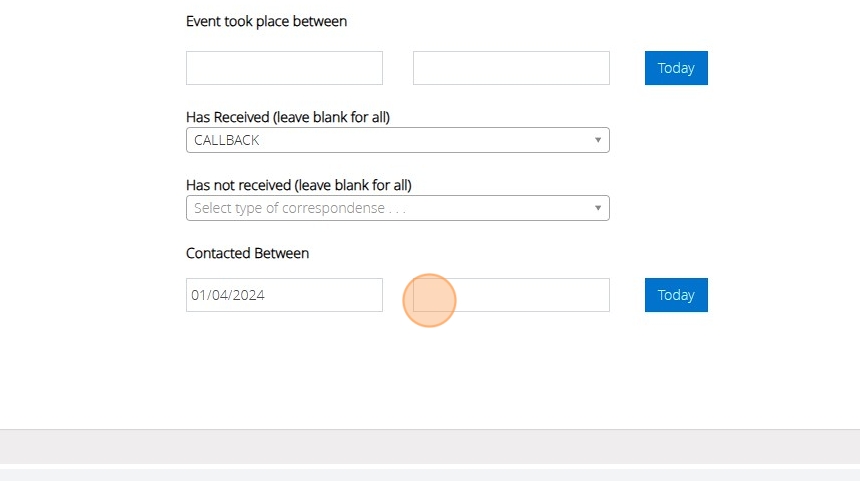
6. Click "Next"

7. Click ">>" to move all fields to the right

8. Double-click "Links" to move it back to the left if you want purely the contact information

9. Double-click "Correspondence" to do the same

10. Double-click "Events" to do the same

11. Click "Generate Report"

12. Click "Previous"

13. Click this text field.

14. Click "«"

15. Click "«"

16. Click "«"

17. Click "January 2024"

18. Click "Jan"

19. Click "January 2024"

20. Click "2024"

21. Click "2021"

22. Click "Jan"

23. Click "1"

24. Click here.

25. Click "Next"

26. Click "Generate Report"

27. Click "OK"

28. Click "Previous"

29. Click this text field.

30. Type "10"
31. Click here.
32. Click "Next"

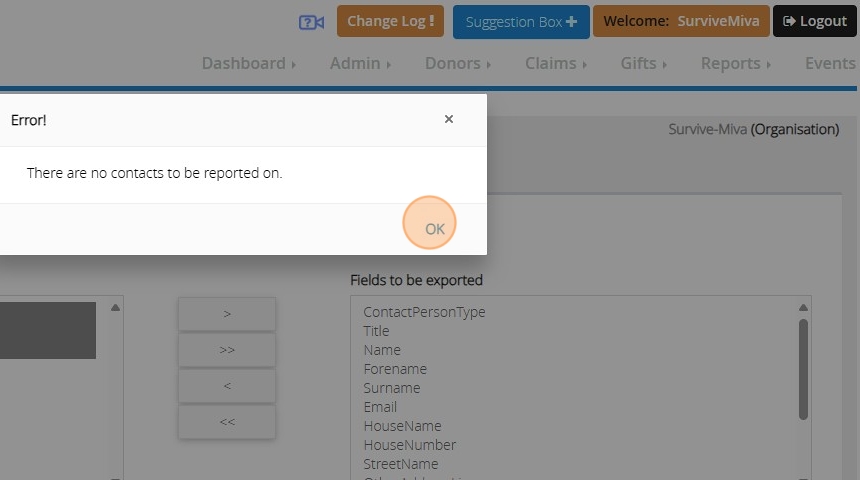
33. Click "Generate Report"

34. Click "OK"
Generate Donor Gift Analysis Report
1. Navigate to https://www.mygiving.online/report/donorgiftanalysis
2. Click this image.

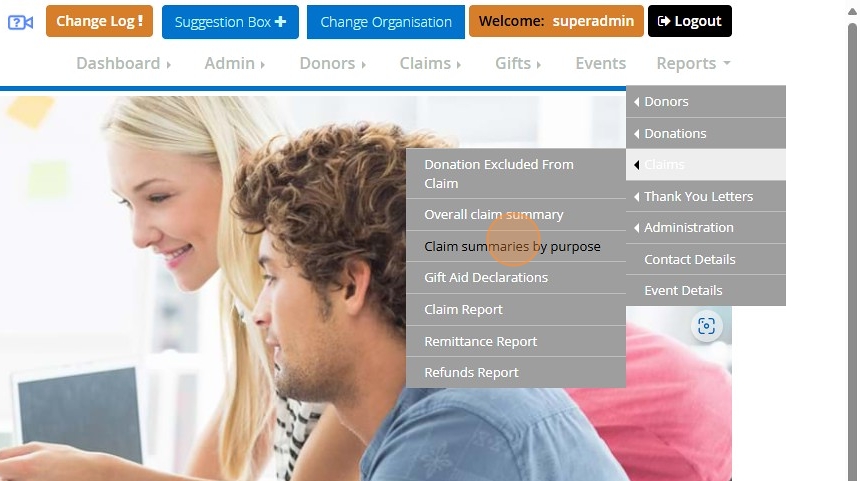
3. Click "Reports"

4. Click "Claims"

5. Click "Claim summaries by purpose"
6. Click here.

7. Click "Next"

8. Click here.

9. Click here.
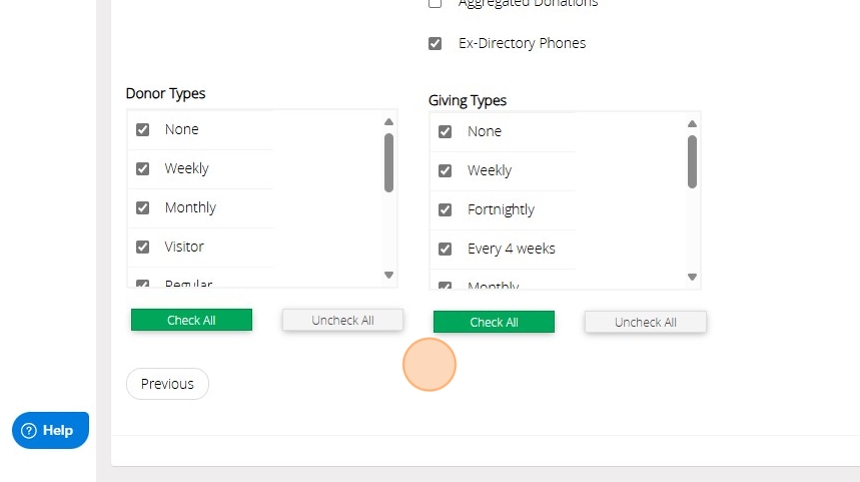
10. Click "Next"
11. Click here.

12. Click here.

13. Click "Next"

14. Click ">>"

15. Click "Generate Report"
16. Click here.

17. Click here.

Generate Event Details Report with donations
1. Navigate to https://staging.mygiving.online/
2. Click "Event Details Report"

3. Click "Select Events types . . ."

4. Click this text field and type in the event number to shorten the list e.g. "113"

5. Click "ST. THOMAS MORE (Appeal number 113)"

6. Click "Next"

7. Click ">>"

8. Double-click "Staff" if you want a simple list of all the donations without the association to a speaker or other volunteers in the event. Otherwise leave staff on the right and you will get a breakdown and a total amount.

9. Click "Generate Report"

10. Click "Preview"

Gift Aid Declarations
1. Navigate to https://www.mygiving.online/
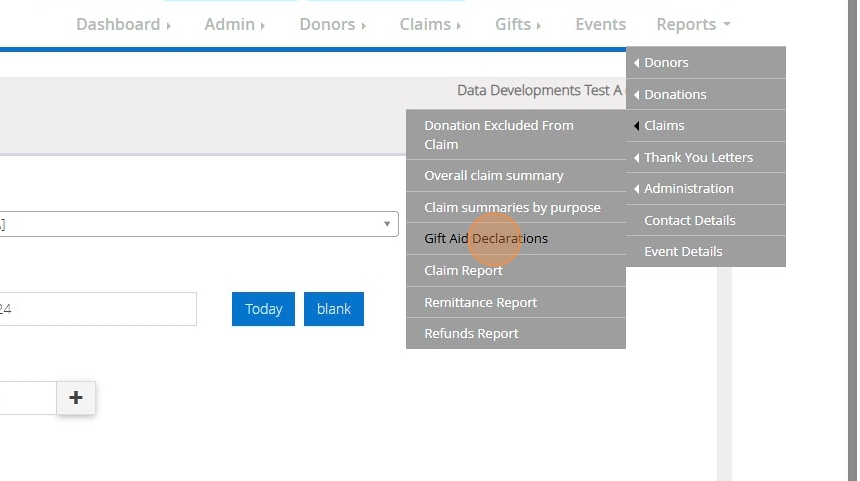
2. Click "Reports"

3. Click "Claims"
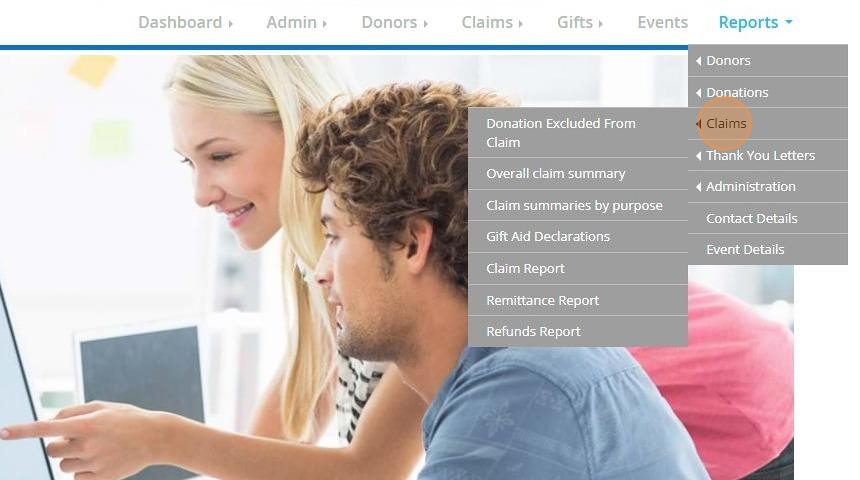
4. Click "Gift Aid Declarations"

Blank Declarations
5. Enter the date for the Declaration date or click blank

6. Select the amount of declarations you require

7. Click next to "Instead of selecting any donors"

8. Click "Export"

9. You can either preview your declarations or download directly to your device

Declarations with Donor Details
10. Click "Gift Aid Declarations"
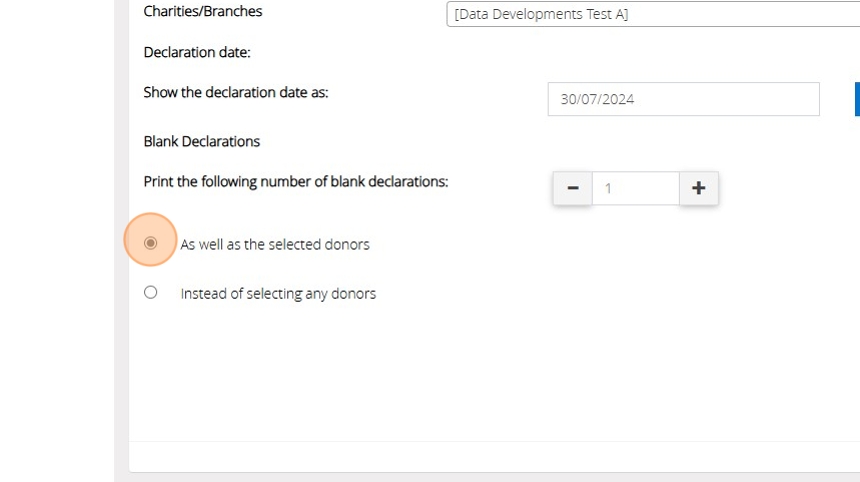
11. Enter the declaration date or select blank

12. Click next to "As well as the selected donors"
13. Click "Next"

14. Tick here to Include all Donors on your list

15. Tick here again if you wish to untick all donors. Alternatively you can tick next to each donor one by one

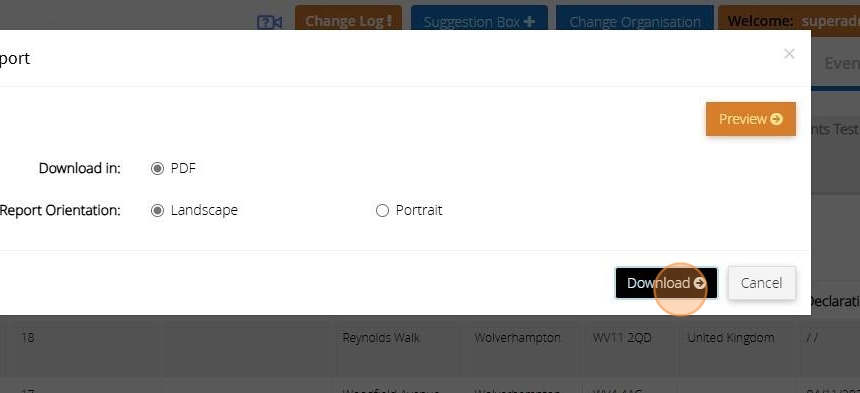
16. Click "Generate Single Donation Report" to print a declaration for one single donation

17. You can either Preview or Download directly to your device
Tip: Tip! You can also generate a declaration for multiple donations.
18. Click "Generate Multiple Donations Report"

19. You can either download this directly to your device or preview

Donor Records
Tip: Tip! If you only need to produce a declaration for one donor you can do this by going directly to their record
20. Click "Donors"

21. Click "View and edit donors"
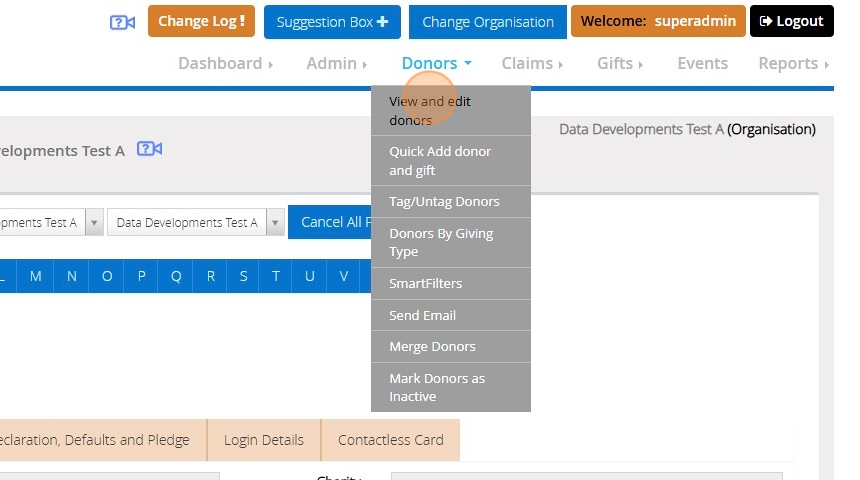
22. Locate your Donor from the list

23. Click "Declaration Form"

24. You will have the option to generate either a single or multiple declaration

Gift Aid Refund
Tip: There are at least two situations when you are required to repay money back to HMRC because you have inadvertently claimed too much
Tip: It may be that you have incorrectly recorded the amount given by the donor, and not noticed the error until after you have made the claim.
For example, the donor may have given £100, and you recorded it as £130.
In this case you need to reduce the donor record by £30, and you need to pay some tax back to HMRC.
Tip: The below steps will guide you through making a Gift Aid Refund
1. Navigate to https://www.mygiving.online
2. Click "Claims"
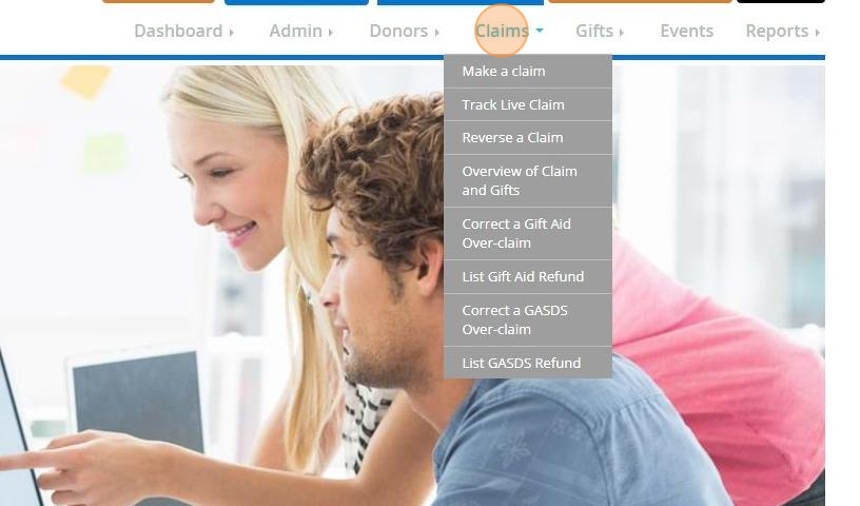
3. Click "Correct a Gift Aid Over-claim"

An incorrect amount was recorded
4. First you will need to select if the amount recorded was incorrect or if the donor had paid insufficient tax.
We will first go through the steps needed if a donor has an incorrect amount recorded against their record.
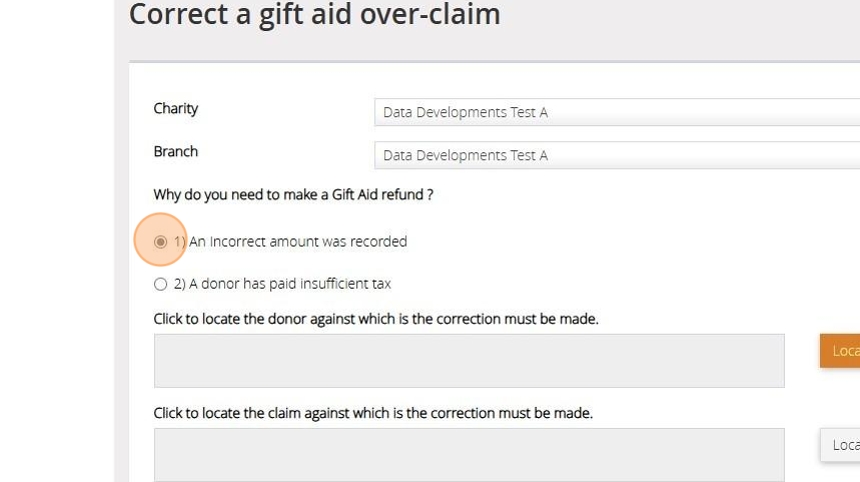
5. Click "Locate Person"

6. Select the donor the incorrect amount was recorded against from the list or search for them via the box provided.

7. Once you have selected the record Click "Ok"

8. Click "Locate Claim"

9. Select the claim the donation was included in and Click "Ok"

10. Click "Locate Gift"

11. Select the donation that has been incorrectly recorded and Click "Ok"

12. Enter the date to be recorded against the correction

Tip: Tip! It is best to use the date of the original donation or a date within the tax year that the donation was made
13. Enter the amount that was donated
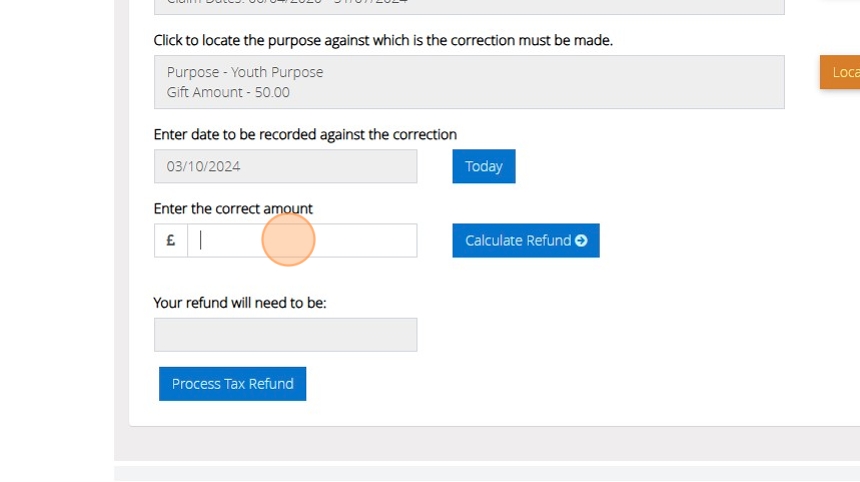
14. Click "Calculate Refund" to automatically calculate the amount to be refunded to the HMRC

15. Once you are happy with the amount please click "Process Tax Refund"
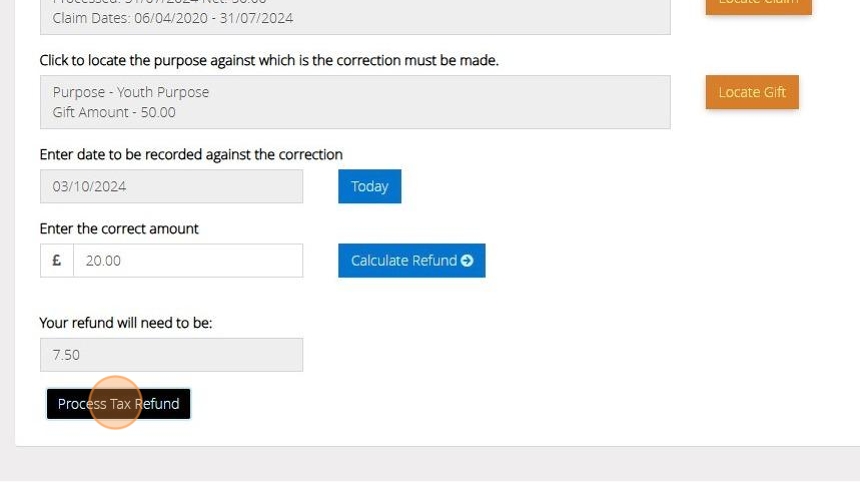
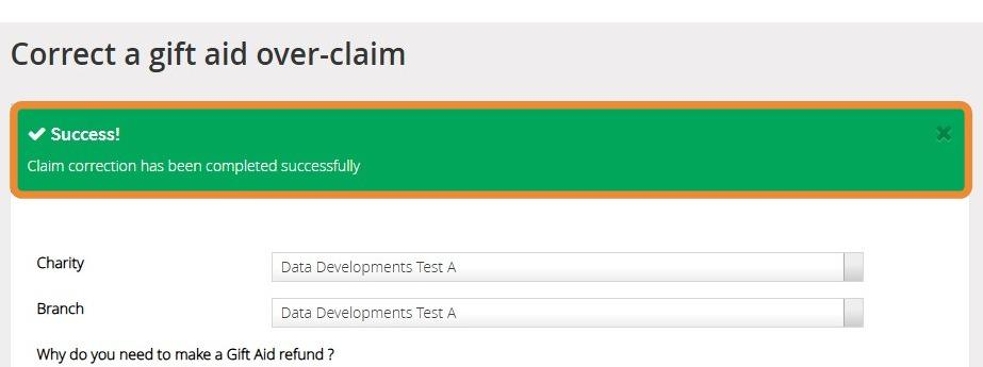
16. The below message will appear once the refund has been created
A donor has paid insufficient tax
17. Select "A donor has paid insufficient tax"

18. Click "Locate Person"

19. Search for your donor record from the list or by using the search box provided.

20. Once you have selected the record Click "Ok"

21. Click "Locate Claim"

22. Select the claim the donation was included in and Click "Ok"

23. Click "Locate Gift"

24. Select the donation that the donor made and Click "Ok"

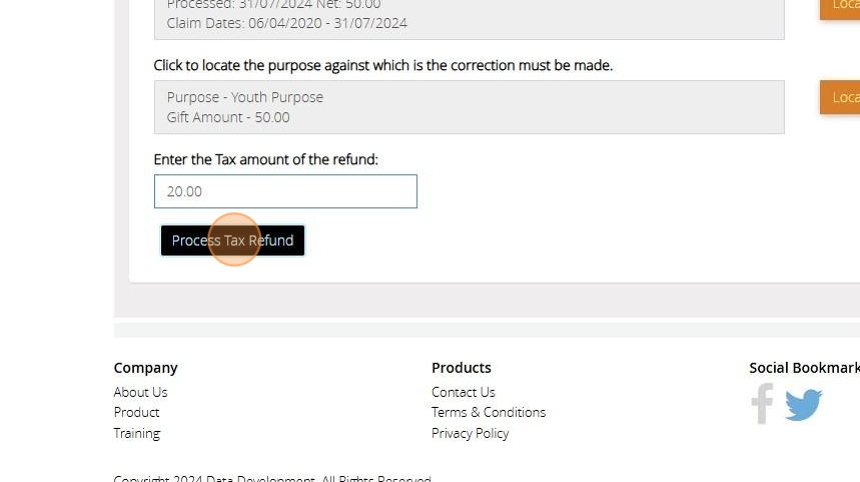
25. Enter the amount of tax that the donor could not cover here

26. Click "Process Tax Refund"
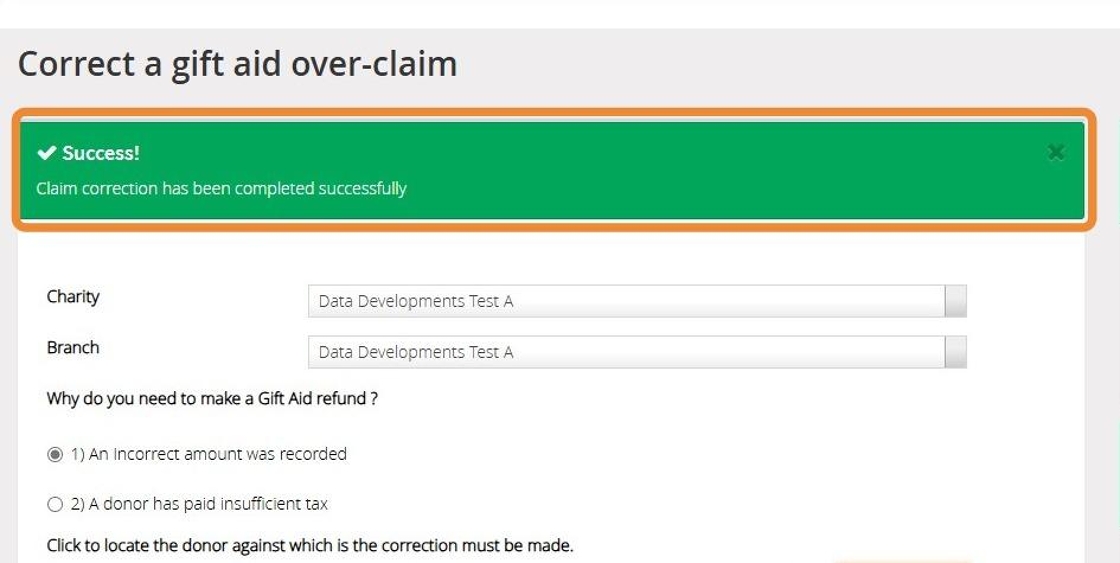
27. The below message will appear once the refund has been created
Attaching your refund to a Claim
Tip: Tip! The below steps will show you how to attach a refund to a claim before submitting this to the HMRC. For a more in depth guide on submitting a claim please click here
28. Navigate to https://www.mygiving.online/dashboard
29. Click "Claims"

30. Click "Make a claim"

31. Click "Submit a claim to HMRC"

32. Click "Find Tax Refund" to open a list of all refunds that can be individually selected.

33. Click "Add All Refund" to automatically attach all refunds to the claim

34. You can continue to submit your claim in the normal process. For further guidance on submitting a claim to the HMRC click here
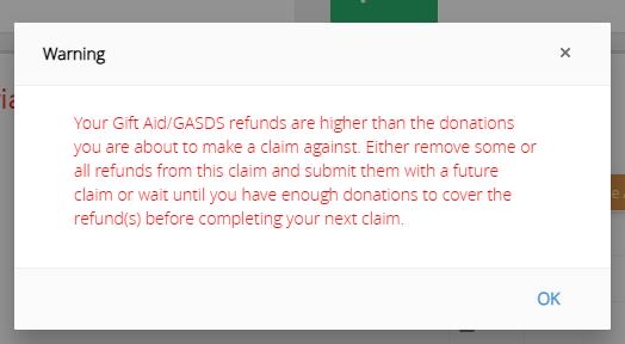
Alert: Alert! The HMRC deduct the refund from the claim you are submitting. Due to this the below warning will appear if the amount you need to refund is higher than the amount you are claiming in this claim. You can either reduce the amount of refunds you are including in the claim by using the Find Tax Refund option or wait until you have more gift aided donations to include in the claim
Guide: Adding Donor/Contact Types to use with Smart Filters or Reports
1. Navigate to https://www.mygiving.online/donor
Using Donor Types (Skip to step 11 for using Contact Types)
Tip: You can only have one donor type assigned so if this isn't a main category you assign to your donors; contact types will be more fit for purpose
2. Click "Donor Types"

3. Click "Add New"

4. Click here.

5. Click the "Donor Type" field.

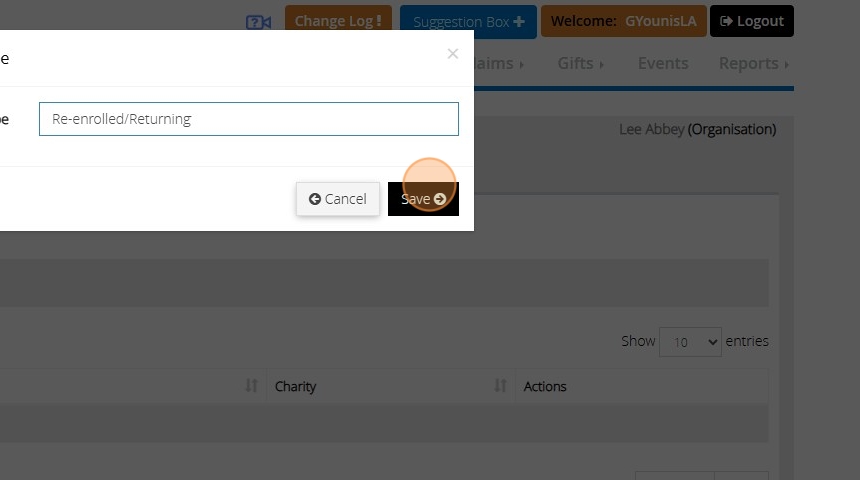
6. Type " [[CapsLock]] R [[CapsLock]] e-enrolled/ [[CapsLock]] R [[CapsLock]] eturning"
7. Click "Save"
8. Click "View and edit donors"

9. Click this dropdown.

10. Click "Save"

11. Click "Contact History"

Using Contact Types
Tip: Contact types are more dynamic since you are not limited to one per donor and so can be used for filtering purposes on numerous types of flags
12. Click "Contact Types"
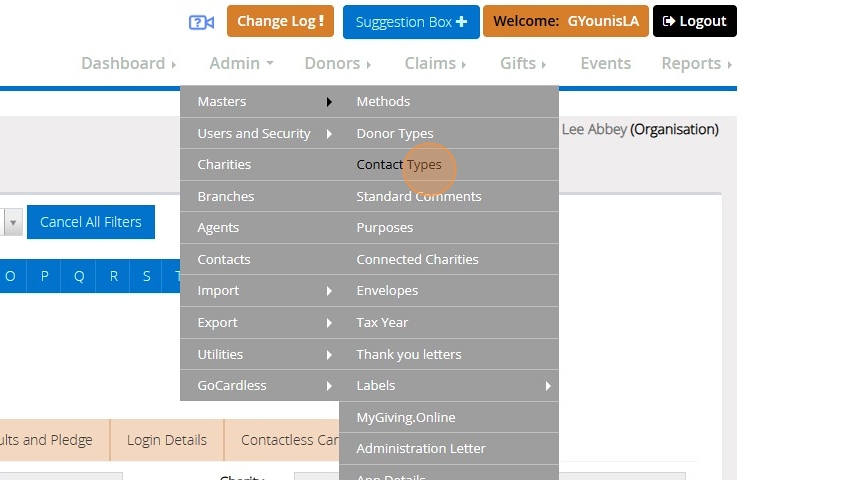
13. Click "Add New"

14. Click here.
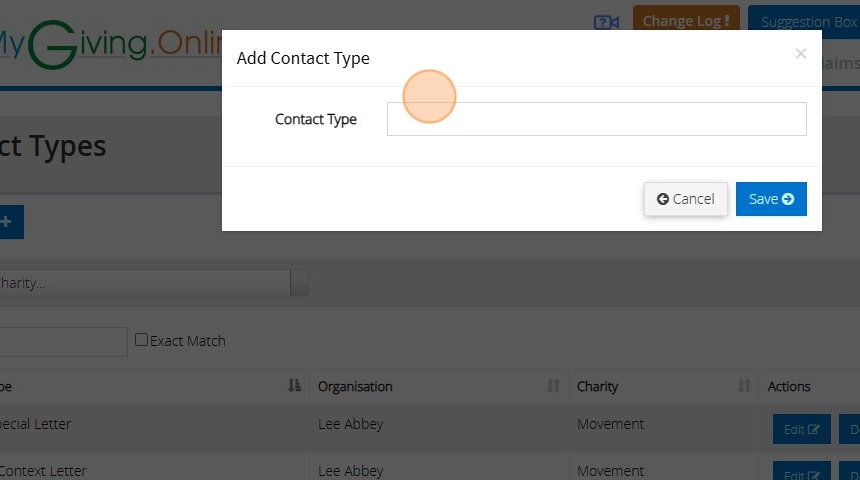
15. Click the "Contact Type" field.
16. Type " [[CapsLock]] R [[CapsLock]] e0enrolled [[left]] [[left]] [[left]] [[left]] [[left]] [[left]] [[left]] [[left]] [[Backspace]] - [[End]] / [[CapsLock]] R [[CapsLock]] eturne [[Backspace]] ing"
17. Click "Save"
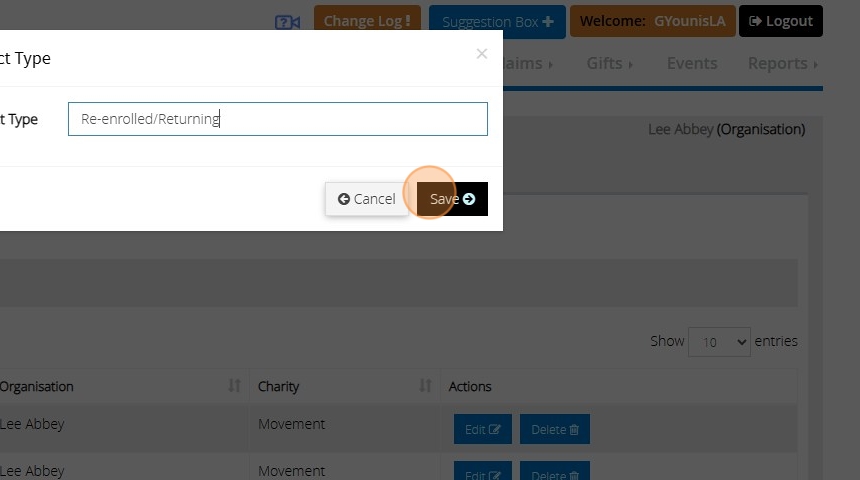
18. Click "View and edit donors"

19. Click "Contact History"

20. Click "Add Contact"
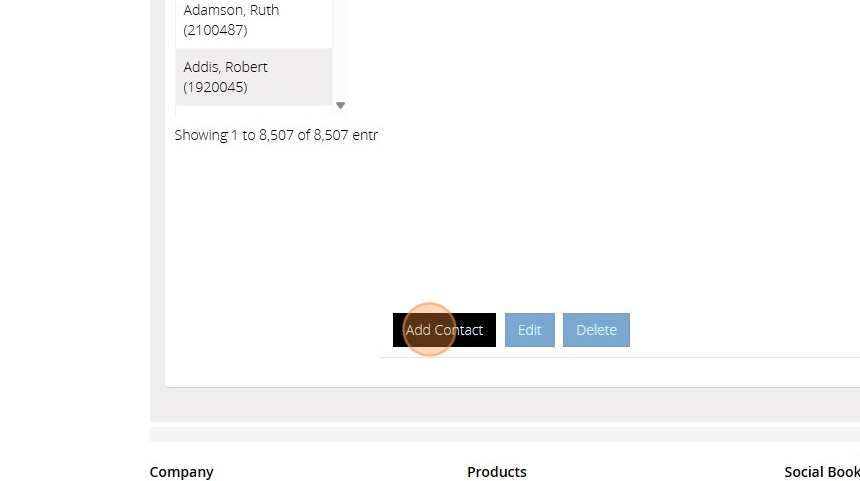
21. Click this dropdown.

22. Click the "Date" field.

23. Click this button field.

24. Click "Save"

Creating Smart Filters using Contact Types
25. Click "SmartFilters"

26. Click "Add New"

27. Click the "Name" field.
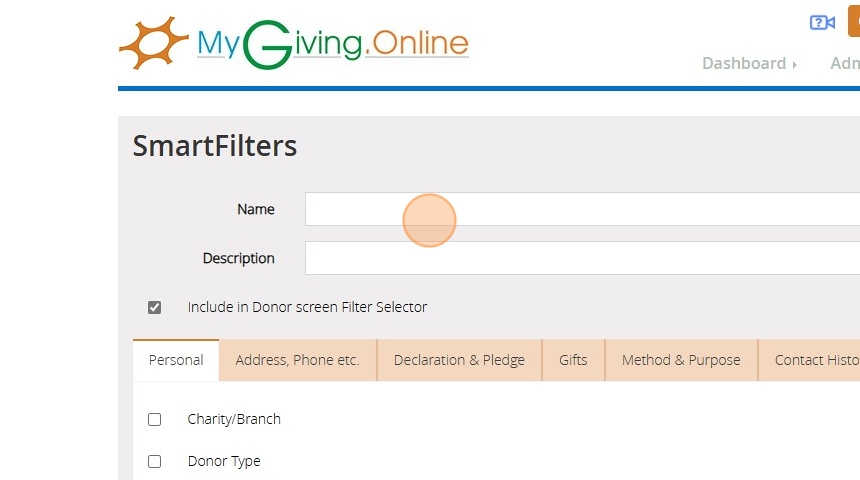
28. Type " [[CapsLock]] R [[CapsLock]] D [[CapsLock]] onors excluding re-enrolled"
29. Click the "Description" field.

30. Type " [[CapsLock]] [[CapsLock]] rR [[CapsLock]] e-enrollment"
31. Right-click the "Description" field.

32. Click "Contact History"

33. Click this radio button.

34. Click this dropdown.

35. Click here.

36. Click "Add Criterion"

37. Click "Save"

How to Add a Smart Filter
1. Navigate to https://www.mygiving.online/dashboard
2. Click "SmartFilters"

3. Click "Add New"
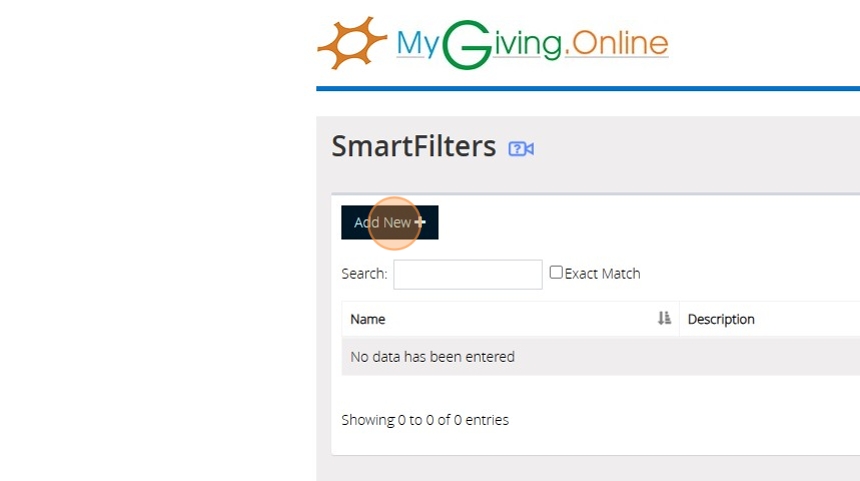
4. Click the "Name" field.

5. Type " [[CapsLock]] A [[CapsLock]] ctive [[CapsLock]] D [[CapsLock]] onors"
6. Click "Declaration & Pledge"

7. Click this checkbox.
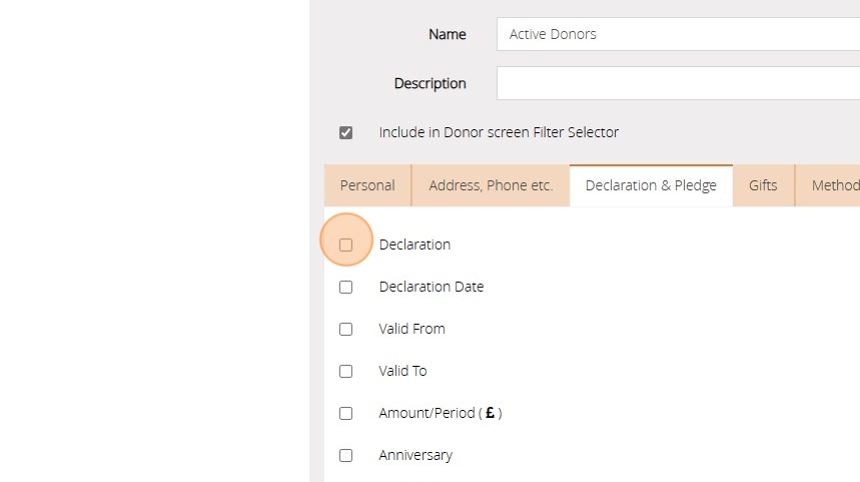
8. Click "Current"

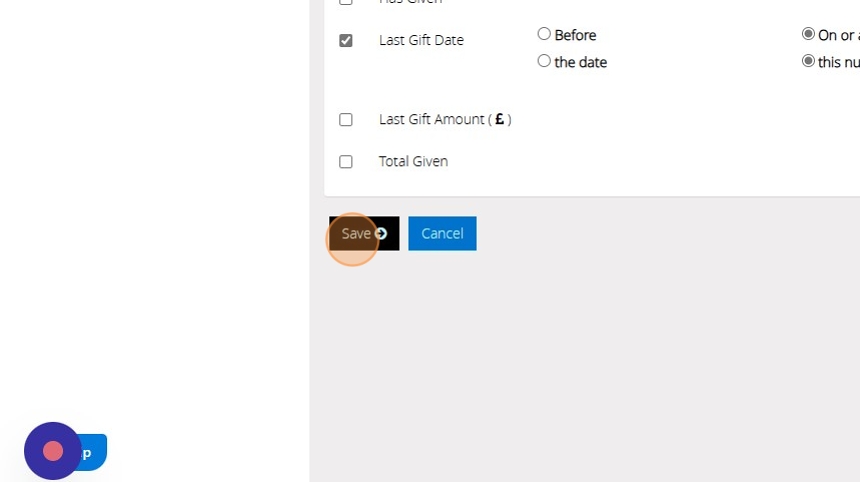
9. Click "Gifts"

10. Click this checkbox.

11. Click this radio button.

12. Click this radio button.

13. Click this text field.

14. Type "30"
15. Click "Save"
How to Create and Print Custom Labels
1. Navigate to https://www.mygiving.online/dashboard
Creating the label
2. Click "Admin" > "Masters" > "Labels" > "Label Sizes"

3. Click "Add New"

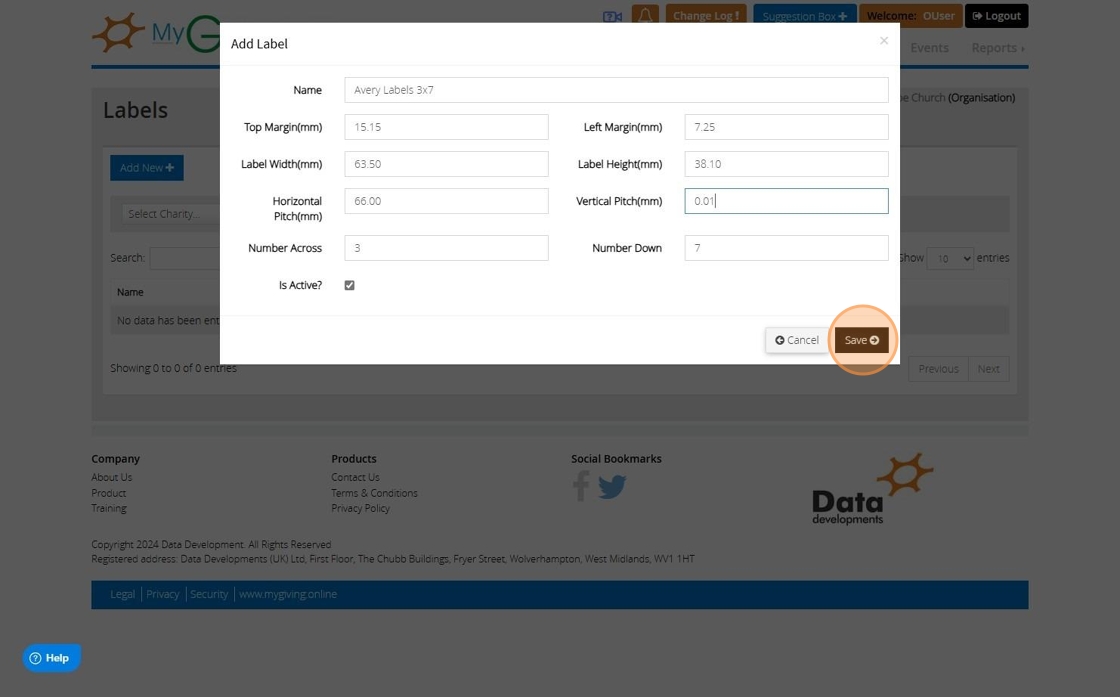
4. Click this text field and name the label according to the ones you use e.g. Avery 3x7
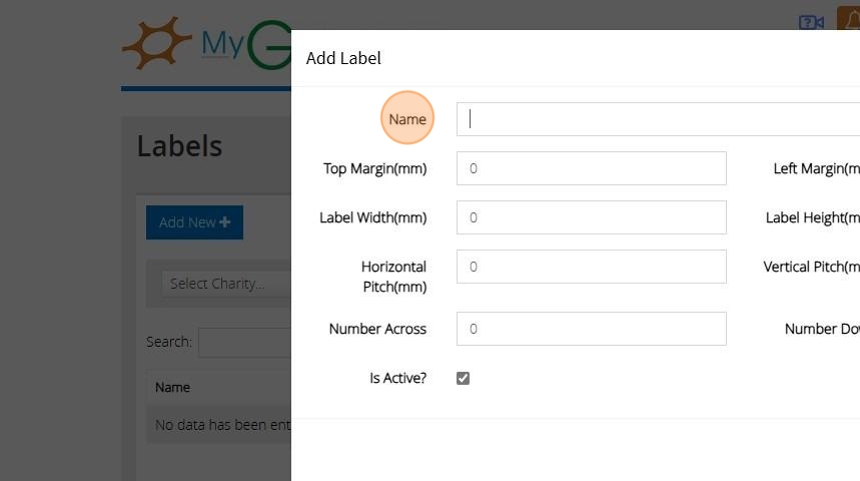
5. Locate the measurements requested on the form either on the packaging of the labels or by searching online on google or a website like A4 Labels - Blank Labels on Sheets & Rolls | OnlineLabels®

Alert: Alert! We do not recommend or endorse any specific websites for this purpose the website provided is for example purposes only
6. Click "Save" once all measurements have been provided
Decide what appears on labels
7. Click "Customise Label Information"

8. Click "Add New"

9. Double-click the fields from the left hand side list that you wish to include in the order you wish to appear on the label.
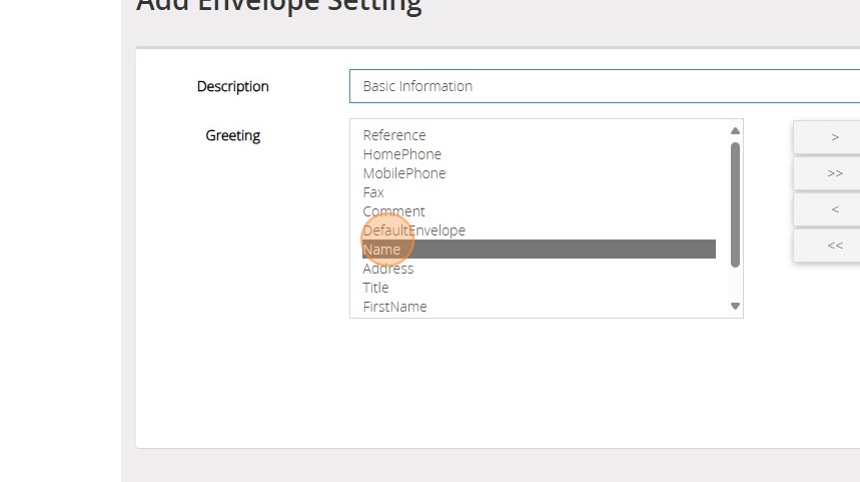
10. As well as double clicking the field to move it left and right you can use the buttons between the two lists. You can move one field at a time by selecting the field and then clicking the ">" button between the list or ">>" to move all fields from left to right. You can do the opposite with the "<" and "<<" buttons.
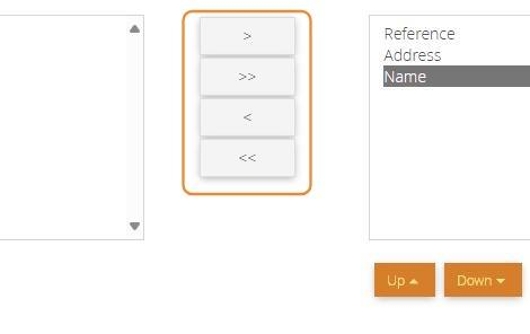
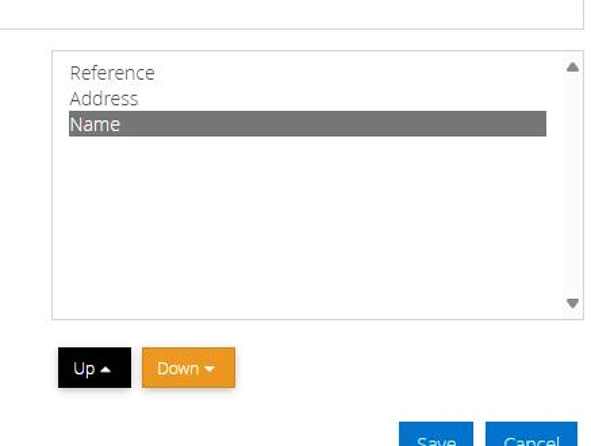
11. If you need to rearrange the order of fields on the right hand side you can use the up and down button to reposition the selected field
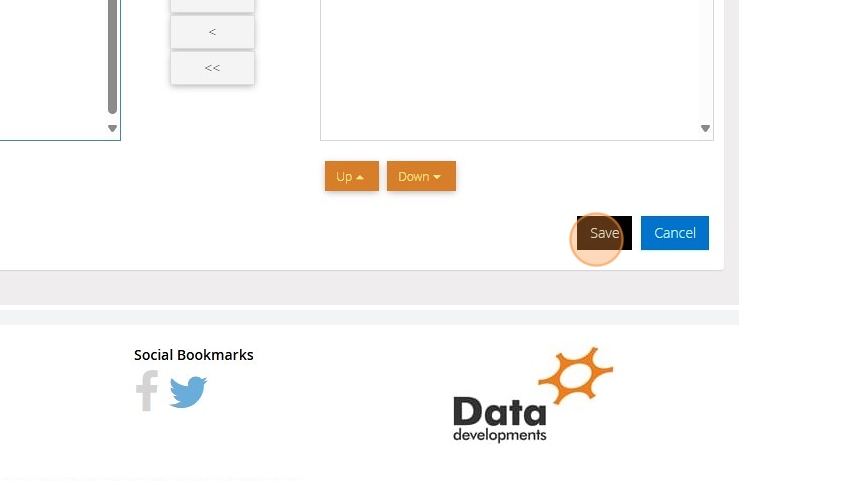
12. Click save once you have all the fields you want in the order you want them to appear on the right hand side.
Using a label
13. You can generate labels in various reports on MyGiving. In this example we will user the report "Audit trails and thank you letters" as an example of how you would use the settings you have created for a label

14. Click "Next" and apply any filters on each step of the report if necessary until you get to the page shown on the next step of this help article
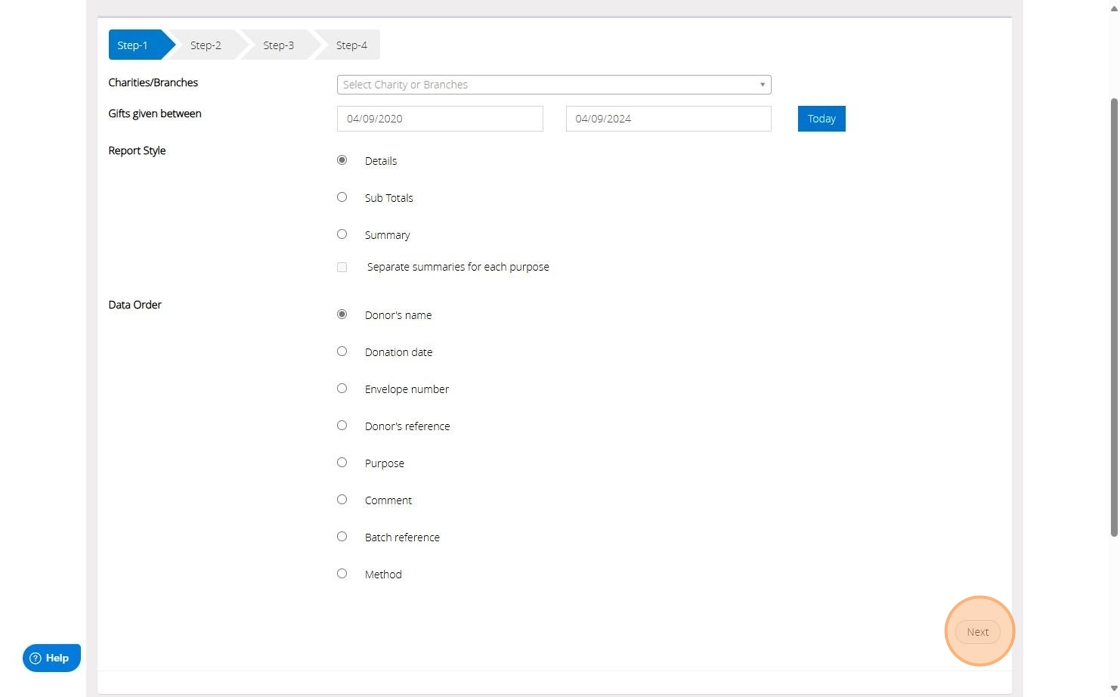
15. Click "Print Labels"

16. Click this dropdown to select the settings for the dimensions of the label

17. Click this dropdown to select the information you want to appear on the label. By default if you do not select your own custom setting it will have the donors name and address.

18. Click "Download" to save the labels to print later or "Preview" to view and print the labels now

19. When printing ensure the printer settings for margins and scaling are turned off as this can cause the information to print off the labels. Printing within the browser these settings can be found after clicking the print button and then more settings.
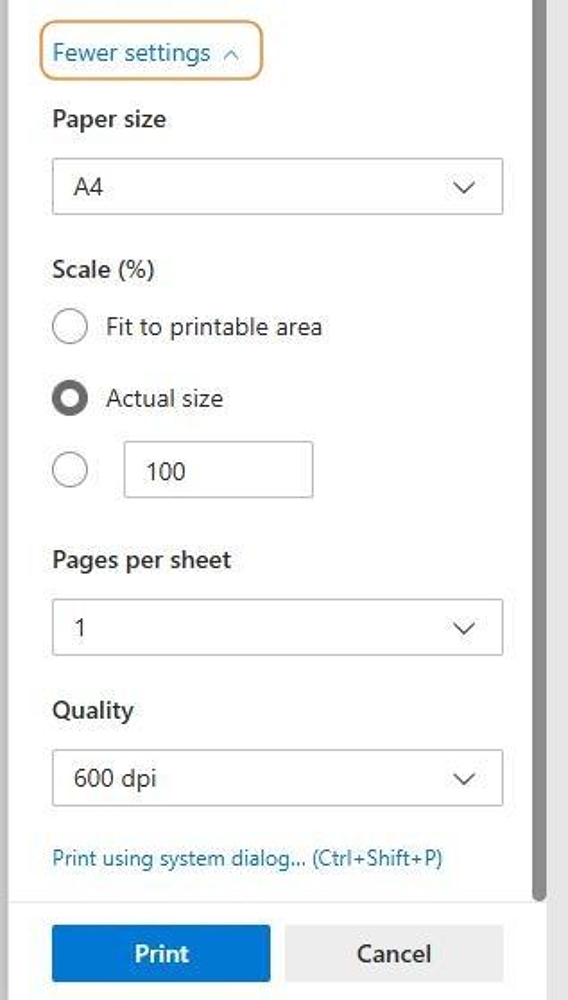
20. Ensure the Scale % is set to actual or 100%

21. The settings can vary from browser to browser or the app you are using to open up pdfs so please call our support line on 01902 714030 if you having any trouble getting the text to fit on the labels you are using.
How to Create a Purpose
Tip: Purpose links are created to enable us to transfer donation information from MyGiving.Online to MyFundAccounting.Online. Please click here for further information.
Tip: The below steps will guide you in creating a new purpose.
Create a Purpose
1. Navigate to https://www.mygiving.online
2. Click "Admin"

3. Click "Masters"

4. Click "Purposes"
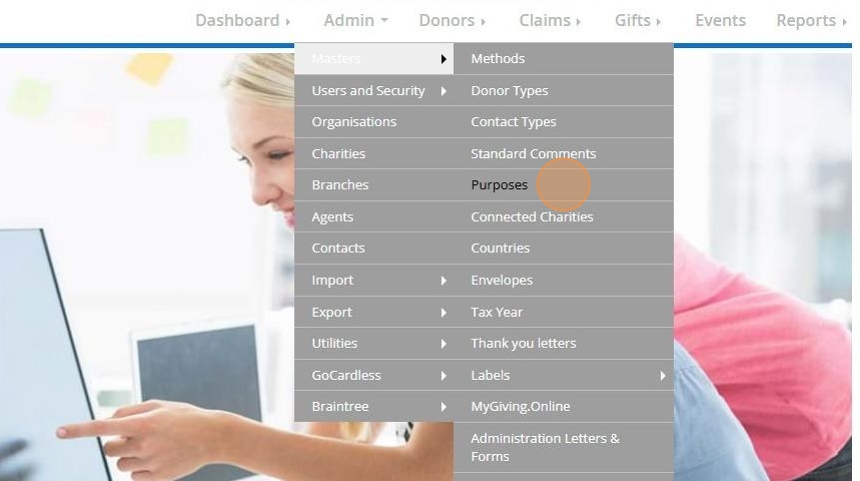
5. Depending on your access level, you might need to filter to the church you want to create a purpose for

6. Click "Add New"

7. Enter a "Abbreviation" and a "Description" of your purpose in the fields provided.

Tip: Tip! The abbreviation will appear when you select which purpose you wish to use for a particular gift, assign it to a donor or select a purpose for reporting on.
Tip: Tip! The description is to simply remind you what the purpose is for.
8. Ensure the checkbox next to "Active" is selected.
Should you no longer require this purpose in the future you can edit the purpose and uncheck this box to make the purpose Inactive.

9. Click "Save"

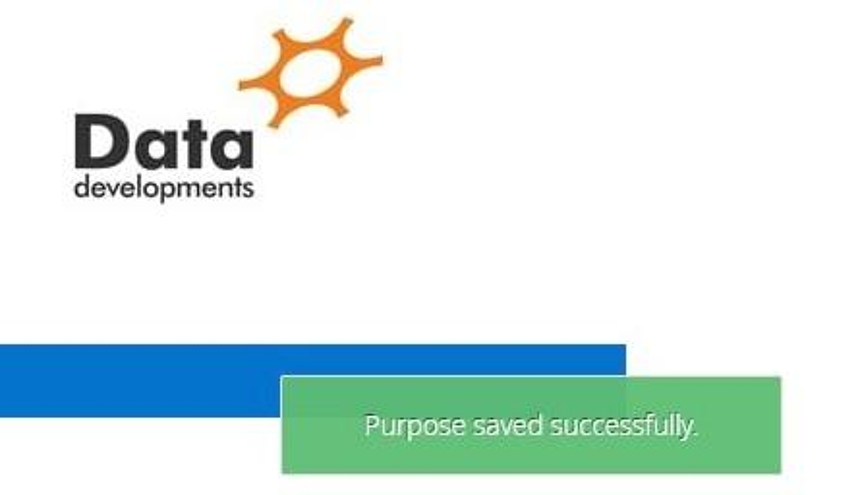
10. The below message will appear once the purpose has been created.
Edit a Purpose
11. Click "Edit"

12. Make any amendments to the purpose that you require.
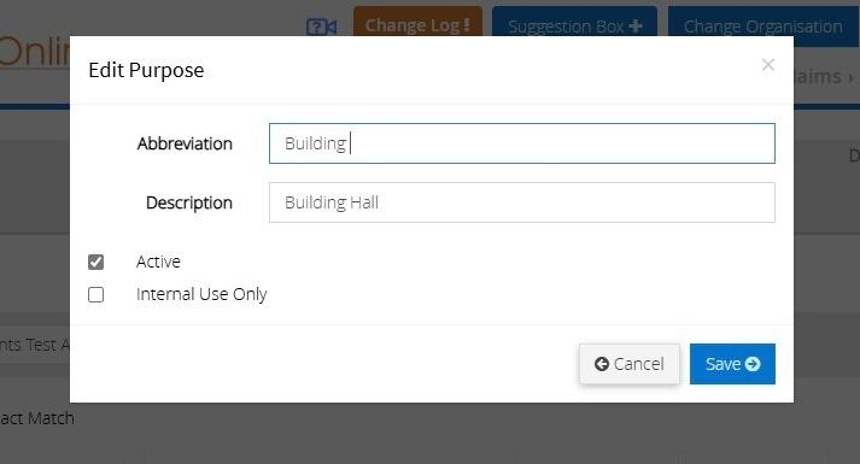
13. Once ready Click "Save"

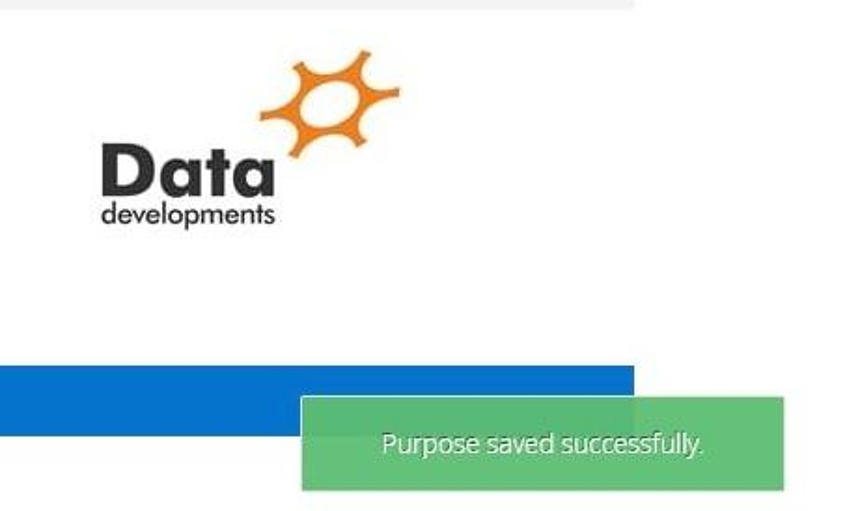
14. The below message will appear once the purpose has been updated.
Delete a Purpose
15. Click "Delete" next to the purpose you do not require.

16. Click "Yes"

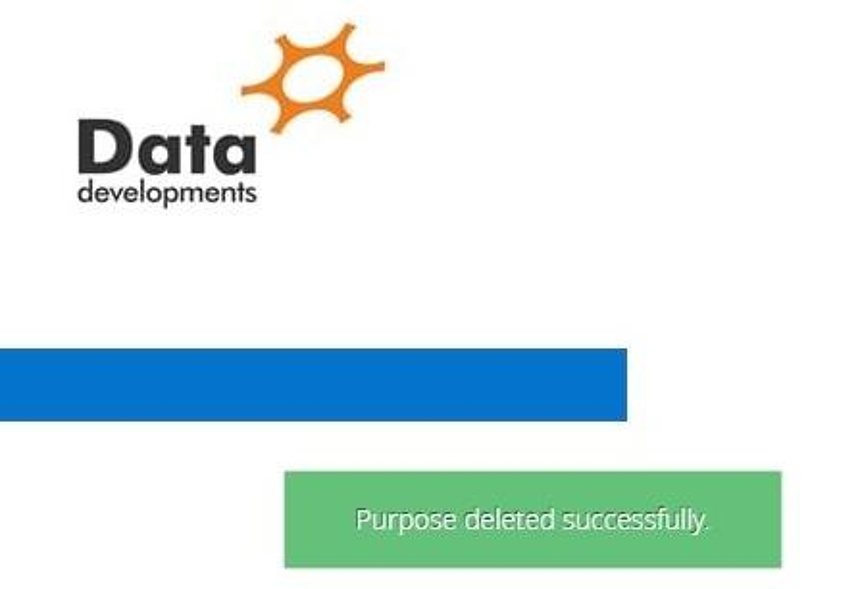
17. The below will appear to confirm the deletion.
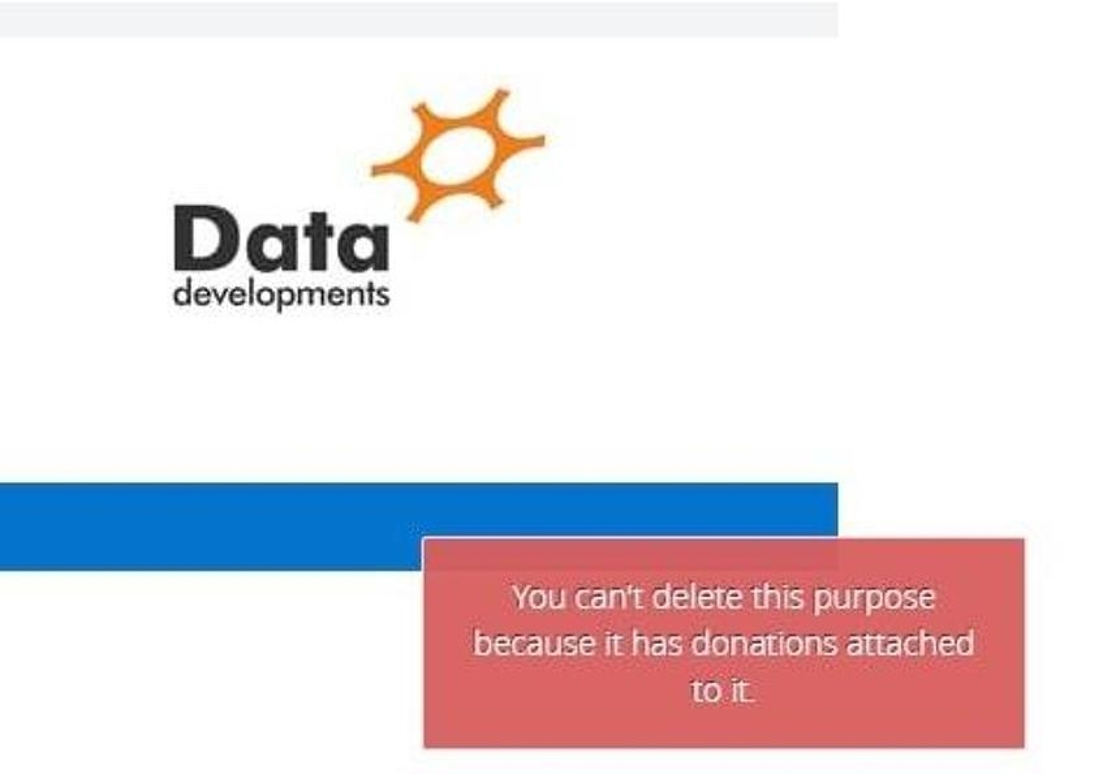
Alert: Alert! If the purpose is being used as a default purpose for a donor or the purpose of a donation you will not be able to delete it as this forms part of your audit trail.
An alternative to deleting the purpose would be to click "Edit" and mark the purpose as inactive by unchecking the "Active" checkbox.
How To Generate a Claim Summaries by purpose Report
Tip: The claims summaries by purpose will produce a report on all amounts claimed on behalf of each purpose.
1. Navigate to https://www.mygiving.online
2. Click "Reports"

3. Click "Claims"

4. Click "Claim summaries by purpose"

5. Enter the date range you wish to report on

6. Click "Next"

7. Select the donors to be included in the report.
You can filter your donors using Smart Filters. For more guidance on Smart Filters please click here
You can filter via donors who are tagged. For further guidance on Tagged Donors please click here
You can also include Inactive Donors or donations entered via an Aggregated Donor

8. [[Tick the box next to each Donor Type and Giving Type you wish to include]]
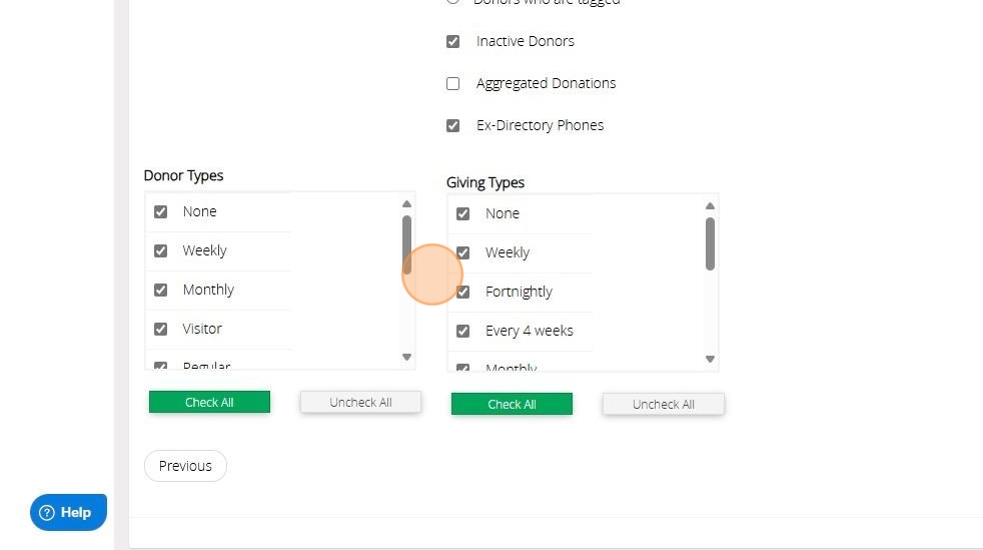
9. Click "Next"
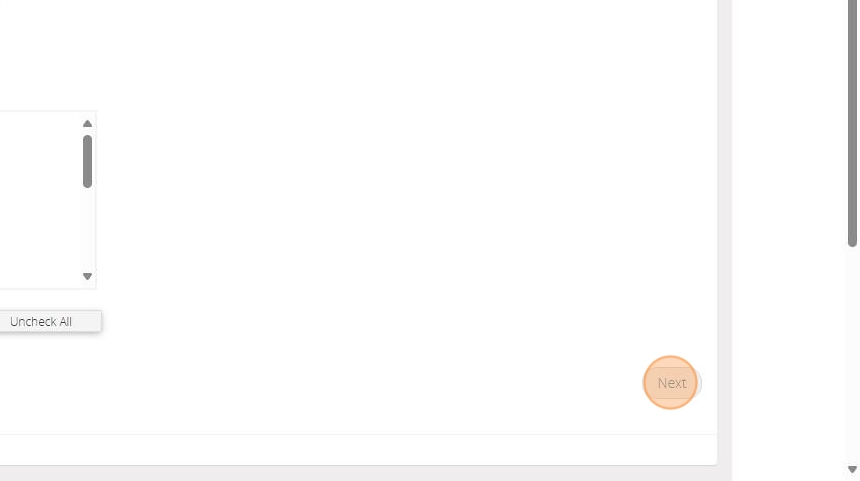
10. In the gift section you have a few options to filter your report/
Select if you wish to include named or anonymous donations and tick if you only require donations given via envelope
Enter a date range for the donation dates should you require and tick to include Gift Aid claimable or GASDS eligible donations

11. [[Tick the box next to each Purpose, Method, Batch number and Comment you wish to include]]

12. Click "Next"

13. Select the information you require by moving the fields from the left box to the right box. You can do this by double clicking on the desired field or using the buttons between the 2 lists

14. Click ">" to move the selected field in the direction of the arrow
Click ">>" to move all fields from one list to the other depending on the direction of the arrow

15. Click "Generate Report"
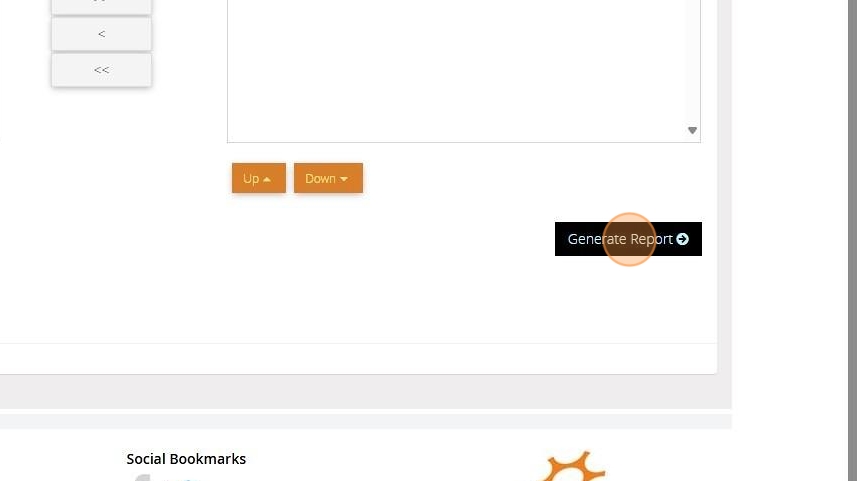
16. Select your preferred download format, enter a file name and click "Download" or click "Preview"

How to generate a report of cash donations
Tip: The below report will guide you in exporting a report of donations given via Cash
1. Navigate to https://www.mygiving.online
2. Click "Reports"
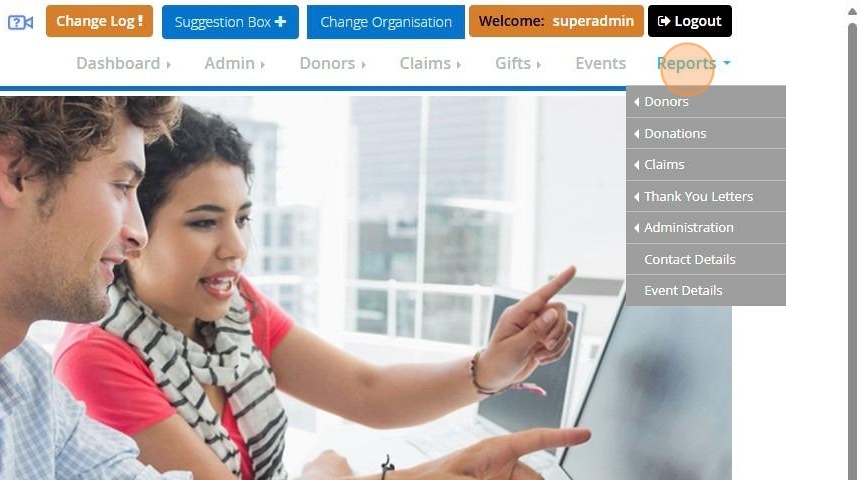
3. Click "Donations"
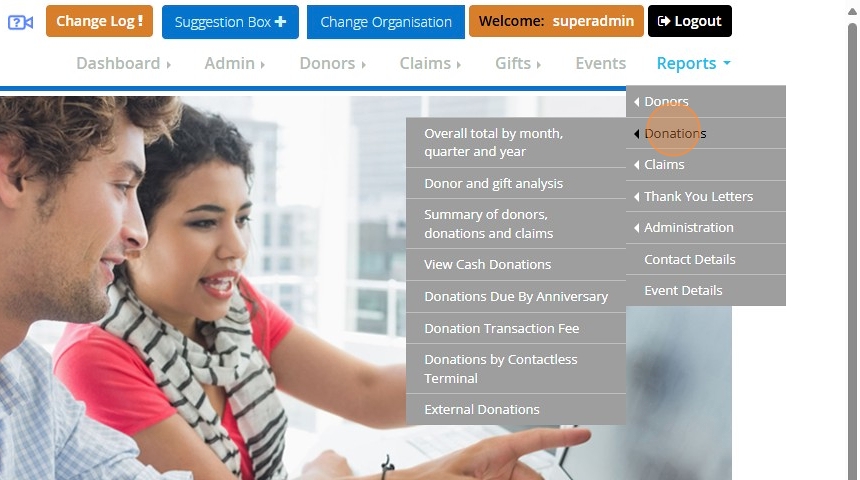
4. Click "View Cash Donations"

5. [[Enter a range of dates to limit the donations being included]]

6. [[Select the criteria of donations to be reports on ]]

7. Click "Show Donations"

8. A list of all donations that meet the criteria selected will be displayed in the list below. Click "Next"
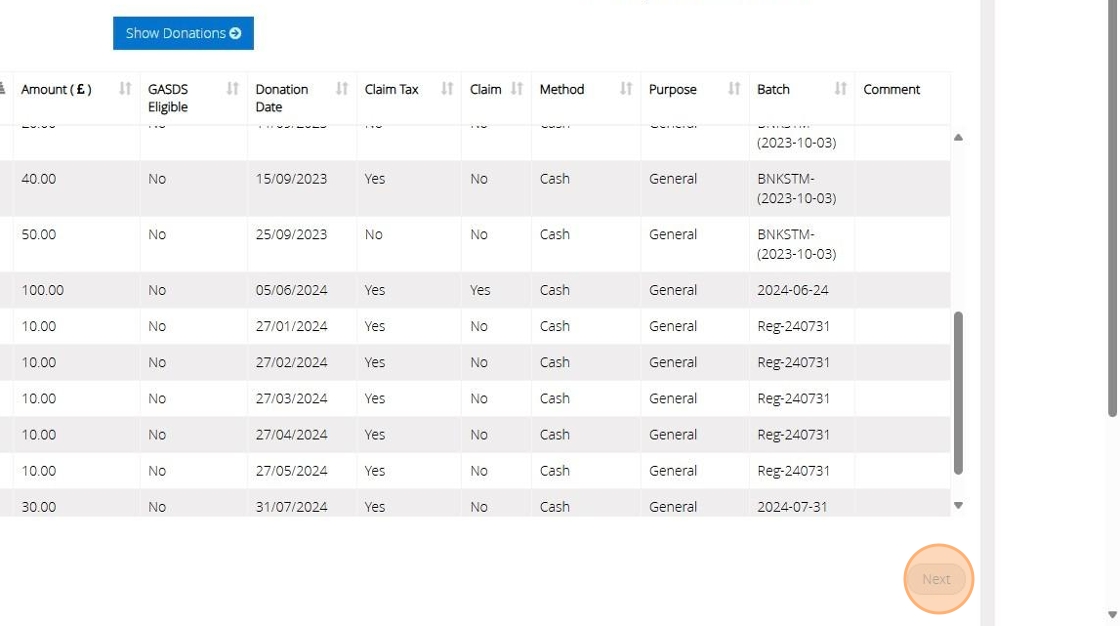
9. Click ">" to move the selected field in the direction of the arrow
Click ">>" to move all fields from one list to the other depending on the direction of the arrow

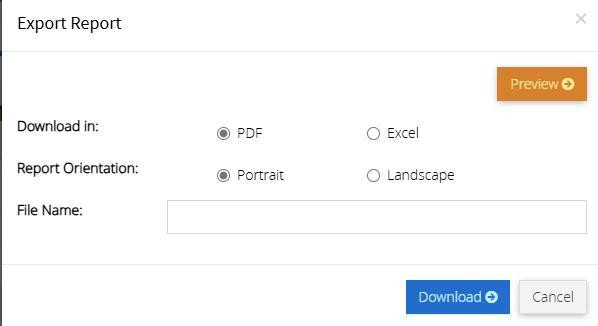
10. Click "Generate Report"

11. Select your preferred download format, enter a file name and click "Download" or click "Preview"
How To Log In To MyGiving.Online
1. Navigate to https://www.mygiving.online
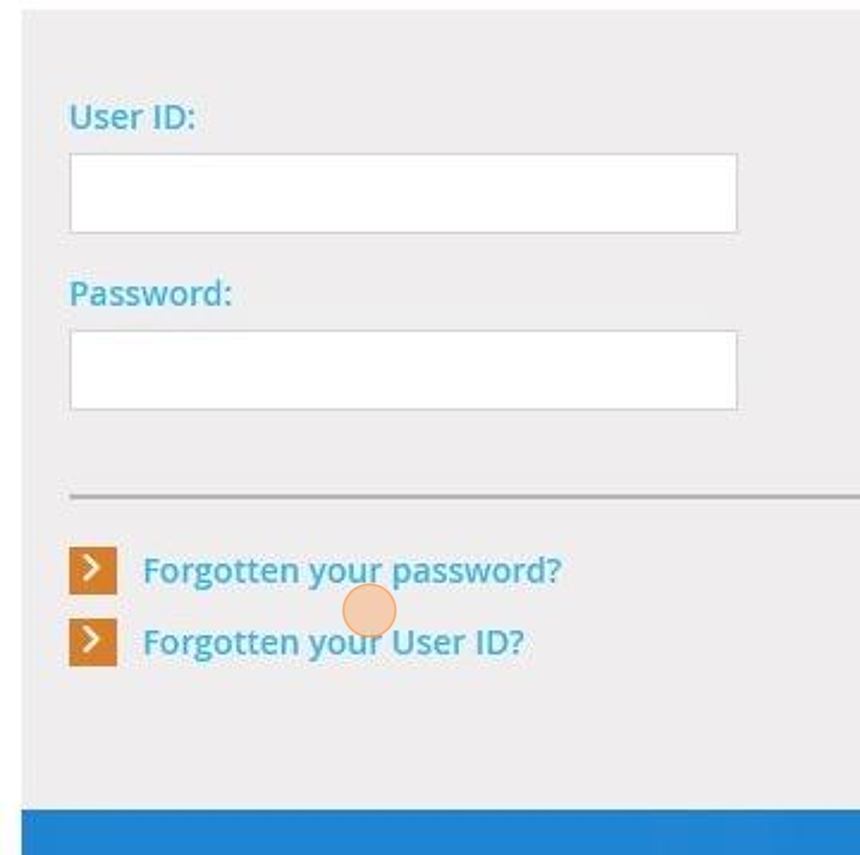
2. Click here to type your User ID and Password
These will have either been sent to you via email when registering your free 30-day trial or by the person who has created your user account and granted access.

3. Click "Forgotten your password" to receive an email to reset your password
Click "Forgotten your User ID" for an email reminder
4. Click "Continue" to log in

How to Submit a Gift Aid/GASDS Claim on MyGiving.Online
Tip: The below steps will guide you through submitting an electronic Gift Aid/GASDS Claim to the HMRC
1. Navigate to https://www.mygiving.online
2. Click "Claims"

3. Click "Make a claim"
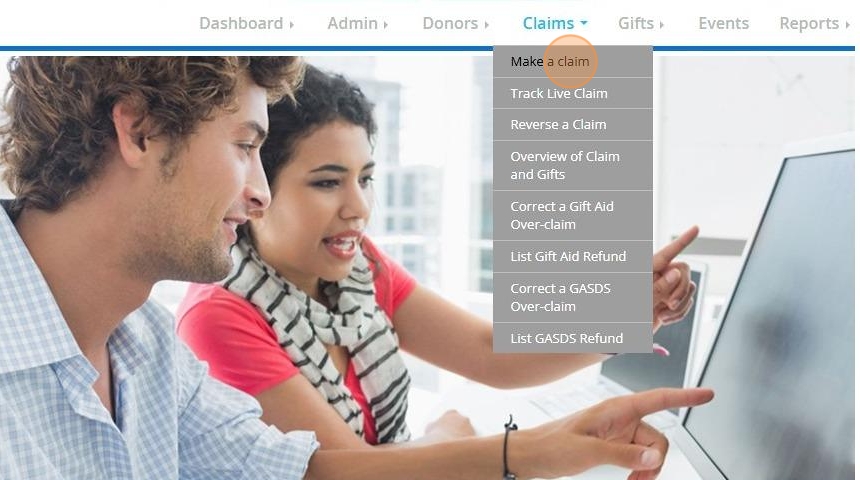
Donations Excluded from Claim
Tip: Before you submit your claim, we strongly advise checking for any donations that will be excluded due to a missing gift aid declaration or the donation being older than the 4 year limit the HMRC imposes.
The below steps will assist you in generating a report of excluded donations
4. Click "Donations Excluded from Claim"

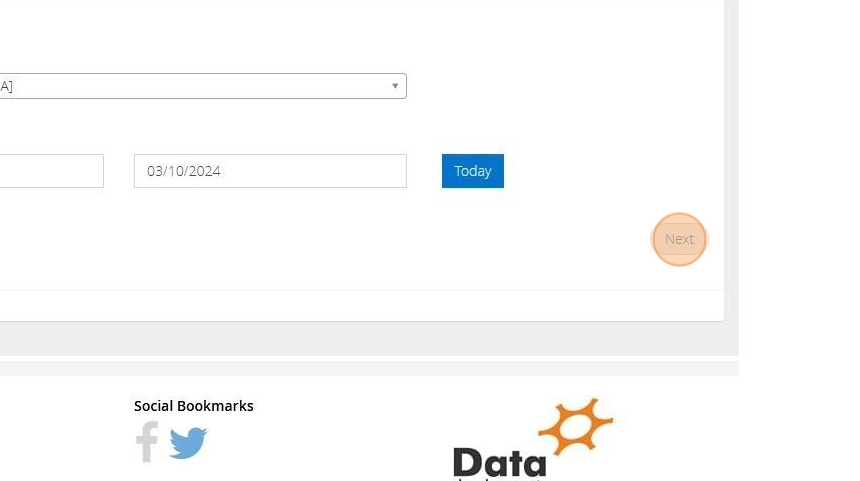
5. Select the charity or branch related to the claim. Enter the date range for the donations included.

6. Click "Next"
7. Select the type of gifts you are including in your claim.
To restrict your donations to gifts with envelope numbers, check the box next to "Only gifts with envelope number"
To add gifts between a specific value, enter the value range in the boxes next to "Gifts with value between"

8. If you would like to review the donations for any specific Purposes, Payment Methods, Batches and Comments you can manually select as many as you like from the options below or use the Check All or Uncheck All buttons underneath each box.
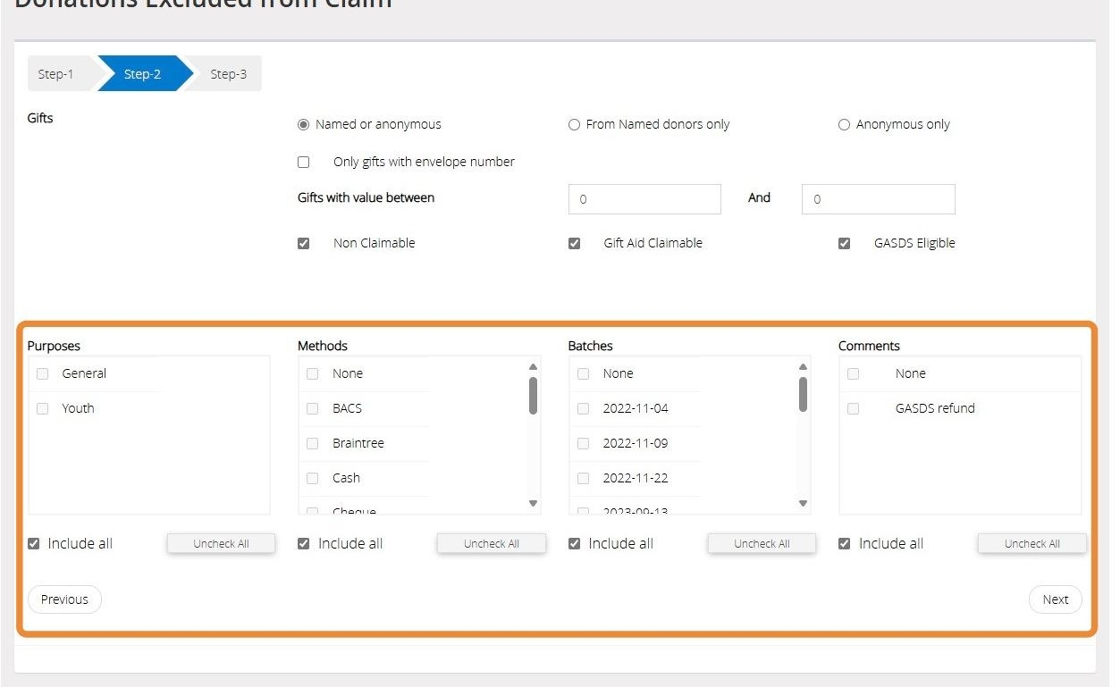
Tip: Tip! You'll usually want to leave the default options selected to ensure all donations that have been marked to be gift aid claimable are included in the report otherwise you run the risk of overlooking donations
9. Click "Next"

10. Select the information you require by moving the fields from the left box to the right box.
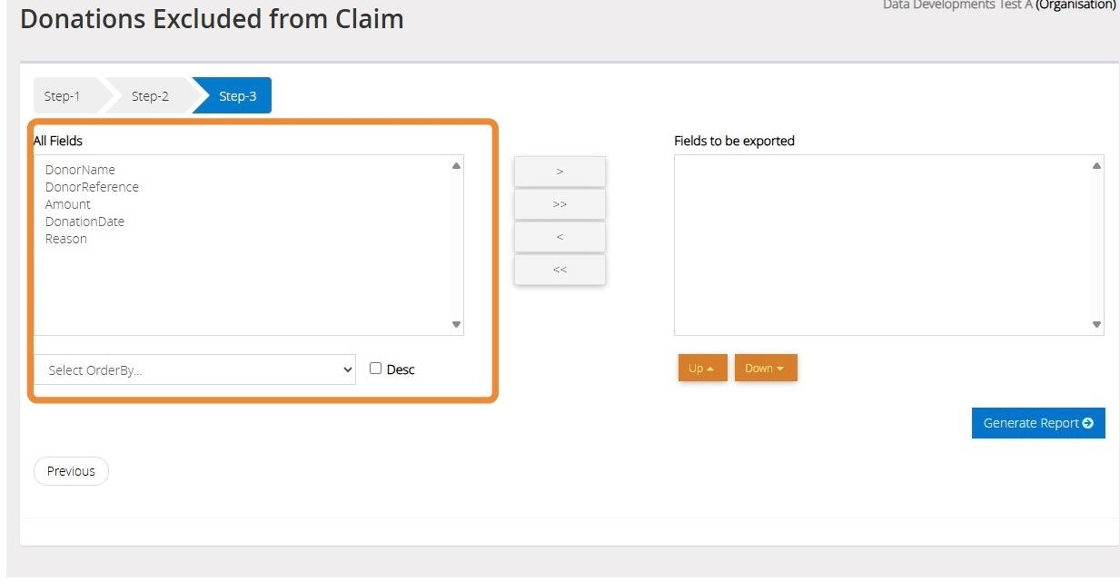
11. You can do this by double clicking on the desired field or using the buttons between the 2 lists
Click ">" to move the selected field in the direction of the arrow
Click ">>" to move all fields from one list to the other depending on the direction of the arrow

12. Click "Generate Report"

Tip: Tip! If there are donations visible on the report, this means these donations will be excluded from your next claim.
The far-right column labelled Reason (if you chose to include the field) on the report will give you the reason a specific donation has been excluded, which you can then use to remedy the issue and remove the donation from the report.
Alert: Alert! If there are no donations displayed, this indicates there are no donations excluded from the claim and you can return to the Make a Claim Screen
13. You can generate the report as a PDF or Excel file. By default "PDF" is selected
You can choose to have the report in portrait or landscape mode

14. Click "Preview" to open a preview of the claim

15. Click "Download" to download a copy of the report to your device

Make a Claim
16. Click "Submit a claim to HMRC"

17. Enter the "date of the last donation to be included in this form" that you want to claim up to.
Select the church and branches related to your claim
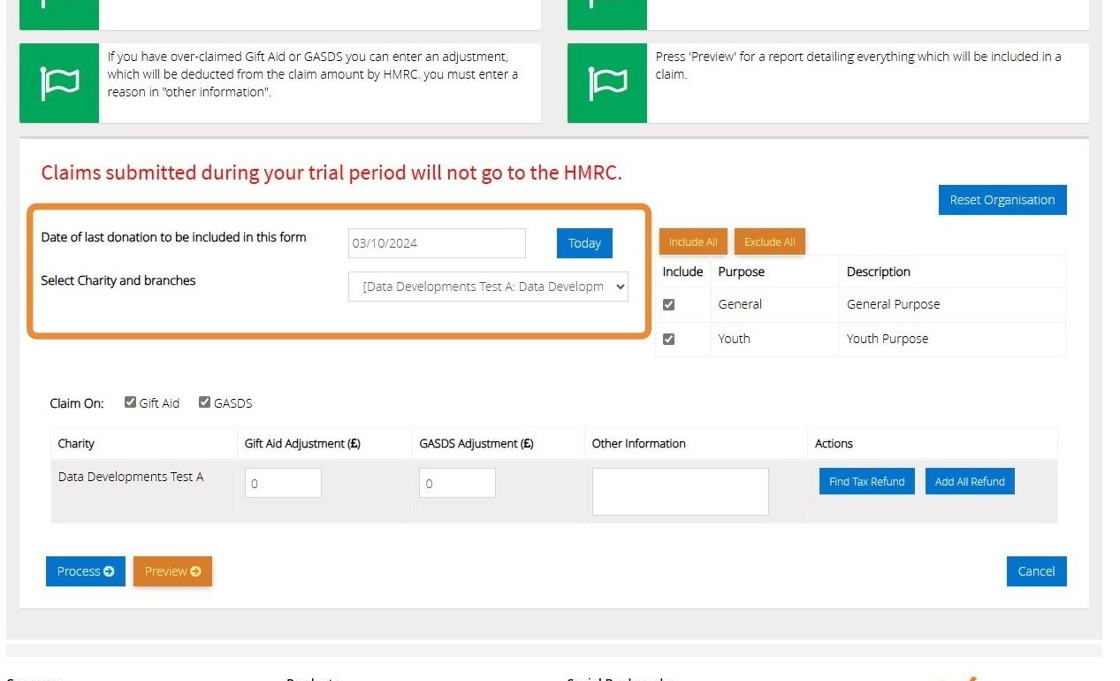
Alert: Alert! If you are in your trial period the submission will not be sent to the HMRC but the system will perform the process as if it were. If you are using live information for a claim you would like to submit you can either subscribe and then make the submission or reverse the claim and resubmit it at a later date. Please refer to the Reverse a claim guide for more detail
18. If you want to limit your claim to a particular purpose, you can do so by selecting and unselecting these manually or using the "Include All" and "Exclude All" buttons.
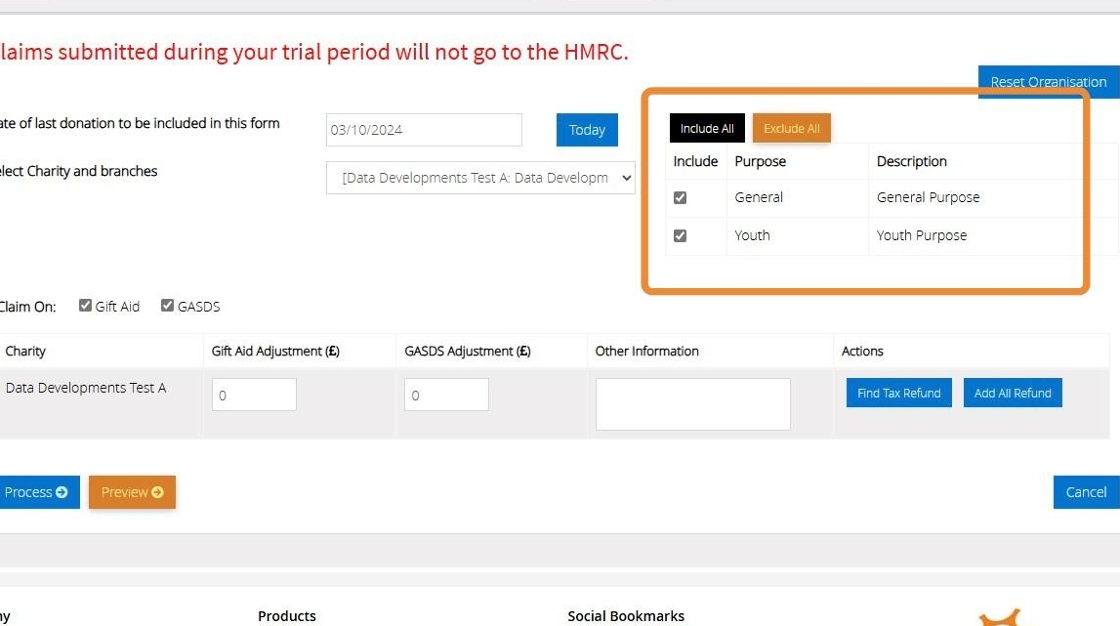
19. If you want to claim on Gift Aid and GASDS (Gift Aid Small Donations Scheme) separately, you can do so by unticking the relevant checkbox
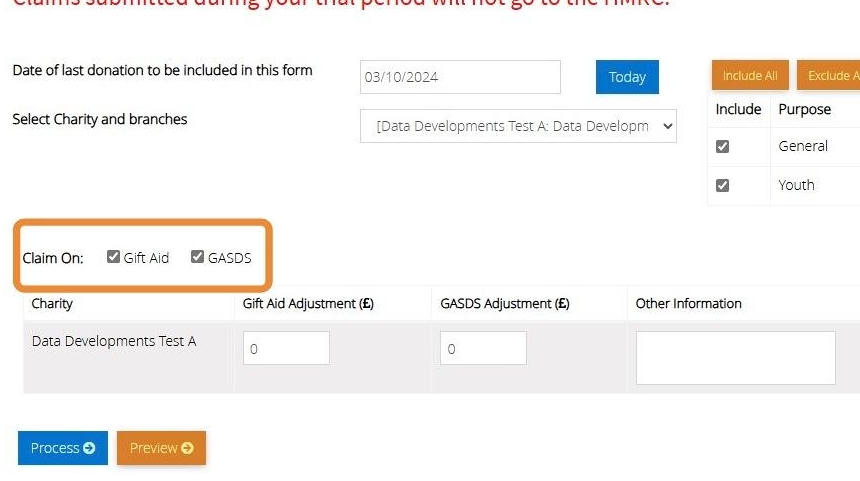
20. Enter any adjustments in the box below, including tax refunds using the "Find Tax Refund" and "Add All Refund" buttons

21. Once you have entered all the necessary information, select "Preview" to see a report before your claim is submitted

22. Once you are happy with your report, click "Process"

23. You will see the following message:
Make sure you read and understand the guidance given before selecting "Agree" to continue as your claim will automatically be sent to the HMRC
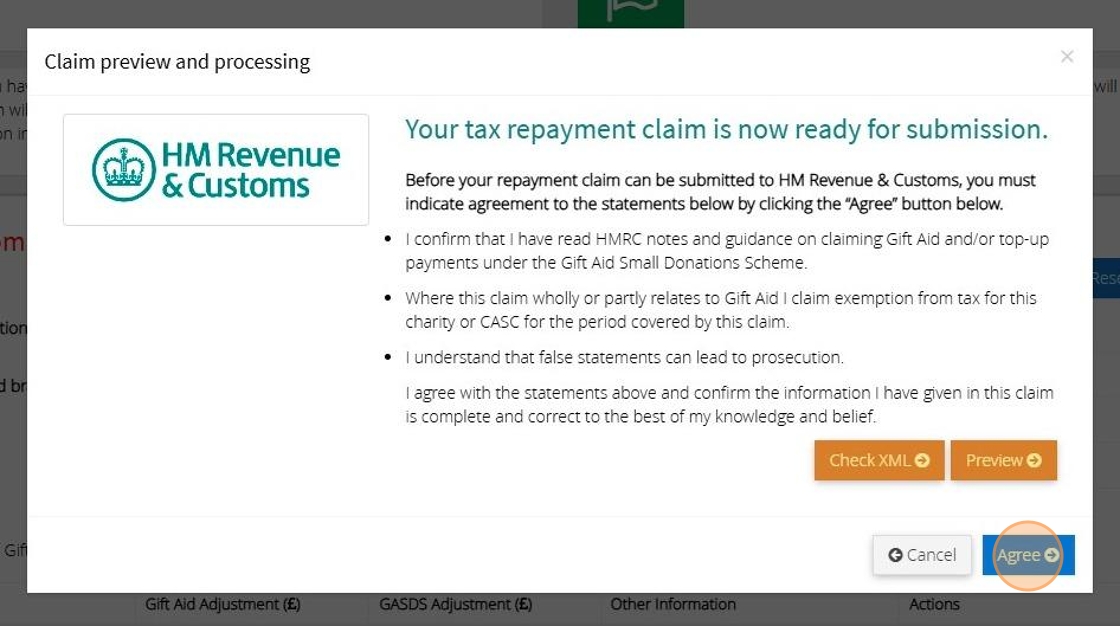
24. You will then receive a confirmation email directly to your inbox from the HMRC to confirm they have recieved your submission
Track Live Claims
Tip: Once your claim has been submitted to HMRC, you can use MyGiving.Online to track its progress live
25. Click "Claims"

26. Click "Track Live Claim"

27. Here you will see the claims you have submitted, along with their status.
HMRC recommends you save your claim file and their receipt file in case you are asked to provide this information to them.
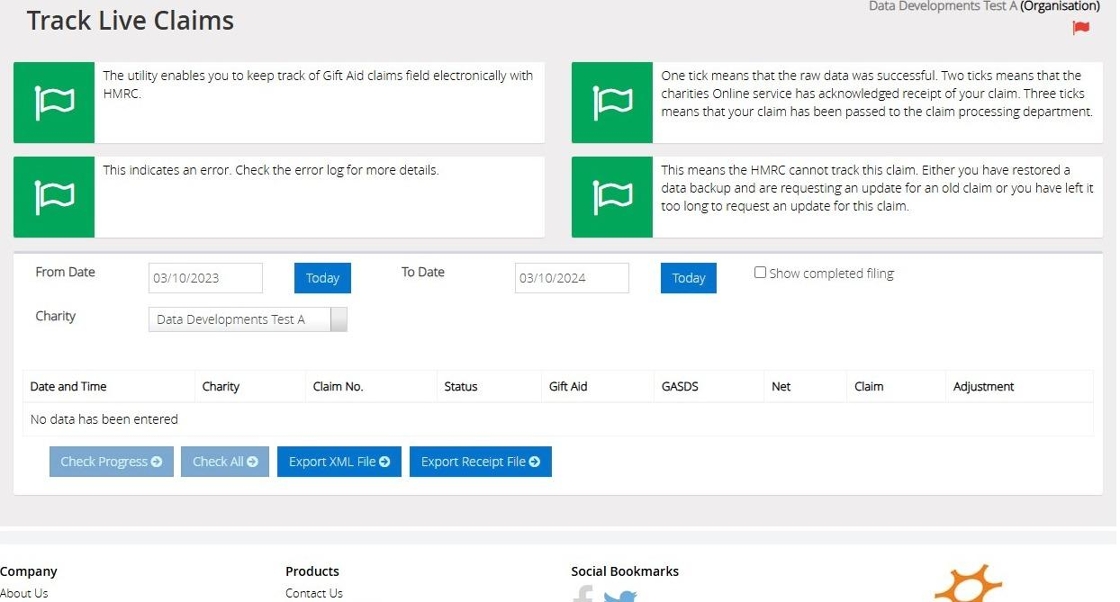
Tip: Tip! As MyGiving.Online automatically stores these into the database, you can export them onto your computer using the Export XML File and Export Receipt File buttons.
How to Tag Donors MyGiving Online
Where Can I Tag Donors?
1. Hover over "Donors"

2. Select "Tag/Untag Donors"

3. Choose the relevant donors you wish to tag.

4. Another place to tag donors is under "View and edit donors"

5. Click the "Tag" field.
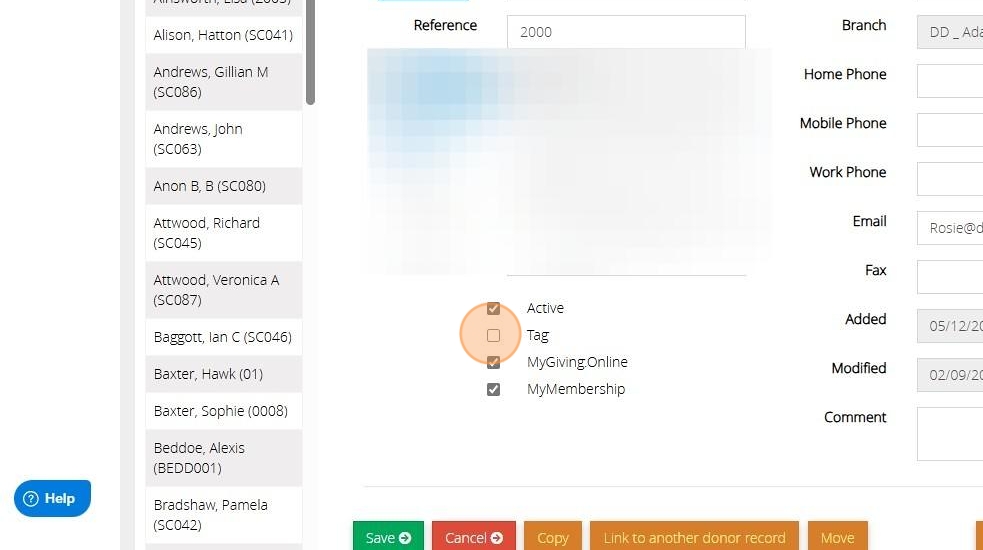
What is Tagging useful for?
6. Tagging is a valuable feature that enables specific reporting on tagged donors, allowing for the rapid collection of information about them.
Alert: Alert! If you tag multiple donor groups, they will be reported together unless you change the existing tag or apply a specific smart filter.
7. Examples of reports that can used with the Tagging option are:
Donor Details.
Overall total by month, quarter and year.
Donor and gift analysis.
Summary of donors, donations and claims.
Donations Due By Anniversary, Claim summaries by purpose.
Gift Aid Declaration.
Audit trails and thank you letters.
Personal statement and thank you letters.
Donations Received Between – Input Sheet.
8. As an example if you "Audit trails and thank you letters"
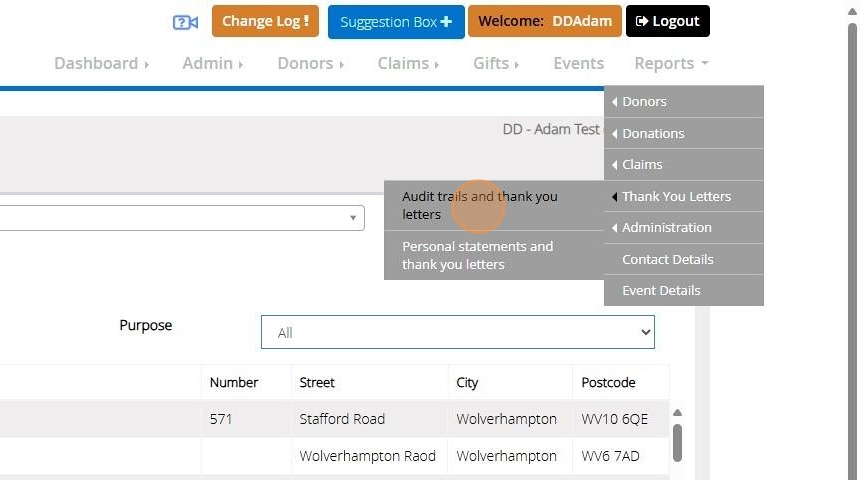
9. After selecting the option on step 1 Click "Next"

10. You will see the 'Donors who are Tagged' option on step 2 for your selection.

How to view the Change Log
Tip: When updates occur in MyGiving.Online, the details will be accessible in the change log.
You can find this by following the steps outlined below:
1. Navigate to https://www.mygiving.online/
2. Click "Admin"
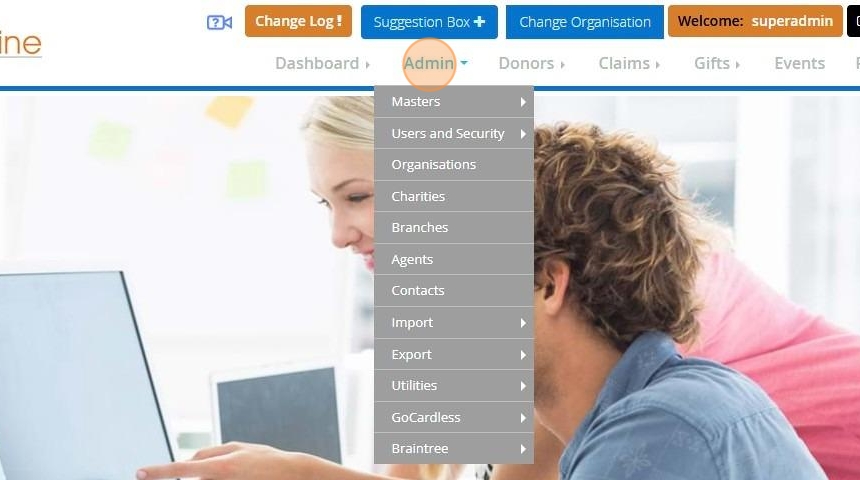
3. Click "Masters"

4. Click "MyGiving.Online"

5. All Changes made to the application can be viewed here

Tip: Tip! You can also access the change log by clicking here. An explanation mark shows there are changes that have been added to the log that you have not yet viewed.

Import Donations from MyGiving Online (Excel/CSV)
1. Navigate to https://www.mygiving.online
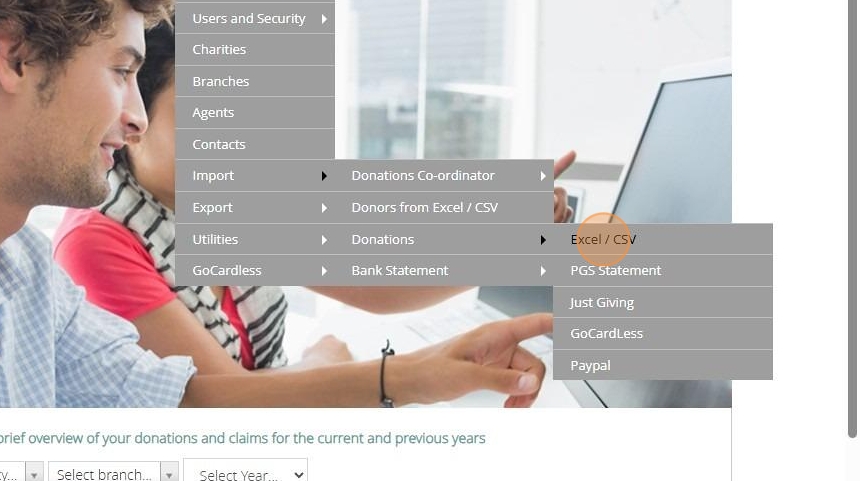
2. Click "Admin" > "Import" > "Excel / CSV"
3. Click "Select Charity..." and choose the charity the donations are for

4. Click "Select Branch..." and choose the branch the donations should be recorded under

5. You then need to select the fields from the list on the left hand side and move them to the right in the order they appear in the file being imported.

6. Based on the example above the order would be: Reference, Amount, DonationDate and ClaimTax

7. You can move the fields from the left to right by double clicking on the desired field or using the buttons between the 2 lists
8. You can move one field at a time by selecting the field and then clicking the ">" button between the list or ">>" to move all fields from left to right. You can do the opposite with the "<" and "<<" buttons.

Alert: Alert! The fields in red are required fields and must be included in the file you are importing, the rest are optional.
9. Click "Choose File" and select the file with the donations that you wish to import

10. Click this checkbox if the first row in the file has headings and does not contain donation information
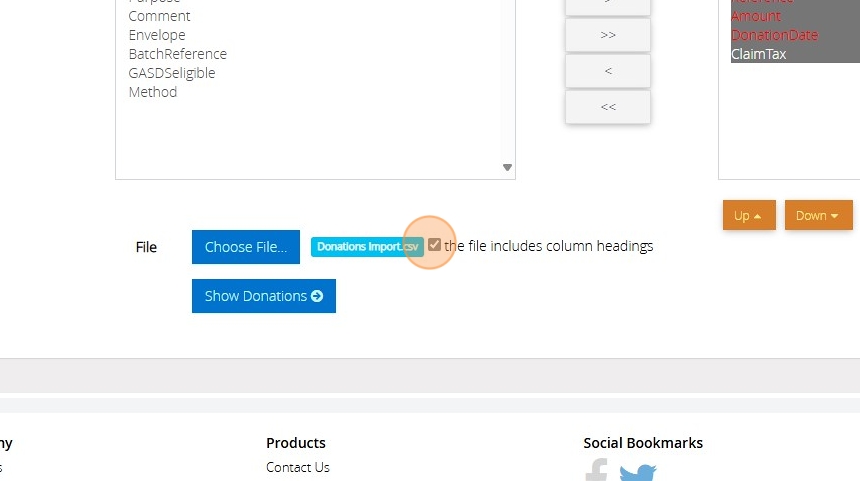
11. Click "Show Donations"

12. MyGiving will try to locate the donor the donation belongs to based on the reference field. If a donor cannot be found you will see a separate list containing the references and donation information which the message "Donor Reference not found"

13. Below the list of unidentified donors, if any, you will see a list of the donors it was able to identify.
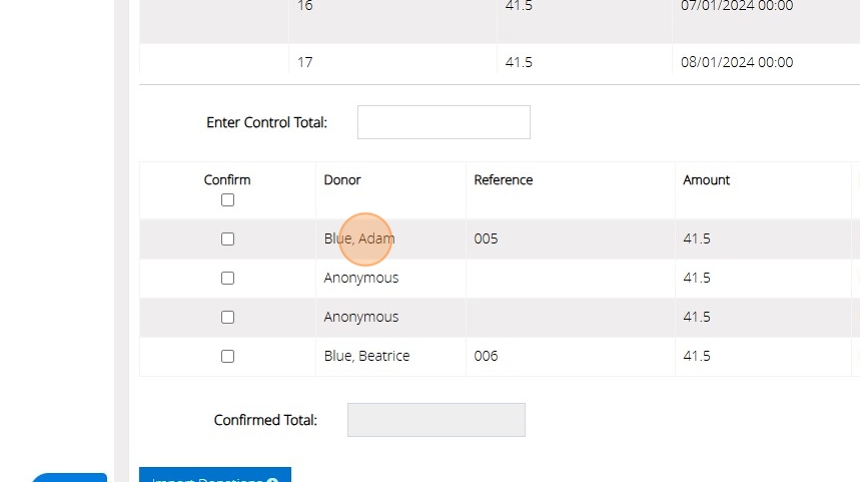
14. If any of the donations in the file had an empty reference they are imported as anonymous

15. Select the donations to import using the checkbox to the left of each row.

16. Alternatively click this checkbox to select all donations
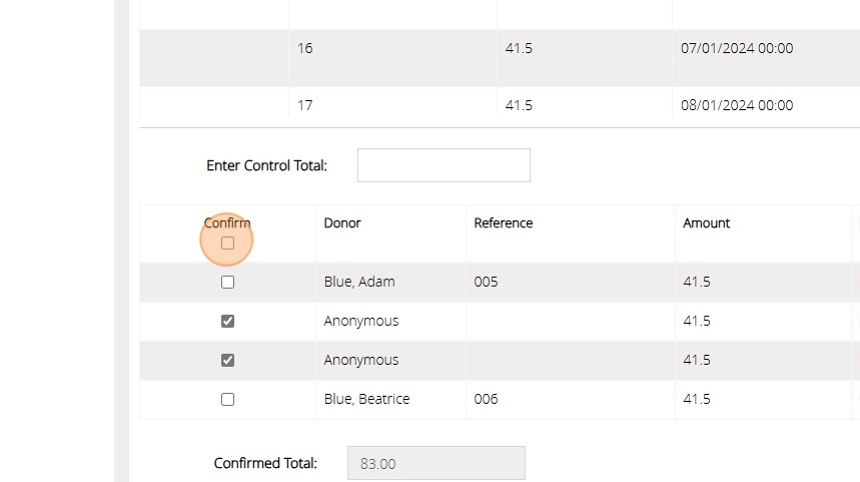
17. The control total will display the total amount of the selected donations

18. Enter this in the box above the donations to confirm it is the amount you were expecting

Tip: Tip! You can enter the control total before selecting donations if you know the sum of the donations you wish to import
19. Once you have selected the donations you wish to import and match the entered "Control Total" Click "Import Donations" to save the donations against the relevant records

Import Donors from Excel or CSV to MyGiving Online
1. Navigate to https://www.mygiving.online/
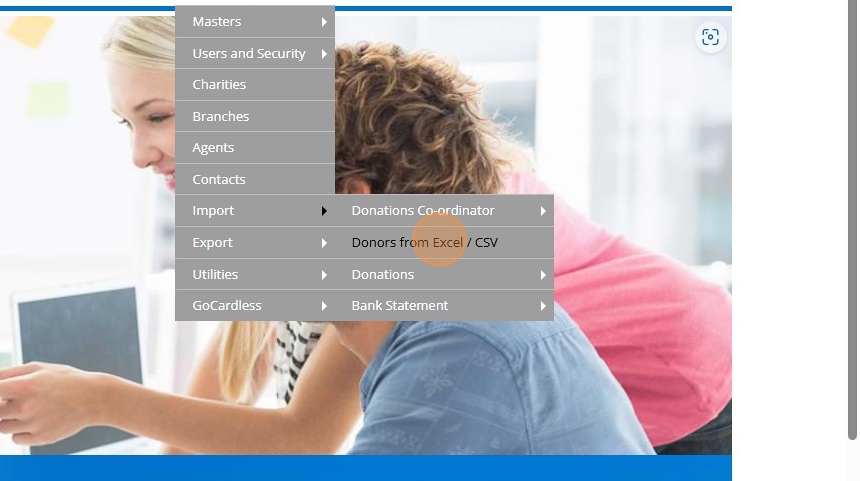
2. Click "Admin" > "Import" > "Donors from Excel / CSV"
3. Click "Select Charity..." and choose the charity you wish to import the donors under

4. Click "Select Branch..." and choose the branch under the charity you have selected to record the donors against

5. Below is a screenshot from the file we will be importing.

6. Based on the file we need to select the fields in the order they appear: Reference, Forenames, Surname, Street, City and Postcode, moving them from the left hand side to the right.
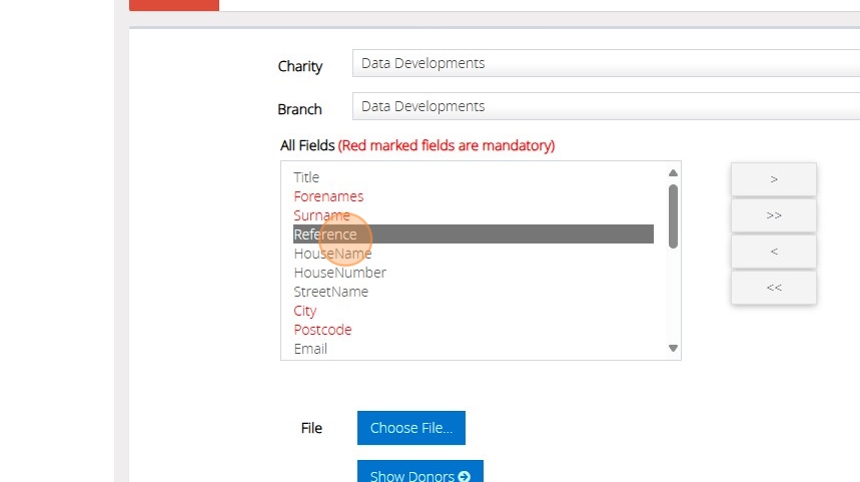
Alert: Alert! The fields in red are required fields and must be included in the file you are importing, the rest are optional. In addition to the fields in red you must provide either a house name or street name.
7. You can move the fields from the left to right by double clicking on the desired field or using the buttons between the 2 lists
8. Moves the selected field in the direction of the arrow

9. Moves all fields from one list to the other depending on the direction of the arrow

10. If you have made a mistake with the order of the fields on the right hand side you can rearrange them using the up and down buttons below the list

Alert: Alert! If you have any additional columns that are not listed in your excel document you will need to remove these before completing the import
Tip: Tip! The default method, purpose or envelope number you assign a donor in the file do not have to be present in MyGiving.Online before the import. If you enter a method, purpose or envelope number that does not already exist they will automatically be created for you upon a successful import.
11. Click "Choose File..." and select the file containing your donor information
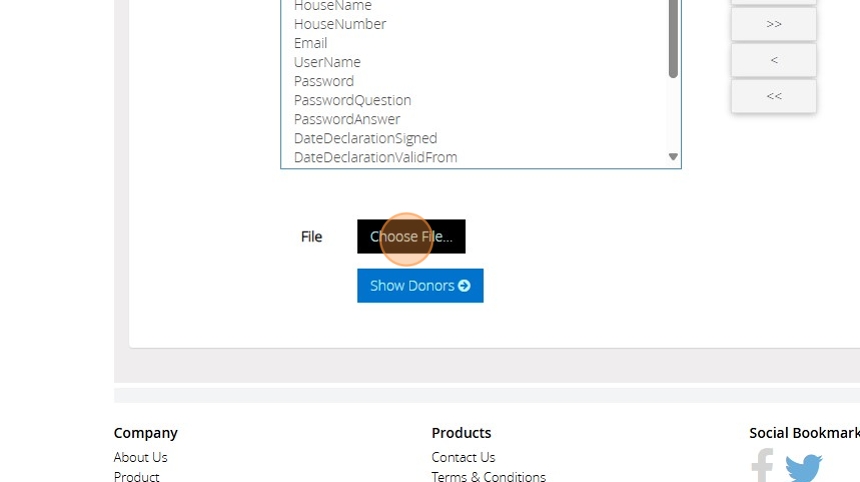
12. Click "Show Donors"
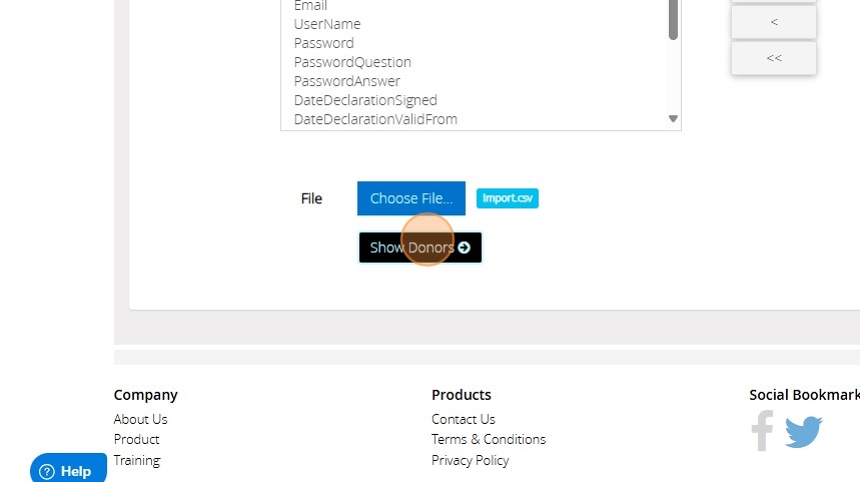
13. A list of the donors found in the file will be listed for you to review. Click the checkbox to the left of the donors that you wish to import.
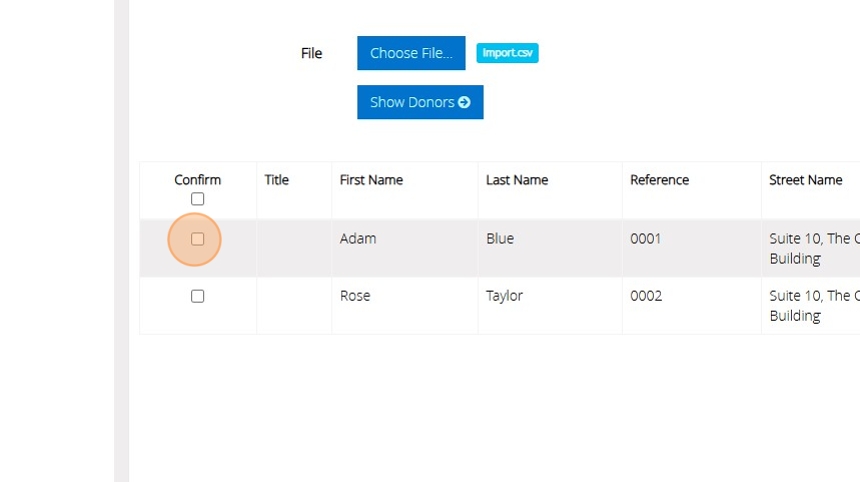
14. Alternatively if you want to import all the donors you can click this checkbox to save you selecting each donor individually

Tip: Tip! If you see any rows highlighted in red there is likely an issue with the information in one of the columns. This will usually happen if the order of the headings do not match the order provided to MyGiving in step 6. Please contact our support line on 01902 714030 for further assistance if you have trouble identifying the problem
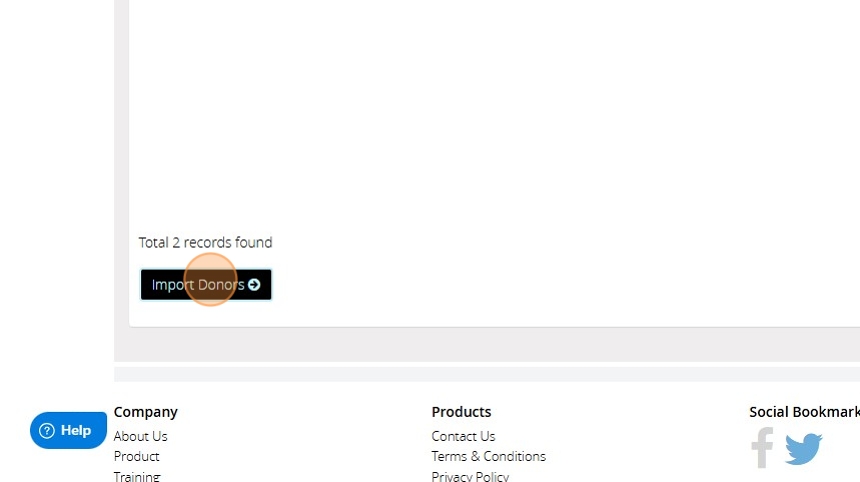
15. Click "Import Donors" when you are happy with your selection and your records will then be available under "Donors" > "View and edit donors"
List of parishes with events in a given date range
1. Navigate to https://staging.mygiving.online/
2. Click "Event Details Report"

3. Click this text field below the label Event took place between.

4. Select the start of the date range

5. You can choose a date in a previous year quicker by clicking the top bar of the date selector

6.

7. Click this text field to then choose the end date of the date range

8. Click "Next"
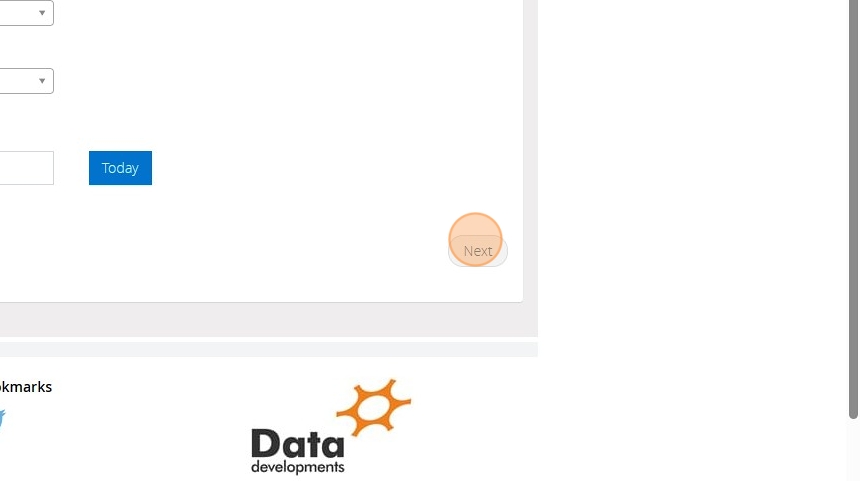
9. Click ">>" to move all fields across intially

10. Double-click "Donations" to move it back to the left if you are only interested in the event details and the parish/church that participated in an event

11. Double-click "Staff" to do the same

12. Click "Generate Report"

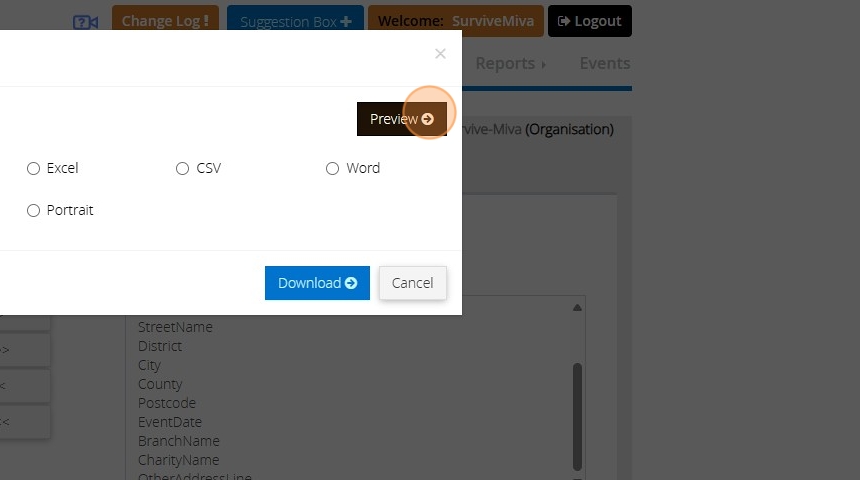
13. Click here.
Merge Donor records
Tip: Occasionally, two donor records may be created for the same individual.
Follow the instructions below to merge these duplicate donor records.
1. Navigate to https://www.mygiving.online/
2. Click "Donors"
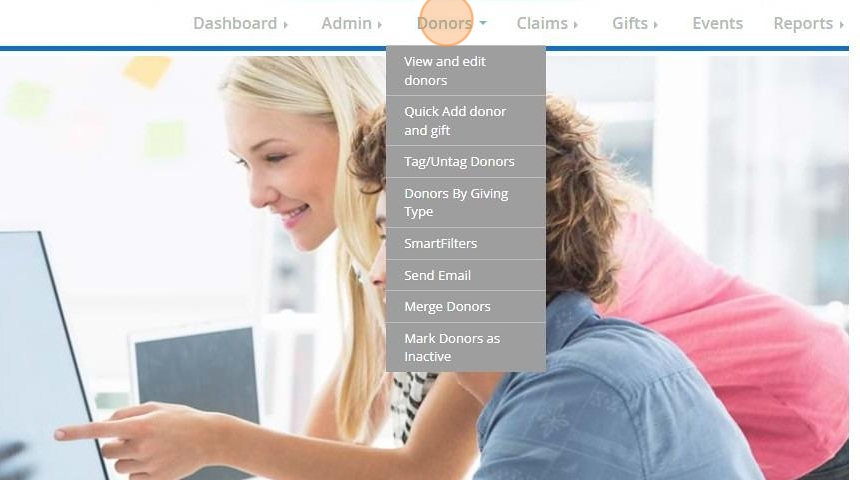
3. Click "Merge Donors"

4. Search the name of the Donor or locate from the Donor list

5. Next to the donor record you intend to merge, check the box.
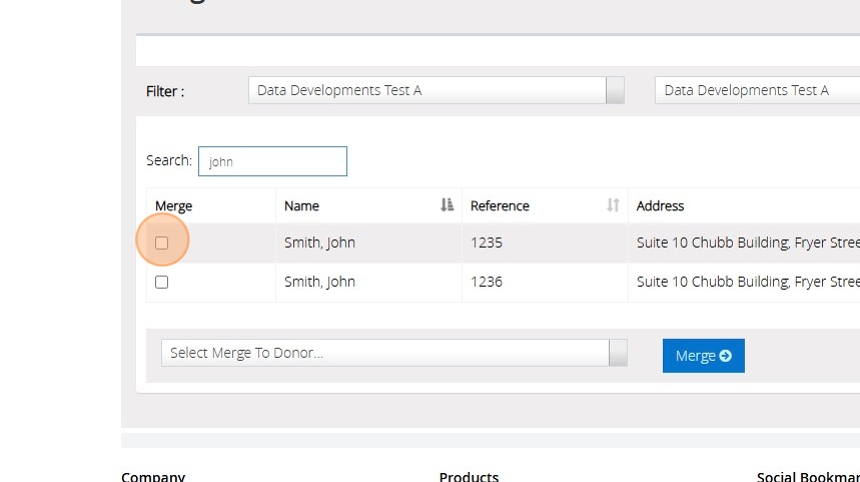
6. Click "Select Merge To Donor" dropdown and select the donor record you wish to merge

7. Click "Merge"

8. Click "OK"

9. Once the records have merged you will see the below message

Merge Donor records
Tip: Occasionally, two donor records may be created for the same individual.
Follow the instructions below to merge these duplicate donor records.
1. Navigate to https://www.mygiving.online/
2. Click "Donors"

3. Click "Merge Donors"

4. Search the name of the Donor or locate from the Donor list

5. Next to the donor record you intend to merge, check the box.

6. Click "Select Merge To Donor" dropdown and select the donor record you wish to merge

7. Click "Merge"

8. Click "OK"

9. Once the records have merged you will see the below message

Overview of Claims and Gifts
Tip: The overview of Claims and Gifts Report provides a list of the gifts included within the claim filed with HMRC. This report is particularly useful if you do not have a copy of your initial pre- claim report.
1. Navigate to https://www.mygiving.online/
2. Click "Claims"

3. Click "Overview of Claim and Gifts"

4. Please enter the date range during which your claim was submitted.

5. Select your charity from the drop down

6. Select your branch from the drop down

7. Click search

8. This section of the screen shows the claims that have been made

9. Further details for the claim that is highlighted in the top section are shown below

10. Details of the donations included in the highlighted claim can be seen here

11. To generate a report of this information Click "Export"
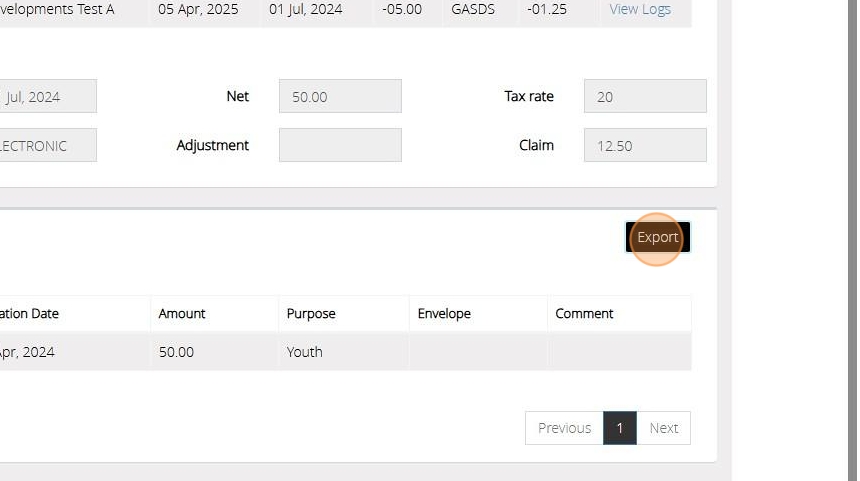
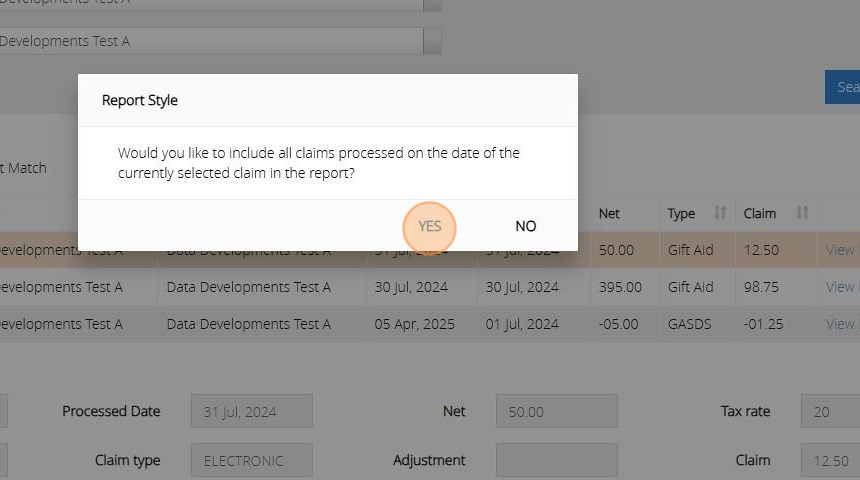
12. Should you want to include all claims processed on the date currently selected Click "YES"
13. Select the required fields to be exported

14. Click ">>" to move all fields across or click ">" to move one at a time

15. Click "Generate Report"
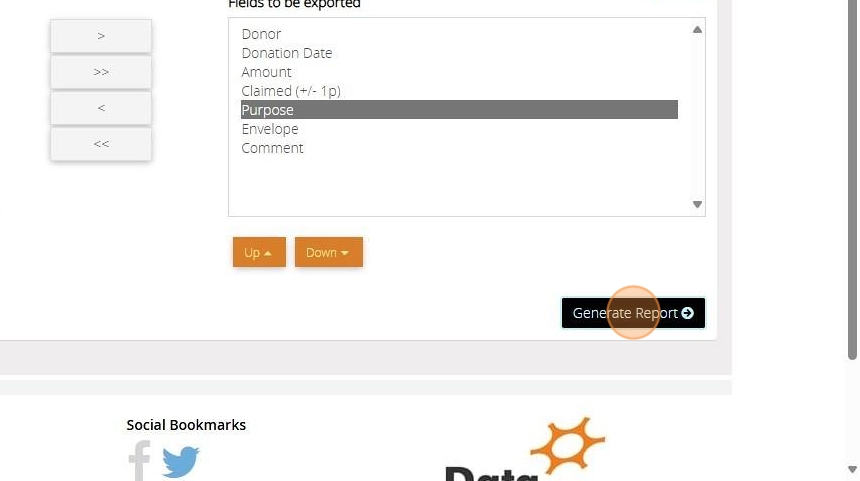
16. Select your preferred download format and click "Download" or click "Preview"

Produce a Donor details report
Tip: The below steps will guide you in producing a detailed report showing information about a donor, their pledge, declaration, giving and other important donor details.
1. Navigate to https://www.mygiving.online/dashboard
2. Click "Reports"

3. Click "Donors"

4. Click "Donor Details"

5. Select the donors to be included in the report.
You can filter your donors using Smart Filters. For more guidance on Smart Filters please click here
You can filter via donors who are tagged. For further guidance on Tagged Donors please click here

6. [[Tick the box next to each Donor Type and Giving Type you wish to include]]

7. Click "Next"

8. Select the information you require by moving the fields from the left box to the right box. You can do this by double clicking on the desired field or using the buttons between the 2 lists

9. Click ">" to move the selected field in the direction of the arrow

10. Click ">>" to move all fields from one list to the other depending on the direction of the arrow

11. Click "Full Donor details" is a complete record for all information from the donors record. Running this report can result in a longer processing time if you have selected to include a large number of donors.
Click "Basic Donor Details for a summarised report that only includes the fields you have selected above

Reverse a Claim
Tip: This option is for the rare occasions when you may need to reverse a claim that has been submitted.
A situation in which this would be needed would be if the submission has been successful but the HMRC have then rejected the claim after further processing.
In this instance you would reverse the claim to unmark the donations as claimed and re-submit.
Alert: Alert! If you have submitted a claim to the HMRC that has been accepted you must not use this option! Please see Gift Aid refunds for further information.
1. Navigate to https://www.mygiving.online
2. Click "Claims"

3. Click "Reverse a Claim"

4. All claims submitted will be listed here. You can select to reverse all claims by using the tick all option

Alert: Alert! Use this with care as selecting all claims will select every claim you have processed in Donations Coordinator and MyGiving.Online
5. To filter the claims to a particular date please click next to " For claim on the following date"

6. Click here to either type your cut off date or click to open a calendar to make your selection.
Alternatively click "Today" to enter todays date

7. Click "Tick All" to select all of the claims listed above

8. Click "Untick All" to unselect all of the claims above

9. Check the box next to each claim you need to reverse

10. Click "Reverse Claim"

11. Click "Continue"

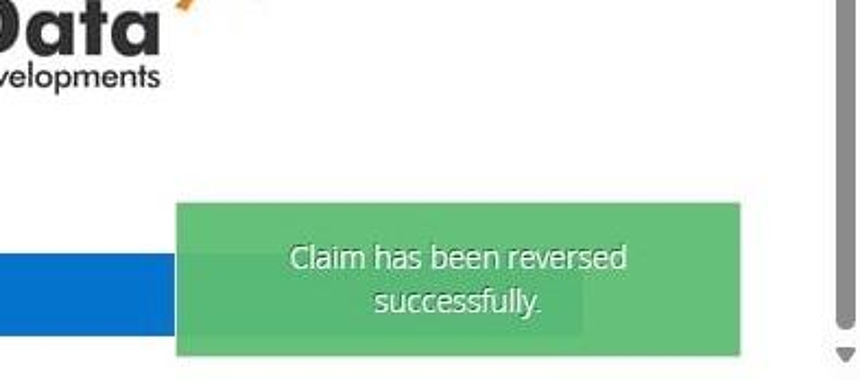
12. The below message will appear once the claims selected have been reversed
Sending out letters in MyGiving.Online Dashboard
1. Navigate to https://www.mygiving.online/dashboard
2. Click "Events"

Send confirmation letter for a new event
3. Click "Add New"

4. Click this text field.

5. Click "Select Charity..."

6. Click "Select branch..."

7. Click here to choose the person the confirmation letter needs to be sent to
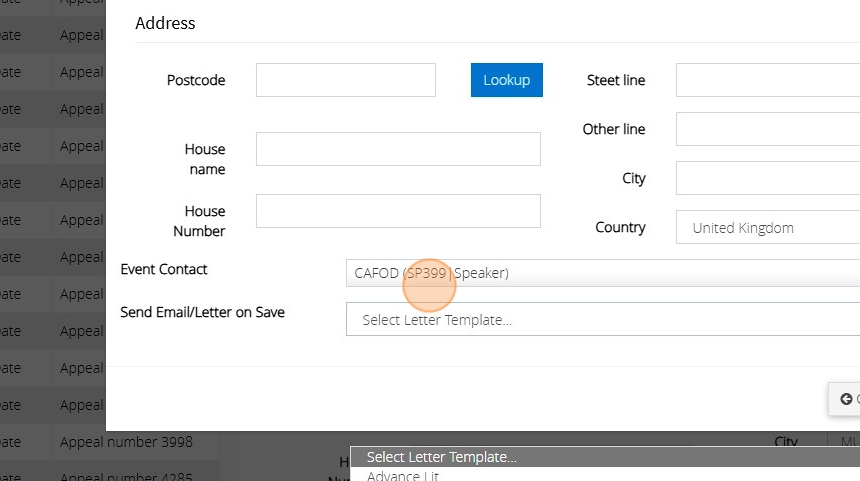
8. Click this dropdown to choose the letter to send/generate the letter
Alert: If the contact has an email address they will receive the letter via email otherwise a PDF document will appear for you to print or save
Send a Letter for an existing appeal
9. Click "Contact History" on the "Events" page after selecting the appeal from the left hand side

10. Click "Add Contact"

11. Click "Select contacts . . ." to choose a contact associated with the appeal to send the letter. You can choose multiple people if needed

12. Set the date the letter was or is due to be sent

13. Click this dropdown to indicate the type of letter you are sending

14. Click this dropdown to select the letter you wish to send

15. You can check the option "Send letter via email automatically where possible" to send the contacts that have an email address the letter via email
16. You can choose to create a pdf document to print or save in order to email the letter manually or send it in the post
17. If the letter is due to be sent in the future you can have MyGiving send you an email on the day to remind you to send it out. The email will contain a pdf copy of the letter and/or inform you that emails have been sent.
Sending Thank You Letters for Events
Alert: Alert! Donations must be associated with a staff member to send out thank you letters
1. Navigate to https://staging.mygiving.online/
2. Click "Events"

3. Click this text field to then search for an event

4. Or scroll through the events list to find the event and click on it to select it

5. Click "Contact History"

6. Click "Add Contact"

7. Click "Select contacts . . ."
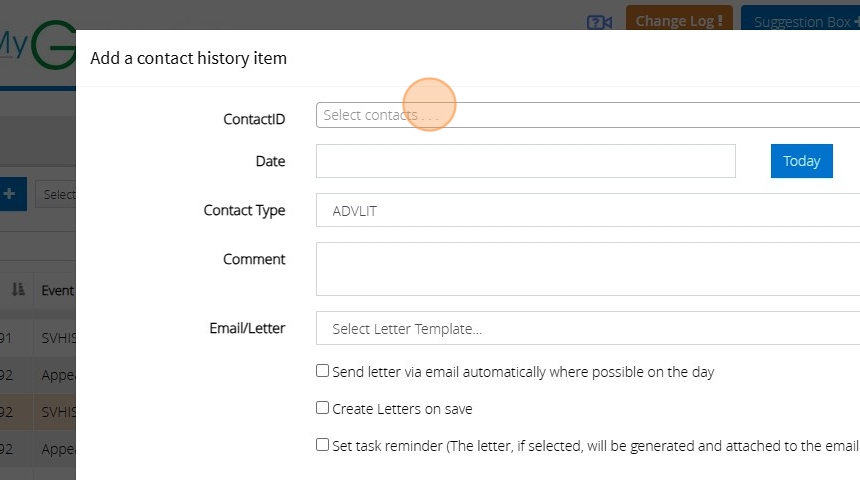
8. And choose the contacts you wish to send a thank you letter to

Tip: Tip! The letter generated will contain only donations assigned to the contact person and not the overall event
9. Click "Date" and enter the date for when you want to send the letter. Put todays date if it is to be sent straight away

10. Click this dropdown and choose "Thank you letter" this is not necessary for sending the letter but is required for accurate record keeping

11. Click the "Comment" field and type anything you believe necessary about the letter you are sending

12. Click this dropdown and choose the letter you wish to send. This can be used to send any kind of letter you have created and not just thank you letters.
e.g. Advanced Lit
How you create/edit a letter is outlined at the end of this section

13. Click this checkbox if you have an email address for some or all of the contacts selected and wish to send the letter straight away via email

14. Click this checkbox if you want to generate a printable version of the letters as a pdf generated as soon as you click save

15. Click this checkbox if you want to be reminded on the date you has set in step 9 above to contact the selected contacts. The reminder is sent via email to your email set under your user profile.

16. Click "×" to cancel the contact record or click save to commit it
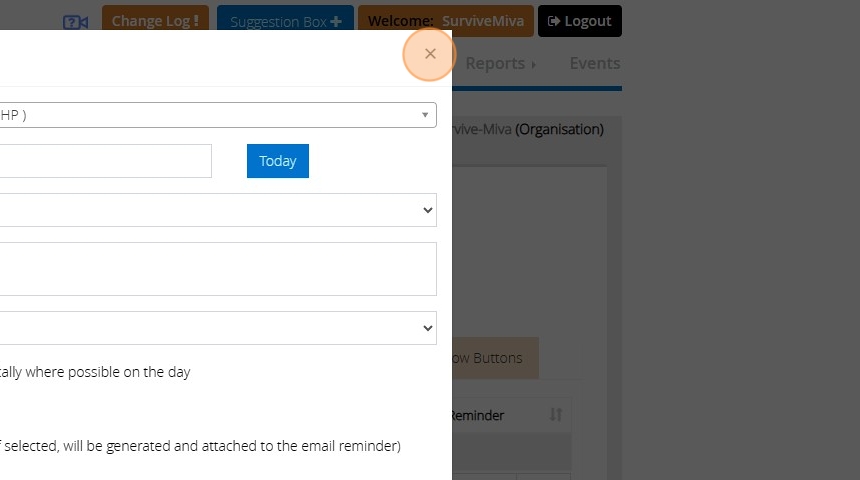
Creating/Editing Letter templates
17. Click "Admin" > "Masters" > "Administration Letter"

18. Click "Add New" on the top left or "Edit" against an existing template

Smart Filter
Tip: Often, when utilising data within MyGiving.Online you may only need to work with a portion of the stored data.
This is usually when running reports, sending emails, texts, or generating letters via mail merge.
You'll likely want to focus on a specific group of donors from your records.
SmartFilters function as dynamic lists that refresh automatically—you set the criteria of interest, and the SmartFilter consistently provides a current list of donors meeting those criteria.
Tip: SmartFilters can be used throughout MyGiving.Online and provide a powerful way of handling your data.
1. Navigate to https://www.mygiving.online
2. Click "Donors"

3. Click "SmartFilters"

4. Click "Add New"

5. Enter a Name for your SmartFilter

6. Enter a Description for your SmartFilter

7. Having created a new SmartFilter, you now need to tick to include the criteria which will determine which donors will be included within it.

Tip: Tip! The six tabs offer dozens of different possible criteria that are grouped together according to which part of the system they relate to
8. Once you have selected your criteria Click "Save"

9. Here, you can preview donors who meet the selected criteria. The list will automatically refresh to show active donors matching these criteria.
For instance, if you add a donor record following the creation of the smart filter and they do not have an active declaration, their name will appear here.
Alternatively, if a donor's declaration is updated to valid dates, their name will be removed from the list.

Tip: The following steps demonstrate how to generate a report using the smart filter you have created.
10. Click "Reports"

11. Click "Donors"

12. Click "Donor Details"
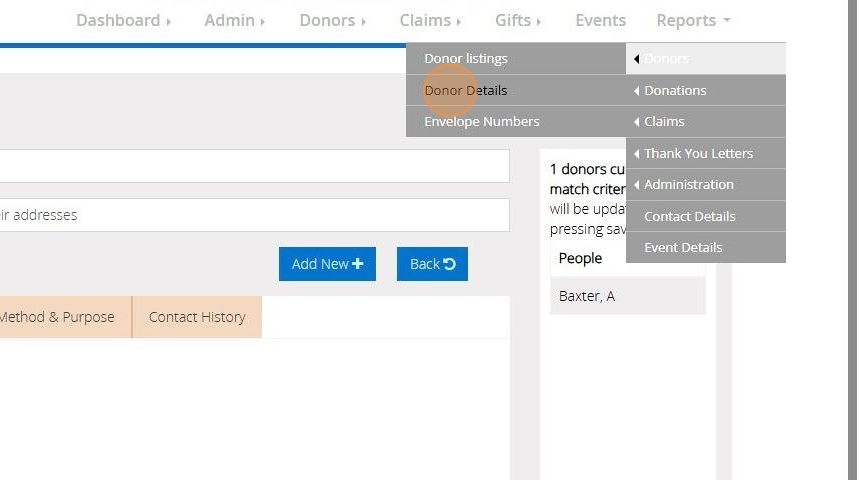
13. Select Donors in the following SmartFilters

14. Click on the drop down bar and select your "Smart filter" from the list

15. Click "Next"

16. Select the first field to be included

17. Click ">"to move this across to be included. Repeat this step until all fields needed are in the box on the right hand side

18. Click "Basic Donor Details"

19. Click "Preview" or download the report directly to your device

Updating the Authorised Official
Tip: If a new Authorised Official has been appointed to manage your organisations donations their details will need to be entered in order to submit a claim to the HMRC
1. Click "Admin"

2. Click "Charities"
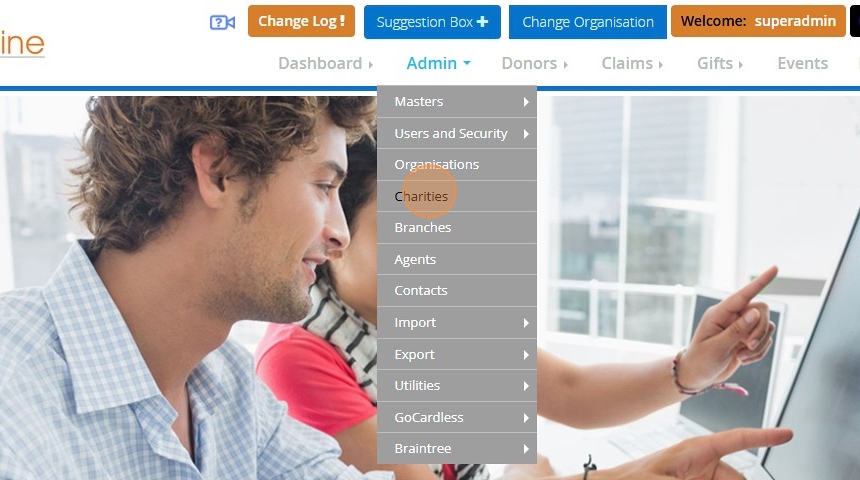
3. Click "Edit"

4. Under the heading Claim Type select Claim as this authorised official

5. Click "CONTINUE"
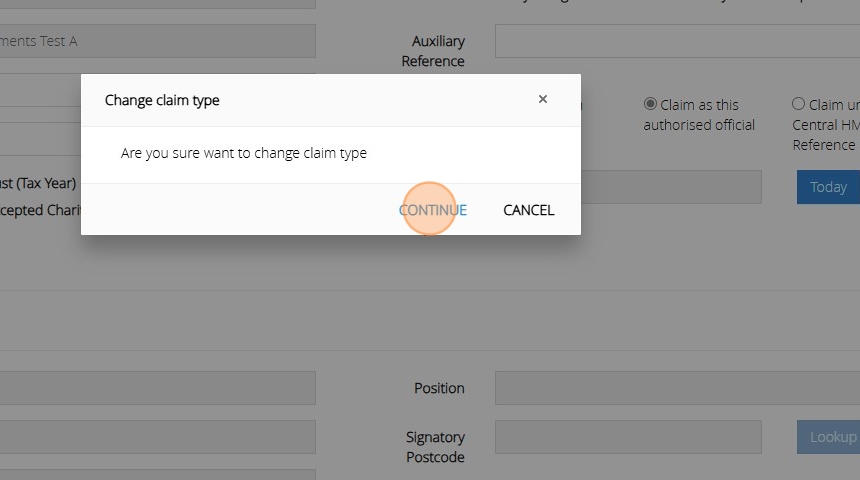
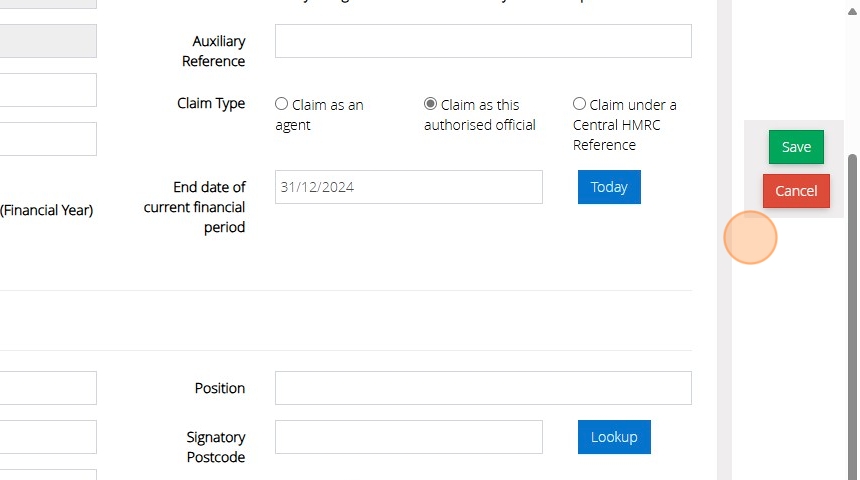
6. Enter the Authorised Officials Details

Tip: The HMRC will provide the Authorised Official with new log in details for the Charity Online Portal.
7. Click "Charity Online Login"

8. Enter the "User ID"

9. Enter the "Password"

10. Click Save
Updating the Authorised Official
Tip: If a new Authorised Official has been appointed to manage your organisations donations their details will need to be entered in order to submit a claim to the HMRC
1. Click "Admin"

2. Click "Charities"

3. Click "Edit"

4. Under the heading Claim Type select Claim as this authorised official

5. Click "CONTINUE"

6. Enter the Authorised Officials Details

Tip: The HMRC will provide the Authorised Official with new log in details for the Charity Online Portal.
7. Click "Charity Online Login"

8. Enter the "User ID"

9. Enter the "Password"

10. Click Save

Creating A New User Account
Tip: On MyFundAccounting.Online you can create user accounts with a custom roles and permissions that tailors each user's access.
This ensures they only see the parts of the application that are relevant to their role.
The below steps will guide you in creating a custom role with specific permissions.
1. Navigate to https://www.mygiving.online/dashboard
2. Click "Admin" > "Users and Security" > "Custom Roles & Permissions"

3. Click "Add New"

4. Name the new role depending on who you would assign it to e.g. Assistant, Gift Aid Secretary

5. Click "Save"

6. Your new role will appear in the list

7. Click "Edit" to bring up the form you filled in step 4 to amend any details

8. You can remove the role by clicking "Delete"

Alert: Alert! If the role has been assigned to a user it cannot be removed until the user is reassigned to another role or deleted
9. Click "Edit MGO Permission" to begin choosing what permissions this role will give the user. "Edit MMO Permission" may be available if you use MyMembershipManager.Online.

10. Click the checkbox of the options you want available to the user and uncheck the ones you wish to hide or block

11. Click "Save" once you are happy with your selection.

Tip: Tip! If you do have access to MyMembershipManager.Online (MMO) you can set up the permissions for MMO by now clicking "Edit MMO Permission"
Creating the User
12. Click "Users"

13. Click "Add New"

14. Click this dropdown to select a default role or a custom role you have created

15. If you select to use a "Custom" role you will see a new dropdown where the roles you have created will appear. Click this dropdown to select the relevant role you wish to assign the user.

16. Checking "MyGiving.Online" will allow the user to log into MyGiving using the details you set up

17. Checking "MyMembershipManager.Online" will allow the user to log into MyMembershipManager using the details you set up

18. Fill out the rest of the form with the users personal details

19. You can use the lookup option after entering the postcode to autofill the address from a dropdown

20. Click this dropdown after clicking the lookup for all the addresses that have been found for the postcode

21. Click the "Password" field and enter a password for the user to use when they first log into the account

22. Click the "Confirm Password" field and re-enter the same password

23. Enter in a password question and answer. The user can update these once they log into the account

24. Click "Save"

Tip: Tip! After saving the details you can send the username and password you have created to the user in an email
Tip: Tip! Once the user logs in they can update their password and password answer and question by going to "My Profile" on the left hand side of the dashboard and checking the change password checkbox on the right

Creating, managing and processing Standing Orders
Tip: If you have recurring transactions or standing orders that you enter each month or at regular intervals, you can utilize the standing order feature to automate their generation according to the desired frequency. These transactions will appear on the ‘Process standing orders’ screen, allowing you to choose whether to include them in your transaction listings.
Creating a Standing Order
1. Navigate to https://www.myfundaccounting.online/dashboard
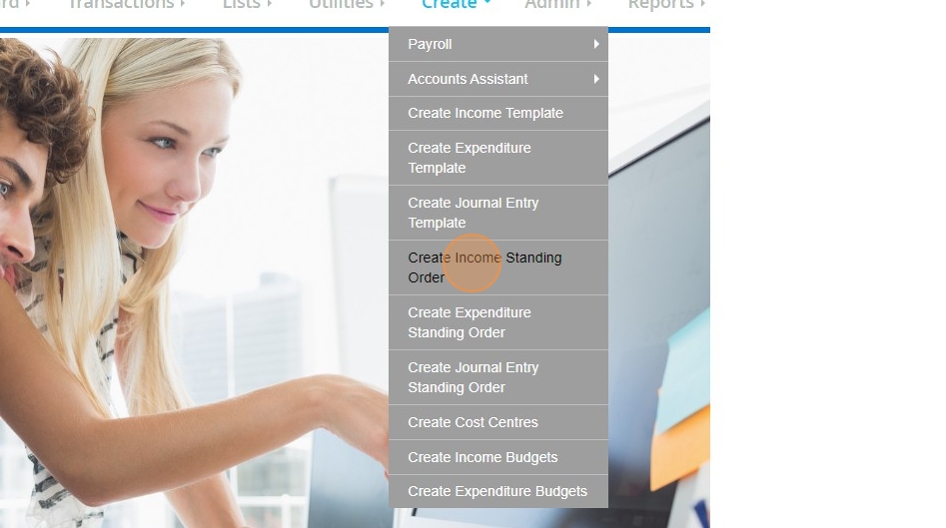
2. Click the "Create" menu.

3. Click "Create Income Standing Order"
4. On the Create Income Standing Order screen, you will be able to enter in a 'text for list display'. This is a name that you will be able to see in the display of your standing orders, but will not be posted to the actual transaction itself. If you wish to keep donor's names private in your transaction listings, you can put their name here instead and use a more generic description and reference on the actual transaction.

5. You will then need to enter the Start Date of the transaction. This is the date that the standing order will begin generating from. You are able to backdate this if you need to enter multiple months worth of transactions.

6. If the standing order already has a date at which it is set to finish, you can also enter that in the 'Finish Date' box.
7. The 'Schedule' dropdown allows you to set a frequency at which this standing order will generate, for example 'Monthly' means it will generate each month starting from the Start Date that has been set.

8. You can then enter the details of the transaction in the same way that you would for any normal income transaction. First, select the bank account this will post to.

9. Then, enter the amount for the standing order.

10. Then, enter a relevant reference and description.

11. Select the income code.

12. Once you have filled in all the details of the transaction, click the 'Store' button.
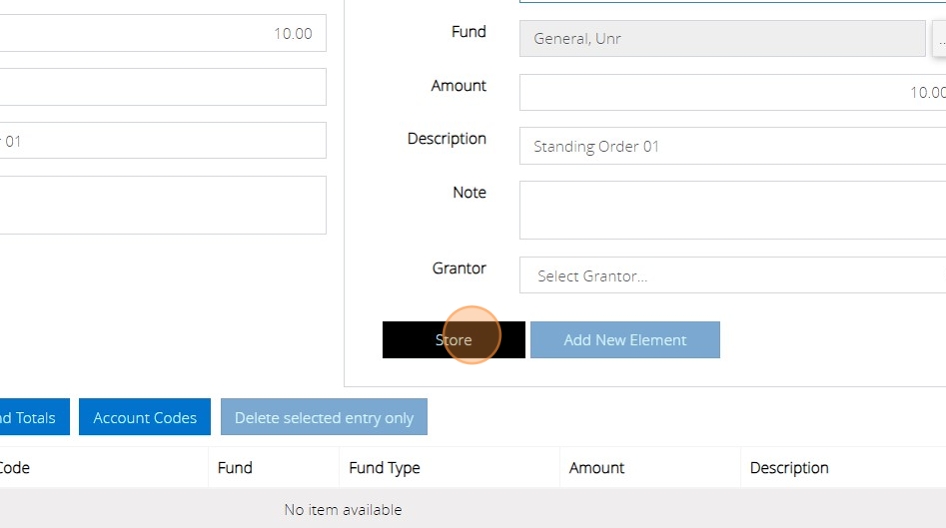
13. If both sides of the transaction balance, you will see a message that asks if you wish to go ahead and create a standing order. Click 'YES'

14. You will then be notified that the standing order has been created successfully. You can click OK.
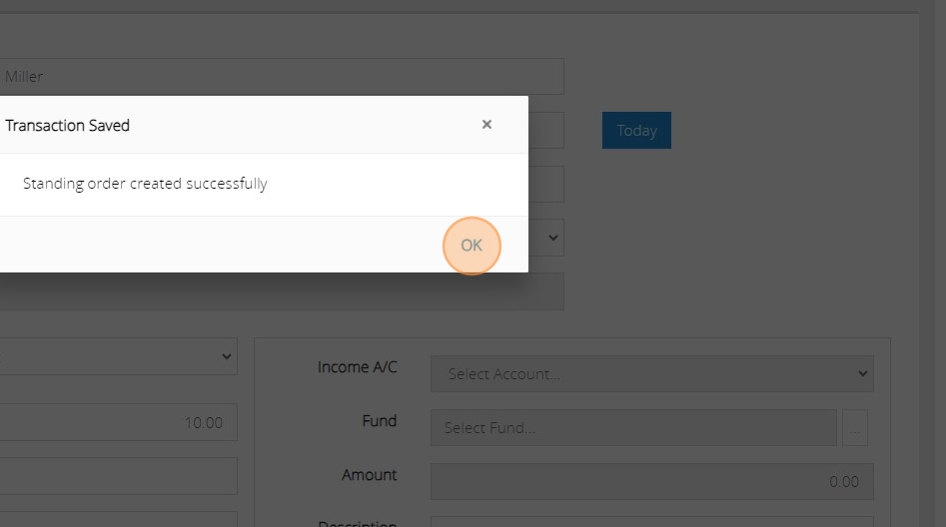
Tip: Creating Expenditure standing orders works in exactly the same way. You can just reach it by going to Create > Create Expenditure standing orders.
Managing Standing Orders
Tip: You are also able to view, amend and delete standing orders.
15. Under the transactions menu, click "Standing Orders"

16. Select the standing order that you wish to view, amend or delete.
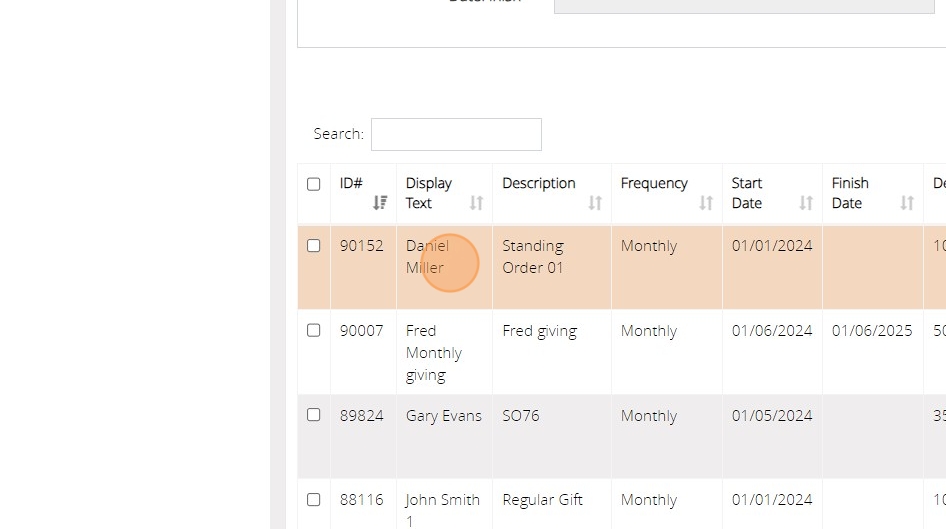
17. Once selected, you can view the details at the top of the list of standing orders.
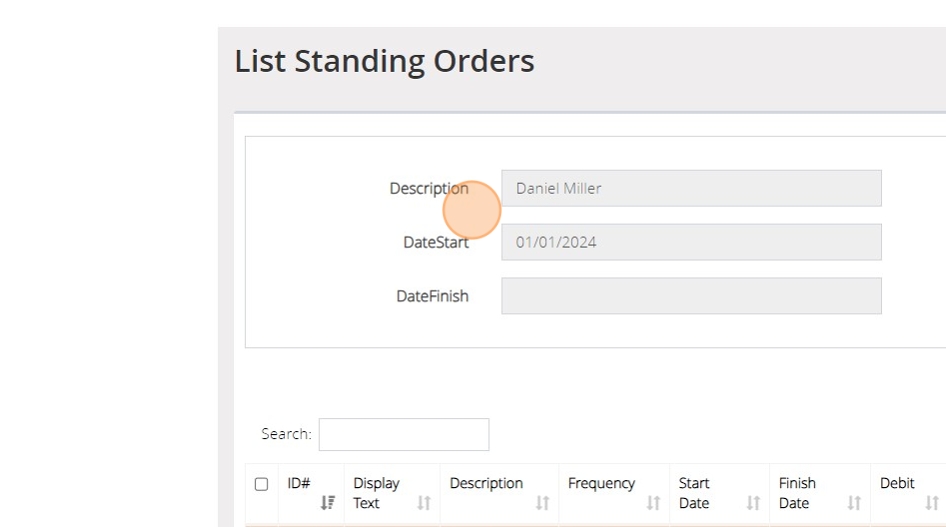
18. If you wish to edit the standing order you can click the 'Edit' button. If you wish to delete the standing order, you can click the 'Delete selected items' button.
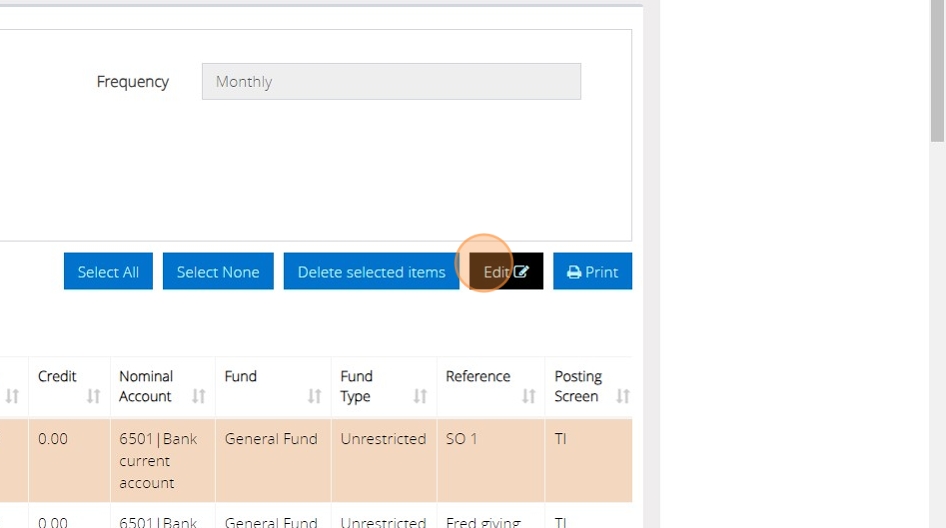
19. Once on the edit screen, you can then amend any of the details of the transaction that you wish, including the Text for list display and start date.
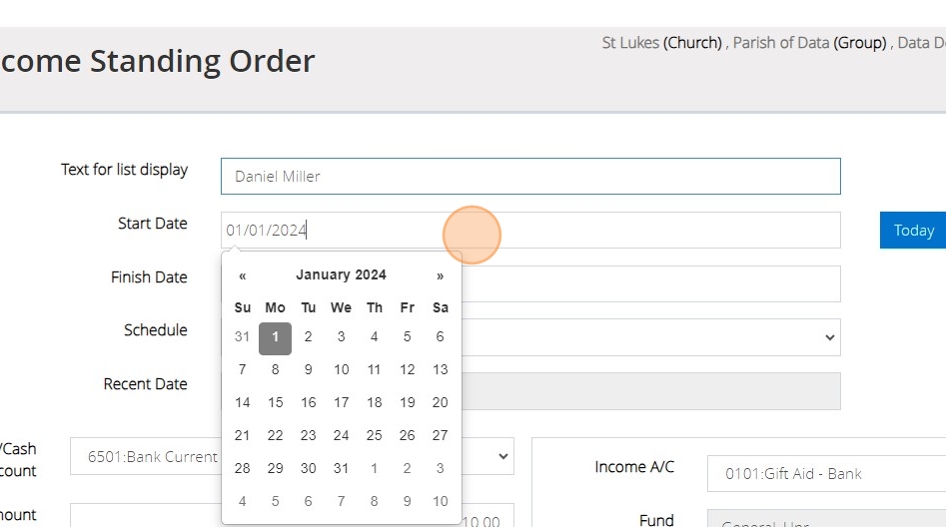
20. Once you have finished amending any details of the standing order, click the "Save" button.
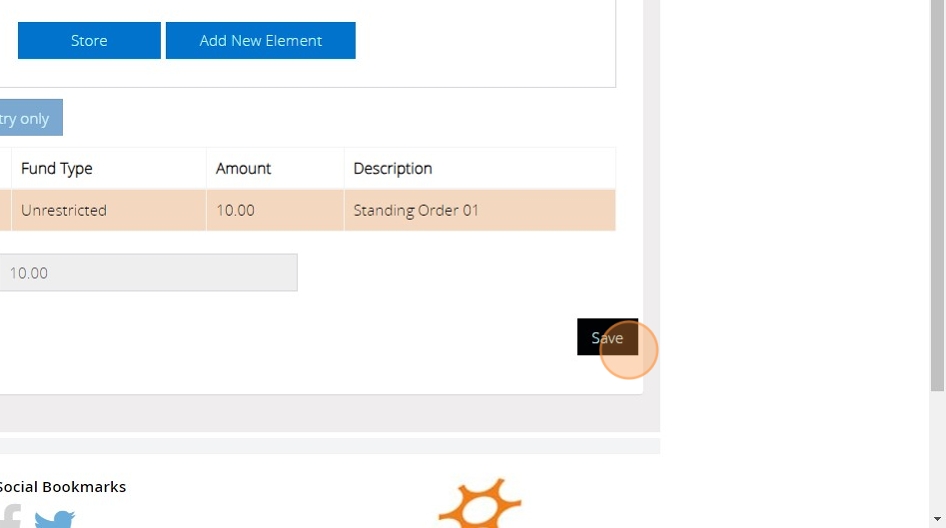
21. You will see the confirmation message that the standing order has been created successfully. Click 'OK'.
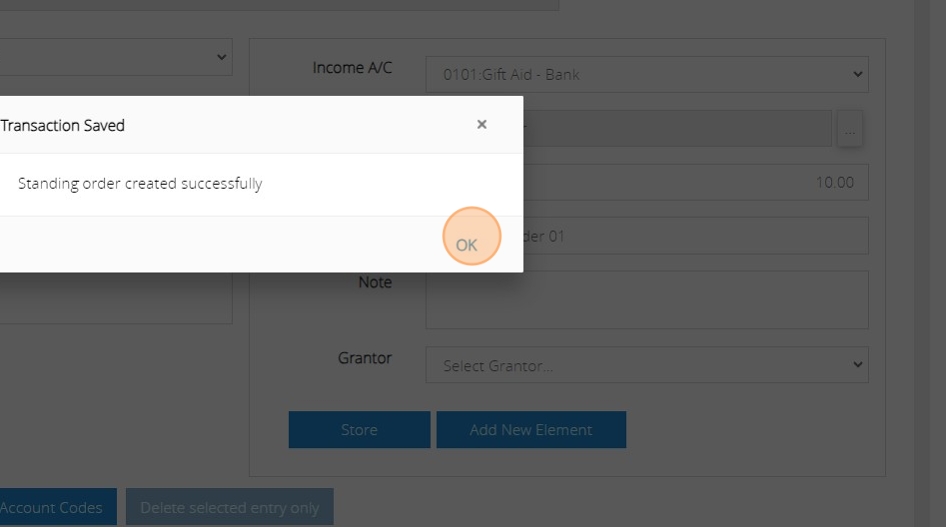
Processing Standing Orders
Tip: Standing orders do not automatically post to your transaction listings. They generate on the Process Standing Orders screen, ready for you to select which of them are to be posted to list transactions.
22. Under the Transactions menu, click "Process Standing Orders"

23. On the 'View and transfer standing orders' screen, you are able to select a 'Cut off date' for the transactions that you can see on this screen. This can be especially helpful if you are posting one month at a time. Setting a cut off date will limit the transactions that appear in the list on the screen.

24. You can also click the Bank Account dropdown to narrow down the list further to just the transactions for one particular bank account.

25. If you wish to select a standing order to be posted, you can click the checkbox shown below to the left of the transaction.
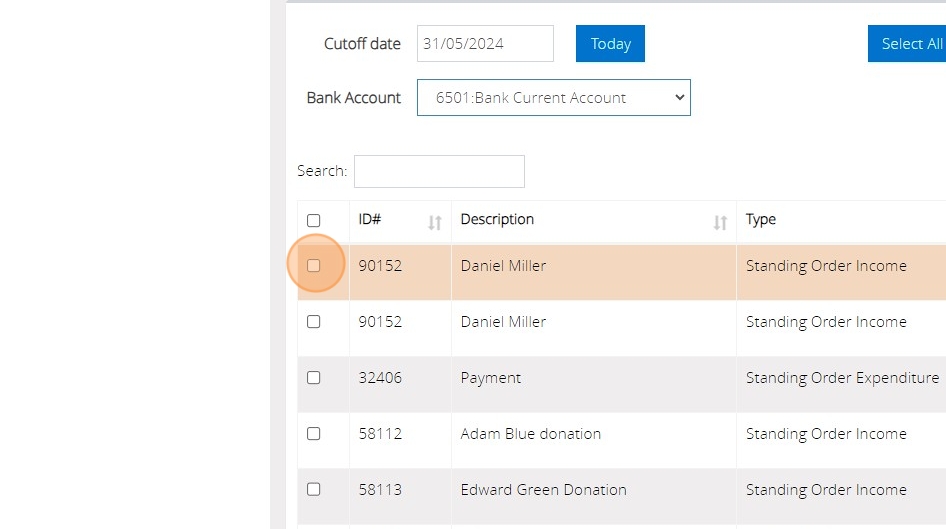
26. You can also use the search box to search for a particular donor name or description on a standing order.

27. If you wish to post all the transactions that you can see in the list that is presented to you after you have filtered down, you can click the checkbox shown below This will select all the transactions that you can see in the list.
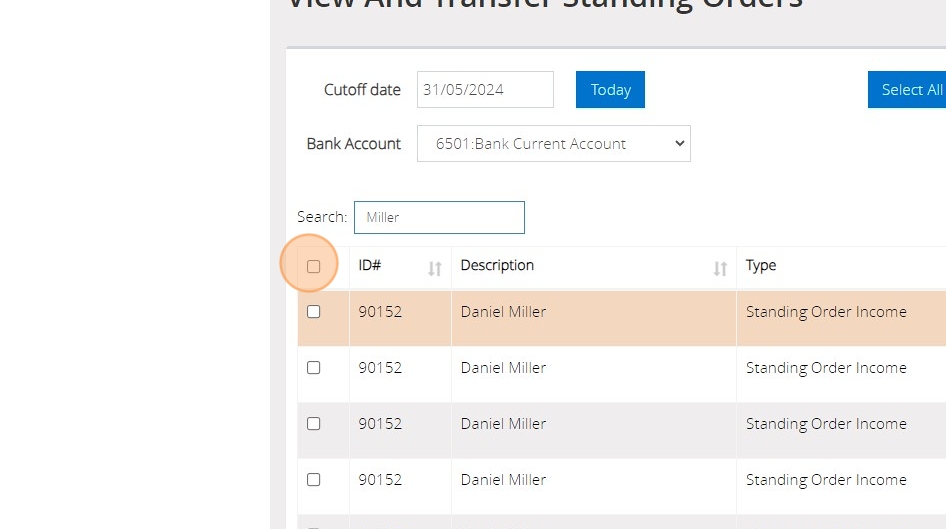
28. You can also change the date on the transaction, if for example, the date the transaction came into the bank account is slightly different to the one automatically generated for it in MyFundAccounting.Online.

29. When you are happy that you have all the transactions that you wish to post to the bank account selected, click the "Transfer" button.
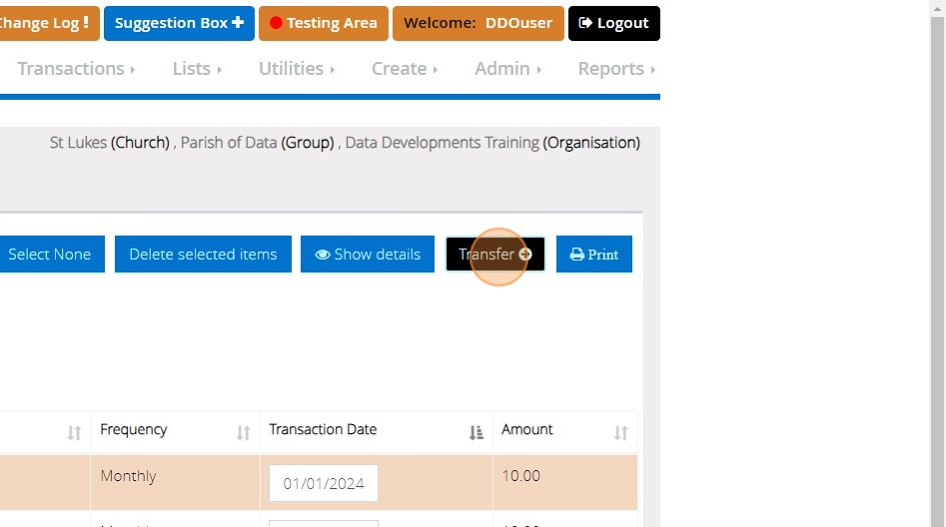
30. This will post all of the transactions that you had selected. You will then be able to produce a report of those transactions. If you wish to do so, click 'Yes' when the confirmation message pops up.

Tip: All of the transactions that you have just posted will now show on your transaction listings and on the bank reconciliation screen, ready to be reconciled.
